Table of Contents
Advertisement
Quick Links
Advertisement
Table of Contents

Related Manuals for E-FLITE P-51B Mustang 32e ARF


Summary of Contents for E-FLITE P-51B Mustang 32e ARF
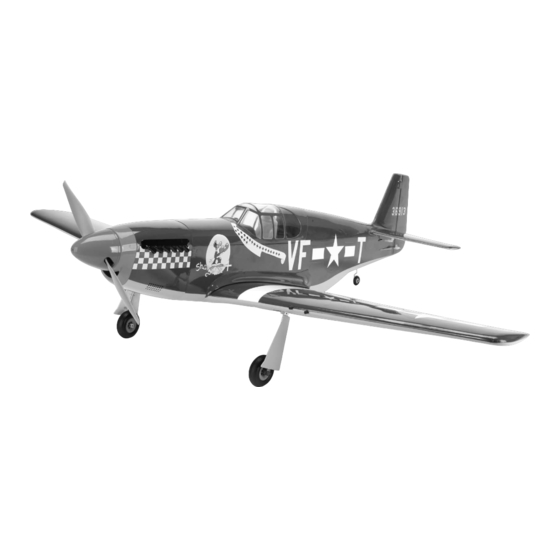
- Page 1 P-51B Mustang 32e ARF Assembly Manual...
-
Page 2: Notice
Safety can never be taken lightly. • Do not fly near power lines. E-flite P-51B Mustang 32e ARF Assembly Manual... -
Page 3: Table Of Contents
Detailing Your P-51B Mustang ......36 Control Throws............. 40 Specifications Preflight ............... 40 Flying Your P-51B Mustang 32e ARF ..... 41 Wingspan: 52.0 in (1320mm) Range Test Your Radio .......... 41 Wing Area: 460 sq in (29.7 sq dm) -
Page 4: Hardware/Accessory Sizes
Power 32 Motor Setup (Recommended) EFLM4032A Power 32 Brushless Outrunner Motor, 770Kv EFLA1060 60-Amp Pro Switch-Mode BEC Brushless ESC EFLB32004S30 3200mAh 4S 14.8V 30C Li-Po, 12AWG EC3 APC13065E 13 x 6.5E Electric Propeller, Thin E-flite P-51B Mustang 32e ARF Assembly Manual... -
Page 5: Hinging The Control Surfaces
Read through the following steps on positioning the hinges before applying any glue. Improper installation of the hinges will cause the control surfaces to bind, which can cause premature drain on the battery or even damage to the servos. E-flite P-51B Mustang 32e ARF Assembly Manual... - Page 6 Ensure you have at least this much control throw when surfaces are installed. Elevator: 1/2-inch (13mm) up and down Aileron: 3/8-inch (9mm) up and down Rudder: -inch (32mm) right and left E-flite P-51B Mustang 32e ARF Assembly Manual...
- Page 7 Improper installation of the surfaces will cause the control surfaces to bind, which can cause premature drain on the battery or even damage to the servos. E-flite P-51B Mustang 32e ARF Assembly Manual...
-
Page 8: Tail Wheel Installation
Note the position of the arm in relationship to the bend in the pushrod wire. Ensure your flaps can travel at least 1 inch (38mm) down for full defelection. E-flite P-51B Mustang 32e ARF Assembly Manual... - Page 9 Use a 1.5mm to prevent them from vibrating loose. hex wrench to tighten the setscrew. 3. Use a 1.5mm hex wrench to start the 3mm x 4mm setscrew in the steering arm. E-flite P-51B Mustang 32e ARF Assembly Manual...
-
Page 10: Stabilizer And Rudder Installation
Prepare when installing the control horn. Prepare all three using two 2mm x 8mm sheet metal screws and a #1 both stabilizer halves at this time. horns at this time. Phillips screwdriver. E-flite P-51B Mustang 32e ARF Assembly Manual... - Page 11 It should fit tightly against the Repeat steps 7 through 9 to install the remaining fuselage without moving the stabilizer tube. It should stabilizer half. also slide freely on the tube with only slight friction. E-flite P-51B Mustang 32e ARF Assembly Manual...
-
Page 12: Motor And Cowling Installation
Secure the leads so they do not interfere with the operation of the motor. E-flite P-51B Mustang 32e ARF Assembly Manual... - Page 13 One will be located near positioned so the canopy hatch can be installed the front, while the other is located slightly aft of the without any interference. wing leading edge. E-flite P-51B Mustang 32e ARF Assembly Manual...
-
Page 14: Rudder Servo, Elevator Servo And Receiver Installation
4. Plug a Y-harness into the aileron and flap port of your receiver. Plug the special Y-harness included Required Tools and Adhesives with your E-flite retracts into the gear port of the Ruler Side cutters receiver. Plug in a 3-inch extension into the Aux2... - Page 15 9/16-inch (15mm) from the center of the servo horn. You will also need to enlarge the hole that is 3/8-inch (9mm) from the center of the horn using a pin vise and 5/64-inch (2mm) drill bit. E-flite P-51B Mustang 32e ARF Assembly Manual...
- Page 16 Step 9 using a nylon pushrod connector. 14. Insert the Z-bend of the 22 -inch (572mm) pushrod in the hole enlarged in the rudder servo back in Step 10. E-flite P-51B Mustang 32e ARF Assembly Manual...
- Page 17 Once set, slide the silicone retainer over the forks of the clevis so the clevis does not open accidentally in flight. Always use threadlock on metal-to-metal fasteners to prevent them from vibrating loose. E-flite P-51B Mustang 32e ARF Assembly Manual...
-
Page 18: Propeller And Spinner Installation
If so, remove the spinner cone and propeller and slide the adapter forward on the motor shaft. Repeat Steps 3 through 5 to replace the propeller and spinner cone. E-flite P-51B Mustang 32e ARF Assembly Manual... -
Page 19: Aileron Servo Installation
Phillips screwdriver. 1. Use a felt-tipped pen to mark the aileron and flap servo covers so they can be installed in the correct direction after they have been removed from the wing. E-flite P-51B Mustang 32e ARF Assembly Manual... - Page 20 Enlarge the hole in the servo horn that is 5/16-inch (7mm) from the center of the horn using a pin vise and 5/64-inch drill bit. E-flite P-51B Mustang 32e ARF Assembly Manual...
- Page 21 8mm sheet metal screws to attach the control horn apply 2–3 drops in each of the holes for the aileron correctly. Then remove the mark can using rubbing to the aileron. control horn mounting screws. alcohol and a paper towel. E-flite P-51B Mustang 32e ARF Assembly Manual...
-
Page 22: Flap Servo Installation
1. Prepare the flap servo by installing the system has been turned off as to not run the brass eyelets and rubber grommets in the servo. batteries down. Also remove the stock servo horn using a #1 Phillips screwdriver. E-flite P-51B Mustang 32e ARF Assembly Manual... - Page 23 Slide the silicone retainer over the forks of the removed from the servo and a #1 Phillips screwdriver. clevis to prevent it from opening accidentally. The overall length of the linkage will be adjusted in the next steps. E-flite P-51B Mustang 32e ARF Assembly Manual...
- Page 24 Measure the distance between the flap and wing. Adjust the linkage so the distance measures 3/4-inch (19mm). You may need to remove the servo once or twice to set the correct length on the linkage. E-flite P-51B Mustang 32e ARF Assembly Manual...
-
Page 25: Fixed Gear Installation
Mark the flap lead using low-tack tape. Make sure your radio system has been turned off as to not run the batteries down. Note: The included fixed gear will differ slightly from what is shown. E-flite P-51B Mustang 32e ARF Assembly Manual... -
Page 26: Retract Installation
3. Use two wheel collars to secure the wheel on the main gear strut. Use a 1.5mm hex wrench to tighten the setscrews on the wheel collars to secure them to the main gear strut. E-flite P-51B Mustang 32e ARF Assembly Manual... - Page 27 5. Place a drop of light machine oil on the axle. Place the wheel on the axle and secure it using the wheel collar and a 1.5mm hex wrench. E-flite P-51B Mustang 32e ARF Assembly Manual...
- Page 28 Use a small drop of silicone adhesive on the mounts of the gear door to secure it to the strut. Allow the adhesive to fully cure with the gear in the UP position. E-flite P-51B Mustang 32e ARF Assembly Manual...
-
Page 29: Cockpit Details
2. Insert the aluminum anti-rotation pin near the possible. Note that the taller portion of the radio trailing edge of the wing. box faces to the front of the cockpit. E-flite P-51B Mustang 32e ARF Assembly Manual... - Page 30 4. Connect the leads between the receiver and location of the CG on the top of the wing with a wing. Make sure the retracts, flaps, ailerons and felt-tipped pen. any other connections are correct at this time. E-flite P-51B Mustang 32e ARF Assembly Manual...
-
Page 31: Installing The Optional Ordinance Pylons
After the first flights, the CG position can be adjusted for your personal preference. E-flite P-51B Mustang 32e ARF Assembly Manual... - Page 32 You will find it will make an indentation in the bottom of the wing covering where it exits. Using a hobby knife and #11 blade, slice a small hole in the covering where the cable exits. E-flite P-51B Mustang 32e ARF Assembly Manual...
-
Page 33: Decal Placement
You will need to determine which time period version you would like to reproduce. It is easy to peel off the white stripes of the stabs and/or wings to match your aircraft. E-flite P-51B Mustang 32e ARF Assembly Manual... - Page 34 Termite (M - QP). The dash is for the star and bar decal. 4. Trim the decal as shown with a hobby knife and #11 blade. You will need to trim the front slightly as well. E-flite P-51B Mustang 32e ARF Assembly Manual...
- Page 35 .50-caliber guns. You may choose to remove the wooden guns that are installed and TURNIP TERMITE install the plastic guns if you choose. Use Major Decal Sheet #P-6 for the Hamilton Standard logos on the static prop. E-flite P-51B Mustang 32e ARF Assembly Manual...
-
Page 36: Detailing Your P-51B Mustang
You can take the model to any level you wish and change it after you are done to achieve a different look if you wish. Please read through E-flite P-51B Mustang 32e ARF Assembly Manual... - Page 37 3/16–inch (5mm) long. 3. Using a drill with a 1/8-inch (3mm) drill bit, drill a hole in the center of each machine gun. This hole needs to be approximately 1/8-inch (3mm) deep. E-flite P-51B Mustang 32e ARF Assembly Manual...
- Page 38 Gun residues are cleaned off for the most part as it is very corrosive, but there are always stains. Exhaust residue is always alive but routinely light if the engine was run correctly. E-flite P-51B Mustang 32e ARF Assembly Manual...
- Page 39 This will take some time but will yield a more realistic looking model. It will high- light certain points of the model. 15. Stroke over the static spinner and flying spinner during this process. E-flite P-51B Mustang 32e ARF Assembly Manual...
-
Page 40: Control Throws
This will keep the servos from moving to their endpoints 3/8-inch (9mm) until the transmitter and receiver connect. Down 3/8-inch (9mm) Aileron Low Rate 1/4-inch (6mm) Down 1/4-inch (6mm) E-flite P-51B Mustang 32e ARF Assembly Manual... -
Page 41: Flying Your P-51B Mustang 32E Arf
We hope you enjoy flying the want to get an idea of the flight quality with the flaps P-51B Mustang. down and slowed down. Once you are happy with this Happy Landings! now we can enjoy the Mustang. E-flite P-51B Mustang 32e ARF Assembly Manual... -
Page 42: Daily Flight Checks
Product. This warranty does not cover damage due to improper installation, operation, maintenance, or attempted repair by anyone other than Horizon. Return of any Product by Purchaser must be approved in writing by Horizon before shipment. E-flite P-51B Mustang 32e ARF Assembly Manual... -
Page 43: Warranty Services
61822 USA you purchased the product. Notice: Do not ship batteries to horizon. If productsupport@horizonhobby.com you have any issue with a battery, please 877-504-0233 contact the appropriate horizon Product Support office. E-flite P-51B Mustang 32e ARF Assembly Manual... -
Page 44: 2010 Official Academy Of Model Aeronautics Safety Code
I will have completed a successful radio equipment air), nor will I operate model aircraft with fuels ground-range check before the first flight of a new containing tetranitromethane or hydrazine. or repaired model aircraft. E-flite P-51B Mustang 32e ARF Assembly Manual... - Page 45 Be aware of other activities in the vicinity of your flight path that could cause potential conflict. Carefully plan your flight path prior to launch. Abide by any and all established AMA National Model Aircraft Safety Code. E-flite P-51B Mustang 32e ARF Assembly Manual...
-
Page 46: Building And Flying Notes
Building and Flying Notes E-flite P-51B Mustang 32e ARF Assembly Manual... - Page 47 Building and Flying Notes E-flite P-51B Mustang 32e ARF Assembly Manual...
- Page 48 The Spektrum trademark is used with permission of Bachmann Industries, Inc. E-flite, JR SPORT, DSM, DSM2 and UltraCote are trademarks or registered trademarks of horizon hobby, Inc. All other trademarks, service marks and logos are the property of their respective owners.