Bosch MIC Series 550 Classic Installation And User Manual
Hide thumbs
Also See for MIC Series 550 Classic:
- User manual (74 pages) ,
- Installation and user manual (20 pages) ,
- Installation manual (8 pages)

Related Manuals for Bosch MIC Series 550 Classic


Summary of Contents for Bosch MIC Series 550 Classic
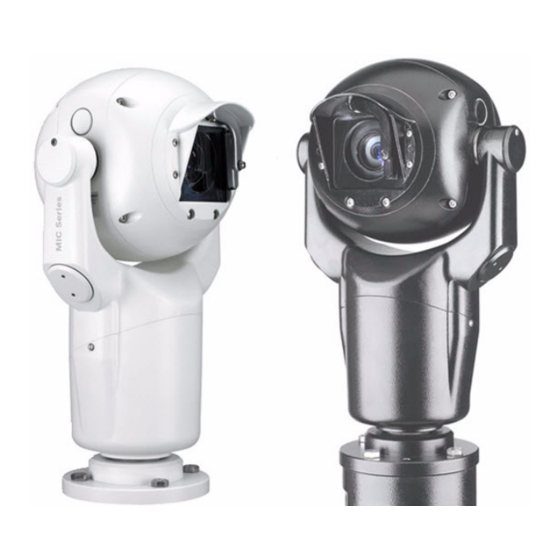
- Page 1 MIC Series 550 Classic Camera MIC Series 550 Classic Installation and User Manual...
-
Page 3: Table Of Contents
MIC Series 550 Classic Camera Table of Contents | en Table of Contents Preface About this Manual Conventions (Safety Precautions) in this Manual Legal Information Safety Important Safety Instructions Important Notices FCC and ICES Compliance Bosch Notices Customer Support and Service... - Page 4 | Table of Contents MIC Series 550 Classic Camera Setting Passwords 6.5.1 Special Passwords 6.5.2 Setting Passwords, Bosch Protocol Configuring the Camera for Inverted Operation On-Screen Display (OSD) Menus (Bosch Protocol) Camera Setup Menu Lens Setup Menu PTZ Setup Menu...
-
Page 5: Preface
Legal Information Copyright This user manual is the intellectual property of Bosch Security Systems, Inc. and is protected by copyright. All rights reserved. Trademarks All hardware and software product names used in this document are likely to be registered trademarks and must be treated accordingly. -
Page 6: Safety
Power disconnect - Units have power supplied whenever the power cord is inserted into the power source. The power cord is the main power disconnect for all units. Ventilation - The MIC Series 550 Classic camera is a completely sealed unit and requires no special consideration as regards to ventilation. -
Page 7: Important Notices
13. Attachments, changes or modifications - Only use attachments/accessories specified by the manufacturer. Any change or modification of the equipment, not expressly approved by Bosch, could void the warranty or, in the case of an authorization agreement, authority to operate the equipment. - Page 8 (Aux ON 911) or a power cycle before usable video is available. Disposal - Your Bosch product was developed and manufactured with high-quality material and components that can be recycled and reused. This symbol means that electronic and electrical appliances, which have reached the end of their working life, must be collected and disposed of separately from household waste material.
-
Page 9: Fcc And Ices Compliance
Video loss - Video loss is inherent to digital video recording; therefore, Bosch Security Systems cannot be held liable for any damage that results from missing video information. To minimize the risk of lost digital information, Bosch Security Systems recommends multiple, redundant recording systems, and a procedure to back up all analog and digital information. -
Page 10: Bosch Notices
| Safety MIC Series 550 Classic Camera produit dans une zone résidentielle peut provoquer des interférences nuisibles. Le cas échéant, l’utilisateur devra remédier à ces interférences à ses propres frais. Au besoin, l’utilisateur consultera son revendeur ou un technicien qualifié en radio/télévision, qui procédera à... -
Page 11: Customer Support And Service
MIC Series 550 Classic Camera Safety | en Customer Support and Service If this unit needs service, contact the nearest Bosch Security Systems Service Center for authorization to return and shipping instructions. Service Centers Telephone: 800-366-2283 or 585-340-4162 Fax: 800-366-1329 Email: cctv.repair@us.bosch.com... -
Page 12: Unpacking
The original packing carton is the safest container in which to transport the unit and must be used if returning the unit for service. Save it for possible future use. NOTICE! Do not stand the canted (45°) MIC Series 550 Classic camera upright as it is unstable unless properly mounted. Parts List... -
Page 13: Installation Overview
PMB); however, users should be aware that lamp posts can often be subject to movement and are not suitable platforms in all conditions or for all applications. For mounting directly onto buildings, Bosch Security Systems manufactures a range of brackets suitable for all typical building installations for upright (90°), Inverted, or canted (45°) positions. -
Page 14: Typical Mounting Arrangements
| Installation Overview MIC Series 550 Classic Camera Typical Mounting Arrangements Below are examples of typical mounting arrangements for MIC Series cameras. Figure 4.2 Typical pole mount (from left to right: Pole Mount Bracket (MIC-PMB), Shallow Conduit Adapter (MIC-SCA), and Wall Mount Bracket (MIC-WMB)) -
Page 15: Mounting Positions
The MIC Series 550 Classic cameras, if canted, are designed to be mounted upright (straight up, 90°), inverted (straight down, 90°), or canted upright (ball up, 45°). The tilt limits for the canted unit prevent it from working properly if mounted ball down. -
Page 16: Installation
| Installation MIC Series 550 Classic Camera Installation Overview of Installation Steps Follow these steps in sequence to install the MIC550 Classic camera. Note: Depending on your desired mounting position and location, as well as your chosen accessories, you may not need to complete every step. -
Page 17: Adjusting The Rain Shield For Inverted Operation
MIC Series 550 Classic Camera Installation | en Figure 5.2 Pan body fixing screws NOTICE! The small security screws (identified in Figure 5.4 below) are not designed to be removed. Any attempt to remove these screws will void the warranty and potentially cause serious damage to the camera. -
Page 18: Mounting The Camera
| Installation MIC Series 550 Classic Camera To reverse the rain shield, follow these steps: Remove the four (4) M3 x 6 screws that hold the rain shield to the face of the camera. Two screws are on the left of the rain shield; two screws are on the right of the rain shield. -
Page 19: Lightning Protection
MIC Series 550 Classic Camera Installation | en Attach the security attachment point to a safety chain (not supplied). Attach the safety chain to a secure part of your mounting structure. Connect the female cable 12-pin connector to the male plug in the base of the camera. -
Page 20: Electrical Connections
25 m Figure 5.8 Composite cable before connection Figure 5.9 View of the Composite Cable connected to a MIC Series 550 Classic camera Refer to the MIC Series Power Supply Installation Manual included on the Installation CD for full details on installing a MIC Series Power Supply Unit and connecting to a MIC550 Classic camera. -
Page 21: Alarm Inputs
Green Power Input 1 Low Voltage Power Input NOTICE! Bosch Security Systems does not recommend using the shielded composite cable for distances in excess of 25 m between the camera and the MIC power supply. 5.6.2 Alarm Inputs The table below identifies the number of alarm inputs and outputs available depending on the type of MIC power supply unit installed and whether or not an 8-input alarm card is installed. -
Page 22: Getting Started
Establishing Control of the Camera The MIC550 Classic camera supports two communication protocols (Biphase and RS-485), Bosch, Pelco D and P, and Forward Vision (keyboard) controller protocols that allow you to send commands to the camera and to receive information from the camera. -
Page 23: Powering On
Bilinx or the RS-232/RS-485 communication protocol. Go to www.boschsecurity.com to download the latest version of the software and the CTFID User Manual. – Using a PC-based graphical user interface (GUI) such as the Bosch DiBos 8 software. Refer to the DiBos 8 User Guide for instructions. 6.3.1 Navigating the On-Screen Display (OSD) Menus The OSD menus provide access to the programmable settings of the camera. -
Page 24: Basic Keyboard Operation
| Getting Started MIC Series 550 Classic Camera Use the joystick to highlight a menu item. Press either the Focus or the Iris key to open a menu item. Follow the on-screen instructions. Note: To select the Exit Menu item from anywhere in the current menu, use the Zoom command. -
Page 25: Keyboard Commands, Pelco Protocol
MIC Series 550 Classic Camera Getting Started | en 6.3.4 Keyboard Commands, Pelco Protocol Pelco control commands are composed of a sequence of two (2) keyboard inputs with the following convention: 1) a Command Number and 2) a Function key input. -
Page 26: Setting The Camera Address Via Fastaddress
FastAddress is stored in nonvolatile memory and does not change if the power is turned off or if the default settings are restored. 6.4.1 FastAddress, Bosch Protocol In Bosch protocol, there are three (3) FastAddress commands: – ON-999-ENTER: Displays and programs all cameras without an address in the system. NOTICE! If a keyboard is set to a camera number that already has an address, that camera also responds to this command. -
Page 27: Setting Passwords
MIC Series 550 Classic Camera Getting Started | en – Pelco-D protocol must use addresses 1 to 254. NOTICE! A previously-configured MIC550 camera with an address above 32 (Pelco-P upper limit) or 254 (Pelco-D upper limit) can be used without readdressing the unit. However, no two (2) addresses can be the same. -
Page 28: Configuring The Camera For Inverted Operation
| Getting Started MIC Series 550 Classic Camera Configuring the Camera for Inverted Operation The video display from a camera installed in inverted position will appear upside down until you set the video orientation to “Inverted position.” Follow these steps: Access the main Setup Menu of the on-screen display (OSD). -
Page 29: On-Screen Display (Osd) Menus (Bosch Protocol)
This chapter identifies and describes each OSD menu option, as well as the default setting for each option, for Bosch protocol. For step-by-step instructions, see Section 9 Common User Commands (unlocked), page 45 and Section 10 Advanced Features, page 48. -
Page 30: Camera Setup Menu
| On-Screen Display (OSD) Menus (Bosch Protocol) MIC Series 550 Classic Camera Camera Setup Menu The Camera Setup Menu contains camera settings that can be changed/customized. Camera Setup Exit... * White Bal: EXT ATW * Gain Control: AUTO * Max Gain Level:... -
Page 31: Lens Setup Menu
MIC Series 550 Classic Camera On-Screen Display (OSD) Menus (Bosch Protocol) | en Backlight Comp Improves image quality when the background illumination level is high. Options: ON, OFF (default setting). Wide Dynamic Range. Options: ON, OFF (default setting), AUTO. Shutter Mode Turns Auto SensUP on or off. -
Page 32: Ptz Setup Menu
| On-Screen Display (OSD) Menus (Bosch Protocol) MIC Series 550 Classic Camera Lens Setup Restore Defaults * = Factory Setting Focus / Iris: Select Auto Focus Automatically focuses on the subject in the center of the screen. Options: Option Description CONSTANT Auto Focus is always active, even while the camera is moving. - Page 33 MIC Series 550 Classic Camera On-Screen Display (OSD) Menus (Bosch Protocol) | en PTZ Setup * Orientation NORMAL * Freeze Frame on Preposition Tilt Up Limit... Restore Defaults... * = Factory Setting Focus/Iris: Select AutoPan Adjusts speed of camera during AutoPan and AutoScan. Sliding scale: –(1º/sec. to 60º/sec.)+.
-
Page 34: Display Setup Menu
| On-Screen Display (OSD) Menus (Bosch Protocol) MIC Series 550 Classic Camera Tilt Up Limit... Sets the upper tilt limit of the camera. Use the joystick to move to a scene. Display Setup Menu The Display Setup Menu contains display settings that can be changed/customized. -
Page 35: Alarm Setup
MIC Series 550 Classic Camera On-Screen Display (OSD) Menus (Bosch Protocol) | en Communication Setup Exit... * AutoBaud: * Baud Rate: 9600 Restore Defaults * = Factory Setting Focus / Iris: Select AutoBaud Turns on AutoBaud detection, which detects and adjusts the camera protocol and baud rate to match that of the controller. - Page 36 | On-Screen Display (OSD) Menus (Bosch Protocol) MIC Series 550 Classic Camera Alarm Setup Inputs Setup 10. NONE 11. NONE 12. NONE Focus / Iris: Select Type Focus / Iris: Select Right / Left: Select Mode Inputs Setup Defines physical inputs or events and commands that can be used in a rule. There are twelve (12) alarm inputs available.
- Page 37 MIC Series 550 Classic Camera On-Screen Display (OSD) Menus (Bosch Protocol) | en Defines a physical output: N.O. (Normally Open circuit) (default setting) or N.C. (Normally closed circuit). Outputs 5-12 Defines a command output for use in a rule. Option...
-
Page 38: Diagnostics Menu
| On-Screen Display (OSD) Menus (Bosch Protocol) MIC Series 550 Classic Camera Selecting a Rule number provides access to its configuration menu. The Rule # Menu allows you to configure a rule from previously-defined alarm inputs and outputs. Once an alarm is configured with valid inputs and outputs, it can be turned on or off (enabled or disabled) through its configuration menu. - Page 39 MIC Series 550 Classic Camera On-Screen Display (OSD) Menus (Bosch Protocol) | en Diagnostics CTFID Access: Restart Events: Low-Volt Events: Power Up Events: Video Loss Events: Total Time On 0hr 0min Focus / Iris: Save and Exit Alarm Status Enters the Alarm Status menu and displays the real time status of alarm inputs and outputs.
- Page 40 | On-Screen Display (OSD) Menus (Bosch Protocol) MIC Series 550 Classic Camera Power Up Events Displays the number of power up events. Low Volt Events Displays the number of times that the camera dropped below the acceptable voltage limit.
-
Page 41: On-Screen Display (Osd) Menus (Pelco Protocol)
MIC Series 550 Classic Camera On-Screen Display (OSD) Menus (Pelco Protocol) | en On-Screen Display (OSD) Menus (Pelco Protocol) This chapter identifies and describes each OSD menu option, as well as the default setting for each option, for Pelco protocol. For step-by-step instructions, see Section 9 Common User Commands (unlocked), page 45 and Section 10 Advanced Features, page 48. -
Page 42: Bosch Menu (Locked)
| On-Screen Display (OSD) Menus (Pelco Protocol) MIC Series 550 Classic Camera Bosch Menu (locked) The Bosch Menu allows full access to the main Setup Menu and all configuration settings. Pelco menu Bosch menu Setup Menu Setup Menu Exit... -
Page 43: Ptz Setup (Unlocked)
MIC Series 550 Classic Camera On-Screen Display (OSD) Menus (Pelco Protocol) | en Menu Description Sub-menu / Description Default Setting Night Mode Switches from color to ON: Sets Night Mode on. ON (Day/Night monochrome. OFF: Sets Night Mode off. models only) AUTO: Sets Night Mode to Auto set. -
Page 44: Other Menus
| On-Screen Display (OSD) Menus (Pelco Protocol) MIC Series 550 Classic Camera Menu Description Sub-menu / Description Default Setting Scan Speed Changes the Autopan and Sliding scale: – (1°/sec to 60°/sec) + 30°/sec. AutoScan speeds. Edit Presets Modifies preset scenes. -
Page 45: Common User Commands (Unlocked)
MIC Series 550 Classic Camera Common User Commands (unlocked) | en Common User Commands (unlocked) This chapter details common user commands. See Section A Keyboard Commands by Number, page 50, for a complete list of commands. Setting AutoPan Mode AutoPan mode pans the camera 360° or pans between user-defined limits (when programmed). -
Page 46: Configuring Preposition Tours
| Common User Commands (unlocked) MIC Series 550 Classic Camera To clear a character from a title: Use the joystick to highlight the Clear OR Position Character prompt. Move the joystick left or right until the cursor is below the title character that you need to clear. -
Page 47: Recording Tours
MIC Series 550 Classic Camera Common User Commands (unlocked) | en Recording Tours The camera can make up to two (2) recorded tours. A Recorded Tour saves all manual camera movements made during the recording, including its rate of pan, tilt and zoom speeds and other lens setting changes. -
Page 48: Advanced Features
| Advanced Features MIC Series 550 Classic Camera Advanced Features This chapter details advanced user commands, which are more complicated than those in Section 9 Common User Commands (unlocked), page 45. 10.1 Alarm Rules The camera features a powerful alarm rule engine. In its simplest form, an alarm rule defines those inputs that activate specific outputs. -
Page 49: Pre-Position Tour
MIC Series 550 Classic Camera Advanced Features | en Example 2: Advanced Alarm Rule Scenario: A MIC550 camera located at an airport is set to AutoPan Between Limits from the parking garage to the airport terminal. The gate entering the airport has an alarm contact connected to the camera, and the perimeter fence in the area of the gate has an infrared (IR) sensor for motion detection (motion detector) that is connected to the camera. -
Page 50: Keyboard Commands By Number
| MIC Series 550 Classic Camera Keyboard Commands by Number Locked Function Command Command Description On/Off Scan 360° Autopan without limits On/Off Autopan Autopan between limits On/Off Iris Control Enters menu (auto, manual) On/Off Focus Control Enters menu (spot, auto, manual) - Page 51 MIC Series 550 Classic Camera | en Locked Function Command Command Description On/Off/ IR Focus Correction On (two times)–Activates focus compensation Auto when using external IR illuminators. Off–Deactivates focus compensation when using normal lighting. Auto–Automatically activates/deactivates IR Focus Correction when external IR illuminators turn on/off.
- Page 52 | MIC Series 550 Classic Camera Locked Function Command Command Description Edit Password Enters the Edit Password menu Reset ALL Restores all settings to original defaults and clears all user-programmed settings Edit Tour 1 (Standard) Enters the Standard Tour Scene menu...
- Page 54 Bosch Security Systems, Inc. 850 Greenfield Road Lancaster, PA 17601 U.S.A. www.boschsecurity.com © Bosch Security Systems, Inc., 2012...