Table of Contents
Advertisement
Quick Links
Download this manual
See also:
Installation Manual
Advertisement
Table of Contents

Related Manuals for KVH Industries RV1


Summary of Contents for KVH Industries RV1
- Page 1 TracVision ® User’s Guide...
- Page 2 TracVision RV1 User’s Guide This user’s guide provides all of the basic information you need to operate, set up, troubleshoot, and maintain the TracVision RV1 system. For detailed installation information, please refer to the TracVision RV1 Installation Guide. If you have any comments regarding this manual, please e-mail them to manuals@kvh.com.
- Page 3 Trademark Information TracVision, KVH, and the unique light-colored dome with dark contrasting baseplate are trademarks of KVH Industries, Inc. All other trademarks are the property of their respective owners. Disclaimer Every effort has been made to ensure the correctness and completeness of the material in this document.
-
Page 4: Table Of Contents
TracVision RV1 User’s Guide Table of Contents Introduction Documentation Overview..............3 Important Safety Information.............4 System Overview ................6 Getting Started Receiving Satellite TV Signals............11 Avoiding Blockage ................12 Turning On the System ..............13 Accessing the Web Interface ............14 Network Settings Connecting the TV-Hub to Your Onboard Network......17 TV-Hub Ethernet Settings ..............19... - Page 5 TracVision RV1 User’s Guide Receiver Settings Configuring a Linear Receiver for Automatic Switching ....33 Configuring DIRECTV Receivers for Automatic Switching....34 Allowing External Access on a DIRECTV Receiver ......38 Setting the Dish Type on a DIRECTV Receiver .........39 Running a Check Switch Test on a DISH Network or Bell TV Receiver ................41...
- Page 6 TracVision RV1 User’s Guide Selecting the Master Receiver............73 Manual Satellite Switching..............74 Troubleshooting Basic Checks ...................77 Status Information on the Home Page..........79 TV-Hub Status Indicators..............81 IP AutoSwitch Status Indicator ............84 Error Messages................85 System Logs ..................88 Operational Log ..............89 Event Log................90 System Information .................91 Technical Support................93...
- Page 7 TracVision RV1 User’s Guide Introduction 1. Introduction This section provides important safety information you need to know before using the system. It also provides an overview of the system and its documentation. Contents Documentation Overview ..................3 Important Safety Information ................4...
-
Page 8: Introduction
This is a danger, warning, or caution notice. Be sure to read these carefully to avoid injury! Related Documentation In addition to the Help accessible from the TV-Hub’s web interface, the following documents are provided with your TracVision system: Document Description Installation Guide... -
Page 9: Important Safety Information
There are no user-serviceable parts inside. WARNING Risk of Electric Shock If any component of the TracVision system becomes damaged and/ or no longer functions normally, disconnect it from power, secure it from unintended operation, and contact KVH Technical Support (see “Technical Support”... - Page 10 TracVision RV1 User’s Guide Introduction WARNING Risk of Burns Make sure the antenna is pointed away from the sun whenever the radome is removed. The high-gloss reflector can focus sunlight into a narrow beam, generating a significant amount of heat that can cause damage and injury.
-
Page 11: System Overview
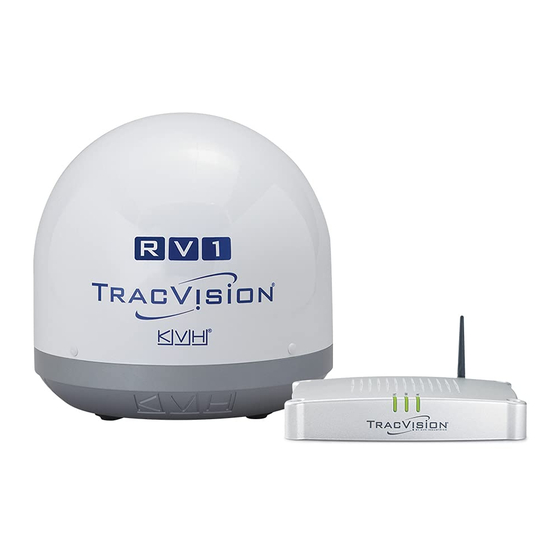
TracVision RV1 User’s Guide Introduction System Overview Your TracVision system is a state-of-the-art, actively stabilized antenna system that delivers live satellite TV to your mobile audio/ video entertainment system. A basic system is illustrated below. Refer to the Installation Guide for detailed wiring diagrams. - Page 12 TracVision RV1 User’s Guide Introduction The TracVision system includes the following components: Antenna Housed within a protective radome, the antenna quickly acquires and tracks the desired satellite to deliver a crystal-clear television picture, even while you’re on the move. Its built-in DVB-S2 technology ensures...
- Page 13 TracVision RV1 User’s Guide Introduction There are two versions of TV-Hub: • TV-Hub A: Supplied with North American systems; includes a built-in DIRECTV SWM (single wire multiswitch) with its associated connectors on the rear panel; also supports DISH Network and Bell TV services •...
-
Page 14: Getting Started
TracVision RV1 User’s Guide Getting Started 2. Getting Started This section explains how to turn on the system for the first time and access the web interface. Contents Receiving Satellite TV Signals .................11 Avoiding Blockage ...................12 Turning On the System ..................13... -
Page 15: Receiving Satellite Tv Signals
Therefore, to receive TV signals from a given satellite, you must be located within that satellite’s unique coverage area, also known as its “footprint.” To view the latest TracVision satellite coverage maps, visit KVH’s website at www.kvh.com/footprint. -
Page 16: Avoiding Blockage
Avoiding Blockage Since satellites are located 22,300 miles (35,900 km) above the equator, the TracVision antenna must have a clear view of the sky to receive satellite TV signals. Anything that stands between the antenna and the satellite can block the signal, resulting in lost reception. Common causes of blockage include the following: •... -
Page 17: Turning On The System
TracVision RV1 User’s Guide Getting Started Turning On the System To turn on your TracVision system, follow these steps: 1. Make sure the antenna has a clear, unobstructed view of the sky. 2. At the rear panel of the TV-Hub, set the power switch to the On (|) position. -
Page 18: Accessing The Web Interface
TracVision RV1 User’s Guide Getting Started Accessing the Web Interface The TV-Hub’s web interface allows you to check system status, switch satellites and master receiver, update software and the satellite library, and configure all aspects of the system. To access the web interface... - Page 19 TracVision RV1 User’s Guide Network Settings 3. Network Settings This section explains the various ways you can connect to the TV-Hub to access the web interface. It also explains how to connect the TV-Hub to an onboard network. Contents Connecting the TV-Hub to Your Onboard Network ..........17 TV-Hub Ethernet Settings ................19...
-
Page 20: Network Settings
TracVision RV1 User’s Guide Network Settings Connecting the TV-Hub to Your Onboard Network You can connect the TV-Hub to an onboard local area network (LAN). A network connection is necessary if either of the following conditions apply: • You have one or more IP AutoSwitches installed to enable automatic satellite switching (Linear/DISH Network/Bell TV only). - Page 21 TracVision RV1 User’s Guide Network Settings If Bonjour is installed on your device, you can use it to find the TV-Hub on the onboard network without knowing the IP address. Just search for its host name: TVHub-<TV-Hub serial number>. For more information about Bonjour, visit www.apple.com/support/bonjour.
-
Page 22: Tv-Hub Ethernet Settings
TracVision RV1 User’s Guide Network Settings TV-Hub Ethernet Settings By default, the Ethernet port of the TV-Hub is configured for Dynamic mode. This means that, when the TV-Hub is connected to an onboard network, the network’s router assigns it an IP address. Most routers are normally configured as a DHCP (dynamic host configuration protocol) server. -
Page 23: Connecting To The Tv-Hub Using Its Built-In Wi-Fi
TracVision RV1 User’s Guide Network Settings Connecting to the TV-Hub Using its Built-in Wi-Fi You can connect any Wi-Fi enabled mobile device (such as a smartphone, tablet, or laptop) to the TV-Hub via its built-in wireless access point (WAP). Figure 3-3 TV-Hub Wi-Fi Connection (TV-Hub A shown) NOTE: This direct wireless connection will not work if you changed the TV-Hub’s wireless settings from Access Point mode to Infrastructure. -
Page 24: Tv-Hub Wireless Settings
TracVision RV1 User’s Guide Network Settings TV-Hub Wireless Settings By default, the TV-Hub’s wireless settings are configured for the following: • Wireless Mode: AP (Access Point) • SSID: TVHub-<TV-Hub serial number> • IP address: 172.16.0.1 • Security Mode: Off You can change any of these settings at the Settings page of the web interface (go to Settings >... -
Page 25: Connecting Directly To The Tv-Hub Ethernet Port
TracVision RV1 User’s Guide Network Settings Connecting Directly to the TV-Hub Ethernet Port You can connect a computer directly to the “Ethernet” port on the back of the TV-Hub. This option allows you to access the TV-Hub web interface if you do not have a Wi-Fi-enabled device and you do not wish to connect the TV-Hub to an onboard network. -
Page 26: Resetting Network Settings To Factory Defaults
TracVision RV1 User’s Guide Network Settings Resetting Network Settings to Factory Defaults If the TV-Hub’s network configuration becomes corrupted such that you can no longer access the web interface, you can reset all of the network settings to their original factory settings. -
Page 27: Antenna Settings
TracVision RV1 User’s Guide Antenna Settings 4. Antenna Settings This section explains how to adjust the skew of a linear LNB and modify advanced settings. Contents Adjusting the LNB Skew Angle (Linear Only) ...........27 Advanced Settings...................30... -
Page 28: Adjusting The Lnb Skew Angle (Linear Only)
2. Manually enter your current position at the Setup Wizard. 3. At the Setup Wizard, note the displayed skew angle for the selected satellite. 4. Turn off the TV-Hub to remove power from the TracVision antenna. CAUTION For your own safety, make sure the TracVision system is powered off before you perform any work on the antenna. - Page 29 TracVision RV1 User’s Guide Antenna Settings 6. Using a 2mm Allen hex key, loosen (but do not remove) the two M4 socket set screws securing the LNB to the reflector. Figure 4-2 LNB Skew Adjustment 7. Rotate the LNB clockwise or counter-clockwise until the arrow on the LNB points to the correct skew angle printed on the choke feed.
-
Page 30: Understanding Skew
Linearly polarized satellite signals are transmitted in vertical and horizontal “waves” offset exactly 90° from each other. Since these signals are oriented in a precise cross pattern, the TracVision antenna’s receiving element, called the LNB, must be oriented in the same way. -
Page 31: Advanced Settings
The TV-Hub setting is used for linear configurations that include a multiswitch (TracVision TV5 and TV6 models only). In that mode, the TV-Hub ignores the voltage/tone from the master receiver and outputs whichever polarization/band corresponds to the voltage/ tone that is present on the coax cable connected to its “Receiver”... - Page 32 Receiver Settings 5. Receiver Settings This section explains how to set up various types of satellite TV receivers to operate with the TracVision system. For receiver wiring details, refer to the Installation Guide. Contents Configuring a Linear Receiver for Automatic Switching........33 Configuring DIRECTV Receivers for Automatic Switching .......34...
-
Page 33: Receiver Settings
For automatic satellite switching to work properly using the DiSEqC communication protocol, you need to set up your receivers for the same satellites you installed in the TracVision antenna. Be sure to set up the satellites in the receiver in the exact same order as they were set up in the antenna. -
Page 34: Configuring Directv Receivers For Automatic Switching
Receiver Settings Configuring DIRECTV Receivers for Automatic Switching To establish communications between the TracVision system and each SWM-compatible DIRECTV receiver for automatic satellite switching, you need to set each receiver to a static IP address and enter that address, along with the receiver's location, in the TV-Hub's web interface. - Page 35 TracVision RV1 User’s Guide Receiver Settings Static IP Address Range WITH an Onboard Network If the TV-Hub and the DECA Broadband Kit or Genie DVR are connected to an onboard network (i.e., router), set each receiver to a static IP address that is outside the router's DHCP range. (Refer to your router's user manual for details on finding its IP address range.)
- Page 36 Refer to your receiver's owner's manual for details. NOTE: A video tutorial showing how to navigate to the receiver’s IP address is available in KVH’s TracVision Tutorials playlist on YouTube (Internet access required). 1. Activate the receiver for DIRECTV service, if you haven’t already done so (see “Activating Your Receiver(s)”...
- Page 37 TracVision RV1 User’s Guide Receiver Settings Figure 5-4 IP Address on a DIRECTV Receiver (Example)
-
Page 38: Allowing External Access On A Directv Receiver
TracVision RV1 User’s Guide Receiver Settings Allowing External Access on a DIRECTV Receiver For automatic satellite switching, the TV-Hub needs to communicate with the receiver over the network. The receiver needs to be set up to allow this external access. To allow external access on a DIRECTV... -
Page 39: Setting The Dish Type On A Directv Receiver
TracVision RV1 User’s Guide Receiver Settings Setting the Dish Type on a DIRECTV Receiver To work with the TracVision system, the DIRECTV receiver(s) must be set to the correct dish type for your particular configuration. To set the dish type, follow these steps: NOTE: A video tutorial of this procedure is available in KVH’s TracVision... - Page 40 TracVision RV1 User’s Guide Receiver Settings Figure 5-6 Satellite Dish Setup on DIRECTV Receiver...
-
Page 41: Running A Check Switch Test On A Dish Network Or Bell Tv Receiver
Running a Check Switch Test on a DISH Network or Bell TV Receiver To operate with the TracVision system, you need to run a single Check Switch test on every DISH Network or Bell TV receiver. To run a Check Switch test, follow these steps: NOTE: A video tutorial of this procedure is available in KVH’s TracVision... - Page 42 Check Switch. The receiver now runs the Check Switch test. 12. At the Installation Summary screen, make sure all of the satellites you installed in the TracVision antenna are listed “OK.” Also be sure the switch type is “DP34.” If you do not see these results, select Test to run another test.
- Page 43 TracVision RV1 User’s Guide Receiver Settings 14. At the Setup Details screen, select Continue. 15. Allow the receiver to run two additional tests of its landline connections. 16. At this point, you may activate the receiver. Call the number provided in “Activating Your Receiver(s)”...
-
Page 44: Check Switch Mode
TracVision RV1 User’s Guide Receiver Settings Check Switch Mode When the Setup Wizard prompts you to run a Check Switch test for a DISH Network or Bell TV configuration, the antenna automatically enables Check Switch mode. In this mode, the antenna stops actively tracking and stores the relative pointing position to each installed satellite. -
Page 45: Activating Your Receiver(S)
TracVision RV1 User’s Guide Receiver Settings Activating Your Receiver(s) Before you can watch television, the receiver(s) must be activated for your satellite TV service. Refer to the receiver owner’s manual or packaging for details. To activate DIRECTV U.S. or DISH Network receivers, call the... -
Page 46: Selecting A Single Satellite
TracVision RV1 User’s Guide Satellite Settings 6. Satellite Settings This section explains how to select, edit, and add satellites and satellite groups. Contents Selecting a Single Satellite..........49 Creating a New Satellite..........50 Selecting a Satellite Group ..........51 Creating a New Satellite Group ........53 Changing Satellites in a Group ........ -
Page 47: Satellite Settings
TracVision RV1 User’s Guide Satellite Settings Selecting a Single Satellite If all of the programming you want to watch is carried by a single satellite, follow these steps to configure the antenna to track that one satellite: Important! KVH recommends that you run the Setup Wizard whenever you need to change the configuration of your system (especially if you need to change your satellite TV service or receiver equipment). -
Page 48: Creating A New Satellite
TracVision RV1 User’s Guide Satellite Settings Creating a New Satellite If the satellite you wish to track is not included in the satellite library, you can add a new custom “User” satellite. To create a new satellite, follow these steps: 1. -
Page 49: Selecting A Satellite Group
TracVision RV1 User’s Guide Satellite Settings Selecting a Satellite Group The TV-Hub comes preloaded with some of the most popular groups of satellites. To select one of these preset groups for tracking, or to select a custom group that you created yourself, follow these steps:... - Page 50 72W: 72W only TV3, TV5, TV6* * TV1/RV1 is not compatible with the Eastern Arc or 72W at this time. In addition, due to the low elevation angle, the 129W satellite cannot be viewed by the TV1/RV1 in the Northeast U.S.
-
Page 51: Creating A New Satellite Group
TracVision RV1 User’s Guide Satellite Settings Creating a New Satellite Group If there is no preset satellite group containing the satellites you want to track, you can create your own custom satellite group. Follow these steps: 1. On the Satellites page of the web interface, set Satellite Mode to Group. - Page 52 TracVision RV1 User’s Guide Satellite Settings Figure 6-4 Creating a New Satellite Group...
-
Page 53: Changing Satellites In A Group
TracVision RV1 User’s Guide Satellite Settings Changing Satellites in a Group While you cannot alter the satellites in a preset group, you can change the satellites that are included in any user-defined group. Follow these steps to edit a user-defined group: 1. -
Page 54: Changing Satellite Tracking Parameters
TracVision RV1 User’s Guide Satellite Settings Changing Satellite Tracking Parameters A satellite TV service provider may change a transponder frequency or other satellite parameters at any time without warning. Since the antenna uses these parameters to identify and track the satellite, the TV-Hub allows you to change the tracking parameters of any satellite in its library. - Page 55 TracVision RV1 User’s Guide Satellite Settings Figure 6-6 Edit Satellite Details 3. If the satellite is a custom user-defined satellite, you can change the additional parameters listed below. Parameter Description Satellite Name User-defined name (e.g., User Sat 1) Region Africa, Asia, Australia/New Zealand,...
-
Page 56: Switching Satellites
TracVision RV1 User’s Guide Switching Satellites 7. Switching Satellites This section explains how to switch between multiple satellites installed in the antenna. Contents Automatic Satellite Switching for Linear, DISH Network, or Bell TV....61 Automatic Satellite Switching for DIRECTV .............65 Selecting Automatic Switching Mode..............72 Selecting the Master Receiver ................73... -
Page 57: Automatic Satellite Switching For Linear, Dish Network, Or Bell Tv
TracVision RV1 User’s Guide Switching Satellites Automatic Satellite Switching for Linear, DISH Network, or Bell TV In Automatic satellite switching mode, the TV-Hub can accept DiSEqC satellite change commands from linear, DISH Network, or Bell TV receivers that are either: •... -
Page 58: Setting Up A Linear Receiver For Automatic Switching
TracVision RV1 User’s Guide Switching Satellites Setting Up a Linear Receiver for Automatic Switching For automatic switching to work properly with your linear receivers, be sure to set up the satellites in each receiver in the same order as they are set up in the antenna. -
Page 59: Setting Up A Dish Network/Bell Tv Receiver For Automatic Switching
51). User-defined groups are limited to manual satellite switching only. • Run the TracVision Setup Wizard and initiate a Check Switch test on the receiver when prompted to do so. See “Running a Check Switch Test on a DISH Network or Bell TV Receiver”... -
Page 60: Setting Up An Ip Autoswitch
TracVision RV1 User’s Guide Switching Satellites Setting Up an IP AutoSwitch Whenever you install a new IP AutoSwitch, you need to add it to the Autoswitch page of the web interface. Enter the IP AutoSwitch’s serial number and assign it a friendly name (e.g., ”Master Bedroom”). You can find the serial number on the bottom of the IP AutoSwitch. -
Page 61: Automatic Satellite Switching For Directv
TracVision RV1 User’s Guide Switching Satellites Automatic Satellite Switching for DIRECTV In Automatic satellite switching mode, the TV-Hub can accept commands from the master SWM-compatible DIRECTV receiver to automatically switch between the 101W and 119W satellites. (To learn more about SWM technology, see “Understanding DIRECTV SWM... -
Page 62: Directv Coax Network Connections
TracVision RV1 User’s Guide Switching Satellites DIRECTV Coax Network Connections DIRECTV recently adopted coax networking technology, by which both satellite TV signals and network communications data are carried by the coax cables. This simplifies installation, since Ethernet cables don't need to be run to all of the receivers. - Page 63 TracVision RV1 User’s Guide Switching Satellites Genie Configurations Full DECA Broadband functionality is built into Genie DVRs (HR44 or HR34). So if a Genie DVR is present on your DIRECTV SWM network, no external DECA Broadband kit is required. Just connect the Genie's Ethernet port to the TV-Hub's Ethernet port, either directly or via an onboard router.
-
Page 64: Additional Equipment For Old Directv Receivers
TracVision RV1 User’s Guide Switching Satellites Additional Equipment for Old DIRECTV Receivers In addition to the DECA Broadband Kit or a Genie DVR, you might need to connect an additional device to individual receiver(s), depending on the model. Old Receiver Models... -
Page 65: Setting Up A Directv Receiver For Automatic Switching
TracVision RV1 User’s Guide Switching Satellites H20 Model This receiver is not network-ready. It is only designed to receive a satellite TV signal via its "Satellite In" port. Since both the satellite TV signal and network communications data are present on the coax cables, a band stop filter (KVH part no. - Page 66 TracVision RV1 User’s Guide Switching Satellites Figure 7-6 Adding a DIRECTV Receiver to the Autoswitch Page...
-
Page 67: Understanding Directv Swm Technology
TracVision RV1 User’s Guide Switching Satellites Understanding DIRECTV SWM Technology The TV-Hub has a built-in DIRECTV single wire multiswitch (SWM), allowing you to connect multiple SWM-compatible receivers via a single coax cable. At startup, the SWM allocates one of eight channels to each tuner it detects on the cable. -
Page 68: Selecting Automatic Switching Mode
TracVision RV1 User’s Guide Switching Satellites Selecting Automatic Switching Mode To select automatic switching, simply select the Automatic satellite switching mode at the Home page of the web interface. Figure 7-8 Automatic Satellite Switching on Home Page... -
Page 69: Selecting The Master Receiver
TracVision RV1 User’s Guide Switching Satellites Selecting the Master Receiver The master receiver controls satellite selection. The TracVision antenna will switch between satellites automatically as you change channels using the master receiver’s remote control. All other receivers will only be able to select channels that are carried by the currently selected satellite. -
Page 70: Manual Satellite Switching
TracVision RV1 User’s Guide Switching Satellites Manual Satellite Switching Even if your system is set up for automatic satellite switching, you always have the option to manually switch satellites at the Home page of the web interface. Simply select the Manual satellite switching mode then select the desired satellite from the displayed list of installed satellites. -
Page 71: Troubleshooting
TracVision RV1 User’s Guide Troubleshooting 8. Troubleshooting This section identifies some basic problems along with their possible causes and solutions. It also explains what the status lights and error messages indicate, how to view the system logs and information, and how to get technical support. -
Page 72: Basic Checks
Troubleshooting Basic Checks If you are experiencing a problem receiving satellite TV with your TracVision system, first check the following: Check the System Status Information Check the status indicators in the upper-left corner of the Home page of the web interface, or check the three lights on the front of the TV-Hub itself. - Page 73 TracVision RV1 User’s Guide Troubleshooting Restart the System Try restarting the system at the web interface (see “Restarting the System” on page 103). If you cannot access the web interface, turn off the TV-Hub at the rear panel power switch, then turn it back on.
-
Page 74: Status Information On The Home Page
TracVision RV1 User’s Guide Troubleshooting Status Information on the Home Page The Home page of the web interface provides basic system status information, as described below. Figure 8-1 Home Page Item Description Three status indicators match the physical status lights on the TV-Hub (see “TV-Hub Status Indicators”... - Page 75 TracVision RV1 User’s Guide Troubleshooting Item Description Latitude/longitude you entered in the Setup Wizard, if applicable List of satellites currently installed in the antenna Tracking status visual display; a green line between the antenna and the satellite indicates the antenna is tracking...
-
Page 76: Tv-Hub Status Indicators
TracVision RV1 User’s Guide Troubleshooting TV-Hub Status Indicators Status lights on the Home page of the web interface and on the front of the TV-Hub itself indicate the current status of the system and can help you identify problems quickly. - Page 77 TracVision RV1 User’s Guide Troubleshooting TV-Hub Light The table below explains what the TV-Hub light indicates. State Description TV-Hub is powered off, or there is no power input Green TV-Hub is operating normally Green, Flashing TV-Hub is initializing Orange, Flashing...
- Page 78 TracVision RV1 User’s Guide Troubleshooting Power Light The table below explains what the Power light indicates. State Description TV-Hub is powered off, or there is no power input Green Good input power Red, Flashing Input power is unacceptable; a major error...
-
Page 79: Ip Autoswitch Status Indicator
TracVision RV1 User’s Guide Troubleshooting IP AutoSwitch Status Indicator A status light on the IP AutoSwitch indicates the current status of the IP AutoSwitch. Figure 8-3 IP AutoSwitch Status Light The table below explains what the IP AutoSwitch status light indicates. -
Page 80: Error Messages
TracVision RV1 User’s Guide Troubleshooting Error Messages If any of the Status indicators on the Home page of the web interface are flashing orange, flashing red, or solid red, click on it to view the error message. Figure 8-4 Example of Error Messages under Status Indicators The table below lists all of the possible error messages. - Page 81 TracVision RV1 User’s Guide Troubleshooting Error Description The TV-Hub internal temperature exceeds acceptable limits. If the problem persists, you might need to relocate the unit to an area that provides better ventilation. An automated reboot of the TV-Hub is in process to resolve low memory.
- Page 82 TracVision RV1 User’s Guide Troubleshooting Error Description The antenna’s elevation motor has a power failure. Contact KVH. The antenna’s elevation motor or limit switch failed. Contact KVH. The antenna’s internal temperature exceeds acceptable limits. Turn off the system and allow it to cool.
-
Page 83: System Logs
TracVision RV1 User’s Guide Troubleshooting System Logs Two system logs are available on the Support page of the web interface to capture historical system data: • Operational Log (see “Operational Log” on page • Event Log (see “Event Log” on page... -
Page 84: Operational Log
TracVision RV1 User’s Guide Troubleshooting Operational Log The Operational Log, when initiated, records all messages that the antenna system generates within a period of several minutes. To start a new log or view the current log, select Operational Log on the Support page of the web interface. -
Page 85: Event Log
TracVision RV1 User’s Guide Troubleshooting Event Log The Event Log keeps a historical record of all major system events, including any error messages the antenna system generates. On the Support page of the web interface, select Event Log. You can then save the log file (filename: majorError.log) to your computer and e-mail it... -
Page 86: System Information
TracVision RV1 User’s Guide Troubleshooting System Information You can find the serial numbers, software versions, voltages, and other technical information for the TV-Hub and antenna on the Support page of the web interface (go to Support > System Info). You will need this information whenever you contact KVH Technical Support. - Page 87 TracVision RV1 User’s Guide Troubleshooting Figure 8-8 System Info: Antenna Unit...
-
Page 88: Technical Support
TracVision RV1 User’s Guide Troubleshooting Technical Support The TracVision system is a sophisticated electronic device; only specially trained KVH-certified technicians have the tools and expertise necessary to diagnose and repair a system fault. Therefore, if you experience an operating problem or require technical assistance,... - Page 89 TracVision RV1 User’s Guide Maintenance 9. Maintenance This section explains how to perform preventive maintenance to keep the system in tip-top shape. It also explains how to update the software and satellite library, and restart system components. Contents Preventive Maintenance ..................97 Updating the Satellite Library ................98...
-
Page 90: Maintenance
TracVision RV1 User’s Guide Maintenance Preventive Maintenance The following tasks should be performed periodically to help maintain peak performance: • Vacuum the vents on the TV-Hub. Air needs to flow through these vents to cool the electronic components and prevent overheating. -
Page 91: Updating The Satellite Library
Updating the Satellite Library Service providers occasionally change the tracking parameters of their satellites, necessitating an update to the data in the TracVision satellite library. You can update your system’s satellite library to the latest version at any time by downloading the file from KVH’s Update server and uploading it to the TV-Hub. - Page 92 TracVision RV1 User’s Guide Maintenance 1. Download the latest version of the library file onto your computer from the KVH website (go to www.kvh.com/ Support/Product-Support-Library/Software-Updates). 2. Once you have downloaded the file onto your computer, use the same computer to access the TV-Hub’s web interface (see “Accessing the Web Interface”...
-
Page 93: Updating The Software
If you have an Apple iOS or Google Android smartphone or tablet, and your device has an Internet connection, you can use the TracVision TV/RV App to download the latest software and upload it to the system. You can download the App for free from the Apple iTunes App Store or Google Play Store. - Page 94 TracVision RV1 User’s Guide Maintenance 2. Once you have downloaded the file to your computer, use the same computer to access the TV-Hub’s web interface (see “Accessing the Web Interface” on page 14). 3. At the Updates page of the web interface, select the antenna then select Install Update.
-
Page 95: Corrective Maintenance
TracVision RV1 User’s Guide Maintenance Corrective Maintenance If a system component fails, it will need to be replaced by a KVH- certified technician. Instructions are provided with the replacement part. Important! Field replaceable units should only be replaced by a trained, KVH- certified technician. -
Page 96: Restarting The System
You can restart the following system components at the web interface (go to Support > Restart System). • Restart Antenna: Restarts the TracVision antenna. Choose this option whenever the antenna is unable to find the satellite. • Restart All: Restarts both the TV-Hub and the antenna. Choose this option if the problem cannot be isolated to the antenna. -
Page 97: Specifications
TracVision RV1 User’s Guide Specifications Appendix A. Specifications This section provides the technical specifications of the TracVision system’s components. Contents System Specifications ........... 107... -
Page 98: System Specifications
TracVision RV1 User’s Guide Specifications System Specifications NOTE: All specifications are subject to change without notice. TracVision RV1 Antenna Specifications Attribute Rating Dimensions 13.5" (34.3 cm) OD x 13.3" (33.7 cm) H Weight 8 lbs (3.6 kg) Temperature Operating: -13°F to +131°F (-25°C to 55°C) Survival: -13°F to +158°F (-25°C to +70°C) - Page 99 TracVision RV1 User’s Guide Specifications TV-Hub Specifications Attribute Rating Dimensions 11.2" (28.5 cm) W x 8.5" (21.6 cm) D x 2.8" (7.1 cm) H Weight 10 lbs (4.5 kg) Temperature Operating: 5°F to +131°F (-15°C to 55°C) Survival: 5°F to +158°F (-15°C to +70°C)
- Page 100 www.kvh.com KVH Industries A/S KVH Industries, Inc. KVH Industries Pte Ltd. EMEA Headquarters World Headquarters Asia-Pacific Headquarters Kokkedal, Denmark Middletown, RI U.S.A. Singapore Tel: +45 45 160 180 Fax: +45 45 160 181 Tel: +1 401 847 3327 Fax: +1 401 849 0045 Tel: +65 6513 0290 Fax: +65 6472 3469 E-mail: info@emea.kvh.com E-mail: info@kvh.com...