
Related Manuals for Sony LBT-ZUX10D


Summary of Contents for Sony LBT-ZUX10D
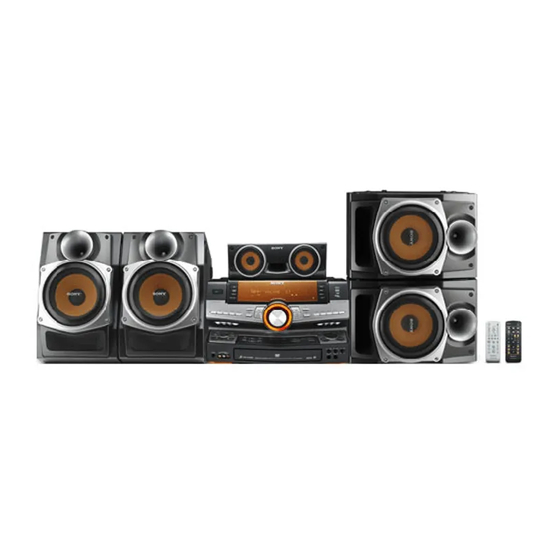
- Page 1 3-100-771-13(1) Mini Hi-Fi Component System Operating Instructions LBT-ZUX10D ©2007 Sony Corporation...
- Page 2 WARNING To reduce the risk of fire or electric shock, do not expose this apparatus to rain or moisture. To prevent fire, do not cover the ventilation of the apparatus with newspapers, table- cloths, curtains, etc. And don’t place lighted candles on the apparatus.
-
Page 3: About This Manual
About this manual The LBT-ZUX10D consists of: – Tuner/DVD player/Stereo cassette deck/Amplifier (unit) HCD-ZUX10D – Speaker System • Front/surround speaker SS-ZUX10D • Center speaker SS-CT10D • Icons, such as , listed at the top of each explanation indicate the type of media that can be used with the function being explained. -
Page 4: Table Of Contents
Tuner Table of Contents Listening to the radio....53 About this manual ....... 3 Playable discs ......5 Tape Guide to parts and controls..9 Playing a tape......55 Getting Started Recording onto a tape ....56 Hooking up the system ....17 Sound Adjustment Hooking up the TV.... -
Page 5: Playable Discs
Playable discs Icon used in Type Characteristics Logo this manual DVD VIDEO • DVD VIDEO • DVD-R*/-RW*/+R/+RW in DVD VIDEO format * also in video mode VR mode • DVD-R/-RW in VR (Video Recording) mode VIDEO CD • VIDEO CD •... - Page 6 MP3 (MPEG 1 Audio Layer 3) is a standard format defined by ISO/MPEG which compresses audio data. MP3 audio tracks must be in MPEG 1 Audio Layer 3 format. JPEG image files must conform to the DCF image file format. (DCF “Design rule for Camera File System”: Image standards for digital cameras regulated by Japan Electronics and Information Technology Industries Association (JEITA)).
- Page 7 Discs that cannot be played Note on DualDiscs • CD-ROMs recorded in PHOTO CD A DualDisc is a two sided disc product format which mates DVD recorded material on • DATA CDs recorded in MP3 PRO one side with digital audio material on the format other side.
- Page 8 Music discs encoded with Copyrights copyright protection This product incorporates copyright technologies protection technology that is protected by U.S. patents and other intellectual This product is designed to play back property rights. Use of this copyright discs that conform to the Compact Disc protection technology must be authorized (CD) standard.
-
Page 9: Guide To Parts And Controls
Guide to parts and controls This manual mainly explains operations using the remote, but the same operations can also be performed using the buttons on the unit having the same or similar names. Front view ws wa w; ql qk qj qh qg qfqd Top view Continued... - Page 10 M MIC 1/2 LEVEL (pages 57, 65, 1 "/1 (on/standby) (pages 18, 19, 20, 54, 77, 78, 84) Press to turn the system on or off. Turn to adjust the microphone volume. B BEAM MODE (page 71) Press to change the lighting effect of ECHO LEVEL (page 65) a beam.
- Page 11 Z AMP MENU (page 70) e; DISC 1 ~ 3 (page 28) Press to change the spectrum Press to select a disc or switch to analyser display, adjust the DVD function from another source. brightness of the display and built-in DISC SKIP/EX-CHANGE beam or change the power illuminator pattern.
- Page 12 es PRESET –/+ (page 53) Press to select a preset station. ./> (go backward/go forward) (pages 27, 38, 56, 84) Press to select a track, chapter or DivX video file. TUNING –/+ (pages 53, 54) Press to tune in a radio station. (rewind/fast forward) (page 27) Press to rewind or fast forward.
- Page 13 Display RELAY A Indicators for the disc tray (page 27). K Indicators for the BEAT BLEND “ ” lights up when the disc is mode (page 63). selected. “ ” lights up when there is L Indicators for the X-ROUND mode a disc on the disc tray.
- Page 14 T Indicates the selected play mode C DISC SKIP (page 28) (page 31). Press to select the next disc. “SHUF” lights up when Shuffle Play D FUNCTION +/– (pages 27, 53, is activated. “PROGRAM” lights up 55, 76) when Program Play is activated. “REP”...
- Page 15 O TV CH +/– (page 22) R V/v/B/b (pages 23, 31, 53, 66, Press to select a TV channel. Press to select the settings. PRESET +/– (page 53) ENTER (pages 23, 31, 53, 58, Press to select a preset station. ./>...
- Page 16 3 PAD A (page 63) * The numeric button 5, TV VOL +, VOLUME + and H buttons have a tactile dot. Use the PAD B (page 63) tactile dot as a reference when operating the Press to add percussion sound. system.
-
Page 17: Getting Started
Getting Started Hooking up the system 1 To AM loop antenna 2 To FM lead antenna 3 To front speaker (right) 4 To front speaker (left) 5 To surround speaker (right) 6 To surround speaker (left) 7 To center speaker A Antennas B Speakers Set up the AM loop antenna, then connect... - Page 18 C VOLTAGE SELECTOR Center speaker For models equipped with a voltage selector, set VOLTAGE SELECTOR to the position of your local power line voltage. Green Depending on the model, the VOLTAGE SELECTOR may differ. VOLTAGE SELECTOR Surround speakers 220V 120V* 230-240V Blue * Saudi Arabian model: 120 - 127V...
-
Page 19: Attaching The Speaker Pads
Inserting two R6 (size AA) When carrying the unit batteries into the remote Do the following procedure to protect the disc mechanism. Use the buttons on the unit for the Example operation. RM-AMU005 Press "/1 to turn on the system. Press DVD. -
Page 20: Hooking Up The Tv
Hooking up the TV For higher quality video images: – Use the optional component video cords to connect the COMPONENT VIDEO input Connect the video input jack of your TV jacks on your TV to the COMPONENT to the VIDEO OUT jack with the supplied VIDEO OUT jacks of this unit. - Page 21 About DVD VIDEO software types and Changing the format of the the conversion method video signal from COMPONENT The DVD VIDEO software can be VIDEO OUT jacks divided into 2 types: • Film-based software Progressive is a method for displaying TV Film-based software is derived from images which reduces flickering and film and displays the images at 24...
-
Page 22: Positioning The Speakers
Operating a Sony TV create a party environment, we You can use the following buttons to recommend that you place your speakers operate a Sony TV. These buttons have as shown in Example 1. been marked in orange. A Front speaker (left) -
Page 23: Setting The Clock
Example 2 Setting the clock Place the surround speakers on the top of the front speakers. Press "/1 to turn on the system. Press TIMER MENU. The hour indication flashes in the display. If “PLAY SET?” flashes in the display, press repeatedly to select “CLOCK SET?”, then press ENTER. -
Page 24: Performing Quick Setup
Press repeatedly to Performing QUICK select a language, then press ENTER. setup Tips • The selected language is for “OSD”, Before using the system, you can make “MENU” and “SUBTITLE”. the minimum basic adjustments in • The selectable language is different QUICK setup. -
Page 25: Using The Theatre Sync Function
DISPLAY when playback THEATRE SYNC allows you to turn on is stopped. your Sony TV and this system, changes the system’s function to “DVD” and then The Control Menu appears on the TV switches the TV’s input source you have screen. - Page 26 Operating the THEATRE SYNC function Point the remote in the direction of the TV and this unit. Then, hold down THEATRE SYNC until the TV is turned on and the input source is changed correctly. If this function does not work, change the transmission time.
-
Page 27: Disc
Press on the unit). Press VOLUME +/– (or turn Disc MASTER VOLUME on the unit) to adjust the volume. Playing a disc Note — Normal Play Depending on the system status, the volume level may not appear on the TV screen. Other operations Depending on the DVD VIDEO or Press... - Page 28 You cannot select an audio track during Lock Press Search operation of MP3 audio tracks. DVD VIDEO, DVD-R/-RW in VR mode, Watch frame by SLOW or SLOW VIDEO CD, AUDIO CD and DivX video m or frame (Slow- files only. motion Play) on the unit) MP3 audio tracks, JPEG image files and DivX...
- Page 29 Displaying the subtitles When playing a DVD VIDEO: Depending on the DVD VIDEO, the (DVD VIDEO, DVD-R/-RW in VR mode option of language and audio format and DivX video files only) varies. While playing a DVD VIDEO, When a 4-digit number is displayed, the DVD-R/-RW in VR mode or DivX video digits represent a language code (see files, you can...
- Page 30 To return to the previous menu When playing a Super VCD: • 1: STEREO: the stereo sound of the Press O RETURN. audio track 1. Note • 1: 1/L: the sound of the left channel of PBC playback is canceled when Shuffle Play, the audio track 1 (monaural).
-
Page 31: Using Play Mode
Notes Using play mode • You cannot perform Resume Play during Shuffle Play or Program Play. • This function may not work properly with some discs. Creating your own program • Resume Play is canceled when you – press x when playback is stopped. —... - Page 32 Press Press (or nN on the unit). The cursor moves to the track row “T” Program Play starts. (in this case, “01”). When the Program Play ends, you can restart the same program by pressing 0 : 00 : 00 PROGRAM (or nN on the unit).
-
Page 33: Playing Repeatedly
Press ENTER. Playing in random order Shuffle Play starts. To cancel Shuffle Play, press CLEAR — Shuffle Play or select “OFF” in step 3. To turn off the Control Menu You can play back the tracks on the Press DISPLAY repeatedly until the current disc in random order. -
Page 34: Searching/Selecting A Disc
Press repeatedly to Searching/selecting a select the setting you want. • OFF (default setting) disc • ALL DISCS • ONE DISC • TITLE (DVD VIDEO or Playing DVD VIDEOs using the DVD-R/-RW in VR mode) menu • CHAPTER (DVD VIDEO or DVD-R/-RW in VR mode) •... - Page 35 Press DISPLAY. (When Selecting “ORIGINAL” or playing a DATA CD/DVD with “PLAY LIST” on a DVD-R/-RW JPEG image files, press in VR mode DISPLAY twice.) The Control Menu appears on the TV screen. This function is only available for Press repeatedly to DVD-R/-RW in VR mode with a playlist select the search item.
-
Page 36: Searching By Scene
Searching by scene When the Control Menu display is turned off, you can search for a chapter (DVD VIDEO and — Picture Navigation DVD-R/-RW in VR mode), track (AUDIO CD and VIDEO CD) or file (DivX video files in DATA CD/DVD) by pressing the numeric buttons and ENTER. -
Page 37: Playing Mp3/Jpeg Discs
Press to select a Playing MP3/JPEG chapter, title or track, then press ENTER. discs The system starts playing from the selected scene. During Picture Navigation, “VIEWER” appears in the display. Notes • The system can recognize up to 200 albums, To cancel searching even if the albums do not contain MP3 audio tracks and JPEG image files. - Page 38 To return to the album list display Press repeatedly to select an album. when the track list is displayed Press O RETURN. Playing an album: (or nN on the unit). Press To turn on or off the display of album The system starts playback from the list or track list first track of the selected album.
- Page 39 Press to select the Notes • The PICTURE NAVI button does not work image you want to view, then when “MODE (MP3, JPEG)” is set to press (or nN on the unit). “AUDIO (MP3)”. The slide show starts from the •...
- Page 40 Press repeatedly to • If you play back a large data size of MP3 audio tracks and JPEG image files at the same select “AUTO”, then press time, the sound may skip. It is recommended ENTER. that you reduce the data size by creating the MP3 audio tracks with a bit rate of 128 kpbs Press DVD MENU.
-
Page 41: Enjoying Divx ® Video Files
Selecting a transition effect for ® Enjoying DivX video image files in the slide show (JPEG image files only) files Press DISPLAY repeatedly until the Control Menu for JPEG image files appears on the TV screen. Notes Press repeatedly to select •... - Page 42 To return to the album list display Press repeatedly to select an album. when the file list is displayed Press O RETURN. Playing an album: (or nN on the unit). Press To turn on or off the display of album The system starts playback from the list or file list first file of the selected album.
-
Page 43: Adjusting The Delay Between The Picture And Sound
Adjusting the delay Restricting playback of between the picture the disc and sound — CUSTOM PARENTAL CONTROL, PARENTAL — A/V SYNC CONTROL When the sound does not synchronize You can set 2 types of playback with the pictures on the screen, you can restrictions for the disc you want. - Page 44 To play back a disc for which Press repeatedly to select (PARENTAL Custom Parental Control is set CONTROL), then press ENTER. Insert the disc for which Custom The options for “PARENTAL Parental Control is set. CONTROL” appear on the TV screen. The “CUSTOM PARENTAL Press repeatedly to...
- Page 45 Press repeatedly to Press repeatedly to select (PARENTAL select “STANDARD”, then press CONTROL), then press ENTER. ENTER. The options for “PARENTAL The options for “STANDARD” appear CONTROL” appear on the TV screen. on the TV screen. Press repeatedly to Press repeatedly to select “PLAYER t”, then press select a geographic area as the...
-
Page 46: Changing The Password
To play back a disc for which Changing the password Parental Control is set Insert the disc and press Press DISPLAY when (or nN on the unit). playback is stopped. The display for entering your password The Control Menu appears on the TV appears on the TV screen. -
Page 47: Using The Dvd Setup Menu
Press repeatedly to Using the DVD setup select the setup item from the displayed list: “LANGUAGE menu SETUP”, “SCREEN SETUP”, “CUSTOM SETUP”, or By using the DVD setup menu, you can “SPEAKER SETUP”. Then press make various adjustments to items such as ENTER. -
Page 48: Dvd Setup Menu Item List
Press repeatedly to SUBTITLE* select the setting you want, then (DVD VIDEO only) Switches the press ENTER. language of the subtitle. The setting is selected and setup is When you select “AUDIO FOLLOW”, completed. the language for the subtitles changes according to the language you selected for SCREEN SETUP the sound track. - Page 49 COLOR SYSTEM (VIDEO CD) BLACK LEVEL (Except for Latin American models) (Latin American models only) Select the Select the color system when you play black level (setup level) for the video back a VIDEO CD. signals output from the video jacks other than COMPONENT VIDEO OUT jacks.
-
Page 50: Track
Setting playback options – CUSTOM The default setting varies depending on the country. SETUP CUSTOM SETUP AUTO PAUSE MODE: TRACK SELECTION: MULTI-DISC RESUME: AUDIO DRC: Registration Code t DivX: 16:9 PAUSE MODE (DVD VIDEO and DVD-R/-RW in VR mode only) 4:3 LETTER BOX AUTO: The picture, including subjects that move dynamically, is output with no... - Page 51 Setting the speakers – SPEAKER AUDIO DRC (Dynamic Range SETUP Compression) To obtain the best possible surround (DVD VIDEO and DVD-R/-RW in VR sound, set the connection of the speakers mode only) Useful for watching movies at you have connected and their distance low volume late at night.
- Page 52 SUBWOOFER TEST TONE YES: Select this if an optional subwoofer OFF: The test tone is not emitted from the is connected. speakers. NONE: Select this if an optional ON: The test tone is emitted from each subwoofer is not connected. speaker in sequence except for DISTANCE subwoofer.
-
Page 53: Tuner
Press TUNER MENU. “Memory?” flashes in the display. Tuner Press ENTER. A preset number flashes in the display. Listening to the radio The stations are stored from preset number 1. You can listen to a radio station either by Preset number selecting a preset station, or by manually tuning in the station. - Page 54 To change the AM tuning interval Listening to a non-preset radio (Except for Saudi Arabian models) The station factory setting for AM tuning interval is 9 kHz (or 10 kHz for some areas). Use the buttons on the unit for the You can use manual tuning to tune in a operation.
-
Page 55: Tape
Press (or nN on the unit). The tape starts playing. Tape Press (or nN on the unit) again to play back the reverse side. Playing a tape You can use TYPE I (normal) tape. Front side Reverse side indicator Select a tape deck. indicator Press FUNCTION +/–... -
Page 56: Recording Onto A Tape
Set Deck B to stand by for Recording onto a tape recording. For CD Synchro Recording: There are three ways to record on a TYPE Press CD SYNC. “SYNC” lights up in I (normal) tape. Use the buttons on the the display and “REC”... - Page 57 For Sound Mixing, start singing along with the music and adjust the microphone volume by turning MIC 1 LEVEL or MIC 2 LEVEL. After you have finished, turn MIC 1 LEVEL or MIC 2 LEVEL to “MIN”. To stop recording Press x.
-
Page 58: Sound Adjustment
Adjusting the graphic equalizer and storing the user equalizer setting Sound Adjustment You can adjust the sound by raising or lowering the level of specific frequency band, then store up to three user equalizer Adjusting the sound settings in the memory. Press EQ BAND/MEMORY Reinforcing the sound repeatedly to select a frequency... - Page 59 Selecting the sound field PRO LOGIC* Performs Pro Logic decoding. The source You can take advantage of the surround recorded in 2 channels is decoded into 4.1 sound simply by selecting one of the channels. sound fields. They bring the exciting and PLII MOVIE* powerful sound of movie theaters into Performs Pro Logic II Movie mode...
-
Page 60: Creating A Party Atmosphere
When the headphones are connected: Creating a party HP 2CH atmosphere The normal sound field for headphones. HP VIRTUAL* — X-TRANCE PRO The sound field for headphones with You can create a party atmosphere by virtual surround effect. This sound field is using the buttons on the X-TRANCE only effective when you play back multi PRO remote. - Page 61 Adding chorus – CHORUS Creating moving sound effect Press CHORUS repeatedly. — X-ROUND Select To enjoy the X-ROUND effect, place CHORUS 1 create a slow and deep your front and surround speakers at an chorus effect. equal distance from your listening CHORUS 2 create a tremolo chorus position (see “Positioning the speakers...
- Page 62 To change the sound movement Creating “MAX” or “JUMP” Press X-ROUND +/– repeatedly (or turn effect X-ROUND JOG on the unit) to change the sound movement from one speaker to — MAX/JUMP mode MANUAL WAVE another speaker when MANUAL FADER MANUAL You can use “MAX”...
- Page 63 Creating the “MAX” and “JUMP” To add the drum sound effect manually Make sure that “BEAT BLEND” lights up in the display. Otherwise, press PAD A or Press X-ROUND ON/OFF PAD B. “BEAT BLEND” lights up and repeatedly until “X-ROUND” “BEAT BLEND ON”...
- Page 64 Press BEAT PATTERN +/– Notes • The beat tempo input is canceled if you press repeatedly (or hold down BEAT any buttons other than BPM CONTROL or PATTERN and turn OPERATION you connect or disconnect the microphones or DIAL on the unit) to select the headphones.
-
Page 65: Singing Along: Karaoke
Start playing the music and Singing along: Karaoke adjust the volume. DVD VIDEO, DVD-R/-RW in VR mode or DivX video files: The system outputs the audio format that you have selected. You can sing along with any multiplex AUDIO CD, multiplex VIDEO CD or AUDIO CD, VIDEO CD or MP3 DVD VIDEO in Dolby Digital Karaoke audio tracks:... - Page 66 Dolby Digital Karaoke format Example: The Dolby Digital format, which DOLBY DIGITAL 3 / 2 reproduces surround sound using 5 channels, can also contain the “Dolby Digital Karaoke” format which is 2/0: Recorded only with accompaniment. specialized for karaoke. In the Dolby 3/0: Recorded with guide melody.
- Page 67 Press SCORE before singing a VOCAL SELECT song in Karaoke Mode. (DVD VIDEO, VIDEO CD, AUDIO CD The previous highest score appears on only) the TV screen. When playing a DVD VIDEO: After singing for more than a OFF: Cancel the guide vocal. minute, press SCORE again to 1+2: Guide vocal 1+2.
- Page 68 When playing a DVD VIDEO, the function only works for Dolby Digital Karaoke format. For DVD VIDEOs without guide melody, you cannot hear the guide melody even if you set the setting to “ON”. The highest score is reset when the system is turned off.
-
Page 69: Other Operations
For Recording Timer: Tune in the preset radio station you Other Operations want. Press TIMER MENU. Using the timer Press repeatedly to select “PLAY SET?” or “REC SET?”, then press ENTER. Falling asleep to music “ON” appears and the hour indication —... -
Page 70: Changing The Display
When you record on both sides, be sure to start from the front side. If you start Changing the display from the reverse side, recording stops at the end of the reverse side. Use the buttons on the unit for the operation. - Page 71 Turn OPERATION DIAL to select Turning off the display the setting you want. Setting Effect — Power Saving Mode F.BEAM ON, The front and bottom B.BEAM ON beam lights up. The demonstration display and the clock display can be turned off to minimize the F.BEAM 1, The front and bottom amount of power consumed during...
-
Page 72: Viewing Information About The Disc
When playing an AUDIO CD or VIDEO Viewing information CD without PBC function: 1 Elapsed playing time of the current about the disc track 2 Remaining time of the current track 3 Elapsed playing time of the current Viewing information about the disc 4 Remaining time of the current disc disc in the front panel display... - Page 73 “NO TEXT” appears in the display if the Viewing information about the DVD VIDEO is not a DVD-TEXT disc, the AUDIO CD is not a CD-TEXT disc or the disc in the on-screen display VIDEO CD does not have text information. The current chapter number and the current Press TIME/TEXT repeatedly title number are displayed for 2 seconds...
-
Page 74: Track
When playing a VIDEO CD with PBC When playing a DVD VIDEO: function/Super VCD: For example, in Dolby Digital format, multiple signals ranging from monaural to Elapsed playing time of the current scene/ 5.1 channel signals can be recorded on a track and title of the disc DVD VIDEO. -
Page 75: Hooking Up The Optional Components
When playing a DivX video file: Hooking up the Example: MP3 audio track optional components 1 : MP3 128k To enhance your system, you can connect optional components. Refer to the Bit rate operating instructions provided with each component. Front panel Checking the date information of JPEG image files You can check the date information... - Page 76 Use a video cord to connect to the played back. For details, consult your video input jack of a TV. nearest Sony dealer. H S VIDEO OUT jack E D-LIGHT SYNC OUT jack Use an S video cord to connect to the (Except for Oceanian models) S video input jack of a TV.
- Page 77 To switch between the “TV” and “SAT” function Use the buttons on the unit for the operation. Hold down TV/SAT and press "/1 while the system is turned on. Release "/1 first, then release TV/SAT. The system switches the function from “TV” to “SAT”...
-
Page 78: Additional Information
• The clock is not set. Set the clock If the problem persists after doing all of (page 23). the above, consult your nearest Sony • A power failure has occurred. Set the dealer. clock (page 23) and timer settings (page 69) again. - Page 79 There is severe hum or noise. The sound from the audio source has • A TV or VCR is placed too close to the echo effects. unit. Move the unit away from the TV or • Press FLANGER, DELAY, CHORUS VCR.
- Page 80 • Move the unit to a place without “LOCKED” appears in the display. vibration (e.g., on top of a stable stand). • Consult your nearest Sony dealer or • Move the speakers away from the unit, local authorized Sony service facility.
- Page 81 Playback does not start from the first • The disc contains more than 200 albums. track. • The album contains more than 600 • The system is in Program Play or tracks/files. Shuffle Play mode. Turn off Program • For MP3 audio tracks/JPEG image files, Play and Shuffle Play.
- Page 82 The surround effect is difficult to hear • Even if your TV is compatible with progressive format (525p/625p) signals, when you are playing a Dolby Digital the image may be affected when you set or MPEG audio sound track. to progressive format. In this case, set to •...
- Page 83 Tuner The aspect ratio of the TV screen cannot be changed even though you can set “TV TYPE” under “SCREEN The radio presetting is canceled. SETUP” in the Setup Menu when you • The power cord is disconnected or a play back a wide picture.
- Page 84 If the system still does not operate There is excessive wow or flutter, or the sound drops out. properly after performing the above • The capstans or pinch rollers are dirty measures or other troubles not (see “Cleaning the tape heads” on described above occur, reset the page 87).
- Page 85 [VER.X.XX] (X is a number) display) may appear on the TV screen. Although When the self-diagnosis function is this is not a malfunction and for Sony activated to prevent the system from service use only, normal system operation malfunctioning, a 5-character service will not be possible.
-
Page 86: Precautions
Invalid Precautions You have pressed an invalid button. No Disc Discs that this system CANNOT play There is no disc on the disc tray. • Discs of non-standard shape (for example, No Tab heart, square, star). You cannot record onto the tape because •... - Page 87 • If the system is brought directly from a cold to To prevent a tape from being a warm location or is placed in a very damp accidentally recorded over room, moisture may condense on the lens Break off the cassette’s overwrite protection tab inside the unit, and cause the system to from side A or B as illustrated.
-
Page 88: Specifications
TV/SAT AUDIO IN L/R: Frequency response Voltage 250 mV/450 mV, impedance 50 – 13,000 Hz (±3 dB), 47 kilohms using Sony TYPE I tape MIC 1 or 2: Wow and flutter Sensitivity 1 mV, impedance ±0.35% W.Peak (IEC) 10 kilohms 0.3% W.RMS (NAB) - Page 89 AM tuner section Center Speaker Tuning range (SS-CT10D) Latin American and Oceanian models: Speaker system 530 – 1,710 kHz (with the interval set Full range speaker system, Bass reflex, at 10 kHz) Magnetically shielded 531 – 1,710 kHz (with the interval set Speaker unit at 9 kHz) Full range, 10 cm, cone type ×...
-
Page 90: Guide To The Control Menu Display
Guide to the Control Menu display Use the Control Menu to select a function and to view related information. Press DISPLAY repeatedly to turn on, turn off or change the Control Menu display as follows: Control Menu display 1 t Control Menu display 2 (appears for certain discs only) t Control Menu display off t Control Menu display 1 t …... -
Page 91: Track
Item Item Name, Relevant Disc Type, Function TRACK Selects the track to be played back. ORIGINAL/PLAY LIST Selects the playback sequence either to the originally recorded sequence or to the playlist created on the disc. TIME/TEXT Checks the elapsed playing time and the remaining time. Input the time code for picture and music searching. - Page 92 Item Item Name, Relevant Disc Type, Function DATE Displays the date when the picture was taken by a digital camera. INTERVAL Specifies the duration for which the slides are displayed on the TV screen. EFFECT Selects the transition effects to be used for changing slides during a slide show.
-
Page 93: Language Code List
Language code list The language spellings conform to the ISO 639:1988 (E/F) standard. Code Language Code Language Code Language Code Language 1027 Afar 1186 Scots Gaelic 1350 Malayalam 1513 Siswati 1028 Abkhazian 1194 Galician 1352 Mongolian 1514 Sesotho 1032 Afrikaans 1196 Guarani 1353... - Page 94 Parental Control area code list Code Area Code Area Code Area Code Area 2044 Argentina 2165 Finland 2362 Mexico 2149 Spain 2047 Australia 2174 France 2376 Netherlands 2499 Sweden 2046 Austria 2109 Germany 2390 New Zealand 2086 Switzerland 2057 Belgium 2248 India 2379...
-
Page 95: Glossary
Movie mode Glossary The Movie mode is for use with stereo television shows and all the programs encoded in Dolby Surround. The result is ® DivX enhanced sound field directionality that approaches the quality of discrete 5.1- Digital video technology created by channel sound. - Page 96 DVD VIDEO Film based software, Video based software A disc that contains up to 8 hours of moving pictures even though its diameter DVD VIDEOs can be classified as Film is the same as a AUDIO CD. based or Video based software. Film The data capacity of a single-layer and based DVD VIDEOs contain the same single-sided DVD VIDEO, at 4.7 GB...
- Page 97 Parental Control VIDEO CD A function of the DVD VIDEO to limit A compact disc that contains moving playback of the disc by the age of the pictures. users according to the limitation level in The picture data uses the MPEG 1 format, each country.
-
Page 98: Index
Index Numerics 16:9 48 FILE 35 Non-playable disc 7 4:3 LETTER BOX 48 File 35 Normal Play 27 4:3 PAN SCAN 48 Film based software 96 5.1 channel 66 FLANGER 60 FM MODE 54 On-screen display 35, 73 Freeze Frame 28 ORIGINAL/PLAY LIST 35 Front panel display 13, 72, 85 ALBUM 35... - Page 99 Test tone 52 THEATRE SYNC 25 Time Search 36 TIME/TEXT 73 Timer Play Timer 69 Recording Timer 69 Sleep Timer 69 Title 35 TITLE/SCENE/TRACK 35 TRACK 35 Track 35 Transition effect 41 User equalizer 58 Video based software 96 VIDEO CD 5 VOCAL SELECT 67 X-ROUND 61 X-TRANCE PRO 60...
- Page 100 Sony Corporation Printed in Malaysia...