
Related Manuals for Sony FST-ZX100D


Summary of Contents for Sony FST-ZX100D
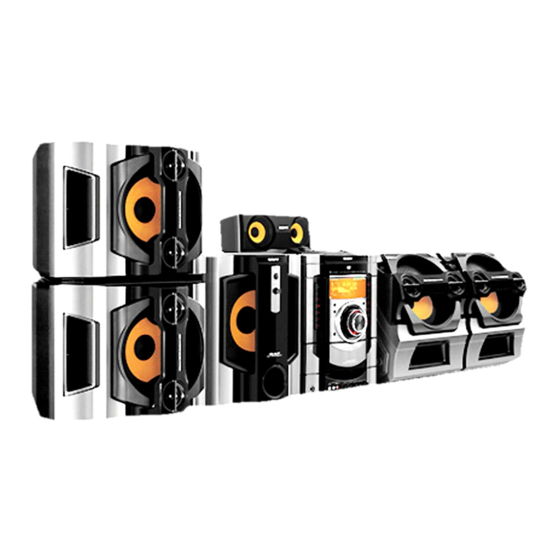
- Page 1 2-672-108-12(2) Mini Hi-Fi Component System Operating Instructions FST-ZX100D/ZX80D LBT-ZX100D/ZX80D MHC-GN1000D ©2006 Sony Corporation Downloaded From Disc-Player.com Sony Manuals...
- Page 2 (only for models with a voltage selector). The following caution label is located inside the Remove the 13 A 3-pin plug using a apparatus. screwdriver. Attach the supplied parallel blade plug (Type A). Downloaded From Disc-Player.com Sony Manuals...
-
Page 3: Table Of Contents
Playing DATA CDs or DATA DVDs with MP3 audio tracks and JPEG image files ......28 Playing MP3 audio tracks and JPEG image files as a slide show with sound..........30 ® Enjoying DivX video files....32 continued Downloaded From Disc-Player.com Sony Manuals... - Page 4 Changing the power illuminator ... 72 Viewing information about the disc in the front panel display ....73 Viewing information about the disc in the on-screen display ....74 Checking the date information of JPEG image files ......75 Downloaded From Disc-Player.com Sony Manuals...
-
Page 5: About This Manual
• The English on-screen display is used for illustration purposes only. • The Control Menu items may be different depending on the disc. • The Setup Menu items may be different depending on the area. Downloaded From Disc-Player.com Sony Manuals... -
Page 6: Playable Discs
“.AVI” or “.DIVX”. ISO 9660 Format “DVD+RW”, “DVD-RW”, “DVD+R”, A logical format of files and folders on CD-ROMs, “DVD VIDEO”, and the “CD” logos are defined by ISO (International Organization for trademarks. Standardization). Downloaded From Disc-Player.com Sony Manuals... - Page 7 However, since the audio material side does not VIDEO CDs Enjoy video playback (moving conform to Compact Disc (CD) standard, without PBC pictures) as well as music. playback on this product is not guaranteed. functions (Ver. 1.1 discs) continued Downloaded From Disc-Player.com Sony Manuals...
- Page 8 Digital Theater played back. Systems, Inc. • If the first session is recorded in AUDIO CD or VIDEO CD format, only the first session will be played back. Downloaded From Disc-Player.com Sony Manuals...
-
Page 9: Getting Started
Red (3) 2 Connect the surround speakers. Black (#) /Blue Connect the speaker cords of the surround speakers to the SURR SPEAKER terminals Front speakers only. as shown below. Surround speakers only. Blue Grey continued Downloaded From Disc-Player.com Sony Manuals... - Page 10 Set up the AM loop antenna, then connect V I D E O S V I D E O U T O U T AM loop antenna Extend the FM lead antenna horizontally Downloaded From Disc-Player.com Sony Manuals...
- Page 11 You can use the following buttons to operate a Each time you perform the procedure Sony TV. These buttons have been marked in below, the color system changes as follows: orange. To use these buttons, hold down TV NTSC before pressing the button you want.
-
Page 12: Attaching The Speaker Pads
Press Z OPEN/CLOSE again to close the disc tray. Wait until “DVD No Disc” Example appears in the display. Front/surround speaker of FST-ZX100D Hold down DVD and then press ?/1 until “STANDBY” appears in the display. Then, “MECHA LOCK” appears in the display. -
Page 13: Positioning The Speakers
To enjoy DVD VIDEOs and other discs with Sub woofer* multi-channel sound and Dolby surround effects, you need to adjust the speaker settings. For details, see “Setting the speakers” on page Listener * Not supplied for FST-ZX80D/LBT-ZX80D Downloaded From Disc-Player.com Sony Manuals... -
Page 14: Setting The Clock
47. SCAN (page 45) Turn on your TV and select the video input. If you have a wide-screen TV or a 4:3 standard TV with wide-screen mode Select 16:9 (page 45) Downloaded From Disc-Player.com Sony Manuals... -
Page 15: Using The Theatre Sync Function
THEATRE SYNC allows you to turn on your front speaker distance from your Sony TV and this system, changes the system’s listening position, then press ENTER. function to “DVD” and then switches the TV’s You can set from 1.0 to 7.0 meters. -
Page 16: Changing The Format Of The Video Signal From Component Video Out Jacks
Select this when your TV accepts progressive Notes signals and the TV is connected to the • This function is only available for Sony TV series. COMPONENT VIDEO OUT jacks. The system • If distance between the TV and this unit is too far, automatically detects the software type and this function may not work. - Page 17 • There would be no image on your TV or the image is not clear if your setting does not match your TV or connection. • “PROGRESSIVE” lights up in the display when you select “P AUTO” or “P VIDEO”. Downloaded From Disc-Player.com Sony Manuals...
-
Page 18: Disc - Playback
• When you eject a disc, handle the disc by its edge. Do When playing a VIDEO CD (playback not touch the surface of the disc. without PBC function): Elapsed Disc tray playing time Track number number Disc playing Disc presence indicator indicator Downloaded From Disc-Player.com Sony Manuals... - Page 19 Or, press the numeric buttons Disc playing Disc presence when the Control Menu is turned indicator indicator off, then press ENTER Select an album Press ALBUM +/– repeatedly during playback or when playback is paused. continued Downloaded From Disc-Player.com Sony Manuals...
- Page 20 • If you press DVD on the unit while the system is another source Source Selection). turned off, the system turns on automatically and and start “DVD” is selected as the function except during playback Power Saving Mode. automatically Downloaded From Disc-Player.com Sony Manuals...
-
Page 21: Resuming Playback From The Point You Stopped The Disc
When using the Resume Play function on CD Graphics, playback starts from the beginning of the track. To play back from the beginning of the disc, press x twice, then press H (or nN on the unit). continued Downloaded From Disc-Player.com Sony Manuals... - Page 22 Follow steps 1 to 3 of “Creating your own program”. Press repeatedly to select the programmed step number you want to delete. Then, press CLEAR. The selected step is deleted. The following steps are shifted up. Downloaded From Disc-Player.com Sony Manuals...
-
Page 23: Playing In Random Order
Press CLEAR or select “OFF” in step 3. The Control Menu appears on the TV screen. To turn off the Control Menu Press DISPLAY repeatedly until the Control Menu disappears from the TV screen. continued Downloaded From Disc-Player.com Sony Manuals... -
Page 24: Playing Repeatedly
ALL DISCS To turn off the Control Menu ONE DISC TRACK Press DISPLAY repeatedly until the Control Menu disappears from the TV screen. Press repeatedly to select the setting you want. The default settings are underlined. Downloaded From Disc-Player.com Sony Manuals... -
Page 25: Playing Dvd Videos Using The Menu
A DVD VIDEO contains a lot of sections of ORIGINAL picture or music feature called “title”. When you play back a DVD VIDEO which contains several titles, you can select the title you want using TOP MENU. continued Downloaded From Disc-Player.com Sony Manuals... -
Page 26: Playing Video Cds With Pbc Functions (Version 2.0)
3 may appear as “Press SELECT” in the “.JPEG”. operating instructions supplied with the disc. In this case, press H (or nN on the unit). • PBC Playback is canceled when Shuffle Play, Program Play or Repeat Play is activated. Downloaded From Disc-Player.com Sony Manuals... - Page 27 A t B t C t D t F t G. Albums that do not contain tracks (or files) (such as album E) do not appear in the list. continued Downloaded From Disc-Player.com Sony Manuals...
-
Page 28: Playing Data Cds Or Data Dvds With Mp3 Audio Tracks And Jpeg Image Files
M Y F A V O U R I T E S O N G R & B J A Z Z C L A S S I C S A L S A O F C U B A B O S S A N O V A Downloaded From Disc-Player.com Sony Manuals... - Page 29 The system starts a slide show from the first image Press repeatedly when the album list is file of the selected album. displayed. To display the next or previous JPEG image file Press repeatedly during the slide show. continued Downloaded From Disc-Player.com Sony Manuals...
-
Page 30: Playing Mp3 Audio Tracks And Jpeg
• You can select Repeat Play while playing JPEG image files (page 24). Press MENU. The list of albums appears on the TV You can also change the slide show speed (page 31) screen. and effect (page 32) while playing JPEG image files. Downloaded From Disc-Player.com Sony Manuals... -
Page 31: To Stop Playback
“IMAGE (JPEG)”, “No image data” appears on the TV screen and the disc cannot be played back. • The PICTURE NAVI button does not work when “MODE (MP3, JPEG)” is set to “AUDIO (MP3)”. continued Downloaded From Disc-Player.com Sony Manuals... -
Page 32: Enjoying Divx ® Video Files
(page 6) and “Notes on Multi Session disc” (page 8). DATA CD JPEG 1 0 / 2 3 / 2 0 0 4 MODE 1 MODE 1 MODE 2 MODE 3 MODE 4 MODE 5 Downloaded From Disc-Player.com Sony Manuals... - Page 33 The system starts playing the first DivX video file when the file list is displayed of the selected album. Press O RETURN. To turn on or off the display of album list or file list Press MENU repeatedly. continued Downloaded From Disc-Player.com Sony Manuals...
-
Page 34: Using The On-Screen Display To Search For A Title/Chapter/Scene/Track/ Index/Album/File
Control Menu on the TV screen. You can also search for a particular point using the time code (Time Search) (DVD VIDEO and DVD-R/DVD-RW in VR mode only). Downloaded From Disc-Player.com Sony Manuals... - Page 35 (DVD VIDEO and DVD-R/ DVD-RW in VR mode), track (AUDIO CD and VIDEO CD) or file (DivX video files in DATA CD and DATA DVD) by pressing the numeric buttons and ENTER. Downloaded From Disc-Player.com Sony Manuals...
-
Page 36: Searching By Scene
The first scene of the first 9 chapters, titles or tracks appears on the TV screen as follows: Press to select a chapter, title or track, then press ENTER. The system starts playing from the selected scene. Downloaded From Disc-Player.com Sony Manuals... -
Page 37: Disc - Various Functions
5.1 channel • 2: SUB: the sub sound of the audio track 2. signals can be recorded on a DVD VIDEO. • 2: MAIN+SUB: the main and sub sound of the audio track 2. continued Downloaded From Disc-Player.com Sony Manuals... -
Page 38: Changing The Angles
DVD VIDEO. You also may not be able to turn the subtitles off. • You can change the subtitles if the DivX video file has an “.AV1” or “.DivX” extension and contains subtitle information within the same file. Downloaded From Disc-Player.com Sony Manuals... -
Page 39: Adjusting The Delay Between The Picture And Sound
• OFF: does not adjust. The Control Menu appears on the TV • ON: adjusts the difference between screen. picture and sound. Press ENTER. Note Depending on the input stream, this function may not be effective. continued Downloaded From Disc-Player.com Sony Manuals... - Page 40 Enter password, then press ENTER Enter or re-enter your 4-digit password using the numeric buttons, then press ENTER. “Custom parental control is set.” appears on the TV screen and the screen returns to the Control Menu. Downloaded From Disc-Player.com Sony Manuals...
- Page 41 STANDARD: OTHERS PARENTAL CONTROL Enter a new 4-digit password, then press ENTER Enter a 4-digit password using the numeric buttons, then press ENTER. The display for confirming the password appears on the TV screen. continued Downloaded From Disc-Player.com Sony Manuals...
- Page 42 If you make a mistake entering your password Press repeatedly to delete the number you have entered, then re-enter your password again. To turn off the Parental Control function Set “LEVEL” to “OFF” in Step 8. Downloaded From Disc-Player.com Sony Manuals...
-
Page 43: Using The Dvd Setup Menu
The display for entering the password appears on the TV screen. Enter your 4-digit password using the numeric buttons, then press ENTER. Enter a new 4-digit password using the numeric buttons, then press ENTER. continued Downloaded From Disc-Player.com Sony Manuals... -
Page 44: Setting The Language
SUBTITLE (DVD VIDEO only) Options Switches the language of the subtitle . When you select “AUDIO FOLLOW”, the language for the subtitles changes according to the language you selected for the sound track. Downloaded From Disc-Player.com Sony Manuals... - Page 45 4:3 PAN SCAN Select this when you connect a 4:3 Turns off the screen saver. screen TV. This setting displays the wide picture on the entire screen and cuts off the portions that do not fit. continued Downloaded From Disc-Player.com Sony Manuals...
-
Page 46: Custom Setup
Set the black level of the output CUSTOM SETUP AUTO PAUSE MODE: signal to the standard level. TRACK SELECTION: MULTI-DISC RESUME: Raise the standard black level. AUDIO DRC: Registration Code t Use this when the picture becomes DivX: too black. Downloaded From Disc-Player.com Sony Manuals... -
Page 47: Setting The Speakers
40 discs. TEST TONE: FRONT: Does not store the resume CENTER: SURROUND: BEHIND playback point in the memory. SUBWOOFER: Playback starts at the resume playback point only for the current disc in the system. continued Downloaded From Disc-Player.com Sony Manuals... - Page 48 (FST-ZX80D/ of “SIZE” to default setting. LBT-ZX80D only). Note NONE: Select this if the subwoofer is not connected (FST-ZX100D/ You cannot perform SPEAKER SETUP when you LBT-ZX100D/MHC-GN1000D connect headphones or microphones to the unit. only). x SIZE...
- Page 49 • Do not place the surround speakers further away from your listening position than the front speakers. • Depending on the input stream, the “DISTANCE” setting may not be effective. continued Downloaded From Disc-Player.com Sony Manuals...
- Page 50 The test tone is not emitted from the “ON”, then press ENTER. speakers. For FST-ZX100D, LBT-ZX100D and The test tone is emitted from each speaker MHC-GN1000D, you will hear the test tone in sequence (FST-ZX100D/LBT-ZX100D/ from each speaker in sequence.
-
Page 51: Tuner
If “TUNED” does not light up and the scanning does not stop Set the frequency of the radio station you want as described in step 2 of “Manual tuning preset”. Press MENU. “Memory?” flashes in the display. continued Downloaded From Disc-Player.com Sony Manuals... - Page 52 “AM 9k STEP” or “AM 10k STEP” appears in the display. When you change the interval, all the AM preset stations are erased. To reset the interval, repeat the same procedure. Downloaded From Disc-Player.com Sony Manuals...
-
Page 53: Listening To The Radio
Press FUNCTION +/– repeatedly to select “TUNER FM” or “TUNER AM” (or press TUNER/BAND on the unit repeatedly to select “FM” or “AM”). Press PRESET +/– repeatedly to select the preset station you want. Preset number Frequency Downloaded From Disc-Player.com Sony Manuals... -
Page 54: Tape - Playback
TAPE A function is selected and there is no tape in Deck A, the system automatically switches to the TAPE B function when there is a tape in Deck B and vice versa. Then, playback will start. Downloaded From Disc-Player.com Sony Manuals... -
Page 55: Tape - Recording
TV/SAT or VIDEO to select the source you want to record. Load the disc, tape or tune to the station you want to record. To record from the connected component, connect the external audio sources. continued Downloaded From Disc-Player.com Sony Manuals... -
Page 56: Sound Adjustment
6 of “Recording onto a tape manually” (page 55)). • When recording from the tape: If you set the direction to “j” (or “RELAY”) when the tapes you use have different lengths, the tape in each deck reverses independently. Downloaded From Disc-Player.com Sony Manuals... -
Page 57: Selecting The Preset Effect
Use the buttons on the unit for the operation. Press SOUND FIELD. Press EQ BAND repeatedly to select a The last selected sound field appears in the frequency band. display. continued Downloaded From Disc-Player.com Sony Manuals... - Page 58 • You can also press SOUND FIELD repeatedly to the original sound from the source. select the sound field you want. • PRO LOGIC: Performs Pro Logic decoding. The source recorded in 2 channels is decoded into 4.1 channels. Downloaded From Disc-Player.com Sony Manuals...
-
Page 59: Using The Subwoofer
To change the sound flash speed Hold down SOUND FLASH and turn OPERATION DIAL clockwise or counterclockwise to change the sound flash speed (1 ~ 20). • The power illuminator will synchronize with the selected SOUND FLASH effect. continued Downloaded From Disc-Player.com Sony Manuals... - Page 60 CHORUS 2 a tremolo chorus with high speed setting. Press DELAY repeatedly to select the DELAY effect you want. To cancel the CHORUS effect The DELAY indicator lights up. Press CHORUS repeatedly to select “CHORUS OFF”. Downloaded From Disc-Player.com Sony Manuals...
- Page 61 TEMPO B.MAX Enhance the sound according X-ROUND JOG clockwise or counterclockwise. to the tempo of the music. TEMPO B.JUMP Switch the sound position to the opposite direction instantly according to the tempo of the music. continued Downloaded From Disc-Player.com Sony Manuals...
-
Page 62: Listening To The Sound In Another Room
FST-ZX80D/LBT-ZX80D only) You can place your front speakers in one room and your surround speakers in another room. Then, use the Multi Room function to select the speakers you want to turn on. Downloaded From Disc-Player.com Sony Manuals... - Page 63 To adjust the microphone echo The sound of vocal is reduced. Turn ECHO LEVEL on the unit to adjust the echo effect. To cancel the echo effect, turn ECHO LEVEL on the unit to “MIN”. continued Downloaded From Disc-Player.com Sony Manuals...
- Page 64 DISPLAY once or twice when Karaoke Mode is turned on while The Control Menu appears on the TV playing a disc. screen. The Control Menu appears on the TV Press repeatedly to select screen. (KEY CONTROL), then press ENTER. Downloaded From Disc-Player.com Sony Manuals...
- Page 65 Karaoke Mode is turned on while accompaniment. You can select them when playing a disc. Karaoke Mode is turned on. The Control Menu appears on the TV screen. continued Downloaded From Disc-Player.com Sony Manuals...
- Page 66 ENTER. 2:L+R The options for “GUIDE MELODY” appear on the TV screen. 2:STEREO (The stereo sound of the Press repeatedly to select audio track 2) “ON”, then press ENTER. The guide melody is turned on. Downloaded From Disc-Player.com Sony Manuals...
- Page 67 • In some cases, you may not be able to use the scoring The Control Menu appears on the TV mode. screen. Press repeatedly to select (SCORE MODE), then press ENTER. The options for “SCORE MODE” appear on the TV screen. NORMAL DVD VIDEO NORMAL EASY DEMO Downloaded From Disc-Player.com Sony Manuals...
-
Page 68: Mixing And Recording Sounds
MIC 1 LEVEL or MIC 2 LEVEL. To stop recording Press x. After you have finished Turn MIC 1 LEVEL or MIC 2 LEVEL to “MIN” and disconnect the microphone from MIC 1 or MIC 2 jack. Downloaded From Disc-Player.com Sony Manuals... -
Page 69: Timer
• Disc: Load a disc. • Tape: Load a tape with the side you want to play back facing forward. • Radio: Tune in the preset station you want (see “Listening to the radio” on page 53). continued Downloaded From Disc-Player.com Sony Manuals... -
Page 70: Timer Recording Radio Programs
Tune in the preset radio station (see “Listening to a preset radio station” on page 53). Press TIMER MENU. Press repeatedly to select “REC SET?”, then press ENTER. “ON” appears and the hour indication flashes in the display. Downloaded From Disc-Player.com Sony Manuals... -
Page 71: Turning Off The Display
• When Timer Recording is selected, “REC” lights up – Changing the color system (page 11). in the display. Tips • The timer continues to operate in Power Saving Mode. • The indicator lights up in red even in Power Saving Mode. Downloaded From Disc-Player.com Sony Manuals... -
Page 72: Adjusting The Brightness Of The Front Panel Display
Each time you press the button, the power illuminator changes as follows: PATTERN OFF y X-PATTERN* * The power illuminator will synchronize with the selected X-ROUND effect. Downloaded From Disc-Player.com Sony Manuals... -
Page 73: Viewing Information About The Disc In The Front Panel Display
Total number of scene on the disc t Remaining time of the current title t Title of the disc Elapsed playing time of the current chapter t Remaining time of the current chapter t 2)3) Title of the disc continued Downloaded From Disc-Player.com Sony Manuals... -
Page 74: Viewing Information About The Disc In The On-Screen Display
• The elapsed playing time of MP3 audio tracks and title without a chapter DivX video files may not be displayed correctly. x When playing a VIDEO CD/Super VCD with PBC function • **:** Elapsed playing time of the current scene Downloaded From Disc-Player.com Sony Manuals... -
Page 75: Checking The Date Information Of Jpeg Image Files
• The date information format varies depending on the • For MP3 audio tracks with format other than ISO area. 9660 Level 1 and Level 2, album title and track title may not be displayed. Downloaded From Disc-Player.com Sony Manuals... -
Page 76: Optional Components
To enhance your system, you can connect optional components. Refer to the operating instructions provided with each component. Front panel From the audio and video output jacks of the VCR Rear panel of FST-ZX100D/LBT-ZX100D/ Rear panel of FST-ZX80D/LBT-ZX80D only MHC-GN1000D only TV or satellite tuner TV or satellite tuner... - Page 77 INPUT VIDEO jack through the S VIDEO OUT jack The effect may be limited or noise may occur of this unit. depending on the connected subwoofer or the type of music being played back. For details, consult your nearest Sony dealer. Downloaded From Disc-Player.com Sony Manuals...
-
Page 78: Listening To Audio From A Connected Component
Refer to the operating instructions provided with connected component. Note The audio signal from the AUDIO OUT jacks may cut off for a moment during some operations such as when you press SOUND FIELD, AUDIO or KARAOKE MODE. Downloaded From Disc-Player.com Sony Manuals... -
Page 79: Troubleshooting
If the problem persists after doing all of the • The power cord is disconnected or a power failure occured for longer than half a day. Redo above, consult your nearest Sony dealer. “Presetting radio stations” (page 51). “– –:– –” appears in the display. - Page 80 The disc tray does not open and “LOCKED” Press CHORUS repeatedly until the CHORUS appears in the display. indicator lights off. • Consult your nearest Sony dealer or local authorized Sony service facility. Speakers The disc tray does not close.
- Page 81 Refer to the operating instructions supplied with the disc. • Consult your nearest Sony dealer. The MP3 audio track cannot be played back. Playback does not start. • The DATA CD is not recorded in an MP3 format •...
- Page 82 • The data is not stored in DivX format. • The disc contains more than 200 albums. • The album contains more than 600 files. • The system can play back to a depth of 8 folders only. Downloaded From Disc-Player.com Sony Manuals...
- Page 83 TV. Otherwise, you may • Press FM MODE repeatedly until “MONO” not change the aspect ratio. disappears from the display. • Depending on the TV, you may not change the aspect ratio. continued Downloaded From Disc-Player.com Sony Manuals...
-
Page 84: Tape Deck
– if the cords are connected properly. – if the cord plugs are firmly inserted all the way. • Turn on the connected component. • Refer to the operating instructions supplied with the connected component and start playing. Downloaded From Disc-Player.com Sony Manuals... -
Page 85: Self-Diagnosis Function
• The MP3 audio track, JPEG image file and DivX • Contact your nearest Sony dealer or video file you want to play back is damaged. local authorized Sony service • The MP3 audio track does not conform to MPEG facility and give the 5-character 1 Audio Layer 3 format. -
Page 86: Additional Information
– subject to direct sunlight. • Use caution when placing the unit or speakers on surfaces that have been specially treated (with wax, oil, polish, etc.) as staining or discoloration of the surface may result. Downloaded From Disc-Player.com Sony Manuals... - Page 87 • Before you move the unit, make sure that all discs are removed from the unit. If you have any questions or problems concerning your system, please consult your nearest Sony dealer. If you later want to reuse the tape for recording, cover the broken tab with adhesive tape.
-
Page 88: Specifications
(6 ohms at 1 kHz, 10% Voltage 250 mV/450 mV, THD) impedance 47 kilohms Subwoofer: 180 W (8 ohms at 100 Hz, MIC 1 or 2 (phone jack): Sensitivity 1 mV, 10% THD) impedance 10 kilohms Downloaded From Disc-Player.com Sony Manuals... - Page 89 4-track 2-channel stereo Voltage 250 mV, Frequency response 50 – 13,000 Hz (±3 dB), impedance 1 kilohm using Sony TYPE I tape VIDEO OUT (phono jack): Wow and flutter ±0.15% W.Peak (IEC) Max. output level 1 Vp-p, 0.1% W.RMS (NAB) unbalanced, Sync.
- Page 90 Adjustable with voltage Dimensions (w/h/d) Approx. 176 x 362 x selector 215 mm Mass Approx. 2.9 kg net per speaker Center Speaker SS-CT100D (FST-ZX100D/ LBT-ZX100D/FST-ZX80D/LBT-ZX80D) Speaker system Full range, 2-unit, bass-reflex type, magnetically shielded Speaker units Full range 8 cm, cone type x 2...
- Page 91 LBT-ZX80D only) – White for front speaker (left) – Red for front speaker (right) – Blue for surround speaker (left) – Grey for surround speaker (right) Design and specifications are subject to change without notice. Downloaded From Disc-Player.com Sony Manuals...
-
Page 92: Guide To The Control Menu Display
DVD VIDEO played back 1 : 3 2 : 5 5 Elapsed playing time Selected item Current setting DISC Options TITLE CHAPTER Function name of selected Control REPEAT Menu item Quit: ENTER DISPLAY Operation message Downloaded From Disc-Player.com Sony Manuals... - Page 93 Use QUICK SETUP to choose the language of the on-screen display, the aspect ratio of the TV and the distance of the speakers you are using. CUSTOM Setup In addition to the Quick Setup setting, you can adjust other settings. RESET Returns the settings in “SETUP” to the default setting. continued Downloaded From Disc-Player.com Sony Manuals...
- Page 94 Selects the vocal type recorded on the disc (VIDEO CD, AUDIO CD only). GUIDE MELODY* Turns on or off the guide melody for Dolby Digital Karaoke Format disc. * This function is only available during karaoke mode. Downloaded From Disc-Player.com Sony Manuals...
-
Page 95: Dvd Setup Menu Item List
(COMPONENT LBT-ZX100D/ OUT) MHC-GN1000D) 4:3 OUTPUT FULL (–10.0 dB – +10.0 NORMAL dB for FST-ZX80D/ LBT-ZX80D) LEVEL 0.0 dB (–6.0 dB – +6.0 dB) (SURROUND) 0.0 dB (–6.0 dB – +6.0 dB) TEST TONE continued Downloaded From Disc-Player.com Sony Manuals... - Page 96 SETUP (page 14, 43, 84) QUICK CUSTOM RESET The default setting varies depending on the area. Except for Latin American and Russian models. Latin American models only. Downloaded From Disc-Player.com Sony Manuals...
-
Page 97: Language Code List
1327 Laothian 1506 Slovenian 1166 Fiji 1332 Lithuanian 1507 Samoan 1171 Faroese 1334 Latvian; Lettish 1508 Shona 1174 French 1345 Malagasy 1509 Somali 1181 Frisian 1347 Maori 1511 Albanian 1183 Irish 1349 Macedonian 1512 Serbian Downloaded From Disc-Player.com Sony Manuals... -
Page 98: Glossary
5.1 channels for playback. There is a MOVIE mode for movies and MUSIC mode for stereo sources such as music. Old movies encoded in traditional stereo format can be enhanced with 5.1 channel surround sound. Downloaded From Disc-Player.com Sony Manuals... - Page 99 Multi-angle function rewritable disc. DVD+RWs use a recording format that is comparable to the DVD VIDEO Various angles, or viewpoints of the video format. camera, for a scene are recorded on some DVD VIDEOs. continued Downloaded From Disc-Player.com Sony Manuals...
- Page 100 Play back interactive software using menu screens displayed on the TV screen (PBC Playback), in addition to the video playback function of Version 1.1 discs. Moreover, you can play high-resolution still pictures, if they are included on the disc. Downloaded From Disc-Player.com Sony Manuals...
- Page 101 There are 2 versions of VIDEO CDs. • Version 1.1: You can play back only moving pictures and sounds. • Version 2.0: You can play back high- resolution still pictures and enjoy PBC functions. This system conforms to both versions. Downloaded From Disc-Player.com Sony Manuals...
-
Page 102: List Of Button Locations And Reference Pages
X-ROUND JOG EX-CHANGE/DISC SKIP t; rj (61) X-ROUND OFF (12, 18, 20) rf (61, 62) WAVE rg (61, 62) FADER FLANGER 3 (60, 80, 84) GROOVE qh (56) ILLUMINATION 1 (72, 73) IR Receptor ek (80) Downloaded From Disc-Player.com Sony Manuals... - Page 103 Front Panel 1 2 3 4 5 6 7 8 Top Panel Buttons numbered r; to rk are for models FST-ZX100D, LBT-ZX100D, FST-ZX80D and LBT-ZX80D only. ts ta t; rl continued Downloaded From Disc-Player.com Sony Manuals...
-
Page 104: Remote Control
O RETURN wg (26, 29, 33, 36) 62, 78) DISPLAY qg (15, 21, 23–25, STEP C wf (20) 30–32, 34–36, 39, 41, 43, 50, SUBTITLE 9 (38) 63–67, 75, 84, 92) c STEP wf (20) Sony Corporation Printed in Malaysia Downloaded From Disc-Player.com Sony Manuals...