
Related Manuals for Sony 3-287-077-14(2)


Summary of Contents for Sony 3-287-077-14(2)
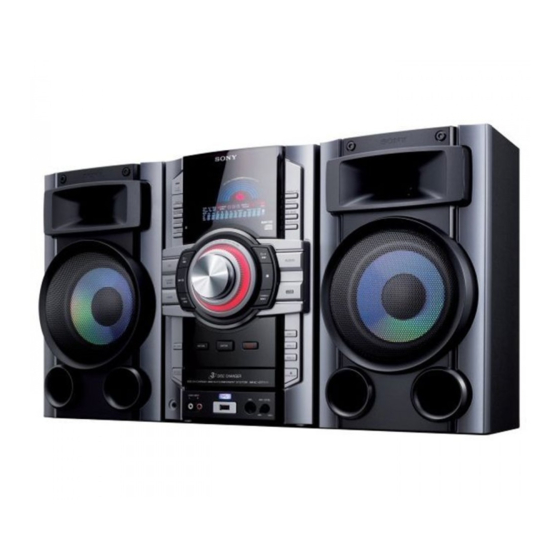
- Page 1 Mini Hi-Fi Component System Operating Instructions MHC-GT555 / GT444 MHC-GT222 / GT111 LBT-ZT4 ©2008 Sony Corporation 3-287-077-14(2)
- Page 2 The model and serial numbers are located on the rear of the unit. Record these numbers in the space provided below. Refer to them whenever you call upon your Sony dealer regarding this product. Model No. Serial No. This symbol is...
-
Page 3: Important Safety Instructions
The following FCC statement applies only to the version of this model manufactured for sale in the U.S.A. Other versions may not comply with FCC technical regulations. WARNING This equipment has been tested and found to comply with the limits for a Class B digital device, pursuant to Part 15 of the FCC Rules. - Page 4 Notice for the customer in the countries applying EU Directives The manufacturer of this product is Sony Corporation, 1-7-1 Konan Minato-ku Tokyo, 108-0075 Japan. The Authorized Representative for EMC and product safety is Sony Deutschland GmbH, Hedelfinger Strasse 61, 70327 Stuttgart, Germany.
-
Page 5: About This Manual
CD standard and may not be playable by this product. • “WALKMAN” and “WALKMAN” logo are registered trademarks of Sony Corporation. • MICROVAULT is a trademark of Sony Corporation. • MPEG Layer-3 audio coding technology and patents licensed from Fraunhofer IIS and Thomson. -
Page 6: Table Of Contents
Table of Contents About this manual ... 5 Guide to parts and controls... 7 Getting Started Hooking up the system securely ... 13 Setting the clock ... 15 Basic Operations Playing an AUDIO CD/MP3 disc... 16 Listening to the radio... 17 Transferring onto an USB device... -
Page 7: Guide To Parts And Controls
Guide to parts and controls This manual mainly explains operations using the remote, but the same operations can also be performed using the buttons on the unit having the same or similar names. Unit Front view TUNER/ BAND TAPE LBT-ZT4 only * MHC-GT555, MHC-GT444 and LBT-ZT4 only Top view AUDIO... - Page 8 "/1 (on/standby) (pages 14, 33, 37) Press to turn on the system. The STANDBY indicator lights up when the system is turned off. DISPLAY (pages 26, 28, 33) Press to change the information on the display. METER MODE (page 26) Press to select the preset meter display.
- Page 9 DISC SKIP/EX-CHANGE (pages 14, 16, 27, 29) Press to select a disc. Press to exchange a disc while playing. PHONES jack Connect the headphones. LBT-ZT4 only AUDIO INPUT jack (page 24) Other models AUDIO INPUT L/R jacks (page 24) Connect to an audio component (Portable audio player, etc.).
- Page 10 x Z (stop/eject) (pages 23, 29) Press to stop tape playback. Press to insert or eject a tape. X (pause) (pages 23, 29) Press to pause tape playback. Remote RM-AMU008 (LBT-ZT4 only) "/1 (on/standby) (pages 15, 32) Press to turn on the system. CLEAR (page 27) Press to delete the last step from the program list.
- Page 11 FUNCTION +/– (pages 16, 17, 21, 23, Press to select a function. VOLUME +/–* (pages 16, 17, 21, 23, Press to adjust the volume. * The VOLUME + button has a tactile dot. Use the tactile dot as a reference when operating the system.
- Page 12 USB (page 21) Press to select the USB function. CD (pages 16, 29) Press to select the CD function. TUNER/BAND (page 17) Press to select the TUNER function. Press to select the FM or AM band. FUNCTION (pages 23, 24) Press to select a function.
-
Page 13: Getting Started
Getting Started Hooking up the system securely ANTENNA DMPORT SUBWOOFER FRONT SPEAKER 1 To FM lead antenna 2 To AM loop antenna 3 To DIGITAL MEDIA PORT adapter 4 To subwoofer 5 To front speaker (left) 6 To front speaker (right) VOLTAGE SELECTOR The FM 75 Ω... -
Page 14: Front Speakers
A Antennas Find a location and an orientation that provide good reception, and then set up the antennas. Extend the FM lead antenna horizontally Keep the antennas away from the speaker cords, the power cord and the USB cable to avoid picking up noise. B DMPORT (DIGITAL MEDIA PORT) (LBT-ZT4 only) Connect the DIGITAL MEDIA PORT... -
Page 15: Setting The Clock
Speaker pads Attach the supplied speaker pads to the bottom of the front speakers and subwoofer to prevent slipping. Front speakers: 4 pads for each speaker Subwoofer: 4 pads (MHC-GT555, MHC-GT444 and LBT-ZT4 only) To use the remote Slide and remove the battery compartment lid, then, insert the two supplied R6 (size AA) batteries, E side first, matching the polarities shown... -
Page 16: Basic Operations
Basic Operations Playing an AUDIO CD/ MP3 disc Select the CD function. Press CD (RM-AMU006) or press FUNCTION +/– (RM-AMU008) repeatedly (or press CD on the unit). Place a disc. Press Z OPEN/CLOSE on the unit, and place a disc with the label side up on the disc tray. -
Page 17: Listening To The Radio
To change the play mode Press PLAY MODE repeatedly in stop mode. You can select normal play (“ALL DISCS” for all discs or “1 DISC” for a disc or “ *” for all MP3 files in the folder on the disc), shuffle play (“ALL DISCS SHUF”... -
Page 18: Transferring Onto An Usb Device
Transferring onto an USB device You can connect an optional USB device to the (USB) port on the unit and transfer music from a sound source (including connected audio components) to the USB device. The audio format of files transferred by this system is MP3. - Page 19 To select the playback source or transferring destination on a Sony Ericsson mobile phone When listening to music from a Sony Ericsson mobile phone or when transferring music from this system to the mobile phone, you can select the playback...
- Page 20 Press ENTER on the unit. The drive name of the mobile phone appears in the display but varies depending on the specification of the mobile phone. Turn OPERATION DIAL on the unit to select the drive you want. Press ENTER on the unit. Start playback of the audio files in the selected drive of the mobile phone or start...
-
Page 21: Listening To Music Of An Usb Device
“USB READING” t Volume label* * “STORAGE DRIVE” appears when there is no volume label assigned to the USB device. “WALKMAN” appears if the USB device is the supported Sony digital music player. Note It may take some time before “USB READING”... - Page 22 To remove the USB device Use the buttons on the unit for this operation. Press to select the USB function. Hold down x in stop mode until “NO DEVICE” appears. Remove the USB device. To erase audio files or folders from the USB device You can erase audio files or folders from the USB device.
-
Page 23: Playing A Tape
• When the USB device is inserted, the system reads all the files on the USB device. If there are many folders or files on the USB device, it may take a long time to finish reading the USB device. •... -
Page 24: Using Optional Audio Components
Using optional audio components Connect an optional audio component to the unit. LBT-ZT4 only: Connect to the AUDIO INPUT jack on the unit using a stereo mini-plug cord (not supplied). Other models: Connect to the AUDIO INPUT L/R jacks on the unit using an audio cord (not supplied). -
Page 25: Adjusting The Sound
Adjusting the sound Use the controls on the unit for this operation. To add a sound effect Press Reinforce the GROOVE repeatedly bass and create until “GROOVE”* or a more powerful “Z-GROOVE”* lights up sound in the display. Select the SURROUND repeatedly surround effect until “SURROUND”... - Page 26 Changing the display mode Press DISPLAY repeatedly while the system is turned off. Demonstration The display changes and the indicator flashes even when the system is turned off. No display (Power Saving mode) The display is turned off to conserve power.
-
Page 27: Other Operations
Other Operations Creating your own program — Program Play Select the function you want. CD function Press CD (RM-AMU006) or press FUNCTION +/– (RM-AMU008) repeatedly to select the CD function. USB function Press USB (RM-AMU006) or press FUNCTION +/– (RM-AMU008) repeatedly to select the USB function. -
Page 28: Presetting Radio Stations
Presetting radio stations You can preset your favorite radio stations and tune them in instantly by selecting the corresponding preset number. Use the buttons on the remote for this operation. Tune in the station you want (see “Listening to the radio” (page 17)). -
Page 29: Recording Onto A Tape
Recording onto a tape — CD-TAPE Synchro Recording/Manual Recording/Sound Mixing You can record on a TYPE I (normal) tape in three ways: CD-TAPE Synchro Recording: You can record an entire disc onto a tape. Manual Recording: You can record just the portions you like from a sound source, including connected audio components. -
Page 30: Creating Your Own Sound Effect
Creating your own sound effect You can raise or lower the levels of specific frequency ranges or select the surround effect, and then store the setting as “USER EQ” in the memory. Use the buttons on the unit for this operation. -
Page 31: Using The Timers
Using the Timers The system offers three timer functions. You cannot activate both the Play Timer and the Recording Timer at the same time. If you use either with the Sleep Timer, the Sleep Timer has priority. Sleep Timer You can fall asleep to music. This function works even if the clock is not set. - Page 32 Select the sound source or prepare the USB device. Play Timer Press ./> (RM-AMU006) (RM-AMU008) repeatedly until the sound source you want appears, and then press ENTER (RM-AMU006) or (RM-AMU008). The display shows the timer settings. Recording Timer Connect a transferable USB device to (USB) port on the unit.
-
Page 33: Others
Find your problem in the checklist below, and take the indicated corrective action. If the problem persists, contact your nearest Sony dealer. Note that if service personnel changes some parts during repair, these parts may be retained. If the STANDBY indicator flashes Immediately unplug the power cord, and check the following items. - Page 34 Starting playback takes more time than usual. • The following MP3 discs take a longer time to start playback. – a disc recorded with a complicated tree structure. – a disc recorded in multisession mode. – a disc that has not been finalized (a disc to which data can be added).
- Page 35 USB device from the (USB) port. Make sure there is no problem with the USB device. If this display pattern persists, contact your nearest Sony dealer. There is no sound. • The USB device is not connected correctly. Turn off the system and reconnect the USB device, then turn on the system and check if “USB...
- Page 36 USB cable to avoid picking up noise. • Connect a commercially available external antenna. • Consult your nearest Sony dealer if the supplied AM antenna has come off the plastic stand. • Turn off nearby electrical equipment.
-
Page 37: Messages
Messages CD/MP3 player, Tuner, Tape LOCKED: The disc tray does not open. Contact your nearest Sony dealer. NO DISC: There is no disc on the disc tray. NO STEP: All of the programmed steps have been erased. -
Page 38: Precautions
DEVICE FULL: The memory of the USB device is full. FATAL ERROR: The USB device was removed during transferring or erase operation, and may have been damaged. FOLDER FULL: You cannot transfer onto the USB device because the number of folders have reached its maximum. - Page 39 On safety • The unit is not disconnected from the mains as long as it is connected to the AC outlet, even if the unit itself has been turned off. • Completely disconnect the power cord (mains lead) from the wall socket (mains) if it is not going to be used for an extended period of time.
-
Page 40: Specifications
Specifications AUDIO POWER SPECIFICATION POWER OUTPUT AND TOTAL HARMONIC DISTORTION: (LBT-ZT4 only) With 6 ohm loads, both channels driven, from 120 Hz – 10 kHz; rated 110 watts per channel minimum RMS power, with no more than 0.7% total harmonic distortion from 250 miliwatts to rated output. - Page 41 MHC-GT111 Brazilian model only The following are measured at AC 127 or 220 V 50/60 Hz RMS output power (reference): 100 W + 100 W (at 6 Ω, 1 kHz, 10% THD) Other models The following are measured at AC 120, 127, 220, 230 –...
- Page 42 AM tuner section Tuning range Pan American and Oceanian models: 530 – 1,710 kHz (with 10 kHz tuning interval) 531 – 1,710 kHz (with 9 kHz tuning interval) European and Russian models: 531 – 1,602 kHz (with 9 kHz tuning interval) Other models: 530 –...
- Page 43 MHC-GT111 • Front speaker (European model only) (SS-GT111M) Front speaker (Asian model only) (SS-GT111S) Front speaker (Other models) (SS-GT111) Speaker system: 2-way, 2-unit, bass reflex Speaker unit: Woofer: 160 mm, cone type Tweeter: 40 mm, horn type Rated impedance: 6 ohms Dimensions (w/h/d) (Approx.): 216 ×...
-
Page 44: Compatible Usb Devices With This System
® Notes on Walkman • Some audio files supported by the Sony digital music player are not supported by this system. • When the Sony digital music player is connected to this system, wait until the display of “Creating Library”... - Page 48 Printed in China...