Fortinet FON-350i Start Manual
Fon-350i telephone
Hide thumbs
Also See for FON-350i:
- User manual (86 pages) ,
- Quick start manual (20 pages) ,
- User manual (86 pages)
Table of Contents
Advertisement
Quick Links
Download this manual
See also:
User Manual
Advertisement
Table of Contents

Related Manuals for Fortinet FON-350i


Summary of Contents for Fortinet FON-350i
- Page 1 FON-350i Telephone Start Guide...
- Page 2 Visit these links for more information and documentation for your Fortinet products: Fortinet Knowledge Base - http://kb.fortinet.com Technical Documentation - http://docs.fortinet.com Training Services - http://campus.training.fortinet.com Technical Support - http://support.fortinet.com You can report errors or omissions in this or any Fortinet technical document to techdoc@fortinet.com.
-
Page 3: Table Of Contents
Wall Mounting ....... . 7 Provisioning the FON-350i......8 For internal use . - Page 4 Product Safety Instructions ......27 E-911 and use of the FON-350i with Multi-Line Telephone Systems . . . 27 Privacy .
-
Page 5: Introduction
Introduction Congratulations on your purchase of the FortiFone FON-350i phone! The FON-350i communicates over an IP network, allowing you to receive and place calls in the same manner as a regular business telephone. This release of the FON-350i supports the SIP protocol. -
Page 6: About This Guide
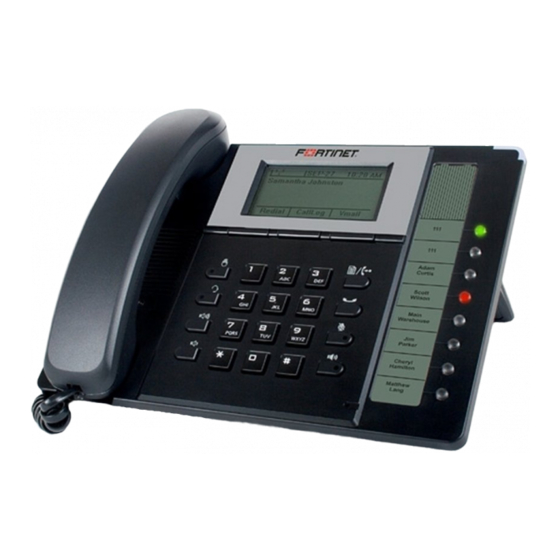
About this Guide Introduction About this Guide This guide describes how to physically set up your FON-350i phone and a brief overview of features. For detailed instructions on using the phone, please download the user guide from http://docs.fortinet.com. Figure 1: FON-350i Front... -
Page 7: Flexible Key States
On solid Call on hold at extension Green Flashing approx. once every second Line/Extension/Queue Green Flashing approx. once ringing every 1/2 second Line/Extension/Queue On solid in use Line/Extension/Queue Flashing approx. once on hold every second FON-350i Telephone Start Guide v2... -
Page 8: Lcd Layout
Speed dial, Intercom, Park and others. LCD Layout The FON-350i phone has a 140x48 dot graphic LCD arranged to show 5 lines of text and is used to display information to the user. The top-bar status line displays icons, date and time. The bottom line shows choices associated with the three context-sensitive softkeys located just below the LCD. -
Page 9: Installing The Fon-350I
The figure below shows the cable connections for your IP phone. The LAN and desktop PC connections employ standard Category 5 cables terminated with RJ-45 connectors. The FON-350i supports PoE (Power over Ethernet) in accordance with the IEEE-802.1af Class 2 standard. When connected to a PoE compliant LAN port, the IP Phone derives power from the port. -
Page 10: Attaching The Stand
2 Align the tabs on the stand with the notches in the base of the phone. 3 Push the stand upward in the slot as far as it can go until properly attached. 55° angle 30° angle Figure 3: Installing the Foot Stand FON-350i Telephone Start Guide v2... -
Page 11: Wall Mounting
Installing the FON-350i Wall Mounting Wall Mounting The FON-350i phone supports wall mounting via the base of the phone housing. Wall mount the FON-350i using the instructions below in Figure 4. • Mark and drill two 7 mm (5/16”) holes for plastic wall anchors (not included) with a vertical separation of 10 cm (4”). -
Page 12: Provisioning The Fon-350I
350i, refer to “Adding IP Phones” in Chapter 2 of the FortiVoice User Guide. For internal use The FON-350i phone supports ‘plug and play’ installation employing the automated provisioning process for discovering FortiVoice phone systems. Once connected to the LAN, the IP phone retrieves IP settings from the local DHCP server. - Page 13 23646. Should you require configuration of the IP phone for use with other devices or information on the web interface, please refer to the FON-350i Telephone User Guide. FON-350i Telephone Start Guide v2...
-
Page 14: Personalizing Your Phone
To enter a space, press # on the dial pad. Prior to saving an entry, you may discard changes by pressing the button to move to the previous menu, or press the button to exit the Settings menu. FON-350i Telephone Start Guide v2... -
Page 15: Setting A Hunt Group As An Access Code Prefix
Press the Down softkey to decrease the contrast, or press the Up softkey to increase the contrast. • To configure another parameter, press the Back softkey to continue or press the button to exit the configuration menu. FON-350i Telephone Start Guide v2... -
Page 16: Ring Settings
Line n Configuration using the Down softkey and press the Select softkey. The value of n is the line button number. • Press the digit, or move the cursor to 1. Ring Type using the Down softkey and press the Select softkey. FON-350i Telephone Start Guide v2... -
Page 17: Delayed Ring
• Press the OK softkey to save the delayed ring setting. • To configure another parameter, press the Back softkey to continue or press the button to exit the configuration menu. FON-350i Telephone Start Guide v2... -
Page 18: Disable Ringer
Headset Auto Mode The FON-350i supports the use of headsets that have a standard RJ22 jack. With Headset Auto Mode enabled, all calls automatically use the headset when engaging lines, redial, speed dials etc. -
Page 19: Time Configuration
Speed Dial Number The FON-350i phone includes a phone book that supports up to 80 entries. Each phone book record includes a speed dial number consisting of two digits. Dialing the speed dial number (00–79) and pressing the Dial softkey places a call using the contact information from the associated phone book record. -
Page 20: Key Tone
Back softkey to continue or press the button to exit the configuration menu. Language The FON-350i ships with 3 supported languages — English, Spanish and French. The default language is English. Languages are configured in the FortiVoice management software for the extension. Please contact your administrator. -
Page 21: Phone Book/Speed Dials
Phone Book/Speed Dials Phone Book/Speed Dials The FON-350i includes a phone book that can store up to 80 contacts. The Phone Book menu is accessed through the LCD menu or programmable key when designated as ‘Phone Book’ in the software then configured on the phone. -
Page 22: Editing A Record
Down softkey. • Select the More softkey to move to the next group of softkeys. Press the Edit softkey. • Enter the new name for the contact and press the OK softkey. FON-350i Telephone Start Guide v2... -
Page 23: Deleting A Phone Book Record
5. Directory, then 1. Phone Book. • Select a contact to delete using the Down softkey. • Use the More softkey to locate and then select the Delete softkey and confirm by selecting the Yes softkey. FON-350i Telephone Start Guide v2... -
Page 24: Deleting All Records
Move to the next group of softkeys using the More softkey then press the Find softkey. • Input a search keyword, and press the OK softkey. • The search result displays showing the Speed Dial number, name and phone number. To enter alphanumeric characters, select the Mode softkey. FON-350i Telephone Start Guide v2... -
Page 25: Placing A Call From The Phone Book
If one of the flexible keys is programmed as Phone Book: • Press the button while the phone is idle. • Select a contact to dial using the Down softkey. • Press the Dial softkey to place the call. FON-350i Telephone Start Guide v2... -
Page 26: Using Your Fon-350I Phone With Fortivoice
Answer queued call Press the flashing key associated with the call in the queue. Otherwise, dial 7 + # to retrieve the next caller in your queue. FON-350i Telephone Start Guide v2... - Page 27 Using Your FON-350i Phone with FortiVoice Accessing Features Answer FortiVoice call waiting Press the Answer softkey or press the flashing line appearance key. Screened transfer Press the button + extension (or outside number) + #. To complete the transfer, press the Transfer softkey or hang up. To cancel transfer, press the EndCall softkey and then the Resume softkey to connect to the caller on hold.
-
Page 28: Voicemail
Voicemail Using Your FON-350i Phone with FortiVoice Voicemail Access Mailbox — Locally Press the Vmail softkey. Access Mailbox — Remotely Press ** + <mailbox number> Change greeting options Dial 2 Change personal options (password, date stamp, remote notification options) Dial 3... -
Page 29: Troubleshooting
(keys 1 and 2) reboot the phone. 2. Ensure the phone type (FON-350i) is the same as the model you have. 3. Ensure the TFTP IP address is correct. To verify, see the Updating the Firmware section. -
Page 30: Regulatory & Safety Notices
This device complies with Class B Limits of Industry Canada. Operation is subject to the following two conditions: 1 This device may not cause harmful interference, and 2 This device must accept any interference received, including interference that may cause undesired operation. FON-350i Telephone Start Guide v2... -
Page 31: European Union Declarations Of Conformity
Regulatory & Safety Notices Product Safety Instructions European Union Declarations of Conformity Fortinet declares that the equipment specified in this document, which bears the “CE” mark, conforms to the European Union Radio and Telecommunications Terminal Equipment Directive (R&TTE 1999/5/EC) including, •... -
Page 32: Limited Warranty
FON-350i Telephone Start Guide Limited Warranty For detailed warranty information, please visit Fortinet Technical Support at: http://www.fortinet.com/fortivoice Warranty Repair Services Should the set fail during the warranty period: • In North America, please call 1-866-393-9960 for further information. • Outside North America, contact your sales representative for return instructions. - Page 33 www.fortinet.com...