Table of Contents
Advertisement
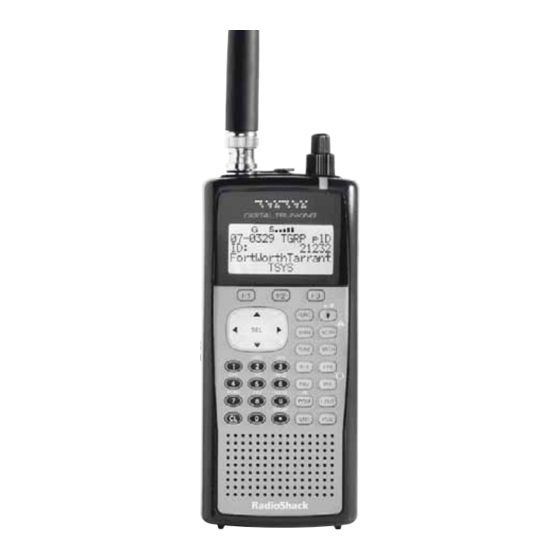
20-106
PRO-106
Digital Trunking
Handheld Radio Scanner
Thank you for purchasing your Digital Trunking
Handheld Radio Scanner from RadioShack.
What's Included
Scanner
Antenna
Belt Clip
Yellow (Rechargeable)
Battery Holder
Black (Non-rechargeable)
Battery Holder
V-Scanner
Preprogrammed Data
User's Guide
Quick Start Guide
Please read this user's guide before installing, setting
up, and using your new scanner.
www.RadioShack.com
Advertisement
Table of Contents

Related Manuals for Radio Shack 20-106


Summary of Contents for Radio Shack 20-106
- Page 1 20-106 PRO-106 Digital Trunking Handheld Radio Scanner Thank you for purchasing your Digital Trunking Handheld Radio Scanner from RadioShack. What’s Included Scanner Antenna Belt Clip Yellow (Rechargeable) Battery Holder Black (Non-rechargeable) Battery Holder V-Scanner Preprogrammed Data User’s Guide Quick Start Guide Please read this user’s guide before installing, setting...
-
Page 2: Table Of Contents
ontents Contents Understanding your Scanner ...... 6 Trunking System (TSYS) Objects... 33 Duplicate (DUPE) ........37 Understanding the Keypad......6 Understanding the Display ......8 Scanning............ 38 Understanding Object Oriented Scanning 9 Basic Scanning Operation......38 Scanner Features ........13 Wildcard Scanning........ - Page 3 ontents Contents Essential Parameters ......57 Multi-Site Mode On Networked Systems... 82 Signal Stalker II Object (STLK) ....59 LTR Home Repeater AutoMove....85 Essential Parameters ......59 Additional Information......86 Dedicated Searches ........61 Power-On Configuration Key Sequences ... 86 Dedicated LMIT Search......
-
Page 4: Understanding Your Scanner
Understanding your Scanner Understanding your Scanner Understanding your Scanner Understanding the Keypad FUNC (Function) Softkeys F1 / F2 / F3 Activates alternative key functions. Activates the function shown in the LCD display above the KEY/LIGHT softkey. Activate backlight. Five Way Pushbutton Pad FUNC + KEY/LIGHT locks keypad. -
Page 5: Understanding The Display
Understanding your Scanner Understanding your Scanner Understanding Object Oriented Scanning SQUELCH Adjust the squelch. Your PRO-106 scanner utilizes an entirely new method of programming called Object Oriented VOLUME/OFF Scanning. In Object Oriented Scanning, all Turn the scanner on or off; “Scannable Objects”... - Page 6 Understanding your Scanner Understanding your Scanner 1. Memory organization is nothing more than a objects are used to store the parameters for large list of Scannable Objects. any radio channel that is not a part of a trunked system. For example, if you want to monitor 2.
-
Page 7: Scanner Features
Understanding your Scanner Understanding your Scanner cannot be scanned by itself and is not considered Scanner Features a Scannable Object. It is a “configuration object” Object Oriented User Interface is designed for that can be used over and over again when ease of use, yet is powerful enough to satisfy the adding talkgroups for a specified trunked radio most sophisticated experts. - Page 8 Understanding your Scanner Understanding your Scanner conditions before the media or emergency Signal Stalker II – Quickly sweeps the scanner’s management officials announce them to the frequency ranges for transmissions from nearby general public. sources. SAME and All Hazards Weather Alerting – Your P25 NAC Functionality –...
-
Page 9: Scanner Setup
Scanner Setup Scanner Setup Connecting the Antenna Powering Your Scanner Attach the supplied antenna You can power your scanner with four AA to the scanner by aligning the batteries or an external power source. For longest slots around its base with the operation and best performance, use alkaline tabs on the scanner, and then batteries, available at your local RadioShack... -
Page 10: Setting Battery Type
Scanner Setup Scanner Setup Warning: Never install non-rechargeable Battery Current Charge Time batteries in the yellow rechargeable battery Ni-MH 1600 mAh 16 hours holder. Non-rechargeable batteries can get hot or Ni-Cd 600 mAh 6 hours explode if you try to recharge them. Ni-Cd 850 mAh 8 hours... -
Page 11: External Power
Scanner Setup Scanner Setup • Use only fresh batteries of the required size External Power and recommended type. Do not mix old and You can power your scanner using a new batteries, different types (alkaline or Class 2 power source that supplies rechargeable), or rechargeable batteries of 9V DC and delivers at least 500mA. -
Page 12: Listening Safety
Scanner Setup Scanner Setup Listening Safety Turning on the Scanner and Setting Squelch To protect your hearing, follow these earphone or 1. Turn the VOLUME and SQUELCH knobs headphones guidelines: clockwise to about their mid-point (12:00 • Do not listen at extremely high volume levels. o’clock) position. -
Page 13: Basic Settings
Scanner Setup Scanner Setup To set the attenuator mode in the Global Menu: • Some Global parameter changes do not take effect until the Global menu is saved. 1. Press PGM for Program Mode. • Help is available for every menu parameter. 2. -
Page 14: Delay
Scanner Setup Scanner Setup 4. Press to select Delay Sometimes, several seconds can pass between 5. Press softkey to save new setting. SAVE transmissions. To avoid missing a reply, a delay is Turning Key and Backlight On or Off automatically set for each channel. The scanner stops for 2 seconds after a transmission stops 1. -
Page 15: Creating Scannable Objects
Creating Scannable Objects Creating Scannable Objects Indicates cursor Understanding Object Menus location in menu When you turn on your scanner for the first time, CONV Channel Menu name the scanner is in Program Mode for you to create Scan Lists: Active menu item your first object into memory. -
Page 16: Conventional Channel Objects
Creating Scannable Objects Creating Scannable Objects • Pressing FUNC or FUNC will jump to to scan or monitor, and the Modulation (MODE) the top or bottom of a menu, respectively. should be set to Auto (au), AM, FM, or NFM. •... -
Page 17: Trunking Talkgroup Objects (Tgrp)
Creating Scannable Objects Creating Scannable Objects To change the tag: on a trunked radio system. A TGRP object allows you to scan and monitor a talkgroup on a 1. Press until the cursor highlights Tag:. particular trunked radio system. 2. Press SEL to edit the tag. Essential Parameters 3. - Page 18 Creating Scannable Objects Creating Scannable Objects Note: By default all new objects are mapped to 10. Press SEL. Scan List 01. Refer to “Grouping Objects with Scan Lists” 11. At use the number keys and • to enter Ch01:, on page 42 for more information on Scan Lists. the first control channel frequency for the system.
-
Page 19: Duplicate (Dupe)
Creating Scannable Objects Creating Scannable Objects Refer to “Appendix B: Detailed Menu Reference: TSYS have the option to save or lock out new Menu” on page 113 for more parameters that can talkgroups as they appear. be customized for your system. •... -
Page 20: Scanning
Scanning Scanning In order for the Wildcard TGRP to function Basic Scanning Operation properly, the radio needs to be in SCAN Mode. Before the scanner can begin to scan, you must This is what enables the scanner to find the have created scannable objects. -
Page 21: Organizing Objects
Scanning Organizing Objects The following screen appears when the scanner is Object Numbering stopped on a conventional channel while scanning. Your PRO-106 is different from other types of scanners in how it stores your Scannable Objects in memory. Instead of fixed channels and banks, objects are stored in the first available block of free memory and an Object ID is assigned. -
Page 22: Grouping Objects With Scan Lists
Organizing Objects Organizing Objects Lists. For example, if you assign a group of LMIT Grouping Objects with Scan Lists or SRVC searches to a single Scan List, you can By default, new objects are automatically easily activate or deactivate searching on those assigned to Scan List 01. -
Page 23: Existing Objects
Organizing Objects Organizing Objects Existing Objects Enabling or Disabling Scan Lists 1. Press PGM to put scanner in Program Mode. While Scanning 2. Press to scroll to the object Scan List 1-10 you want to change. Press the number keys that corresponds with the 3. -
Page 24: Ns (Not Scanned) Scan List
Organizing Objects Organizing Objects To activate FAV scan: NS (Not Scanned) Scan List Press FAV and the radio suspends scanning of all If you accidently store an object with no Scan List objects in the radio except for those that are in mappings, the object will be placed in a special your Favorites list. -
Page 25: Deleting Objects
Organizing Objects Organizing Objects 5. Press ENT or the softkey to store your WARNING: All TGRPs associated with the Done new default Scan List value. deleted TSYS will be lost. 6. Press softkey to save your changes. SAVE Searching for Objects using FIND Deleting Objects The FIND feature allows you to search for locked out objects, or for objects containing a text string... -
Page 26: Filtering By Object Type
Organizing Objects Organizing Objects To find objects with a specified text string: 3. Press to scroll to display the filter softkeys. The filter softkeys are as follows: 1. Press PGM to enter Program Mode. CONV 2. Press softkey. EDIT TGRP 3. -
Page 27: Permanent Lockout
Organizing Objects Organizing Objects To unlock a temporary lockout object: 4. Press and select to change the L/OUT button to be a permanent lockout instead of In Manual Mode or Program Mode, press a temporary lockout. to select an object. Search Lockout 2. -
Page 28: Object Searches
Organizing Objects Object Searches creates a new TGRP object in the radio’s memory, Object Searches then locks that TRGP object out, so that the A powerful feature of your PRO-106 is the ability to next time it appears on the system, the radio will define different types of frequency searches and ignore any traffic on that TGRP. -
Page 29: Service Search Object (Srvc)
Object Searches Object Searches See “Appendix B: Detailed Menu Reference: LMIT Menu” on page 116 for detailed menu information. To create a new LMIT object: 1. Press PGM for Program Mode. 2. Press softkey. 3. Press softkey to view available Search SRCH types. -
Page 30: Signal Stalker Ii Object (Stlk)
Object Searches Object Searches To create a new SRVC object Signal Stalker II Object (STLK) 1. Press PGM for Program Mode. A Signal Stalker Object (STLK) stores the parameters necessary for the radio to rapidly sweep a range 2. Press softkey, then press softkey to SRCH... -
Page 31: Dedicated Searches
Object Searches Dedicated Searches If you want to include or exclude sub bands: Dedicated Searches 1. Scroll down to and press bands: Your scanner provides fast access to dedicated to scroll through the sub-bands. frequency search modes that allow you to 2. -
Page 32: Dedicated Srvc Search
Dedicated Searches Dedicated Searches 4. Press the softkey to change the receive • Aircraft - Searches civilian and military air MODE mode (AM, FM, NFM) from the default for the frequencies. current frequency range (auto). Freq. (MHz) Band 5. Press the softkey to add a found FrL/O 108-118... -
Page 33: Dedicated Signal Stalker Ii
Dedicated Searches Dedicated Searches Public Safety sub bands: Dedicated Signal Stalker II Dedicated STLK mode lets you access and run Freq. (MHz) Band Signal Stalker II easily and quickly. 33.4-46.5 VHF Low Band In Manual, Program or Scan mode, press FUNC 151-170 VHF High Band SCAN to access the Signal Stalker II dedicated... -
Page 34: Tune Led
Dedicated Searches Dedicated Searches 2. Press PSE to begin searching from the current Trunked Mode Analysis Display frequency. qq% SID:ssss Stt Motorola 3600 baud control 3. Press to change the search direction. qq = decoding quality of the control channel channel data, SID = System ID, and or Press FrL/O... -
Page 35: Weather Scanning
Weather Scanning Weather Scanning Weather Scanning Weather Priority Mode Weather Priority mode samples the specified Note: The weather alert feature is an extremely weather frequency periodically while scanning sensitive, high quality receiver of weather to see if the All Hazards 1050 Hz Warning Alert frequencies. - Page 36 Weather Scanning Weather Scanning FIPS codes are formatted as follows: Note: The PRO-106 supports entry of Extended SAME codes, which can include numbers and Subdivisions State Code County Code letters. The text entry mode is used to enter both 01-50 numerical SAME codes and extended SAME (0=entire area) (00=all states)
-
Page 37: Activating Same Standby Mode
Weather Scanning Weather Scanning Note: When a SAME location/event code storage 2. Press to find the best weather radio location is set for Entry ON Lockout ON, transmitter for your location, then press the the radio will process the SAME location/event softkey. -
Page 38: Scanner Memory
Scanner Memory Scanner Memory V-Scanner Storage Using V-Scanners Your PRO-106 features two types of memory storage: You can save active scanner configurations (called “working” or “main” memory) to a V-Scanner • Main memory is used to store programming storage folder for later use. Then recall the stored that is used for everyday monitoring and scanner configurations from a V-Scanner storage scanning. -
Page 39: Loading A V-Scanner Folder To Main Memory
Scanner Memory Scanner Memory 5. The scanner will prompt you to enter a name Cloning for the stored V-Scanner. Use the standard You can transfer the programmed data to and text entry method to type the name you wish from another PRO-106 (or PRO-197) scanner using to use, then press the softkey. -
Page 40: Advanced Settings
Advanced Settings Advanced Settings Advanced Settings CONV Priority Scan When Object Priority is set to for one or Priority Scan more CONV objects, the scanner will sample the CONV objects for activity periodically while Priority Scan operation is available for CONV scanning and monitoring other objects. -
Page 41: Audible Alarms And The Alert Led
Advanced Settings Advanced Settings To turn the Hit Counter on: Audible Alarms and the Alert LED 1. Press PGM. Your PRO-106 features an Alert LED with audible alarm capability that allows you to set different 2. Press softkey. GLOB visual and audible notifications for the different 3. -
Page 42: Multi-Site Mode On Networked Systems
Advanced Settings Advanced Settings To set the Audible Alarm and Alert LED: systems, and for some systems that are used in large, rural counties. In any object menu: As a system user moves around, or “roams,” in 1. Press to scroll to any of the following the coverage area of the network, their radio will settings. -
Page 43: Ltr Home Repeater Automove
Advanced Settings Advanced Settings 4. Press to scroll to the TSYS item Notes: and press the SEL key to edit the TSYS • Multi-site functionality is not available in parameters. EDACS or LTR trunking. 5. Press to scroll to Multi-Site. •... -
Page 44: Additional Information
Additional Information Additional Information Power-On Configuration Key Sequences Power-On Password Power-on keypress sequences are used as Setting a power-on password can prevent anyone shortcuts to configuration items, like attenuator other than you from using this scanner. settings, backlight settings and memory To set the power-on password information. -
Page 45: Birdie Frequencies
Additional Information Additional Information 3. Scroll to then press SEL key. Set password, FCC Notice 4. The confirmation menu for the power-on This equipment has been tested and found to password setting appears. Press softkey. comply with the limits for a scanning receiver, pursuant to Part 15 of the FCC Rules. -
Page 46: Care
Additional Information Additional Information services, military operations, pager services, and store the scanner only in normal temperature and wireline (telephone and telegraph) service environments. Handle the scanner carefully; do providers. It is legal to listen to almost every not drop it. Keep the scanner away from dust and transmission your scanner can receive. - Page 47 Additional Information Additional Information 161.600-161.975 MHz....(in 5 kHz steps/FM) Priority 162.000-174.000 MHz....(in 12.5 kHz steps/FM) Talkgroup and conventional channel priority, selectable priority sample rate and priority sample 216.0025-219.9975 MHz....(in 5 kHz steps/FM) during trunking talkgroup call. 220.000-224.995 MHz....(in 5 kHz steps/FM) Conventional Receiver Modes 225.000-379.99375 MHz..
-
Page 48: Troubleshooting
Additional Information Additional Information Scanning Rate ..Approx. 55 channels per second Troubleshooting Search Rate ....Approx. 90 steps per second Display Problem Cause Solution LCD with amber LED backlight, 4 lines of 16 Scanner won’t Scanner is not re- Recharge the re- characters each, plus 13 display icons power on. -
Page 49: Reset Global Parameters To Factory Defaults
Additional Information Additional Information Reset Global Parameters to Factory Defaults Problem Cause Solution The keypad The keypad may Press FUNC KEY/ If your scanner does not appear to be functioning does not be locked. LIGHT key to unlock. properly, you can reset the global radio work. -
Page 50: Initializing The Scanner To Factory Defaults
Additional Information Additional Information 4. Press ENT. The scanner displays: 2. Press 0 while the scanner is displaying the Welcome/Owner screen. The scanner displays: GLOB EEPROM area System Tests: Initialized to Select a Test... defaults. Exits if no key Press any key. is pressed 5. -
Page 51: Appendix A: Search Bands
Search Bands Search Bands Appendix A: Search Bands Aircraft Band All Sub Bands Searches civilian and military air frequencies. Group. Freq. (MHz) Band 25-54 VHF Low Group. Freq. (MHz) Band 108-137 VHF Aircraft 108-118 Navigation 137-174 VHF High 118-137 Civilian Voice 216-300 220 MHz Commercial/ 138-150... -
Page 52: Appendix B: Detailed Menu Reference
Menu Reference Menu Reference Appendix B: Detailed Menu Reference GLOB Options Description Parameter • Context sensitive help is available for every menu Contrast Sets LCD contrast. Use keys parameter. Press FUNC SEL to view help for the on 5-way pushbutton pad. selected parameter. - Page 53 Menu Reference Menu Reference GLOB Options Description GLOB Options Description Parameter Parameter Battery Ni-MH, Loads low battery profile for Dflt ScanList 0-22 Sets default destination Scan each different battery type. Lists for new objects and Alkaline CONV Stor from Searches, or Ni-Cd Signal Stalker II, and Tune.
- Page 54 Menu Reference Menu Reference GLOB Options Description GLOB Options Description Parameter Parameter LCD BlinkOff 1-250 x For alternating text displays, TLO=FUNC On or Off Controls the operation of the 10 mS sets the display time for the L/OUT key. When Off, pressing secondary display element.
-
Page 55: Conv Menu
Menu Reference Menu Reference CONV Menu CONV Options Description Parameter The CONV menu is used when creating new L/Out On or Off Permanent lockout for the Conventional Channel objects, or editing existing CONV channel. Also accessed Conventional Channel objects. by pressing FUNC L/OUT while the scanner is stopped on the CONV Options... -
Page 56: Tgrp Menu
Menu Reference Menu Reference TGRP Menu CONV Options Description Parameter The TGRP menu is used when creating new Skywarn Yes or No When On, the CONV object is Trunking Talkgroup objects, or editing existing a member of the Skywarn Scan Trunking Talkgroup objects. -
Page 57: Tsys Menu
Menu Reference Menu Reference TGRP Options Description TGRP Options Description Parameter Parameter LED Mode Solid or Controls whether the Alert Delay Time 1-250 x Sets the amount of time (in 100 LED flashes or remains on solid 100 ms millisecond intervals) for the Flash when the Alert LED is used. - Page 58 Menu Reference Menu Reference TSYS Options Description TSYS Options Description Parameter Parameter Alpha- The alphanumeric display name Dwell 0-200 x Sets the amount of time the numeric for the TSYS. Use the standard 100 mS scanner dwells on a Motorola, text text entry method or QTXT to P25 or EDACS system control...
-
Page 59: Lmit Menu
Menu Reference Menu Reference TSYS Options Description LMIT Options Description Parameter Parameter Threshold Hi 1-99 Available When Multi-Site is Alpha- The alphanumeric display set to ROAM. Sets the control numeric name for the LMIT search. channel decode % threshold for text Use the standard text entry a site to be considered good... -
Page 60: Srvc Menu
Menu Reference Menu Reference SRVC Menu LMIT Options Description Parameter The SRVC menu is used when creating new Yes or No When On, the LMIT object Service Search objects, or editing existing Service is a member of the Favorites Search objects. Scan List. - Page 61 Menu Reference Menu Reference SRVC Options Description SRVC Options Description Parameter Parameter L/Out On or Off Permanent lockout for the EXPERT BELOW SRVC object. Also accessed by Modulation Auto, AM, Modulation setting for the pressing FUNC L/OUT while FM, NFM SRVC search.
-
Page 62: Stlk Menu
Menu Reference Menu Reference STLK Menu STLK Options Description Parameters The STLK menu is used when creating new Signal Latch LED On or Off Normally the Alert LED is active Stalker II objects, or editing existing Signal Stalker only while the object is receiv- II objects. -
Page 63: Appendix C: Text Entry And Quicktext
Menu Reference Text Entry Appendix C: Text Entry and QuickText STLK Options Description Parameters Your scanner uses a simple text entry method Zeromatic On or Off When on, enhances the that allows entry of all uppercase and lowercase scanner’s ability to lock on to letters of the alphabet, numbers, and punctuation the actual center frequency of a search hit instead of an adja-... -
Page 64: Quicktext
Text Entry Text Entry • For letters, uppercase text is typed by QuickText default, and you can shift to lowercase by QuickText allows you to store up to 10 commonly pressing FUNC before entering a character. used text items for instant recall while editing •... -
Page 65: Index
Text Entry Index 2. Press to scroll to and find the QTXT Index QuickText storage location that you wish to change. Alarms 3. Press to edit the QuickText entry. Global Setting..............103 Object Setting ....81, 106, 109, 112, 117, 120, 123 4. - Page 66 Index Index Defined.................10 Detailed Menu Reference..........108 Headphones............... 21 Priority Scan .................79 Help Menu................25 Key ..................6 Hit Counters............... 79 Dedicated Searches Defined.................61 LMIT..................61 Input Signal Stalker II ..............64 Character................6 SRVC..................62 Decimal Point ................6 TUNE ..................65 Number ..................6 Tune LED................67 Text ................31, 125 Delay Key ..................6 Object Delay........110, 112, 118, 121, 123...
- Page 67 Index Index Scan Lists................42 Priority Scan .................78 V-Scanner ................74 TGRP Setting ..............111 Motorola Weather Priority Mode............69 Custom Channel Tables............116 Programming Display Information .............67 CONV Objects..............31 Dwell Time .................115 PGM Key ................7 Fleet Map................116 Storing Memory..............74 Multi-Site..............82, 115 TGRP Objects ..............32 Priority Talkgroups...............79 TSYS Objects ...............33 Show CC Info ..............107...
- Page 68 Index Index Signal Stalker II ..............59 Service and Repair ............. 91 V-Scanners Service Search About..................74 Creating ................57 Erasing..................76 Dedicated Service Search...........62 Loading a V-Scanner ............76 Detailed Menu Reference..........119 Using V-Scanners..............75 Shortcuts ................86 Signal Stalker II Creating ................59 Weather Scanning Dedicated Signal Stalker II ..........64 Key ..................7 Detailed Menu Reference..........122...
- Page 69 by law: (a) correct the defect by product repair Limited Warranty without charge for parts and labor; (b) replace This product is warranted by RadioShack the product with one of the same or similar against manufacturing defects in material design; or (c) refund the purchase price. All and workmanship under normal use for one replaced parts and products, and products on (1) year from the date of purchase from...
- Page 70 Notes: Notes:...
- Page 71 Motorola, Smartnet, Smartzone, Omnilink, ASTRO and Privacy Plus are registered trademarks of Motorla Inc. EDACS is a registered trademark of MA-COM Inc. LTR is a registered trademark of EF Johnson. 20-106 ©2008. RadioShack Corporation. Printed in China All rights reserved. RadioShack and GE-08D-0550 RadioShack.com are trademarks used...