Table of Contents
Advertisement
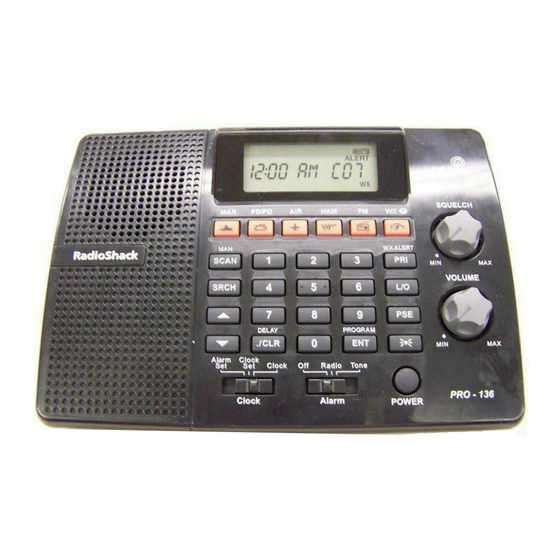
20-136
PRO-136
Desktop Radio Scanner
Thank you for purchasing your 200 Channel Desktop Radio Scanner from
RadioShack. Please read this user's guide before installing, setting up and
using your new scanner.
What's Included
Scanner
AC adapter
Antenna
User's guide
Preprogrammed frequency list
Quick start guide
www.radioshack.com
Advertisement
Table of Contents

Related Manuals for Radio Shack 20-136


Summary of Contents for Radio Shack 20-136
- Page 1 20-136 PRO-136 Desktop Radio Scanner Thank you for purchasing your 200 Channel Desktop Radio Scanner from RadioShack. Please read this user’s guide before installing, setting up and using your new scanner. What’s Included Scanner AC adapter Antenna User’s guide Preprogrammed frequency list Quick start guide www.radioshack.com...
-
Page 2: Table Of Contents
ontents Scanner Setup ................4 Scanner Features ....................4 Connecting the Antenna..................6 Powering Your Scanner..................6 Installing Batteries...................6 Battery Notes....................7 Recycle Rechargeable Batteries..............7 Scanner Placement....................7 Connecting Headphones ..................8 Listening Safely ....................8 Connecting the External Alert Out ..............8 Understanding Your Scanner ................8 Turning on the Scanner..................9 Setting the Clock/Alarm..................9 Alarm Function .................... - Page 3 Contents Receiving NWR-SAME and Weather Alert Signals ........16 Turning On the Digital Weather Alert Feature .......... 16 Receiving Alerts in Standby Mode...............17 Testing the Weather Alarm................17 ..........17 Programming FIPS ..................17 Skywarn ......................18 About Skywarn ....................19 Settings ..................20 Setting Delay ......................
-
Page 4: Scanner Setup
Scanner Setup Scanner Setup Scanner Features Select a service band: MAR (Marine), FD/PD (Fire/Police), AIR (Aircraft), HAM, or FM. Start a weather scan. Press and hold to activate Skywarn. • DELAY ENT (Enter) PROGRAM Enter a decimal point. Complete the entry of frequencies. Clear an entry. - Page 5 Scanner Setup PRI (Priority) WX ALERT Turns the priority function on or off. Press to turn weather alert on and off. Lockout selected channels or skip specified frequencies during a search. PSE (Pause) Stop and resume search or scan. Press to turn the backlight on for 15 seconds. Input a number.
-
Page 6: Connecting The Antenna
Scanner Setup Connecting the Antenna Attach the supplied antenna to the scanner by aligning the arrow on its base with the tab on the scanner’s BNC connector and then pressing into place. When using an external antenna, always connect with 50-ohm, RG-58, or RG-8 coaxial cable. -
Page 7: Battery Notes
Scanner Setup Battery Notes • Use fresh alkaline AA batteries. • Rechargeable batteries can be used, but battery life is shorter than with alkaline batteries. The scanner will not recharge batteries in the compartment. • Always remove old or weak batteries. Batteries can leak chemicals that destroy electronic circuits. -
Page 8: Connecting Headphones
Scanner Setup Connecting Headphones For private listening, you can plug a mono earphone or headset into the Headphone Jack on the back of your scanner. This automatically disconnects the internal speaker. Note that the sound is not in stereo. Listening Safely To protect your hearing, follow these earphone or headphones guidelines: •... -
Page 9: Turning On The Scanner
Scanner Setup Besides searching within a selected frequency range, you can also search your scanner’s service banks. Service banks are preset groups of frequencies categorized by the type of services that use those frequencies. The scanner is preprogrammed with all the frequencies allocated to the Marine, Aircraft, Police (Fire/Emergency), Ham and FM services. -
Page 10: Alarm Function
Scanner Setup 2. The hour digits flash. Press or press the number keys to enter the hour. Then press ENT/PROGRAM to set. 3. The minutes digits flash. Press or press the number keys to enter the minutes. Press ENT/PROGRAM to set. Note: When setting the clock minutes, the seconds digits are reset to 00 to enable accurate time adjustment. - Page 11 Scanner Setup BANK 1 Example shows entering bank 1 channel 00. Note: If you entered an invalid bank or channel number, Error appears and the scanner beeps. Enter a valid bank or channel. 5. Use the number keys to enter the frequency, pressing • /CLR/DELAY for the decimal point.
-
Page 12: Searching
Searching Searching Use the search function to find active frequencies. While doing a fine tune or service bank search, press •/CLR/DELAY to turn the 2-second delay on or off. Fine Tune You can search up or down from the currently displayed frequency using a fine tune search. -
Page 13: Storing Frequencies Found During A Search
Searching Storing Frequencies Found During a Search To store frequencies you find in a fine tune or service bank search: 1. Press PSE at the frequency you want to store. 2. Press ENT/PROGRAM to enter programming mode. 3. The screen flashes, alternating between the smallest empty channel number in the current bank, 000.000, and the frequency you want to store. -
Page 14: Search Speeds
Searching 3. Press L/O. L/O disappears. To clear all skipped frequencies at once: 1. While searching, press PSE. 2. Hold down L/O until the scanner beeps twice. Notes: • If you select more than 50 frequencies to skip, each new frequency replaces a frequency previously stored, beginning with the first stored frequency. -
Page 15: Scanning
Scanning Scanning Scanning Stored Channels Press SCAN/MAN to begin scanning your programmed frequencies. SCAN scrolls across the display and the scanner scans through all non-locked channels in the activated banks. Select any combination of banks to scan by pressing the corresponding number keys. -
Page 16: Weather Scan
Scanning To stop at a channel while scanning: 1. Press SCAN/MAN to stop scanning. 2. Press to select the next or previous channel. 3. Press SCAN/MAN to resume scanning. Weather Scan To scan for weather transmissions: . WX appears. Change the scan direction by using 1. -
Page 17: Receiving Alerts In Standby Mode
Scanning When the scanner receives a SAME-coded signal, ALERT flashes and the SAME alert level appears, alternating with the weather channel. The scanner will also output an alert signal to the external alert output jack. The scanner remains on the weather channel and the audio turns on so you can hear the weather broadcast. -
Page 18: Skywarn
Scanning to select F0 to F14. If a FIPS code is not programmed, 3. Press ------- appears. 4. Use the keypad to enter the FIPS code. 5. Press ENT/PROGRAM to store the FIPS code or press •/CLR/DELAY to clear inputted FIPS code. 6. -
Page 19: About Skywarn
Scanning Note: Before using this feature, enter the local Skywarn frequency for your area into Bank 9, Channel 19. (See “Programming Frequencies into Channels.”) The scanner has 10 channels for Skywarn: Bank 9, Channels 10-19. Press to select other Skywarn channels. Press SCAN/MAN to exit Skywarn. Note: If no frequencies are programmed in the Skywarn channels, No Prg appears and the scanner sounds an error tone. -
Page 20: Settings
Settings Settings Setting Delay Sometimes a radio user might pause before replying to a transmission. To avoid missing a reply on a specific channel, the scanner automatically programs a 2-second delay into any channel or frequency. Depending on the scanner operation, follow one of these steps to turn the delay on or off. -
Page 21: Setting Priority
Settings To remove the lockout from a channel, manually select the channel, then press L/O. L/O disappears. To unlock all channels in the selected banks, press SCAN/MAN to stop scanning, then hold down L/O until the scanner beeps twice. Setting Priority The priority feature lets you scan through the channels and still not miss important or interesting calls on specific channels. -
Page 22: Advanced Programming
Advanced Programming Advanced Programming You can clone your scanner by transferring the programmed data to or from another PRO-136 scanner using a connecting cable. You can also upload or download programmed data from a PC through wired programming. Cloning Your Scanner You can clone all the frequencies in PC/IF Jack your PRO-136 to another PRO-136 or... -
Page 23: Wired Programming
Advanced Programming CLONE and transfer progress are displayed on the slave unit. BANK0 1 2 3 5. When the data transfer is completed, donE appears on both units. If the transfer was not successful, Error appears. To clear the error, press •/CLR/ DELAY and go back to step 2. -
Page 24: Additional Information
Additional Information Additional Information FCC Notice Your scanner might cause radio or TV interference even when it is operating properly. To determine whether your scanner is causing the interference, turn off your scanner. If the interference goes away, your scanner is causing it. Try the following methods to eliminate the interference: •... -
Page 25: Care
Additional Information pick up transmissions that are not legal to listen to. Doing so could subject you to legal penalties. We encourage responsible, legal scanner use. Care Keep the scanner dry. If it gets wet, wipe it dry immediately. Use and store the scanner only in normal temperature environments. - Page 26 Additional Information AM ..............20 dB S/N at 60% modulation 25.0000-27.9950..................1.0µV 108.0000-136.9875................. 1.1µV 380.0000-399.9875................. 1.2µV WMF ............20 dB S/N at 22.5 kHz deviation 88.000-107.9000 (in 100 kHz steps) ............0.7µV TV ..............20 dB S/N at 45 kHz deviation 59.7500, 65.7500, 71.7500, 81.7500, 87.7500 (in 6 MHz steps)...
-
Page 27: Troubleshooting
Additional Information Troubleshooting Problem Cause Solution Scanner is on but SQUELCH is not adjusted correctly. Adjust SQUELCH. will not scan. Only one channel or no channels Store frequencies into more than one are stored. channel. Scanner won’t The AC adapter is not connected. Be sure the adapter’s barrel plug is fully work at all. - Page 28 RadioShack store. RadioShack Customer Relations 300 RadioShack Circle, Fort Worth, TX 76102 04/04 Hypersearch, Hyperscan, and Adaptaplug are trademarks used by 20-136 RadioShack Corporation. Printed in China ©2008. RadioShack Corporation. All rights reserved. UBZZ01354ZZ(0) RadioShack and RadioShack.com are trademarks used by...