Table of Contents
Advertisement
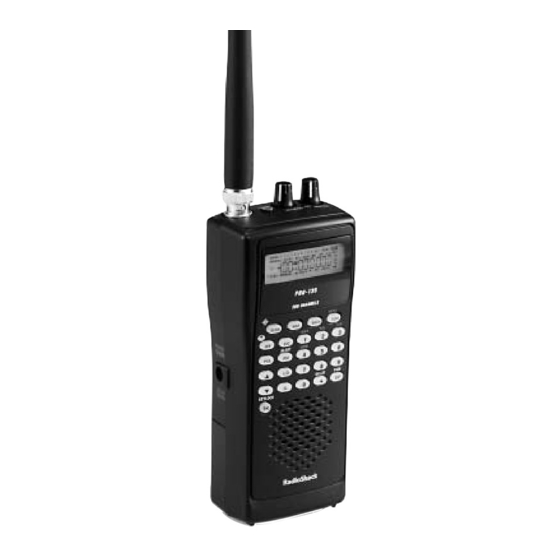
Handheld Radio Scanner
Please read this user's guide before installing, setting
up, and using your new scanner
Thank you for purchasing your
200–channel Handheld Radio
Scanner from RadioShack.
What's Included
Scanner
Antenna
Belt Clip (2) Screws
Preprogrammed
Frequency List
User's Guide
Quick Start Guide
www.radioshack.com
20-135
PRO-135
Advertisement
Table of Contents

Related Manuals for Radio Shack 20-135


Summary of Contents for Radio Shack 20-135
- Page 1 20-135 PRO-135 Handheld Radio Scanner Thank you for purchasing your 200–channel Handheld Radio Scanner from RadioShack. What’s Included Scanner Antenna Belt Clip (2) Screws Preprogrammed Frequency List User’s Guide Quick Start Guide Please read this user’s guide before installing, setting up, and using your new scanner www.radioshack.com...
-
Page 2: Table Of Contents
ontents Scanner Setup ..........4 Scanner Features ............4 Connecting the Antenna.........6 Attaching the Belt Clip..........6 Powering Your Scanner...........6 Installing Batteries..........7 Battery Notes............8 Recycle Rechargeable Batteries.......9 Using External Power..........9 Connecting Headphones ........10 Listening Safely ..........10 Understanding Your Scanner ......10 Birdie Frequencies .......... - Page 3 Contents Manually Selecting a Channel ......22 Weather Scan............22 Weather Alert............22 Testing the Weather Alarm......23 Skywarn ..............23 About Skywarn ..........23 Settings ............. 25 Setting Delay ............25 Turning Channel-Storage Banks On or Off..25 Locking Out Channels.......... 26 Setting Priority ............
-
Page 4: Scanner Setup
Scanner Setup Scanner Setup Scanner Features SCAN Scan the stored channel frequencies. Press and hold to activate Signal Stalker I. Go to manual mode. SRCH Start a limit search. TUNE MENU Operate Fine Tune. Press and hold to enter menu. MENU SRCH SCAN... - Page 5 Scanner Setup Start weather scan. Press and hold to activate Skywarn. PSE (Pause) Stop and resume search or scan. Search up and down a selected frequency range; selects options in menu mode. KEYLOCK Turns the display and key backlight on. Press and hold to lock the keypad.
-
Page 6: Connecting The Antenna
Scanner Setup Headphones VOLUME/OFF Turn the scanner on or off; adjust the volume. SQUELCH Adjust the squelch. Connecting the Antenna Attach the supplied antenna to the scanner by aligning the slots around its base with the tabs on the scanner, and then slide into place. -
Page 7: Installing Batteries
Scanner Setup Installing Batteries 1. Remove the battery compartment cover. 2. Set the Battery Switch inside the battery compartment to the appropriate setting: • ALKALINE when using alkaline batteries. • Ni-MH when using rechargeable (Ni-MH) AA batteries. 3. Insert two AA batteries (not included) into the battery compartment and two AA batteries into the battery compartment cover, matching the polarity symbols (+ and -) marked inside. -
Page 8: Battery Notes
Scanner Setup To charge batteries: 1. Set the Power Switch to Ni-MH. 2. Install rechargeable batteries. 3. Connect an external power source to the DC 9V 300mA jack. The scanner stops charging automatically after a maximum of 14 hours. Warning: Do not attempt to charge batteries if non-rechargeable batteries are installed in the scanner and the switch is set to Ni-MH, or if you are unsure of the switch’s position. -
Page 9: Recycle Rechargeable Batteries
Scanner Setup Recycle Rechargeable Batteries Placing rechargeable batteries into the trash or the municipal waste system can be harmful to the environment. RadioShack participates in an industry program to collect and recycle rechargeable batteries at the end of their useful life. You can return your rechargeable batteries to your local RadioShack store for recycling free of charge. -
Page 10: Connecting Headphones
Scanner Setup Warning: Do not connect a charging adapter to the scanner if non-rechargeable batteries (such as alkaline batteries) are installed in the scanner and the switch is set to Ni-MH, or if you are unsure of the switch’s position. Connecting Headphones For private listening, you can plug headphones (not included) into the headphone jack on top of... -
Page 11: Birdie Frequencies
Scanner Setup The scanner scans conventional frequencies. A frequency, expressed in kHz or MHz, is the tuning location of a station. To find active frequencies, use the search function or consult an online resource such as www.radioreference.com. Besides searching within a selected frequency range, you can also search your scanner’s service banks. -
Page 12: Turning On The Scanner
Scanner Setup you program one of these frequencies, you hear only noise on that frequency. This scanner’s known birdie frequencies (in MHz) are: 449.18125 449.24375 449.30625 Turning on the Scanner 1. Turn SQUELCH fully counterclockwise. 2. Turn VOLUME/OFF clockwise until it clicks and you hear a hissing sound. - Page 13 Scanner Setup Note: If you entered an invalid bank or Error channel number, appears and the scanner beeps. Enter a valid channel. 5. Use the number keys to enter the frequency, using • for the decimal point. 6. Press ENT/PGM to store the frequency into the channel.
-
Page 14: Searching
Searching Searching Use the search function to find active frequencies. While doing a limit search, fine tune, or service bank search, press •/DELAY to turn the 2-second delay on or off. Limit Search This feature lets you search through preset frequency ranges. -
Page 15: Fine Tune
Searching 3. Using the number keys, enter the lower limit frequency, and then press ENT/PGM. 4. Press to move from lower to upper. 5. Using the number keys, enter the upper limit frequency, and then press ENT/PGM. Fine Tune You can search up or down from the currently displayed frequency using a fine tune search. -
Page 16: Service Bank Search
Searching Service Bank Search The scanner is preprogrammed with all the frequencies allocated to Ham, Marine, Aircraft, and Police (Fire/Emergency) transmissions. To search the service banks, press SVC. The current service symbol appears and the scanner starts searching. To select a different service bank, press 1/MAR, 2/POL, 3/AIR, or 4/HAM. -
Page 17: Search Skip Memory
Searching Note: If the same frequency already exists on another channel, the scanner beeps and displays that channel. Press CL to cancel, or press ENT/PGM to store the frequency in both channels. Search Skip Memory You can skip up to 50 unwanted frequencies during a limit search, fine tune, service bank, or Signal Stalker I search. -
Page 18: Search Speeds
Searching Search Speeds The scanner has two search speeds: Normal search at 55 steps/second and Hypersearch at 160 steps/second. Hypersearch applies only to the 5 kHz step bands (25–27.995 MHz, 28–54 MHz, and 137–174 MHz). Signal Stalker I Signal Stalker I detects and then displays the frequency of nearby strong radio transmissions. -
Page 19: Setting The Signal Stalker I Options
Searching Setting the Signal Stalker I Options 1. Press and hold TUNE/MENU to open the menu. 2. Press to select a Signal Stalker I menu option. (The icon appears with Signal Stalker I menu options.) Note: See below for a description of the Signal Stalker I options. - Page 20 Searching • UHFbnd: UHF Band. Set to to search UHF Band (380-512MHz). • IntrPt: Voice Interrupt. While Signal Stalker I is on and the scanner is receiving an audio signal (voice) in normal scanning, the scanner checks the Signal Stalker I every 2 seconds causing the audio signal to break at that moment.
-
Page 21: Scanning
Scanning Scanning Scanning Stored Channels Press SCAN to begin scanning your programmed SCAN frequencies. appears and the scanner scans through all non-locked channels in the activated banks. Select any combination of banks to scan by pressing the corresponding number keys. The bank numbers appear at the top of the display. -
Page 22: Manually Selecting A Channel
Scanning Manually Selecting a Channel You can continuously monitor a single channel without scanning. This is useful if you want to monitor a specific channel or if you hear an emergency broadcast on a channel and do not want to miss any details, even though there might be periods of silence. -
Page 23: Testing The Weather Alarm
Scanning Testing the Weather Alarm To hear the alarm for the weather alert signal, press WX/ to select the weather service, then hold down PRI/ALERT for about two seconds. TEST The tones sound and appears. Press any key to end the test. Skywarn The Skywarn function lets you jump directly to the last channel in memory (Bank 9, Channel 19) - Page 24 Scanning (which spawn tornadoes) • Severe lowering of a wall cloud • Turbulence in a wall cloud • Funnel clouds • Tornadoes • High water areas • Downed power lines • Other emergency conditions that affect life or property Listen to NOAA for weather alerts and warnings, watch box notices, and weather-forecasts.
-
Page 25: Settings
Settings Settings Setting Delay Sometimes a user might pause before replying to a transmission. To avoid missing a reply on a specific channel, the scanner automatically programs a 2-second delay into any channel or frequency. Depending on the scanner operation, follow one of these steps to turn the delay on or off. -
Page 26: Locking Out Channels
Settings • One bank must always be active. If you try to turn off all banks, bank 0 remains. Locking Out Channels You can increase the scanning speed by locking out channels that have a continuous transmission (such as a weather channel). To lock out a channel, quickly press L/O when the scanner stops on a transmission. -
Page 27: Using Keylock
Settings first channel as its priority channel. To select a different channel as the priority channel: 1. Press MAN then press ENT/PGM. 2. Press to select the channel you want to set as priority, then press and hold PRI. Or, enter the bank and channel number you want to set as priority and then press PRI. -
Page 28: Setting The Power On Backlight
Settings 2. Press to select AutLit, then press ENT/PGM. 3. Press to select On or OF. Press ENT/ PGM. 4. Press TUNE/MENU or CL to exit the menu mode. Setting the Power On Backlight The backlight can be set to light for 5 seconds when you power on the scanner. -
Page 29: Setting The Battery Save Function
Settings Setting the Battery Save Function The battery save feature conserves energy when the scanner is set to monitor a manually selected channel and it is not actively scanning. The scanner repeatedly turns off the internal power for one second, and then turns it back on for half a second to check for a transmission. -
Page 30: Advanced Programming
Advanced Programming Advanced Programming Transferring Data To or From another Scanner You can clone your scanner by transferring the programmed data to or from another PRO-135 scanner using a connecting cable. You can also upload or download programmed data from a PC through wired programming. -
Page 31: Transferring Data From A Pc
Advanced Programming donE 5. When the data transfer is completed, appears on both units. If the transfer was not Error successful, appears. 6. After the clone operation is complete, remove the cable, turn both units off and then on again. Transferring Data From a PC Wired Programming You can transfer programming data to your... -
Page 32: Additional Information
Additional Information Additional Information FCC Notice Your scanner might cause radio or TV interference even when it is operating properly. To determine whether your scanner is causing the interference, turn off your scanner. If the interference goes away, your scanner is causing it. Try the following methods to eliminate the interference: •... -
Page 33: Care
Additional Information According to the Electronic Communications Privacy Act (ECPA), as amended, you are subject to fines and possible imprisonment for intentionally listening to, using, or divulging the contents of such a transmission unless you have the consent of a party to the communication (unless such activity is otherwise illegal). - Page 34 Additional Information Specifications Frequency Coverage 25.0000-27.9950 (in 5 kHz steps) 28.0000-54.0000 (in 5 kHz steps) 108.0000-136.9875 (in 12.5 kHz steps) 137.0000-174.0000 (in 5 kHz steps) 380.0000-399.9875 (in 12.5 kHz steps) 400.0000-512.0000 (in 6.25 kHz steps) Sensitivity (AM/FM) FM ......20 dB S/N at 3 kHz deviation 28.0000-54.0000..........
- Page 35 Additional Information Antenna Impedance.........50 Audio Output......260 mW maximum Built-in Speaker....1.25 Inches (32 mm) 8 ............Dynamic Type Power 4 AA Alkaline Batteries (6.0 VDC), or 4 AA Rechargeable Ni-MH Batteries (4.8 VDC) or Optional AC Adapter (9V DC; 300mA; center tip set to positive) Current Drain Squelched............75 mA...
-
Page 36: Troubleshooting
Additional Information Troubleshooting Problem Cause Solution Scanner is on but SQUELCH is not Adjust SQUELCH. will not scan. adjusted correctly. Only one channel Store frequencies into or no channels are more than one chan- stored. nel. Scanner won’t Scanner is not re- Recharge the re- work at all. -
Page 37: Resetting Your Scanner
Additional Information Resetting your Scanner If the scanner’s display locks up or stops operating properly, you might need to reset the scanner. Caution: This procedure clears all the information you have stored in the scanner. Before you reset the scanner, try turning it off and on again to see if it begins working properly. - Page 38 Additional Information Notes:...
- Page 39 Additional Information Notes:...
- Page 40 RadioShack franchisees and dealers. For complete warranty details and exclusions, check with your local RadioShack store. RadioShack Customer Relations 300 RadioShack Circle, Fort Worth, TX 76102 04/04 20-135 Printed in China Hypersearch and Adaptaplug are trademarks UBZZ01353ZZ(0) used by RadioShack Corporation. 12A07 ©2007.