Xerox D95 User Manual
Copier/printer
Hide thumbs
Also See for D95:
- User manual (392 pages) ,
- System administration manual (250 pages) ,
- Supplementary manual (70 pages)

Related Manuals for Xerox D95


Summary of Contents for Xerox D95
- Page 1 Version 3.0 September 2013 701P33170 ® Xerox D95/D110/D125/D136 Copier/Printer User Guide...
- Page 2 ©2013 Xerox Corporation. All rights reserved. Xerox ® and Xerox and Design ® trademarks of Xerox Corporation in the United States and/or other countries. ® ® ® FreeFlow , SquareFold , and CentreWare are trademarks of Xerox Corporation in the United States and/or other countries.
-
Page 3: Table Of Contents
Loading paper in trays 3 and 4.................3-3 Loading tab stock in trays 3 and 4..............3-4 Loading pre-drilled stock in trays 1, 2, 3, and 4..........3-4 Loading transparencies in trays 1-4..............3-5 Loading media in optional feeding devices..............3-6 Xerox ® D95/D110/D125/D136 Copier/Printer User Guide... - Page 4 Table of Contents Loading post-process media in optional finishing devices........3-6 Loading tab stock with the GBC AdvancedPunch........3-6 4 Copy........................4-1 Basic copy using the document feeder...............4-1 Basic copy using the document glass................4-2 Selecting copy options for a DFA finishing device..........4-3 Copy tab..........................4-4 Reduce/Enlarge......................4-4 Paper Supply Screen....................4-4 2-Sided Copying (Making 2-Sided Copies)...........4-5...
- Page 5 Adding E-mail Recipients:..................5-6 Removing E-mail Recipients................5-6 Subject........................5-6 Message Contents....................5-6 Preview Scanned Image..................5-7 Selecting an Output Color...................5-7 Scan Both Sides of a Document...............5-7 Original Type......................5-8 Scan Presets......................5-8 Network Scanning........................5-9 Preview Scanned Images of a Job..............5-9 Xerox ® D95/D110/D125/D136 Copier/Printer User Guide...
- Page 6 Table of Contents Selecting an Output Color...................5-9 Scan Both Sides of a Document...............5-9 Original Type......................5-10 Scan Presets......................5-10 Scan to PC..........................5-11 Transfer Protocol....................5-11 Address Book......................5-11 Browse Network for PC..................5-11 Specify Destination.....................5-12 Scan Presets......................5-12 Store to Folder........................5-13 Selecting an Output Color................5-13 Scan Both Sides of a Document..............5-13 Original Type......................5-14 Preview Scanned Images of a Job..............5-14 Store to USB........................5-14...
- Page 7 Copy..........................6-3 Move..........................6-3 Editing Files..........................6-3 Delete Pages......................6-3 Insert Separators....................6-4 Chapter Start and Insert File................6-4 Edit List and Delete Pages...................6-4 Merging/Batch Printing Files in Copy & Print Jobs..........6-4 File Details.........................6-5 Merge..........................6-5 Merge and Print.......................6-5 Separators.........................6-6 Covers..........................6-6 Xerox ® D95/D110/D125/D136 Copier/Printer User Guide...
- Page 8 Table of Contents Watermark.........................6-6 File Name........................6-7 Output.........................6-7 Annotations......................6-7 Secure Watermark....................6-8 Printing Files in Copy & Print Jobs.................6-8 File Details.........................6-8 Output.........................6-9 Covers..........................6-9 Folding.........................6-9 2 Sided Printing.....................6-10 Image Shift......................6-10 Booklet Creation....................6-10 Annotations......................6-11 Watermark......................6-11 Face Up/Down Output..................6-12 Secure Watermark....................6-12 Add Tab Stock......................6-12 Selecting a folder under Scan & Other Jobs............6-13 Checking/Operating Files in Scan &...
- Page 9 Configure the display method for the scanner name....11-6 Configure the import method for scanned documents..................11-6 12 Job Status....................12-1 Job Status overview......................12-1 Active Jobs...........................12-1 Completed Jobs........................12-2 Secure Print Jobs & More tab..................12-2 Secure Print......................12-2 Sample Set......................12-3 Delayed Print......................12-3 Charge Print......................12-4 Xerox ® D95/D110/D125/D136 Copier/Printer User Guide...
- Page 10 Table of Contents 13 Machine Status..................13-1 Machine Status........................13-1 Machine Information tab....................13-1 Faults tab..........................13-3 Supplies tab.........................13-3 Billing Information tab....................13-4 Accessing Billing Information.................13-4 Billing meters/usage counters.................13-4 Usage Counters..................13-4 User Account Billing Information............13-5 Tools tab..........................13-6 Changing the paper tray attributes..............13-6 14 Maintenance..................14-1 Cleaning the machine ....................14-1 Cleaning the exterior..................14-2 Cleaning the document cover and glass............14-2 Cleaning the document feeder rollers............14-5...
- Page 11 Unable to import the scanned document into the computer...................15-47 Unable to send the scanned document over the network (FTP/SMB)..................15-48 Problems with sending Email............15-49 16 Specifications..................16-1 D95 Copy specifications....................16-1 D110/D125 Copy specifications.................16-3 D136 Copy specifications....................16-5 Print specifications......................16-7 Scan specifications......................16-8 Duplex Automatic Document Feeder (DADF) specifications......16-9 17 High Capacity Feeder (HCF/Trays 6 and 7), 8.5 x 11...
- Page 12 Table of Contents Loading tabs in the OHCF (1 or 2 Trays)............18-4 Loading transparencies in the OHCF (1 or 2 Trays).......18-5 Loading pre-drilled stock into the OHCF (1 or 2 Trays) for 1-sided print jobs......................18-6 Loading pre-drilled stock into the OHCF (1 or 2 Trays) for 2-sided print jobs......................18-7 Skew adjustment levers....................18-8 OHCF problem solving.....................18-9...
- Page 13 Paper jams in areas E1 and E2..............21-22 Paper jams in area E3..................21-24 Paper jams in area E4..................21-25 Paper jams in areas E5 and E6..............21-25 General problems....................21-27 Power interruption during operation..........21-27 Adjusting the printed image and trim.........21-28 Xerox ® D95/D110/D125/D136 Copier/Printer User Guide...
- Page 14 Table of Contents Fault codes......................21-28 Paper size and trim recommendations for perfect bound books....21-32 Binder specifications.....................21-32 22 Standard/Booklet Maker Finisher..........22-1 Manual decurling feature on the finisher..............22-3 Folding feature........................22-4 Fold types........................22-4 Loading paper/tabs in Tray 8/T1 (Post-Process Inserter)........22-6 Maintenance........................22-7 Standard/Booklet Maker consumable supplies........22-7 Replace the standard staple cartridge............22-7 Replace the booklet staple cartridge............22-9 Replacing the Staple Waste Container on the finisher......22-10...
- Page 15 Specifications......................23-26 24 Standard Finisher Plus................24-1 Overview..........................24-1 Finisher Module........................24-2 Finisher Module main components..............24-2 Folding feature......................24-3 Fold types....................24-4 Loading paper/tabs in Tray 8/T1 (Post-Process Inserter).....24-5 Finishing Transport......................24-6 Finishing Transport main components............24-6 Finishing Transport status indicators............24-7 Xerox ® D95/D110/D125/D136 Copier/Printer xiii User Guide...
- Page 16 Table of Contents Standard Finisher Plus maintenance.................24-8 Standard Finisher Plus consumable supplies..........24-8 Replace the standard staple cartridge............24-8 Replacing the Staple Waste Container on the finisher......24-10 Empty the Punch Waste Container............24-12 Problem solving.......................24-13 Paper jams in the Finisher Module.............24-13 Paper jams in Tray 8/T1 (Post-Process Inserter)......24-13 Paper jams inside the finisher left cover........24-14 Paper jams inside the finisher right cover........24-17 Paper jams at the optional C/Z Folder.........24-22...
-
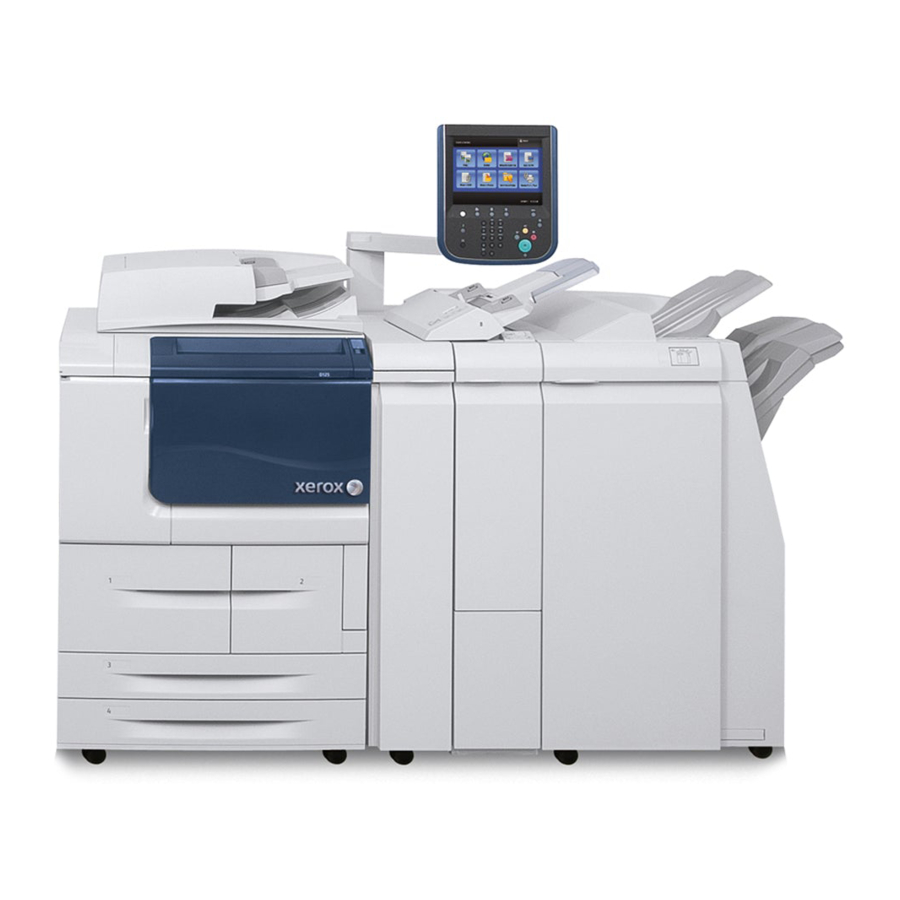
Page 17: Product Overview
Product Overview Machine Components 1 Optional High Capacity Feeder (HCF/Trays 6 and 7) This optional feeding device adds an additional 2000 sheet capacity of letter-size (8.5 x 11 in.)/A4 media. Xerox ® D95/D110/D125/D136 Copier/Printer User Guide... - Page 18 Product Overview 2 Bypass tray (Tray 5) The Bypass tray, also called Tray 5, accommodates all types of stock in various size and weight ranges. The tray holds a maximum of 250 sheets of 20 lb./75 gsm bond paper. This tray is often used to load nonstandard paper, such as heavy stock or other special media, which cannot be loaded in trays 1-4.
-
Page 19: Document Feeder
For best output, ensure that the documents are in good condition. User Interface (UI) The User Interface is the main area where options are selected, procedures are completed, and printer information can be viewed. Xerox ® D95/D110/D125/D136 Copier/Printer User Guide... - Page 20 Product Overview Number Component Function Touch Screen Displays messages required for operation and buttons for features. You can directly touch the screen to instruct operations and to set features. Machine Status Use this button to check the machine status, meters, the status of the consumables, and to print reports.
-
Page 21: Power Source
The machine is provided with the power switch and the main power switch. Power On After turning the power on, the machine takes approximately 3 minutes to warm up before you can start making copies. Xerox ® D95/D110/D125/D136 Copier/Printer User Guide... -
Page 22: Power Off
Product Overview 1. Open the cover. 2. Press the power switch to the On position. The Please wait... message indicates that the machine is warming up. The machine cannot be used while it is warming up. Power Off Before switching the power off, ensure all job processing, copy and printing is completed and ensure that the Data indicator is not lit up. -
Page 23: Exiting The Energy Saver Mode
Feeding and finishing devices Available with your machine is a variety of optional feeding and finishing devices. These devices are briefly discussed on the following pages along with where to find specific information on each device. Xerox ® D95/D110/D125/D136 Copier/Printer User Guide... -
Page 24: High Capacity Feeder (Hcf/Trays 6 And 7), 8.5 X 11 In./A4
Product Overview High Capacity Feeder (HCF/Trays 6 and 7), 8.5 x 11 in./A4 The two-tray High Capacity Feeder (HCF/Trays 6 and 7) provides an extra 4,000 sheet capacity of either 8.5 x 11 in. or A4 paper. Each tray holds 2000 sheets (from 16 lb. Bond to 80 lb. -
Page 25: Interface Module (D110/D125 Configurations)
Note The Interface Module is not available with the D95 Copier/Printer configuration. Interface (Cooling) Module (D136 configuration) The Interface Cooling Module is required for all D136 configurations. It is similar in... -
Page 26: Gbc® Advancedpunch
Information on this device can be found on the customer documentation CD that came with the accessory, or documentation can be downloaded from www.xerox.com. From the website, enter the machine product name in the Search field and select the User Documentation link. - Page 27 The D110/D125 configurations require the Interface Module, while the D136 configuration requires the Interface Cooling Module.The Interface Module is not available with the D95 Copier/Printer configuration. The Perfect Binder can be used in three modes: Manual mode: Load the preprinted book block into the Perfect Binder compiler tray and covers into Tray 9.
-
Page 28: High Capacity Stacker
The High Capacity Stacker (HCS) is an optional finishing device that provides stacking and offsetting capabilities for output to a Stacker Tray. Note The Interface Module is not available with the D95 Copier/Printer configuration. Standard Finisher This finisher provides a wide range of finishing/folding options. -
Page 29: Booklet Maker Finisher
If attached to a D136 configuration, the Booklet Maker Finisher requires the Interface Cooling Module. SquareFold Trimmer Module The SquareFold Trimmer Module is an optional finishing device that is used in conjunction with a finishing device that contains a booklet maker. Xerox ® D95/D110/D125/D136 Copier/Printer 1-13 User Guide... -
Page 30: Standard Finisher Plus
Note All third-party, DFA devices require the Interface Module (for D110/D125 configurations) or the Interface Cooling Module (for D136 configurations), and they also require the Standard Finisher Plus. DFA devices are not available with the D95 Copier/Printer configuration. 1-14 User Guide... -
Page 31: Where To Find Help
You or your System Administrator should print these documents, after the installation is complete. Help on the World Wide Web Xerox on the World Wide Web: For system support, user help, customer documentation, and service support, go to www.xerox.com and click the Contact Us link for specific contact information/telephone numbers in your area. - Page 32 Where to find help It may be helpful to know your machine serial number before calling for support. The machine serial number is shown on the Machine Information tab: Machine Status > Machine Information. User Guide...
-
Page 33: Paper And Other Media
Both trays accommodate media weights from 16 lb bond to 80 lb cover (52 gsm to 216 gsm) Each tray has a capacity of 550 sheets Media may be loaded in either the long edge feed (LEF)/portrait or short edge feed (SEF)/landscape direction Xerox ® D95/D110/D125/D136 Copier/Printer User Guide... -
Page 34: Loading Paper In Trays 1 And 2
Paper and other media Loading paper in trays 1 and 2 Note A paper jam may occur if a tray is opened while it is being used to feed stock. 1. Select the appropriate paper stock for your print job. 2. -
Page 35: Loading Paper In Trays 3 And 4
Refer to the System Administration Guide for detailed information on the paper curl and alignment adjustment options. c) Select Save until you are returned to the tray settings window. 9. Select Confirm to close the window. Xerox ® D95/D110/D125/D136 Copier/Printer User Guide... -
Page 36: Loading Tab Stock In Trays 3 And 4
Paper and other media Loading tab stock in trays 3 and 4 1. Select the appropriate paper stock for your print job. 2. Pull out the tray slowly until it stops. 3. Fan the tab paper before loading into the tray. 4. -
Page 37: Loading Transparencies In Trays 1-4
If enabled by your System Administrator, the Paper Tray settings screen may be displayed on the UI. 7. If changes have been made to the paper tray, select the Change Settings button; otherwise, proceed to the next step. Xerox ® D95/D110/D125/D136 Copier/Printer User Guide... -
Page 38: Loading Media In Optional Feeding Devices
Paper and other media a) Make the desired selections for Paper Type/Paper Weight, Paper Size, and Paper Color. b) If necessary, make the desired changes to paper curl and alignment adjustment. Note Refer to the System Administration Guide for detailed information on the paper curl and alignment adjustment options. -
Page 39: Copy
The confirmation indicator lights to show that the documents are loaded correctly. 3. Press the Services Home button. 4. Select Copy on the Services Home screen. 5. From the Copy screen, select the desired features/options. Xerox ® D95/D110/D125/D136 Copier/Printer User Guide... -
Page 40: Basic Copy Using The Document Glass
Copy Reduce/Enlarge Paper Supply Copy Output 2-Sided Copying Original Type Lighten/Darken The features displayed on the main Copy screen vary depending on how the main Copy screen is configured by the administrator. 6. Enter the quantity. 7. Press Start. Basic copy using the document glass 1. -
Page 41: Selecting Copy Options For A Dfa Finishing Device
5. From the Copy screen, select the desired features/options. The features displayed on the main Copy screen vary depending on how the main Copy screen is configured by the administrator. 6. Enter the quantity. Xerox ® D95/D110/D125/D136 Copier/Printer User Guide... -
Page 42: Copy Tab
Copy 7. Press Start. If prompted on the UI, follow the instructions provided to correct any job submission errors. If there is a DFA problem, refer to your DFA documentation. Copy tab The Copy tab contains the following features: Reduce/Enlarge Paper Supply Note Depending on how the Copy tab is configured by the administrator, this tab may also... -
Page 43: 2-Sided Copying (Making 2-Sided Copies)
The original-type specifications can be defined by using the Original Type button on the Copy tab screen. 1. From the Copy screen, select the Original Type button. 2. Select the applicable specifications for the original type. 3. Select Save to save the changes. Xerox ® D95/D110/D125/D136 Copier/Printer User Guide... -
Page 44: Lighten/Darken
Copy Lighten/Darken You can adjust the copy density to one of seven levels from the Copy window, in the Lighten/Darken area. The density is adjusted by selecting either the left or right buttons. Image Quality The Image Quality option contains the following features/options: Original Type, Image Options, and Background Suppression. -
Page 45: Background Suppression
Right Page Only: Copies the right page only. Binding Edge Erase: Erases the shadow from the center section of the document. You can set the binding erase width in the range from 0 to 50 mm in 1 mm increments. Xerox ® D95/D110/D125/D136 Copier/Printer User Guide... -
Page 46: 2-Sided Book Copying
Copy 2-Sided Book Copying This feature allows you to make 2-Sided copies of facing pages of the original bound document. Note This feature and Book Copying cannot be activated simultaneously, you must use the document glass to make copies from books, magazines, or pamphlets. Do not place bound originals in the document feeder. -
Page 47: Image Shift
1. From the Copy tab screen, select the Layout Adjustment tab. 2. Select Image Rotation... 3. Select the applicable image rotation. 4. Select Save to save the changes. Xerox ® D95/D110/D125/D136 Copier/Printer User Guide... -
Page 48: Invert Image (Mirror Image/Negative Image)
Copy Invert Image (Mirror Image/Negative Image) Copies can be made with a negative image of the original, or with the left and right-side images of the document reversed. 1. From the Copy screen, select the Layout Adjustment tab. 2. Select Invert Image. The default is Normal Image, which does not mirror the images. -
Page 49: Output Format
7. To print the copy of the last original page on the back cover for Blank Cover and Print on Both, select Last Page on Back Cover, then select Save. 8. To enter the number of sheets for each subset, select the plus or minus (+/–) buttons, then select Save. Xerox ® D95/D110/D125/D136 Copier/Printer 4-11 User Guide... -
Page 50: Perfect Binding (Optional)
Copy 9. Offset Stacking places each stack of printed pages slightly to the left or right of the previous stack for easier separation. a) Select Output /Offset. b) Select Center Tray Upper or Center Tray Lower. For automatic creasing, select Right Middle Tray. -
Page 51: Selecting The Perfect Binding Options
2. Select Copy on the Services Home screen. 3. From the Copy screen, select the Output Format tab. The Output Format screen displays. 4. Select Perfect Binding. The Perfect Binding screen displays. 5. Select On. Xerox ® D95/D110/D125/D136 Copier/Printer 4-13 User Guide... - Page 52 Copy The Perfect Binding options are available now for selection. 6. Select the desired Cover option: a) Select the Cover button. b) Select one of the three Cover options: Blank Cover, Print on Both, or 1 Sided Covers, Print on Outside. c) Select Save.
-
Page 53: Covers
1 to 23 times vertically (columns), and between 1 to 33 times horizontally (rows). d) To change the orientation of the copies, select Original Orientation, then select Upright Images or Sideways Images, then select Save. Xerox ® D95/D110/D125/D136 Copier/Printer 4-15 User Guide... -
Page 54: Poster
Copy Poster This feature allows you to create a large poster by pasting the copies spread over multiple sheets together. Copied sheets are provided with a paste margin so that they can be pasted together. This paste margin is fixed to 0.4 inches (10 mm). 1. - Page 55 Select the desired font color. d) To select the placement of the annotations on the second side when printing 2-sided copies, select Same as Side 1 or Mirror Side 1. e) Select Save. 9. Select Save. Xerox ® D95/D110/D125/D136 Copier/Printer 4-17 User Guide...
-
Page 56: Watermark
Secure Watermark Secure Watermark is an optional feature and requires the purchase of an optional package. For information, contact the Xerox Customer Support Center. Secure Watermark is sometimes called Hybrid Watermark. Secure Watermark is a security management feature that embeds a copy-protection, digital code into a document in order to restrict the document from being duplicated (copied). -
Page 57: Tab Margin Shift
Selecting the Auto button automatically determines whether the copies should be output face up or face down. Face Up Selecting the Face Up button causes all output to be delivered face up, with the first page on top of the output stack. Xerox ® D95/D110/D125/D136 Copier/Printer 4-19 User Guide... -
Page 58: Identification Card Copying
Copy Face Down Selecting the Face Down button causes all output to be delivered face down, with the first page on the bottom of the output stack. Face Up (Reverse Order) Selecting the Face Up (Reverse Order) button causes all output to be delivered face up, with the last page on the top of the output stack. -
Page 59: Job Assembly Tab
Copy Caution Xerox recommends OHP transparency film for transparent copies. Use of non-recommended films could cause machine failure or paper jams. 1. On the Services Home screen, select Copy. 2. Select Output Format. 3. Select Transparency Options. Blank Transparency Separators... -
Page 60: Build Job Options
Copy b) When printing 2-sided jobs, the start page of the next segment is set using Chapter Start. To set the start page of the next 2-sided segment, select Chapter Start, then choose from the following: Off: the first page of the next segment prints on the next available side. On: the first page of the next segment prints on Side 1 of a new sheet of paper. -
Page 61: Sample Job
7. Select Start on the touch screen, or press the green Start button on the control panel. 8. When the final set has been copied, in the Combine Original Sets screen, select Last Original. 9. To cancel the job, select Delete. Xerox ® D95/D110/D125/D136 Copier/Printer 4-23 User Guide... -
Page 62: Form Overlay
Copy Form Overlay You can make copies overlaying the first page of the document on the rest of the documents. For example, if the first page of the document only has a header and footer, the rest of the documents can be copied with the same header and footer. 1. -
Page 63: Stored Programming
- Changing the password to the folder used in the stored program after it is stored. System Settings, Job Flow Sheets, Network Scanning, Address Book and the Browse feature for the Scan to PC cannot be used with Stored Programming. Xerox ® D95/D110/D125/D136 Copier/Printer 4-25 User Guide... - Page 64 Copy 4-26 User Guide...
-
Page 65: Scan
4. Load the documents face up for the Document Feeder, or place the document face down on the Document Glass. Selecting Document Features 1. Place the document in either the Document Feeder or on the Document Glass. Xerox ® D95/D110/D125/D136 Copier/Printer User Guide... -
Page 66: Starting The Scan Job
Scan 2. Select the desired feature for the document. Email: Scans a document and sends the scanned data as an e-mail attachment after converting the data to TIFF, JPEG, PDF, DocuWorks, or XPS (XML Paper specification). Network Scanning: Scans a document using a job template created on CentreWare Internet Services. -
Page 67: Cancelling A Scan Job
2. Select Change Settings. 3. Select the appropriate section and make select features. The following features can be adjusted: Color Scanning 2 Sided Scanning Original Type Image Options (Lighten/Darken) Image Enhancement Resolution Quality/File Size Xerox ® D95/D110/D125/D136 Copier/Printer User Guide... -
Page 68: Scan Settings
Scan Shadow Suppression Original Orientation Original Size Edge Erase Book Scanning Reduce/Enlarge 4. After your changes are complete, select Start. Scan Settings The following settings can be set for scan jobs. Color Settings Original Type Resolution Lighten/Darken Original Orientation 2 Sided Scanning Original Size Resolution You can select preset resolution settings. -
Page 69: Original Orientation
7. Select Message... to enter and save the E-mail message by using the keyboard screen. 8. Set the various scan features. 9. As needed, select the Advanced Settings tab and set and save the advanced settings. Xerox ® D95/D110/D125/D136 Copier/Printer User Guide... -
Page 70: Address Book
Scan 10. As needed, select the Layout Adjustment tab and set and save the layout adjustments. 11. Select, set and save the various options from the Email Options tab. 12. Press Start on the control panel. Note The Mail Delivery Notification (MDN) and Split Send features in the Output Format screen are only available when using the E-mail feature. -
Page 71: Preview Scanned Image
2 Sided: Select this option to scan both sides of the document. Originals: This option is displayed when 2 Sided is selected. Head to Head: Select this option when both sides of the 2-sided document are in the same orientation. Xerox ® D95/D110/D125/D136 Copier/Printer User Guide... -
Page 72: Original Type
Scan Head to Toe: Select this option when both sides of the 2-sided document are in opposite orientations. Original Type When you select Black & White in Color Scanning, you must then select the document type. On the current Scanning edit window, select Original Type and select an option. Photo &... -
Page 73: Network Scanning
You can scan a 1-sided or 2-sided document on one or both sides of paper. By setting the binding style, both sides are scanned in the same orientation. 1. Select 2 Sided Scanning from the current scanning edit window. 2. Select an option. Xerox ® D95/D110/D125/D136 Copier/Printer User Guide... -
Page 74: Original Type
Scan 1 Sided: Select this option to scan only one side of the document. 2 Sided (Head to Head): Select this option when both sides of the 2-sided document are in the same orientation. 2 Sided (Head to Toe): Select this option when both sides of the 2-sided document are in opposite orientations. -
Page 75: Scan To Pc
6. Select Close. Browse Network for PC Specify a destination pc by browsing your network. Selecting Browse displays a hierarchy consisting of available server names and folders. 1. Select Scan to PC from Services Home. Xerox ® D95/D110/D125/D136 Copier/Printer 5-11 User Guide... -
Page 76: Specify Destination
Scan 2. Select Browse. 3. Select the destination for saving the data. To locate a file, select Previous or to move to another level and view other destinations, select Next. Specify Destination Use this option to specify a destination PC using the screen keyboard, Enter information in the fields provided for the selected protocol, to specify a forwarding destination. -
Page 77: Store To Folder
2 Sided (Head to Toe): Select this option when both sides of the 2-sided document are in opposite orientations. More: Displays the 2 Sided Scanning window. 3. If More is selected, the 2 Sided Scanning window opens. Select an option. Xerox ® D95/D110/D125/D136 Copier/Printer 5-13 User Guide... -
Page 78: Original Type
Scan 1 Sided: Select this option to scan only one side of the document. 2 Sided: Select this option to scan both sides of the document. Originals: This option is displayed when 2 Sided is selected. Head to Head: Select this option when both sides of the 2-sided document are in the same orientation. -
Page 79: Using A Usb Storage Device
A USB memory device with a storage capacity of up to 128 GB To save using the USB, perform the following: 1. Insert the USB memory device into the USB memory slot on the control panel. Xerox ® D95/D110/D125/D136 Copier/Printer 5-15 User Guide... -
Page 80: Removing The Usb Device
Scan 2. The USB Memory Device Detected window should appear. If this window does not appear, select the Services Home button and select Store to USB. 3. Select Save In. 4. Select a folder to for saving the data. 5. Select Save. If you do not specify the file storage location, the scanned data is saved in the root directory. -
Page 81: Scan Both Sides Of A Document
Photo: Select this option when scanning photos. File Format You can select a file format for scanned data. 1. From the scan window, select File Format and select the appropriate file format for the output data. Xerox ® D95/D110/D125/D136 Copier/Printer 5-17 User Guide... -
Page 82: Send To Folder
Scan TIFF/JPEG Auto Select: Automatically selects JPEG or TIFF. The file format is determined for each page. JPEG for full-color and grayscale pages, and TIFF for monochrome pages. TIFF: Saves scanned data in the TIFF format. JPEG: Saves scanned data in the JPEG format. This option is selectable when either Color or Grayscale is selected in Color Scanning. -
Page 83: Subject
1. Select 2 Sided Scanning from the current scanning edit window. 2. Select an option. 1 Sided: Select this option to scan only one side of the document. Xerox ® D95/D110/D125/D136 Copier/Printer 5-19 User Guide... -
Page 84: Preview Scanned Image
Scan 2 Sided (Head to Head): Select this option when both sides of the 2-sided document are in the same orientation. 2 Sided (Head to Toe): Select this option when both sides of the 2-sided document are in opposite orientations. More: Displays the 2 Sided Scanning window. -
Page 85: Wsd Starting A Scan Job
You can set advanced setting options from the Advanced Settings tab. 1. Select E-mail from the All Services screen. 2. Select the Advanced Settings tab. 3. As needed, select the applicable options: Image Options Image Enhancement Resolution Quality/File Size Xerox ® D95/D110/D125/D136 Copier/Printer 5-21 User Guide... -
Page 86: Image Options
Scan Photographs Shadow Suppression Color Space Image Options Lighten/Darken: This option provides manual control to adjust the lightness or darkness of the scanned images. Select the Down scroll button to darken the scanned image from light originals such as pencil images. Select the Up scroll button to lighten the scanned image from dark originals such as half tones or originals with colored backgrounds. -
Page 87: Resolution
Off: Disables the feature. Enhance Photographs: Enhances images scanned from color photographs with Output Color set to Full Color. 3. Select Save. Note When Enhance Photographs is selected, Shadow Suppression and Background Suppression are not available. Xerox ® D95/D110/D125/D136 Copier/Printer 5-23 User Guide... -
Page 88: Shadow Suppression
Scan Shadow Suppression You can use the Shadow Suppression feature to hide background colors and image bleed-through. 1. From the Advanced Settings tab, select Shadow Suppression... 2. Select No Suppression or Auto Suppression. 3. Select Save. Color Space The Color Space feature is available if Color is selected from the Color Scanning section of a tab screen. -
Page 89: Original Size
Upright Images - Selects the vertical orientation, where the top of the document is orientated towards the back of the machine. Sideways Images - Selects the horizontal orientation, where the top of the document is orientated towards the left of the machine. 5. Select Save. Xerox ® D95/D110/D125/D136 Copier/Printer 5-25 User Guide... -
Page 90: Book Scanning
Scan Book Scanning The Book Scanning feature allows you to scan facing pages of a document on separate sheets of paper in page-number order. 1. From the Layout Adjustments tab, select Book Scanning. 2. From the Book Scanning screen, select the features. 3. -
Page 91: File Format
1. On the printer control panel, press the Services Home button. 2. Select the correct Scan option (Network Scanning, Send to Folder, and so on), then select the Filing Options tab. 3. Select Read Receipts, then select On. 4. Select Save. Xerox ® D95/D110/D125/D136 Copier/Printer 5-27 User Guide... -
Page 92: File Name Conflict
Scan File Name Conflict You can resolve a file-name conflict by using the File Name Conflict option. 1. Select the Filing Options tab. 2. Select the File Name Conflict option. 3. Select the appropriate option: Do Not Save: Cancels the scan operation so that you may enter another file name. -
Page 93: Reply To
Read Receipts for Email 1. On the printer control panel, press the Services Home button. 2. Select E-mail, then select the E-mail Options tab. 3. Select Read Receipts, then select On. 4. Select Save. Xerox ® D95/D110/D125/D136 Copier/Printer 5-29 User Guide... - Page 94 Scan 5-30 User Guide...
-
Page 95: Send From Folder
3. Select a folder displayed on the window or select one using Go to. 4. In the Go to section, a folder at the top will display when you enter the 3-digit folder number with the numeric keypad. Xerox ® D95/D110/D125/D136 Copier/Printer User Guide... -
Page 96: Checking Files In Copy & Print Job
Send from Folder Checking files in Copy & Print Job You can check or operate files stored in a folder under Copy & Print Jobs. Both copy and print files are displayed in folders under Copy & Print Jobs. 1. Select Send from Folder on the Services Home window. 2. -
Page 97: Copy
4. Select Delete Pages or Insert File/Separators. Delete Pages 1. Select Send from Folder on the Services Home window. 2. Select Copy & Print Jobs, and then select a folder. 3. Select a file and select Edit Pages. Xerox ® D95/D110/D125/D136 Copier/Printer User Guide... -
Page 98: Insert Separators
Send from Folder 4. Select Delete Pages. 5. Use the numeric keypad to select the target page to be deleted and select Add to Delete List. 6. Select Delete. Insert Separators 1. Select Send from Folder on the Services Home window. 2. -
Page 99: File Details
2. Select Copy & Print Jobs, and then select a folder. 3. Select a file and select Merge/Batch Print. 4. Select Merge & Print. 5. Select any option. Delete Source Files Keep Source Files Cancel Xerox ® D95/D110/D125/D136 Copier/Printer User Guide... -
Page 100: Separators
Send from Folder Separators 1. Select Send from Folder on the Services Home window. 2. Select Copy & Print Jobs, and then select a folder. 3. Select a file and select Merge/Batch Print. 4. Select Separators. 5. Select any option. No Separators Blank Separators Printed Separators... -
Page 101: File Name
1. Select Send from Folder on the Services Home window. 2. Select Copy & Print Jobs, and then select a folder. 3. Select a file and select an option. 4. Select Annotations. 5. Select any option. Comment Xerox ® D95/D110/D125/D136 Copier/Printer User Guide... -
Page 102: Secure Watermark
Send from Folder Date Stamp Page Numbers Bates Stamp Secure Watermark Secure Watermark is a security management feature to embed a copy protection digital code into a document, to restrict the document to be duplicated. The digital code enables you to analyze "when," "from which machine," and "by whom" the document was output. 1. -
Page 103: Output
1. Select Send from Folder on the Services Home window. 2. Select Copy & Print Jobs, and then select a folder. 3. Select a file and select an option. 4. Select Folding. 5. Select any option. Xerox ® D95/D110/D125/D136 Copier/Printer User Guide... -
Page 104: Sided Printing
Send from Folder Last Saved Settings: Holds settings at the time when the file was saved. No Folding: Does not fold copies Z Fold: Folds copies in three with the printed side inside. C Fold: Folds copies in three with the printed side outside. Single Fold: Folds copies in half. -
Page 105: Annotations
User Account Number: Select this check box to print a user account number. Date & Time: Select this check box to print the serial number of the machine. Serial Number: Allows you to program text effects. Xerox ® D95/D110/D125/D136 Copier/Printer 6-11 User Guide... -
Page 106: Face Up/Down Output
Send from Folder Face Up/Down Output Use this option to select whether prints should be output facing up or down. 1. Select Send from Folder on the Services Home window. 2. Select Copy & Print Jobs, and then select a folder. 3. -
Page 107: Selecting A Folder Under Scan & Other Jobs
3. Select the display style from List and Thumbnail. 4. Select a file. 5. Select any option. Refresh List Thumbnail Number of Files Select All Delete File Details Job Flow Settings Print Batch Print Xerox ® D95/D110/D125/D136 Copier/Printer 6-13 User Guide... -
Page 108: Checking File Details In Scan & Other Jobs
Send from Folder Checking File Details in Scan & Other Jobs 1. Select Send from Folder on the Services Home window. 2. Select a file on the Folder - File List screen. 3. Select File Details. 4. Select any option. Whole Page No Rotation Change File Name... -
Page 109: Link Job Flow Sheet To Folder
1. Select a machine for which password is to be set, and select Device Communication Settings from the Edit menu. 2. Enter the system administrator ID in System Administrator ID. 3. Enter the password in Passcode/Password and Confirm Passcode/Password. 4. Select OK. Xerox ® D95/D110/D125/D136 Copier/Printer 6-15 User Guide... - Page 110 Send from Folder 6-16 User Guide...
-
Page 111: Job Flow
The document processing types that you can register in a Job Flow Sheet depend on how the documents are stored in a private mailbox. See the following chart: Input Output Printer E-Mail Scan Print Stored Only the Job Flow Sheets that you have permission to execute are displayed. Xerox ® D95/D110/D125/D136 Copier/Printer User Guide... -
Page 112: Job Flow Procedures
Job Flow The Job Flow Sheet feature is available only when the Network Scanning Kit is installed on the machine. Note For additional Job Flow Sheet information, including Authentication, and Mailboxes, see the System Administration Guide. Job Flow Procedures Creating a Job Flow Sheet 1. -
Page 113: Linking A Job Flow Sheet With A Mailbox
You can link a mailbox to a Job Flow Sheet, which instructs how the documents in the mailbox are processed. 1. Select the Machine Status button on the controller. 2. From the Tools tab, select Create Mailbox. Xerox ® D95/D110/D125/D136 Copier/Printer User Guide... - Page 114 Job Flow 3. Select a mailbox that is “Not in Use” then select Create/Delete. 4. On the New Mailbox - Password screen, you can enter a password for mailbox access. The password must be entered once you start the Job Flow process. Enter a password of up to 20 digits using the Numeric Keypad, then select a password restriction option: Always (All Operations): A password is required for all Job Flow Sheet access to the mailbox.
-
Page 115: Starting A Job Flow Manually
You can sort documents in ascending or descending order by pressing either Name or Last Updated. To confirm Job Flow contents, select Details. 3. Select the group to change from the Group of Items. The Group window opens automatically. Xerox ® D95/D110/D125/D136 Copier/Printer User Guide... - Page 116 Job Flow 4. Select the items you want to change and make changes as instructed. 5. Close any open screens to keep your changes. User Guide...
-
Page 117: Stored Programming
- System Settings, Job Flow Sheets, Network Scanning, Address Book and the Browse feature for the Scan to PC cannot be used with Stored Programming. Storing a Program 1. Press the Machine Status button. Xerox ® D95/D110/D125/D136 Copier/Printer User Guide... - Page 118 Stored Programming The following actions terminate the storing process: Pressing the Interrupt button on the control panel The Auto Reset feature causes a time-out A popup window (paper jam, for example) displays Note Do not perform the following while storing a program; otherwise, the program may not be stored or may not function as programmed: Remove or insert a paper tray Load or reload paper in Tray 5 (Bypass)
-
Page 119: Deleting Stored Programs
2. From the Tools section, select Stored Programming. 3. Select: a) Assign/Change Icon b) Select the stored program to add or change the icon. Select to display the previous or next screen 4. Select an icon and then select Save. Xerox ® D95/D110/D125/D136 Copier/Printer User Guide... -
Page 120: Calling A Stored Program
Stored Programming The icon is added to the listed stored program. Calling a Stored Program When you call a specified stored program, the last screen shown when you registered the stored program appears. 1. Press the Services Home button. 2. Select Stored Programming. 3. -
Page 121: Media Print - Text
When damage results from a natural calamity Supported file formats The following file formats can be used: PDF - PDF 1.3 or later Extension: pdf TIFF - Grayscale 4 bit/8 bit uncompressed, 8 bit/24 bit JPEG compressed, MH/MMR compressed Xerox ® D95/D110/D125/D136 Copier/Printer User Guide... -
Page 122: Notes And Restrictions
Media Print - Text Extension: tif XPS files Extension: xps - If the medium contains more than 900 folders, the machine may not be able to recognize them correctly. - PDF files or TIFF files cannot be printed if they are stored in folders. - PDF files saved on a MAC OS cannot be displayed on the screen and cannot be printed. -
Page 123: Inserting Usb Memory Device
You can set the printing options on the Media Print - Text tab. Media Print - Text printing options Item Setting Value Quantity Specify the print quantity within the range of 1 - 999, using the numeric keypad. Xerox ® D95/D110/D125/D136 Copier/Printer User Guide... -
Page 124: Index Print
Media Print - Text Item Setting Value Media Print - Text Paper Supply Auto Paper Select, Trays 1 - 5 Select Auto or a tray that holds any of the following sizes of paper: A3, B4, A4, A4 short edge feed (SEF), B5, B5 SEF, A5, A5 SEF, 8.5 x 11", 8.5 x 11"... -
Page 125: Web Applications
You can register frequently used web applications on the Services Home screen as buttons. The following describes how to access the applications by simply selecting the buttons. 1. Press the Services Home button. 2. Select Head Office registered on the Services Home window. Xerox ® D95/D110/D125/D136 Copier/Printer 10-1 User Guide... - Page 126 Web Applications 10-2 User Guide...
-
Page 127: Computer Operations
1. Load the paper in the tray. See the Paper and other Media chapter in the User Guide. 2. From your computer, open the document you want to print. 3. Select File > Print. Xerox ® D95/D110/D125/D136 Copier/Printer 11-1 User Guide... -
Page 128: Copying A Job With Tabs
Computer operations 4. Select the desired printer. 5. Ensure that Auto-Rotate and Center and Choose Paper Source by PDF page size check boxes are clear. Note These options may not be available with your version of Adobe Acrobat or Adobe Reader. -
Page 129: Network Tab Printing
7. Click the Paper Select button. 8. If Tray 3 or Tray 4 is being used for the tab stock, then select Paper Settings for Auto Tray and choose Tab Stock for the paper type. Xerox ® D95/D110/D125/D136 Copier/Printer 11-3 User Guide... -
Page 130: E-Mail Print
Computer operations 9. If Tray 5 (Bypass) is being used for the tab stock, then select Tray 5 (Bypass) Settings and choose Tab Stock for the paper type. 10. Select OK twice to return to the Properties screen. 11. Select the Advanced tab and select the Tab Margin Shift item. 12. -
Page 131: Importing Scanned Data
Clicking Change Scanner returns to step 5, where you can reselect a scanner. 7. Click Open Mailbox. 8. Select a document(s) to import from the list, and click Import. Xerox ® D95/D110/D125/D136 Copier/Printer 11-5 User Guide... -
Page 132: Changing Network Scan Driver Settings
Computer operations Note Import, Refresh, and Delete are available from the menu that appears when you right-click on the list. When import begins, a dialog appears like the one shown at right. Scan data is forwarded from the mailbox to the client. Once forwarding ends, the document is loaded into the application software and is deleted from the mailbox. -
Page 133: Job Status
6. If required, select Display Time to show the time required to process the selected job. 7. To delete a job or change the execution order, select a job from the list. 8. Select Delete or Promote from the pop-up menu. Xerox ® D95/D110/D125/D136 Copier/Printer 12-1 User Guide... -
Page 134: Completed Jobs
Job Status Completed Jobs The Completed Jobs tab allows you to check that a print job has been completed successfully. 1. Select Job Status from the Control Panel. 2. Select Active Jobs. 3. From the View pull-down menu, select the desired jobs to be viewed. You can select: All Jobs Printer and Print from Folder Jobs Scan and Internet Fax Jobs... -
Page 135: Sample Set
Select Yes or No to continue printing the job. Delayed Print This feature allows you to print a job at a specified time and then delete the job. 1. Press the Job Status button. Xerox ® D95/D110/D125/D136 Copier/Printer 12-3 User Guide... -
Page 136: Charge Print
Job Status 2. Select Secure Print Jobs & More tab. 3. Select the Delayed Print. The Delayed Print screen is displayed. 4. Select Refresh to display the latest updated information. Use the up or down buttons to navigate the list. 5. -
Page 137: Machine Status
Paper Tray Status Select the Paper Tray Status button to view the current status information for each paper tray. Xerox ® D95/D110/D125/D136 Copier/Printer 13-1 User Guide... - Page 138 Machine Serial Number The Machine Serial Number is displayed in the General Information area on the Machine Information tab. Use this number when calling Xerox for technical information or assistance. Current System Software The version of the system software that is currently installed on the machine is displayed under the Current System Software title.
-
Page 139: Faults Tab
Select the Fault History button to display a list of past fault codes. This information can be used to diagnose and solve machine problems. Supplies tab The Supplies tab provides status information about the customer replaceable units (CRUs) that are used in the machine. Xerox ® D95/D110/D125/D136 Copier/Printer 13-3 User Guide... -
Page 140: Billing Information Tab
Machine Status To access supplies information, press the Machine Status button on the control panel and then select the Supplies tab from the Machine Status screen. Each Customer Replaceable Unit and status is displayed. Billing Information tab Accessing Billing Information 1. -
Page 141: User Account Billing Information
By selecting either Meter (Copy Jobs) or Meter (Scan Jobs), the following information then is displayed: - Usage amount for this session - Total usage - Account Limit (set by the system administrator) - Available Balance (remaining unused amount for the account) Xerox ® D95/D110/D125/D136 Copier/Printer 13-5 User Guide... -
Page 142: Tools Tab
Machine Status Tools tab Regular users have limited access to some of the features on the Tools tab. Stored Programming When available to the user, this feature enhances productivity by saving a series of programming steps and assigning them to a specified Stored Programming option. Stored programs save frequently used features and job settings which can be accessed using a shortcut button. - Page 143 9. Select Confirm. The Paper Tray Attributes screen is displayed. 10. Select Close. The main Tools screen is displayed. 11. Press the Services button on the control panel to return to the main Copy screen. Xerox ® D95/D110/D125/D136 Copier/Printer 13-7 User Guide...
- Page 144 Machine Status 13-8 User Guide...
-
Page 145: Maintenance
The document glass is the glass on which you place your document in order to copy it. The glass strip is an approximately one-inch wide strip of glass located to the left the document glass. Xerox ® D95/D110/D125/D136 Copier/Printer 14-1 User Guide... -
Page 146: Cleaning The Exterior
Maintenance Cleaning the exterior 1. Wipe the exterior with a soft cloth moistened with water. If dirt is difficult to remove, try gently wiping with a soft cloth moistened with a small amount of neutral detergent. 2. Wipe off any excess water from the exterior with a soft cloth. Cleaning the document cover and glass 1. - Page 147 All parts of the assembly must be cleaned to ensure the best image quality when making copies. b) With the document feeder open, pull the lever that is located at the top of the document cover. Xerox ® D95/D110/D125/D136 Copier/Printer 14-3 User Guide...
- Page 148 Maintenance Part of the document cover pulls away from the assembly, which allows better access to the second-side scanning lens assembly. c) To remove dirt, wipe the mirrored glass, metal strip, both sides of the white-plastic strip, and the rollers with a soft cloth moistened with water, and then wipe it dry with a soft cloth.
-
Page 149: Cleaning The Document Feeder Rollers
2. While turning the rollers, gently clean them with a soft cloth moistened with water. Caution Use a cloth that has been thoroughly wrung to prevent drops of water falling into the machine. Drops of water on internal components may cause a malfunction. Xerox ® D95/D110/D125/D136 Copier/Printer 14-5 User Guide... -
Page 150: Cleaning The Fuser Stripper Fingers
Maintenance If dirt is difficult to remove, try gently wiping with a soft cloth moistened with a small amount of neutral detergent. 3. Close the top cover of the document feeder until you hear it click into place. 4. Close the left cover of the document feeder until you hear it click into place. Cleaning the Fuser Stripper Fingers Note It is recommended to read through all of the installation instructions before performing... - Page 151 Maintenance 8. Return the 2c handle to its original position. 9. Clean the input baffles to the Transfer and Fuser. 10. Wipe the Fuser input baffle. 11. Wipe the Transfer input baffle. Xerox ® D95/D110/D125/D136 Copier/Printer 14-7 User Guide...
-
Page 152: Replacing Consumable Supplies
13. Close the front door. Replacing consumable supplies Ordering supplies Xerox supplies, paper, and throughput material can be ordered from Xerox by going to www.xerox.com and clicking on either the Contact Us link for specific contact information/telephone numbers in your area or by clicking on the Supplies and entering/selecting your specific machine information (product family and model type). -
Page 153: Checking The Status Of Crus
1. Open the left cover of the machine. 2. Lay paper on the floor before removing the cartridge. This will allow any excess toner to fall on the paper. Xerox ® D95/D110/D125/D136 Copier/Printer 14-9 User Guide... - Page 154 Maintenance 3. Grash the handle of the toner cartridge. 4. Pull out the toner cartridge slowly (1), while holding the bottom of the cartridge with one hand (2). 5. Dispose the old toner cartridge as normal office waste or recycle the cartridge. 6.
- Page 155 Never use a vacuum cleaner when cleaning up spilled toner. It can cause a small explosion as the toner fills the vacuum cleaner and creates sparks. Use a broom, brush, or a cloth moistened with a neutral detergent. Xerox ® D95/D110/D125/D136 Copier/Printer 14-11 User Guide...
-
Page 156: Replacing The Toner Waste Container
Maintenance Replacing the toner waste container A message displays on the UI when the toner waste container is full. If you continue copying or printing without replacing it, the machine stops after copying or printing (approximately 18,000 sheets). 1. Make sure that the machine has stopped copying/printing, then open the front cover on the machine. - Page 157 7. Do not grip the container handle. Grasp the top, middle part of the new container and slide it into the machine until it snaps into position. 8. Close the toner waste container cover. 9. Close the front cover. Xerox ® D95/D110/D125/D136 Copier/Printer 14-13 User Guide...
- Page 158 Maintenance A message displays and the machine will not operate if the front cover is open even slightly. 14-14 User Guide...
-
Page 159: Problem Solving
You can get injured or burned. Switch off the machine immediately and contact the Customer Support Center. Xerox ® D95/D110/D125/D136 Copier/Printer 15-1 User Guide... -
Page 160: Document Feeder Jams
Problem solving Document feeder jams 1. Gently lift the latch of the document feeder top cover until it is completely open. 2. Open the left cover until it comes to a stop. 3. If the document is not caught in the entry of the document feeder, then remove it. 15-2 User Guide... - Page 161 6. Close the following open covers until they click into place. Close them in the following order: Inner cover Top cover Left cover 7. If a document jam cannot be found, slowly raise the document feeder, and if the document is there, remove it. Xerox ® D95/D110/D125/D136 Copier/Printer 15-3 User Guide...
-
Page 162: Document Jams Under The Document Feeder Belt
Problem solving 8. Close the document feeder. 9. If indicated, raise the feeder tray area and remove the document. 10. Gently return the feeder tray to its original position. 11. After removing the jammed document, follow the instructions to reload the entire document set into the document feeder. - Page 163 To scan torn, wrinkled or folded documents, use the Document Glass, only. The already scanned document sheets are automatically skipped and scanning resumes from the document sheet last scanned prior to the jam. Xerox ® D95/D110/D125/D136 Copier/Printer 15-5 User Guide...
-
Page 164: Lower Left Cover Jams
Problem solving Lower left cover jams Note This procedure shows how to clear a jam without either the optional HCF (Trays 6/7) or optional OHCF (Trays 6/7) being present. If you have either an HCF or an OHCF, open the front cover to optional Trays 6/7 to access this area. 1. -
Page 165: Paper Jams In The Bypass (Tray 5)
1. Remove the jammed paper and any paper that is loaded from the Bypass tray. Note If paper is torn, check inside the machine and remove it. 2. Open the tray cover and remove jammed paper. Xerox ® D95/D110/D125/D136 Copier/Printer 15-7 User Guide... -
Page 166: Envelope Jams In The Bypass Tray
Problem solving 3. Close the tray cover. 4. Reload paper into the tray and resume copying/printing. Envelope jams in the Bypass tray Note Envelopes can be fed only from the Bypass tray. Check that the envelopes are within specification. Carefully read and adhere to the following guidelines when using envelopes in the Bypass Tray: Always ensure that the Bypass tray guides are against the edges of the envelopes. -
Page 167: Paper Jams In Trays 1-4
To avoid tearing paper, review where the paper jam occurred before pulling out a tray. Torn paper remaining inside the machine can cause machine malfunction. 2. Remove the jammed paper and any torn pieces. 3. Push the tray in gently until it comes to a stop. Xerox ® D95/D110/D125/D136 Copier/Printer 15-9 User Guide... -
Page 168: Paper Jams In Transport Unit 4
Problem solving Paper jams in transport unit 4 Always ensure that all paper jams, including any small ripped pieces of paper, are cleared before proceeding with your copy/print jobs. 1. Make sure that the machine has stopped printing before opening the front cover. 2. -
Page 169: Paper Jams In Duplex Module 3
Always ensure that all paper jams, including any small ripped pieces of paper, are cleared before proceeding with your copy/print jobs. 1. Make sure that the machine has stopped printing before opening the front cover. Xerox ® D95/D110/D125/D136 Copier/Printer 15-11 User Guide... - Page 170 Problem solving 2. Pull out duplex module 3. 3. Move the release lever 3a to remove the jammed paper. Note If paper is torn, check inside the machine and remove it. 4. Move lever 3b to the right and then remove the jammed paper. Note If paper is torn, check inside the machine and remove it.
-
Page 171: Paper Jams Inside The Main Unit
1. Make sure that the machine has stopped printing before opening the front cover. 2. Turn the green lever at the center of the transfer module to the right until it is in the horizontal position and then pull the transfer module out to the end. Xerox ® D95/D110/D125/D136 Copier/Printer 15-13 User Guide... - Page 172 Problem solving 3. Lift up lever 2b to remove jammed paper. Then turn knob 2a to remove jammed paper. 4. If paper is jammed at the top of the transfer module or inside the fuser unit, remove the paper by pulling it out toward the left. If the paper cannot be removed, lift up the lever 2c and then try removing it 5.
- Page 173 8. Insert the transfer module completely and turn the green lever 2 to the left. Note If the lever cannot be turned, pull the transfer module to the middle and insert it again. Xerox ® D95/D110/D125/D136 Copier/Printer 15-15 User Guide...
-
Page 174: Fault Codes
Problem solving 9. Close the front cover completely. The machine will not operate if the front cover is open even slightly. Fault codes Fault code Cause and Remedy 002-770 Cause: Unable to process job template due to insufficient hard disk space. Remedy: Remove unnecessary data from the hard disk to increase free disk space. - Page 175 For information about network settings, refer to the System Administration Guide. 016-503 Cause: Unable to resolve SMTP server name during E-mail send. Remedy: Check that the SMTP server settings from CWIS are correct. Also, check the DNS server settings. Xerox ® D95/D110/D125/D136 Copier/Printer 15-17 User Guide...
- Page 176 Problem solving Fault code Cause and Remedy 016-504 Cause: Unable to resolve POP3 server name during E-mail send. Remedy: Check that the POP3 server settings from CWIS are correct. Check the DNS server settings. 016-505 Cause: Unable to login to POP3 server during mail send. Remedy: Check that the user name and password used in the POP3 server from CWIS are correct.
- Page 177 016-723 Cause: Unsupported punch position is specified. Remedy: Confirm the position, and specify the print data again. 016-728 Cause: An unsupported tag was included in the TIFF file. Remedy: Check the print data. Xerox ® D95/D110/D125/D136 Copier/Printer 15-19 User Guide...
- Page 178 Problem solving Fault code Cause and Remedy 016-729 Cause: Unable to print because the number of colors/resolution of the TIFF file exceeds the allowed range. Remedy: Change the number of colors/resolution for the TIFF file, and specify the print data again. 016-730 Cause: Detected a command not supported by ARTIV.
- Page 179 Cause: An error occurred during image conversion processing. Remedy: A portion of the data might have finished image conversion processing. Check the data via CentreWare Internet Services. Refer to “CentreWare Internet Services” in the System Administration Guide. Xerox ® D95/D110/D125/D136 Copier/Printer 15-21 User Guide...
- Page 180 Problem solving Fault code Cause and Remedy 016-777 Cause: A hard disk error occurred during image processing. Remedy: The hard disk might be defective. When replacing a hard disk, contact the Customer Support Center. 016-778 Cause: Conversion processing of scanned image was interrupted because of insufficient disk space.
- Page 181 For information about network settings, refer to the System Administration Guide. 027-500 Cause: Unable to resolve SMTP server name during answer E-mail send. Remedy: Check that the SMTP server settings from CWIS are correct. Xerox ® D95/D110/D125/D136 Copier/Printer 15-23 User Guide...
- Page 182 Problem solving Fault code Cause and Remedy 027-501 Cause: Unable to resolve POP3 server name when using POP3 protocol. Remedy: Check that the POP3 server settings from CWIS are correct. 027-502 Cause: Unable to login to POP3 server when using POP3 protocol. Remedy: Check that the user name and password used in the POP3 server from CWIS are correct.
- Page 183 Remedy: Contact the Customer Support Center. Trays other than Paper Tray 1 can be used. 072-210 Cause: Paper Tray 2 malfunctioned. Remedy: Contact the Customer Support Center. Trays other than Paper Tray 2 can be used. Xerox ® D95/D110/D125/D136 Copier/Printer 15-25 User Guide...
-
Page 184: Fault Codes 073-210...116-720
Problem solving Fault code Cause and Remedy 073-210 Cause: Paper Tray 3 malfunctioned. Remedy: Contact the Customer Support Center. Trays other than Paper Tray 3 can be used. 074-210 Cause: Paper Tray 4 malfunctioned. Remedy: Contact the Customer Support Center. Trays other than Paper Tray 4 can be used. - Page 185 Power off and on both the printer and the controller. If the problem persists, call the Customer Support Center. 127-213 Cause: Detected a mismatch with the software version of the controller. Remedy: Contact the Customer Support Center for information and/or instructions to remedy the problem. Xerox ® D95/D110/D125/D136 Copier/Printer 15-27 User Guide...
-
Page 186: Machine Troubleshooting
Problem solving Fault code Cause and Remedy 127-220 Cause: Detected a communication error of the video system by the controller. Remedy: Remove and reinsert the cable connection between the printer and the controller. Power off and on both the printer and the controller. If the problem persists, call the Customer Support Center. - Page 187 Printer Mode, select Online. Is the power cord Turn the power switch off and then firmly plug disconnected from the in the power cord. Then turn the power switch machine or the rear of the rack? Xerox ® D95/D110/D125/D136 Copier/Printer 15-29 User Guide...
- Page 188 Problem solving Symptoms Check Remedy Online indicator Is the interface cable Turn the power switch off, unplug the power does not light disconnected? cord from the power outlet, and check the even though you interface cable connection. instructed it to For information about network settings, refer print.
- Page 189 Load paper in the paper tray so that it does not its maximum fill line? exceed the maximum fill line. Is the paper guide set Load the paper correctly, and apply the paper correctly? guides lightly. Xerox ® D95/D110/D125/D136 Copier/Printer 15-31 User Guide...
-
Page 190: Image Quality Problems
Problem solving Symptoms Check Remedy Documents are Are the documents too The minimum size of the document that can not fed into the small? be loaded on the document feeder is A5 and document 5.5 X 8.5.in. feeder. An error Check the position of the Set the paper guides to the correct positions. - Page 191 Load the document correctly, and align the the correct position? document guides with the edge of the document. Is the paper tray set Firmly push in the tray as far as possible. properly? Xerox ® D95/D110/D125/D136 Copier/Printer 15-33 User Guide...
- Page 192 Problem solving Symptoms Check Remedy Part of the image Is the paper damp? Replace with paper from a new ream. is missing on the Is the loaded paper folded copy. or wrinkled? Is the document pasted The pasted or folded in section may be curling together or folded in? back, and risen up from the surface of the document glass.
- Page 193 Text or images are The paper guide in the Set the horizontal and vertical paper guides to printed at an paper tray is not set at the the correct positions. angle. correct position. Xerox ® D95/D110/D125/D136 Copier/Printer 15-35 User Guide...
-
Page 194: Image Is Not What Was Expected
Problem solving Image is not what was expected Symptoms Cause and Remedy (Action) The image is dirty Cause The document glass or the document cover is dirty. If No, go to next symptom. Action Clean the document glass or the document cover. If problem is not solved, go to next Cause/Action. -
Page 195: Copy Troubleshooting
Continue down through the symptoms until you find the symptom that describes the problem. 3. Refer to the Causes and Actions to the right of the correct symptom. Perform the suggested actions until the problem is solved. Xerox ® D95/D110/D125/D136 Copier/Printer 15-37 User Guide... -
Page 196: Unable To Copy
Problem solving Unable to copy Symptoms Yes/No Causes and Actions Document is not fed Cause Document size is too small. properly from the document feeder If No, go to next Action The minimum document size that can be loaded symptom. on the document feeder is A5. -
Page 197: The Copy Result Is Not What Was Expected
Paper set in the paper tray is misaligned. If No, go to next Action Align the edges of the paper, and load it flush against symptom. the front tray corners. Refer to . Xerox ® D95/D110/D125/D136 Copier/Printer 15-39 User Guide... - Page 198 Problem solving Symptoms Yes/No Causes and Actions Part of the image is Cause The paper is damp. missing on the copy Action Replace with paper from a new ream. If No, go to next Refer to . symptom. If problem is not solved, go to next Cause/Action. Cause Paper with folds or wrinkles has been set in the paper tray.
-
Page 199: Print Troubleshooting
The document is folded or bent. Action Straighten and properly reset the document. Print troubleshooting This section describes solutions for problems encountered during printing. 1. Unable to print 2. The print result was not what was expected Xerox ® D95/D110/D125/D136 Copier/Printer 15-41 User Guide... -
Page 200: Unable To Print
Problem solving Unable to print Symptoms Yes/No Causes and Actions Data remains in the Cause The printer is not powered on. printer icon Action Turn the power on. If No, go to next symptom. If problem is not solved, go to next Cause/Action. - Page 201 Delete unnecessary data to increase free space. If problem is not solved, go to next Cause/Action. Cause The printer is connected to multiple computers. Action Wait for a while, and then try printing again. Xerox ® D95/D110/D125/D136 Copier/Printer 15-43 User Guide...
-
Page 202: The Printed Result Is Not What Was Expected
Problem solving Symptoms Yes/No Causes and Actions Sent to printer Cause Out of paper. If No, go to next Action Supply paper to the printer. symptom. If problem is not solved, go to next Cause/Action. Cause No paper for the specified paper size. Action Set paper for the specified paper size. -
Page 203: Scan Troubleshooting
Increase the printable area of the machine, or decrease the document print area. Scan troubleshooting Note An optional package may be necessary for this feature. For more information, contact the Customer Support Center. Xerox ® D95/D110/D125/D136 Copier/Printer 15-45 User Guide... -
Page 204: Unable To Scan With The Machine
Problem solving Unable to scan with the machine Symptoms Yes/No Causes and Actions Document not fed Cause Document size is too small. properly from the Action The minimum size of the document that can be document feeder loaded on the document feeder is A5. If problem is not solved, go to next Cause/Action. -
Page 205: Unable To Import The Scanned Document Into The Computer
If problem is not solved, go to next Cause/Action. Cause Mailbox password forgotten. Action Unable to verify password. Set the password to Off, and then reset the password again. Refer to “Local Disk/Mailbox” in the System Administration Guide. Xerox ® D95/D110/D125/D136 Copier/Printer 15-47 User Guide... -
Page 206: Unable To Send The Scanned Document Over The Network (Ftp/Smb)
Problem solving Symptoms Yes/No Causes and Actions Scanner unable to scan Cause The scan driver is not installed. data due to TWAIN Action Install the scan driver. transmission error If No, go to next symptom. Operation halts during Cause Is the file size too big? scanning Action Reduce the resolution, or choose a compressed... -
Page 207: Problems With Sending Email
If problem is not solved, go to next Cause/Action. Cause Maximum sending e-mail size is exceeded Action Change the maximum sending e-mail size, or reduce the resolution. Refer to Maximum E-mail Size in the System Administration Guide. Xerox ® D95/D110/D125/D136 Copier/Printer 15-49 User Guide... - Page 208 Problem solving 15-50 User Guide...
-
Page 209: Specifications
Specifications D95 Copy specifications Item Copier Type Console Scanning Resolution 600 × 600dpi (23.6 × 23.6 dots/mm) Output Resolution 600 × 600dpi (23.6 × 23.6 dots/mm) Gradation 256 gradation Warm-up Time 6 minutes or less (when the room temperature at 68° F/20° C) Copy Document The maximum size is 297 ×... - Page 210 Trays 1-4, 6, 7 : 13 - 57 lb./52 - 216 gsm Tray 5 (Bypass) : 13 - 67lb./52 - 253 gsm Use Xerox recommended papers for best results. First Copy Output Time 3.5 seconds (When the Document Glass, 100% Values may differ Reduction/Enlargement, Tray 1, 8.5 x 11 in./A4 are used)
-
Page 211: D110/D125 Copy Specifications
Warm-up Time 5 minutes or less (when the room temperature at 68° F/20° C) Copy Document The maximum size is 297 × 432 mm (A3, 11 × 17in.) for both sheets and books Xerox ® D95/D110/D125/D136 Copier/Printer 16-3 User Guide... - Page 212 Trays 1-4, 6, 7 : 13 - 57 lb./52 - 216 gsm Tray 5 (Bypass) : 13 - 67lb./52 - 253 gsm Use Xerox recommended papers for best results. First Copy Output Time 3.5 seconds (When the Document Glass, 100% Values may differ Reduction/Enlargement, Tray 1, 8.5 x 11 in./A4 are used)
-
Page 213: D136 Copy Specifications
Warm-up Time 5 minutes or less (when the room temperature at 68° F/20° C) Copy Document The maximum size is 297 × 432 mm (A3, 11 × 17in.) for both sheets and books Xerox ® D95/D110/D125/D136 Copier/Printer 16-5 User Guide... - Page 214 Y direction from 7 x 19 in./182-488 mm. Copy Paper Trays 1-4 and HCF 6, 7: 13 - 57 lb./52 - 216 gsmTray 5 (Bypass) and OHCF 6, 7: 13 - 67 lb./52 - 253 gsmUse Xerox recommended papers for best results. First Copy Output Time A4 lateral/B &...
-
Page 215: Print Specifications
Jet 750C Plus), PCL5c/PCLXL (HP Color Laser Jet 5500), ESCP/ K, KS/KSSM Memory Capacity 512 MB (maximum 512 MB) Built-in Fonts PCL: European 82 type faces, symbol 86 sets PostScript: European 136 type faces Interface Standard: Ethernet (100Base-TX/10Base-T) USB 2.0 Xerox ® D95/D110/D125/D136 Copier/Printer 16-7 User Guide... -
Page 216: Scan Specifications
Specifications Type Built-in type Supported Protocol Ethernet: TCP/IP (SMB, LPD, Port9100, IPP, WSD, Novell Netware), NetBEUI (SMB), (IPX/SPX), (NetWare), EtherTalk (Apple Talk) Supported OS PCL5c: Microsoft Windows 7 Microsoft Windows 2000, Microsoft Windows XP, Microsoft Windows Server 2003, Microsoft Windows Vista PostScript: Microsoft Windows 2000, Microsoft Windows XP,... -
Page 217: Duplex Automatic Document Feeder (Dadf) Specifications
A5, A5, A4, A4, 8.5 × 11 in., 8.5 × 14 in. (SEF), 11 × 17 in. (SEF) Paper Capacity 250 sheets When using Xerox 20 lb./75 gsm paper. Document Changing Speed Monochrome: 80 sheets/min (8.5 x 11 in./A4 portrait, 1-... - Page 218 Specifications 16-10 User Guide...
-
Page 219: 11 In./A4
The two-tray High Capacity Feeder (HCF/Trays 6 and 7) provides an extra 4,000 sheet capacity of either 8.5 x 11 in. or A4 paper. Each tray holds 2000 sheets (from 16 lb. Bond to 80 lb. Cover/52 gsm to 216 gsm). Xerox ® D95/D110/D125/D136 Copier/Printer 17-1 User Guide... -
Page 220: Loading Media Into The Hcf (Trays 6 And 7)
High Capacity Feeder (HCF/Trays 6 and 7), 8.5 x 11 in./A4 Loading media into the HCF (Trays 6 and 1. Select the appropriate paper stock for your print job. 2. Pull out the tray slowly until it stops. 3. To change the paper size, perform the following: a) Remove any paper currently loaded in the tray. -
Page 221: Problem Solving
1. Pull out the tray where the paper jam occurred. Note To avoid tearing paper, review where the paper jam occurred before pulling out a tray. Torn paper remaining inside the machine can cause machine malfunction. Xerox ® D95/D110/D125/D136 Copier/Printer 17-3 User Guide... -
Page 222: Paper Jams Inside The Hcf Unit
High Capacity Feeder (HCF/Trays 6 and 7), 8.5 x 11 in./A4 2. Remove the jammed paper. Note If paper is torn, check inside the machine and remove it. 3. Gently push in the tray until it comes to a stop. Paper jams inside the HCF unit Always ensure that all paper jams, including any small ripped pieces of paper, are cleared before proceeding with your copy/print jobs. -
Page 223: Paper Jams Inside Lower Left Cover
Always ensure that all paper jams, including any small ripped pieces of paper, are cleared before proceeding with your copy/print jobs. 1. Open the front cover of the HCF. 2. Open the lower left cover while gripping the release lever. Xerox ® D95/D110/D125/D136 Copier/Printer 17-5 User Guide... -
Page 224: Paper Jams At Lever 1A And Knob 1C
High Capacity Feeder (HCF/Trays 6 and 7), 8.5 x 11 in./A4 3. Remove the jammed paper. Note If paper is torn, check inside the machine and remove it. 4. Close the lower left cover. 5. Close the front cover of the HCF completely. Note The machine will not operate if the cover is open even slightly. - Page 225 If paper is torn, check inside the machine and remove it. 3. Return lever 1a to the original position. 4. Close the front cover of the HCF completely. Note The machine will not operate if the cover is open even slightly. Xerox ® D95/D110/D125/D136 Copier/Printer 17-7 User Guide...
-
Page 226: Paper Jams At Lever 1B And Knob 1C
High Capacity Feeder (HCF/Trays 6 and 7), 8.5 x 11 in./A4 Paper jams at lever 1b and knob 1c Always ensure that all paper jams, including any small ripped pieces of paper, are cleared before proceeding with your copy/print jobs. 1. -
Page 227: Paper Jams At Lever 1D And Knob 1C
If paper is torn, check inside the machine and remove it. 3. Return lever 1d to the original position. 4. Close the front cover of the HCF completely. Note The machine will not operate if the cover is open even slightly. Xerox ® D95/D110/D125/D136 Copier/Printer 17-9 User Guide... -
Page 228: Fault Codes
High Capacity Feeder (HCF/Trays 6 and 7), 8.5 x 11 in./A4 Fault codes If a fault causes the copying/printing to stop abnormally or a malfunction occurs in the copier/printer, then a fault code and/or a message displays on the UI. Refer to the following table for fault codes and information on how to rectify the problem. -
Page 229: Trays 6/7 (Hcf) Specifications
Maximum: 8.5 x 11 in./A4 Media/paper weight Weight: 16 lb. Bond to 80 lb. Cover/52 gsm to 216 gsm Tray capacity Each tray holds 2,000 sheets for a total of 4,000 sheets (When using Xerox 20 lb./75 gsm paper) Xerox ® D95/D110/D125/D136 Copier/Printer 17-11... - Page 230 High Capacity Feeder (HCF/Trays 6 and 7), 8.5 x 11 in./A4 17-12 User Guide...
-
Page 231: Oversized High Capacity Feeder (Ohcf), 1 Or 2 Trays (Trays 6/7)
OHCF feeds a variety of stock sizes, including standard and oversized stock up to 13 x 19.2 in./330.2 x 488 mm. Each tray holds 2,000 sheets. Note The 1-tray OHCF is not available with D136 configurations. Xerox ® D95/D110/D125/D136 Copier/Printer 18-1 User Guide... -
Page 232: Postcard Bracket
Oversized High Capacity Feeder (OHCF), 1 or 2 trays (Trays 6/7) Postcard bracket The Postcard bracket is delivered with the OHCF from manufacturing. The Postcard bracket allows you to print on smaller size media without requiring post-processing cutting or sorting. The Postcard bracket specifically accommodates 4 x 6 in. (101.6 x 152.4 mm) SEF media. - Page 233 9. Run your print job. 10. Upon completion of your print job, remove the postcard stock and the Postcard bracket from the tray. 11. Store the Postcard bracket inside the OHCF front cover area. Xerox ® D95/D110/D125/D136 Copier/Printer 18-3 User Guide...
-
Page 234: Loading Media In The 1 Or 2-Tray Ohcf
Oversized High Capacity Feeder (OHCF), 1 or 2 trays (Trays 6/7) Loading media in the 1 or 2-Tray OHCF Loading paper in the OHCF (1 or 2 Trays) 1. Select the appropriate paper stock for your print job. 2. Pull out the tray slowly until it stops. 3. -
Page 235: Loading Transparencies In The Ohcf (1 Or 2 Trays)
5. Adjust the paper guides by pressing in the guide release and carefully moving the Edge Guide until it lightly touches the edge of the material in the tray. Xerox ® D95/D110/D125/D136 Copier/Printer 18-5 User Guide... -
Page 236: Print Jobs
Oversized High Capacity Feeder (OHCF), 1 or 2 trays (Trays 6/7) Do not load materials above the MAX line located on the rear Edge Guide. 6. If necessary, set the skew adjustment levers to the desired position for your print job. 7. -
Page 237: Print Jobs
If enabled by your System Administrator, the Paper Tray settings screen may be displayed on the UI. 10. If changes have been made to the paper tray, select the Change Settings button; otherwise, proceed to the next step. Xerox ® D95/D110/D125/D136 Copier/Printer 18-7 User Guide... -
Page 238: Skew Adjustment Levers
Oversized High Capacity Feeder (OHCF), 1 or 2 trays (Trays 6/7) a) Make the desired selections for Paper Type/Paper Weight, Paper Size, and Paper Color. b) If necessary, make the desired changes to paper curl and alignment adjustment. Note Refer to the System Administration Guide for detailed information on the paper curl and alignment adjustment options. -
Page 239: Ohcf Problem Solving
Always ensure that all paper jams, including any small ripped pieces of paper, are cleared before proceeding with your print jobs. Note Remedies differ according to the paper jam location. Follow the instructions displayed to remove the jammed paper. Xerox ® D95/D110/D125/D136 Copier/Printer 18-9 User Guide... -
Page 240: Paper Jams Inside The Ohcf Trays
Oversized High Capacity Feeder (OHCF), 1 or 2 trays (Trays 6/7) Paper jams inside the OHCF trays 1. Pull out the tray where the paper jam occurred. 2. Remove the jammed paper. Note If paper is torn, check inside the machine and remove it. 3. -
Page 241: Ohcf Paper Jams At Lever 1B And Knob 1C
If the front cover of the OHCF is not completely closed, a message will appear and the machine will not operate. OHCF paper jams at lever 1b and knob 1c 1. Open the front cover of the OHCF. Xerox ® D95/D110/D125/D136 Copier/Printer 18-11 User Guide... -
Page 242: Ohcf Paper Jams At Lever 1D And Knob 1C
Oversized High Capacity Feeder (OHCF), 1 or 2 trays (Trays 6/7) 2. Move the lever 1b to the right and turn the knob 1c to the right. Remove the jammed paper. Note If paper is torn, check inside the machine and remove it. 3. - Page 243 3. If the paper cannot be removed, turn the knob 1c clockwise, and then remove the jammed paper. Note If paper is torn, check inside the machine and remove it. 4. Return the lever 1d to the original position. Xerox ® D95/D110/D125/D136 Copier/Printer 18-13 User Guide...
-
Page 244: Ohcf Fault Codes
Oversized High Capacity Feeder (OHCF), 1 or 2 trays (Trays 6/7) 5. Close the front cover of the OHCF. Note If the front cover of the OHCF is not completely closed, a message will appear and the machine will not operate. OHCF fault codes 024-955 Cause: An OHCF tray is empty or out of paper. - Page 245 1. Check the paper loaded in the trays. 2. Power Off/On the machine. 3. If problems persist, contact the Customer Support Center. Note Trays other than the OHCF trays may be used in the interim. Xerox ® D95/D110/D125/D136 Copier/Printer 18-15 User Guide...
- Page 246 Oversized High Capacity Feeder (OHCF), 1 or 2 trays (Trays 6/7) 078-261 Cause: An OHCF tray has malfunctioned. Remedy: Perform the following: 1. Check the paper loaded in the trays. 2. Power Off/On the machine. 3. If problems persist, contact the Customer Support Center. Note Trays other than the OHCF trays may be used in the interim.
- Page 247 3. If problems persist, contact the Customer Support Center. Note Trays other than the OHCF trays may be used in the interim. 078-269 Cause: An OHCF tray has malfunctioned. Remedy: Perform the following: 1. Check the paper loaded in the trays. Xerox ® D95/D110/D125/D136 Copier/Printer 18-17 User Guide...
- Page 248 Oversized High Capacity Feeder (OHCF), 1 or 2 trays (Trays 6/7) 2. Power Off/On the machine. 3. If problems persist, contact the Customer Support Center. Note Trays other than the OHCF trays may be used in the interim. 078-270 Cause: An OHCF tray has malfunctioned. Remedy: Perform the following: 1.
- Page 249 1. Check the paper loaded in the trays. 2. Power Off/On the machine. 3. If problems persist, contact the Customer Support Center. Note Trays other than the OHCF trays may be used in the interim. Xerox ® D95/D110/D125/D136 Copier/Printer 18-19 User Guide...
- Page 250 Oversized High Capacity Feeder (OHCF), 1 or 2 trays (Trays 6/7) 078-278 Cause: An OHCF tray has malfunctioned. Remedy: Perform the following: 1. Check the paper loaded in the trays. 2. Power Off/On the machine. 3. If problems persist, contact the Customer Support Center. Note Trays other than the OHCF trays may be used in the interim.
- Page 251 3. If problems persist, contact the Customer Support Center. Note Trays other than the OHCF trays may be used in the interim. 078-942 Cause: An OHCF tray has malfunctioned. Remedy: Perform the following: 1. Check the paper loaded in the trays. Xerox ® D95/D110/D125/D136 Copier/Printer 18-21 User Guide...
-
Page 252: Ohcf Specifications
LEF: B5, 7.25 x 10.5 in. (executive), A4, 8.5 x 11 in., 8.0 x 10 in. Custom sizes: 182-330 mm (7.2-13 in.) width and 182-488 mm (7.2-19.2 in.) length Paper weight 18 lb. to 130 lb. cover/55-350 gsm Paper capacity 2000 sheets/drawer Important When using up to Xerox 24 lb./90 gsm paper. 18-22 User Guide... -
Page 253: Interface Module/Interface Cooling Module
The Interface Module is available with a machine configuration that is either D110 or D125 (either Copier/Printer or Printer only). The Interface Cooling Module is available only with the D136 configuration (either Copier/Printer or Printer only). Xerox ® D95/D110/D125/D136 Copier/Printer 19-1 User Guide... - Page 254 Interface Module/Interface Cooling Module Note The Interface Module is not available with the D95 Copier/Printer configuration. D110/D125 configurations For either Copier/Printer or Printer only, the Interface Module is required with the following finishing devices: GBC AdvancedPunch Perfect Binder (available only with the Copier/Printer with integrated controller)
-
Page 255: Module Overview
System Administration Guide for information on adjusting the paper curl. The paper curl buttons are discussed in more detail later in this section. Xerox ® D95/D110/D125/D136 Copier/Printer 19-3 User Guide... -
Page 256: Paper Path
Interface Module/Interface Cooling Module Paper path As media enters the module, it is fed to the module decurler for paper curl correction. The module decurler has both upper and lower decurler rolls that apply pressure to the media based upon the following: System default Manual selections made at the module control panel Based on the paper curl (decurl) settings, the module decurler gate routes the paper to... -
Page 257: Problem Solving
Remedies differ according to the paper jam location. Follow the instructions displayed to remove the jammed paper. Paper jams at lever 1a 1. Open the front cover of the module. 2. Move the lever 1a downward and remove the jammed paper. Xerox ® D95/D110/D125/D136 Copier/Printer 19-5 User Guide... -
Page 258: Paper Jams At Lever 2A
Interface Module/Interface Cooling Module 3. Return the lever 1a to the original position. 4. Close the front cover of the module. 5. Follow the instructions on the UI to clear other areas or to resume your print job. Paper jams at lever 2a 1. - Page 259 3. Return the lever 2a to the original position. 4. Close the front cover of the module. 5. Follow the instructions on the UI to clear other areas or to resume your print job. Xerox ® D95/D110/D125/D136 Copier/Printer 19-7 User Guide...
-
Page 260: Paper Jams At Lever 2B
Interface Module/Interface Cooling Module Paper jams at lever 2b 1. Open the front cover of the module. 2. Move the lever downward, turn the knob 2c counterclockwise, and remove the jammed paper. 3. Return the lever 2b to the original position. 19-8 User Guide... -
Page 261: Fault Codes
Fault codes The fault code table lists problems and suggested solutions that apply to the Interface Module/Interface Cooling. If the problem persists after following all instructions, call your Xerox Customer Support Center. 048-100 Cause: Paper jam: A jam occurred during feeding. - Page 262 Interface Module/Interface Cooling Module Remedy: Perform the following: 1. Open the Interface Module/Interface Cooling Module front door. 2. Carefully remove all sheets and paper scraps from the jam clearance areas. 3. Close the front door. Verify the paper used is within the approved paper specifications.
- Page 263 Ensure all jam clearance handles/levers are returned to their closed positions. After clearing all jams, remove any ejected paper from the finishing output area. Power Off/On the machine. 048-321 Cause: Interface Module/Interface Cooling Module communication failure or connection failure Remedy: Perform the following: Xerox ® D95/D110/D125/D136 Copier/Printer 19-11 User Guide...
- Page 264 Interface Module/Interface Cooling Module Check the connection between the Interface Module/Interface Cooling Module and the connected finishing device or devices. Fully clear any jams between the Interface Module/Interface Cooling Module and the connection finishing device or devices. Ensure all jam clearance handles/levers are returned to their closed positions. After clearing all jams, remove any ejected paper from the finishing output area.
- Page 265 3. Close the front door. Verify the paper used is within the approved paper specifications. 048-901 Cause: Paper jam: A jam occurred during feeding. A jam notification is displayed on the UI. Remedy: Perform the following: Xerox ® D95/D110/D125/D136 Copier/Printer 19-13 User Guide...
- Page 266 Interface Module/Interface Cooling Module 1. Open the Interface Module/Interface Cooling Module front door. 2. Carefully remove all sheets and paper scraps from the jam clearance areas. 3. Close the front door. Verify the paper used is within the approved paper specifications.
-
Page 267: High Capacity Stacker (Hcs)
1. Interface Module/Interface Cooling Module 2. High Capacity Stacker (HCS) Note The HCS is not available with the D95 Copier/Printer configuration. Important The HCS requires the Interface Module or the Interface Cooling Module. Module type depends on your product and machine configuration. The module acts as a communication device and paper path between the machine and the HCS. -
Page 268: Identifying The Components
High Capacity Stacker (HCS) Your system may accommodate a maximum of two High Capacity Stackers at one time. If your system has two stackers attached, they are referred to as B1 and B2. Also, with two stackers attached, and when one of them is full, automatic switching occurs between the two stackers to ensure maximum productivity for your system. -
Page 269: Control Panel
The Top Tray offers the following: Copies/prints are aligned easily without folds or wrinkles in the output. To enable easier pick-up of the output, the HCS can be stopped by selecting the Stop button on the machine’s UI. Xerox ® D95/D110/D125/D136 Copier/Printer 20-3 User Guide... -
Page 270: Unloading The Stacker Tray
High Capacity Stacker (HCS) Unloading the Stacker Tray 1. Press the Unload button on the HCS control panel. Wait until the Unload indicator lights and then open the HCS front door. 2. Open the front door after the Unload indicator lights. 3. -
Page 271: Problem Solving
Remedies differ according to the paper jam location. Follow the instructions displayed to remove the jammed paper. HCS entrance jams (E1, E2, and E3) Perform the following steps to clear the jam and resume printing: 1. Open the HCS Front Cover. Xerox ® D95/D110/D125/D136 Copier/Printer 20-5 User Guide... -
Page 272: Hcs Transport Jams (E4, E5, And E6)
High Capacity Stacker (HCS) 2. Lift the green handle(s) and/or rotate the green knob and remove all paper in the entrance area. 3. Close the green handle(s). 4. Close the HCS Front Cover. 5. If the UI indicates there is a jam in the print engine, follow the instructions on the screen to remove any paper in the area indicated. -
Page 273: Hcs Top Tray Jam (E7)
11. Follow the instructions displayed on the UI to resume printing. HCS top tray jam (E7) Perform the following steps to clear the jam and resume printing: 1. Remove any output delivered to the Top Tray. Xerox ® D95/D110/D125/D136 Copier/Printer 20-7 User Guide... -
Page 274: Hcs Exit Jam (E8)
High Capacity Stacker (HCS) 2. Open the HCS Front Cover. 3. Lift the green handle(s) and/or rotate the green knob and remove all paper in the entrance area. 4. Close the green handle(s). 5. Close the HCS Front Cover. 6. If the UI indicates there is a jam in the print engine, follow the instructions on the screen to remove any paper in the area indicated. -
Page 275: Hints And Tips For Using The Hcs
3. Adjust the paper curl by using the decurler controls on the top of the Interface Module/Interface Cooling Module. 4. If the output has not improved, adjust the paper curl again. 5. If the output still has not improved, call the Customer Support Center. Xerox ® D95/D110/D125/D136 Copier/Printer 20-9 User Guide... -
Page 276: Loss Of Power
High Capacity Stacker (HCS) Loss of power If power is interrupted to the HCS: Ensure that the power cord is plugged in to the proper wall receptacle. Ensure that the machine power is switched on. Ensure that the Ground Fault Indicator is in the On position. If the power has not been restored by checking the above items, then call for service. - Page 277 Cause: Stacker sensor fault Remedy: Perform the following: Power Off/On the machine If the problem still exists, contact the Customer Support Center. Carefully remove all sheets and paper scraps from jam clearance areas. Xerox ® D95/D110/D125/D136 Copier/Printer 20-11 User Guide...
- Page 278 High Capacity Stacker (HCS) 049-115 Cause: Stacker sensor fault Remedy: Perform the following: Power Off/On the machine If the problem still exists, contact the Customer Support Center. Carefully remove all sheets and paper scraps from jam clearance areas. 049-116 Cause: Stacker sensor fault Remedy: Perform the following: Power Off/On the machine If the problem still exists, contact the Customer Support Center.
- Page 279 Cause: Stacker cart sensor fault Remedy: Perform the following: Power Off/On the machine If the problem still exists, contact the Customer Support Center. 049-215 Cause: Stacker cart sensor fault Remedy: Perform the following: Xerox ® D95/D110/D125/D136 Copier/Printer 20-13 User Guide...
- Page 280 High Capacity Stacker (HCS) Power Off/On the machine If the problem still exists, contact the Customer Support Center. 049-216 Cause: Stacker cart sensor fault Remedy: Perform the following: Power Off/On the machine If the problem still exists, contact the Customer Support Center. 049-217 Cause: Stacker full sensor fault Remedy: Perform the following:...
- Page 281 Remedy: Perform the following: Power Off/On the machine If the problem still exists, contact the Customer Support Center. Carefully remove all sheets and paper scraps from jam clearance areas. 049-233 Cause: HCS sensor failure Xerox ® D95/D110/D125/D136 Copier/Printer 20-15 User Guide...
- Page 282 High Capacity Stacker (HCS) Remedy: Perform the following: Power Off/On the machine If the problem still exists, contact the Customer Support Center. Carefully remove all sheets and paper scraps from jam clearance areas. 049-234 Cause: HCS sensor failure Remedy: Perform the following: Power Off/On the machine If the problem still exists, contact the Customer Support Center.
- Page 283 Cause: HCS sensor failure Remedy: Perform the following: Power Off/On the machine If the problem still exists, contact the Customer Support Center. Carefully remove all sheets and paper scraps from jam clearance areas. Xerox ® D95/D110/D125/D136 Copier/Printer 20-17 User Guide...
- Page 284 High Capacity Stacker (HCS) 049-248 Cause: HCS sensor failure Remedy: Perform the following: Power Off/On the machine If the problem still exists, contact the Customer Support Center. Carefully remove all sheets and paper scraps from jam clearance areas. 049-251 Cause: HCS sensor failure Remedy: Perform the following: Power Off/On the machine If the problem still exists, contact the Customer Support Center.
- Page 285 If the problem still exists, contact the Customer Support Center. Carefully remove all sheets and paper scraps from jam clearance areas. 049-286 Cause: HCS communication or software fault Remedy: Perform the following: Power Off/On the machine Xerox ® D95/D110/D125/D136 Copier/Printer 20-19 User Guide...
- Page 286 High Capacity Stacker (HCS) If the problem still exists, contact the Customer Support Center. Check the connection between the Interface Cooling Module and the HCS. 049-287 Cause: HCS communication or software fault Remedy: Perform the following: Power Off/On the machine If the problem still exists, contact the Customer Support Center.
- Page 287 However, no paper is present; HCS sensor fault Remedy: Perform the following: Power Off/On the machine If the problem still exists, contact the Customer Support Center. Carefully remove all sheets and paper scraps from jam clearance areas. Xerox ® D95/D110/D125/D136 Copier/Printer 20-21 User Guide...
- Page 288 High Capacity Stacker (HCS) 049-905 Cause: The HCS detects paper at the HCS top tray, HCS bypass, or at the HCS stacker tray. However, no paper is present; HCS sensor fault Remedy: Perform the following: Power Off/On the machine If the problem still exists, contact the Customer Support Center. Carefully remove all sheets and paper scraps from jam clearance areas.
- Page 289 Cause: The HCS detects paper still remaining on stacker cart after the front door was opened/closed. Remedy: Perform the following: Power Off/On the machine If the problem still exists, contact the Customer Support Center. Open the HCS front door. Remove any paper from the stacker cart. Xerox ® D95/D110/D125/D136 Copier/Printer 20-23 User Guide...
- Page 290 High Capacity Stacker (HCS) Close the HCS front door. 049-968 Cause: Mix size, stacker full detection fault Remedy: Perform the following: Power Off/On the machine If the problem still exists, contact the Customer Support Center. Open the HCS front door. Remove any paper from the stacker cart.
-
Page 291: Specifications
Non-standard papers longer than 305 mm (12 in.) in the feed direction require 210 mm (8.3 in.) minimum measurement across the feed direction. Non-standard papers shorter than 254 mm (10 in.) in the cross-feed direction require 330 mm (13 in.) minimum measurement in the feed direction. Xerox ® D95/D110/D125/D136 Copier/Printer 20-25 User Guide... - Page 292 High Capacity Stacker (HCS) 20-26 User Guide...
-
Page 293: Perfect Binder (D110/D125/D136 With Integrated Controller)
The Perfect Binder is available with the D110, D125, and D136 Copier/Printer. The copier/printer must use the integrated controller and not a separate print server.The Interface Module is not available with the D95 Copier/Printer configuration. The Perfect Binder also requires an optional finisher, such as High Capacity Stacker, Standard Finisher, or Booklet Maker Finisher. - Page 294 Perfect Binder (D110/D125/D136 with integrated controller) Perfect binding is a process in which the leaves (pages) are bound by using an adhesive and trimming off the excess edges. The adhesive holds the interior sheets of the book together. Front and back covers may be included if desired. The final output is a finished, perfect bound book with a wrap-around cover.
-
Page 295: Binder Components
2 Compiler tray cover Open this cover to clear jams or to add a book block (printed, finished book) for manual mode operations. 3 Top cover Open this cover to clear paper jams. Xerox ® D95/D110/D125/D136 Copier/Printer 21-3 User Guide... - Page 296 Perfect Binder (D110/D125/D136 with integrated controller) 4 Compiler tray This tray gathers the finished sheets into a book block, and the book block is used to make the final finished book. 5 Cover inserter Load paper here for covers or inserts. 6 Adhesive filling tray Open this tray to insert adhesive pellets for the binding process.
-
Page 297: Cover Inserter
Adjust this guide so that it touches the loaded media in the tray. 3 Inserter cover Open this cover to access internal components. 4 Inserter inner cover Open this cover to clear jams. 5 Right inserter baffle Open this baffle to clear jams. Xerox ® D95/D110/D125/D136 Copier/Printer 21-5 User Guide... -
Page 298: Internal Components
Perfect Binder (D110/D125/D136 with integrated controller) Internal components 1 Cover transport This moves the cover sheets from the cover inserter to the binding area. 2 Bypass transport This transport moves the cover media to the binding area; the cover media may come either from the cover inserter tray or from the printer (network print job). -
Page 299: Binder Control Panel
Indicator is on (steady light) The binder is ready for operation. 3 Start/Adhesive temperature button Press this button to warm up the adhesive or to start the manual mode process for a job. Xerox ® D95/D110/D125/D136 Copier/Printer 21-7 User Guide... -
Page 300: Binder Circuit Breaker
Perfect Binder (D110/D125/D136 with integrated controller) Binder circuit breaker 1 Circuit breaker Located on the rear of the binder. Power to the machine is automatically interrupted when a circuit is overloaded or when a short circuit is detected. The overload causes the power switch to move to the Off position. -
Page 301: Book Binding Path
The bypass path is used when an incoming job does not require the binder. The job enters from the printer’s paper path, is fed through the binder, and is delivered to the next finishing device in line. Xerox ® D95/D110/D125/D136 Copier/Printer 21-9 User Guide... -
Page 302: Standard Path
Perfect Binder (D110/D125/D136 with integrated controller) Standard path 1 Incoming print job This paper path moves the incoming paper to the compiler tray. 2 Compiler tray Upon arrival to the compiler tray, the paper is then assembled into a book block. 3 Sub-grip/main grip The sub-grip and main grip move the book block to the adhesive unit. -
Page 303: Cover Inserter Path
The sub-grip and main grip move the book block to the adhesive unit. 4 Cover inserter If desired, cover media is loaded into this tray. 5 Bypass transport The bypass transport moves the cover media to the adhesive unit where it awaits the book block. Xerox ® D95/D110/D125/D136 Copier/Printer 21-11 User Guide... -
Page 304: Power On/Off
Perfect Binder (D110/D125/D136 with integrated controller) 6 Adhesive unit Adhesive is applied to the spine of the book block. 7 Binding area The adhesive-coated book block and cover media are bound together and then continue to the next phase of the binding process. If no cover media was specified, the book block continues through the paper path for trimming and delivery to the book stacker tray. -
Page 305: Loading Media In The Cover Inserter Tray
Ensure that there are no defects in the paper and that all edges of the paper are aligned prior to inserting the paper into the Inserter. a) Load the paper with the outside facing upwards and the top towards the rear of the tray. Xerox ® D95/D110/D125/D136 Copier/Printer 21-13 User Guide... -
Page 306: Removing Books From The Binder
Perfect Binder (D110/D125/D136 with integrated controller) b) Align the sheets against the back wall of the tray. 4. From the printer’s UI, enter the correct paper information, including size, type, and weight from the Tray Properties window. 5. Select OK to save the information and close the Tray Properties window. Removing books from the binder 1. -
Page 307: Perfect Binder Hints And Tips
For the copy mode, the Perfect Binder options are accessed from the copier/printer UI by selecting Services Home > Copy > Output Format > Perfect Binding. When the optional Perfect Binding feature is On, the following options are available: Xerox ® D95/D110/D125/D136 Copier/Printer 21-15 User Guide... - Page 308 Perfect Binder (D110/D125/D136 with integrated controller) Covers Choose one of three options: Blank Cover: Select this option either for blank covers (front and back) or when using preprinted covers. Print on Both: Select this option when printing on front and back covers and on both the inside and outside of the covers.
-
Page 309: Selecting The Perfect Binding Options
10. Select Paper Supply. a) If using preprinted covers, select Tray 9 for the cover paper supply. Ensure that the blank or preprinted cover stock is loaded into the Perfect Binder Tray 9. Xerox ® D95/D110/D125/D136 Copier/Printer 21-17 User Guide... -
Page 310: Manual Mode
Perfect Binder (D110/D125/D136 with integrated controller) b) Select the desired tray for the book block pages. Ensure that the correct paper stock is loaded into the selected tray. c) Select Save. The Cover & Book Block/Paper Supply screen displays. 11. Select Cut to Size. a) Select the desired option: No Trim, Minor Trim, Standard Size, or Custom Size. -
Page 311: Print Mode
8. From the Properties window, select Perfect Binder for the finishing device. 9. Select the desired Perfect Binder options. 10. Select Save. 11. Select OK to send the job to the printer. 12. Retrieve the completed job from the copier/printer output area. Xerox ® D95/D110/D125/D136 Copier/Printer 21-19 User Guide... -
Page 312: Maintenance
Perfect Binder (D110/D125/D136 with integrated controller) Maintenance While performing maintenance activities, always keep the following items in mind: It is recommended that you perform all cleaning procedures on a daily basis, preferably at the start of the day before the system is switched on and while the fuser is cool. -
Page 313: Adhesive Filling Tray
The adhesive pellets are transferred to the binder as the supply in the binder is consumed. The binder can contain about 0.8 pounds (380 grams) of adhesive. Xerox ® D95/D110/D125/D136 Copier/Printer 21-21 User Guide... -
Page 314: Replenishing The Adhesive Filling Tray
Perfect Binder (D110/D125/D136 with integrated controller) Replenishing the adhesive filling tray 1. Open the adhesive filling tray. 2. Open the outer cover. 3. Open the inner cover. 4. Using the supplied scoop, add adhesive pellets to the replenishment hopper until the height of the pellets is even and level and just below the adhesive limit line. - Page 315 4. Lift handle 2 to the right and remove any jammed paper. 5. Return handles 2, 1a, and 1b their original positions. 6. Close the compiler tray cover. 7. Follow the instructions displayed on the system UI to restart your print job. Xerox ® D95/D110/D125/D136 Copier/Printer 21-23 User Guide...
-
Page 316: Paper Jams In Area E3
Perfect Binder (D110/D125/D136 with integrated controller) Paper jams in area E3 Note If a jam occurs after the book block leaves the compiler area, the paper is purged with the spine glued to the book block but without a cover attached. 1. -
Page 317: Paper Jams In Area E4
5. Follow the instructions displayed on the system UI to restart your print job. Paper jams in areas E5 and E6 Note The binder’s left and right front doors will not open when the front cover LED is lit. 1. Open the left and right doors. Xerox ® D95/D110/D125/D136 Copier/Printer 21-25 User Guide... - Page 318 Perfect Binder (D110/D125/D136 with integrated controller) 2. Lift handle 5a and remove any jammed paper. 3. Return handle 5a to its original position. 4. Lift handle 5b, rotate knob 6d, and remove any jammed paper. 5. Return handle 5b to its original position. 6.
-
Page 319: General Problems
1. Switch off the system by pressing the power button (which is located on the Print Engine, Right Side). 2. Open the book stacker tray. 3. Check for the presence of paper cuttings/trimmings the tray. Xerox ® D95/D110/D125/D136 Copier/Printer 21-27 User Guide... -
Page 320: Adjusting The Printed Image And Trim
Perfect Binder (D110/D125/D136 with integrated controller) If cuttings/trimmings are present, remove them. 4. Close the book stacker tray. 5. Run a test job to ensure that the binder performs correctly. Adjusting the printed image and trim If the printed book is not within the desired parameters, you can adjust the settings from the system UI. - Page 321 Remedy: Close the cover.If fault continues, power on/off the system.If fault continues, contact the Customer Support Center. 053-404 Cause: Adhesive filling tray is open Remedy: Close the tray.If fault continues, power on/off the system.If fault continues, contact the Customer Support Center. Xerox ® D95/D110/D125/D136 Copier/Printer 21-29 User Guide...
- Page 322 Perfect Binder (D110/D125/D136 with integrated controller) 053-405 Cause: Trimmer waste tray is full Remedy: Empty the tray.Follow the instructions displayed on the system UI to restart your print job. 053-406 Cause: Book stacker tray is full Remedy: Empty the tray.Follow the instructions displayed on the system UI to restart your print job.
- Page 323 Remedy: Open the book stacker tray and remove the defective books. Dispose of accordingly. Close the tray. If fault continues, power on/off the system.If fault continues, contact the Customer Support Center. 153-705 Cause: Trimmer waste tray is open Xerox ® D95/D110/D125/D136 Copier/Printer 21-31 User Guide...
-
Page 324: Paper Size And Trim Recommendations For Perfect Bound Books
Perfect Binder (D110/D125/D136 with integrated controller) Remedy: Close the tray.If fault continues, power on/off the system.If fault continues, contact the Customer Support Center. Paper size and trim recommendations for perfect bound books Finished size Untrimmed book block Untrimmed cover Top trim Face trim size size... - Page 325 1 Book width Minimum: 8 in./203 mm Maximum: 11.7 in./297 mm 2 Book block (body pages) Minimum: 5.8 in./148 mm Maximum: 8.5 in./216 mm 3 Cover Minimum: 11.8 in./299 mm Maximum: 17.9 in./455 mm Xerox ® D95/D110/D125/D136 Copier/Printer 21-33 User Guide...
- Page 326 11 x 17 in./A3 (SEF), 9.84 x 13.90 in./B4 (SEF), SRA3/12.59 x 17.71 in. (SEF) Acceptable paper weights: 24-80 lb. bond (90-300 gsm), 350 gsm Xerox Colotech Binder’s bypass mode Refer to the printer’s specifications for acceptable paper sizes and weights. These paper types can be transported through the binder’s bypass mode directly to the next inline...
- Page 327 100 sheets of 8.5 x 11 in./A4 paper and trimming them to 6.93 x 9.84 in./B5 size). Book stacker tray capacity Approximately 4.17 in./106 mm width capacity Warm-up time Approximately 440 seconds (7 minutes) or less Xerox ® D95/D110/D125/D136 Copier/Printer 21-35 User Guide...
- Page 328 Perfect Binder (D110/D125/D136 with integrated controller) 21-36 User Guide...
-
Page 329: Standard/Booklet Maker Finisher
The following illustration shows the Booklet Maker Finisher. Note The Interface Cooling Module is required with D136 configurations. Note The Standard Finisher or Booklet Maker Finisher may be referred to simply as the finisher. Xerox ® D95/D110/D125/D136 Copier/Printer 22-1 User Guide... - Page 330 Standard/Booklet Maker Finisher The Standard/Booklet Maker finisher is comprised of the following components: Component Function Staple cartridge Contains staples; remove this cartridge to replace staples and clear staple jams. Staple waste container Container for staple waste; remove this container when full. Top tray The Top Tray is used for stacked output and can receive up to 500 sheets of 20 lb./80 gsm paper.
-
Page 331: Manual Decurling Feature On The Finisher
The finisher provides a manual decurling feature, which allows you to adjust the curl of the print output at point of need. Pressing the Decurler button on the finisher switches the decurl feature between the Auto, On, and Off modes. Xerox ® D95/D110/D125/D136 Copier/Printer 22-3 User Guide... -
Page 332: Folding Feature
Standard/Booklet Maker Finisher 1. Auto button: When this indicator is lit, the appropriate curl correction is automatically performed depending on the sizes and orientation of the printed output. The button should be set to Auto for most situations. The button automatically switches to the Auto mode when: The machine is switched on The machine exits the Power Saver mode... - Page 333 Sheet is not folded in two equal folds. The two folds are unequal which allows one edge of the Z-Fold Half Sheet to have a longer edge, and the longer edge allows for stapling or hole punching. Xerox ® D95/D110/D125/D136 Copier/Printer 22-5 User Guide...
-
Page 334: Loading Paper/Tabs In Tray 8/T1 (Post-Process Inserter)
Standard/Booklet Maker Finisher Loading paper/tabs in Tray 8/T1 (Post-Process Inserter) 1. If necessary, remove any remaining media that is currently loaded in Tray 8/T1. 2. Hold the center of the paper guides and slide them to their desired paper size. 3. -
Page 335: Maintenance
Always refer to www.xerox.com for the latest Customer Replaceable Units (CRUs) part numbers. Store supply items and Xerox parts in their original packages in a convenient location. Supply Item Supply Unit Shipped with finisher/Reorder Quantity Staple cartridge/staple waste 4 staple cartridges (5000 staples per cartridge) and 1... - Page 336 Standard/Booklet Maker Finisher 3. Grasp the Staple Cartridge handle located at R1, and pull out the staple cartridge from the finisher. 4. Hold the positions as indicated by the arrow and remove the staple cartridge from the unit. 5. Push a new staple cartridge into the unit. 6.
-
Page 337: Replace The Booklet Staple Cartridge
2. Open the right cover on the finisher. 3. While pressing the lever to the right, pull out the booklet staple cartridge unit. 4. Hold the tabs of the staple cartridge unit by the tabs and lift to remove it. Xerox ® D95/D110/D125/D136 Copier/Printer 22-9 User Guide... -
Page 338: Replacing The Staple Waste Container On The Finisher
Standard/Booklet Maker Finisher 5. While holding the tabs of a new staple cartridge, push it into the unit. 6. Push the staple cartridge unit to its original position in the machine. 7. Close the right cover on the finisher. Note A message will display and the machine will not operate if the right cover is open even slightly. - Page 339 5. Place the used staple waste container into a supplied plastic bag. Note Do not return a disassembled (used) container to the Customer Support Center. 6. Hold the new staple waste container by the R5 handle area and push it into the machine. Xerox ® D95/D110/D125/D136 Copier/Printer 22-11 User Guide...
-
Page 340: Empty The Punch Waste Container
Standard/Booklet Maker Finisher Note To prevent injury, do not put your fingers on top of the container. 7. Push R5 until the lock lever moves to the locked position. 8. Close the right cover on the finisher. Note A message will display and the machine will not operate if the right cover is open even slightly. -
Page 341: Finisher Problem Solving
A message will display and the machine will not operate if the right cover is open even slightly. Finisher problem solving Always ensure that all paper jams, including any small ripped pieces of paper, are cleared before proceeding with your print jobs. Xerox ® D95/D110/D125/D136 Copier/Printer 22-13 User Guide... -
Page 342: Paper Jams In Tray 8/T1 (Post-Process Inserter)
Standard/Booklet Maker Finisher Note Remedies differ according to the paper jam location. Follow the instructions displayed to remove the jammed paper. Paper jams in Tray 8/T1 (Post-Process Inserter) 1. Press the Cover button. 2. Open cover 1e and then remove the jammed paper and all paper loaded in the tray. Note If paper is torn, check inside the machine and remove it. -
Page 343: Paper Jams At Lever 1A And Knob 1C
If paper is torn, check inside the machine and remove it. 4. Return lever 1a to the original position. 5. Close the finisher left cover completely. Note The machine will not operate if the cover is open even slightly. Xerox ® D95/D110/D125/D136 Copier/Printer 22-15 User Guide... -
Page 344: Paper Jams At Lever 1D
Standard/Booklet Maker Finisher Paper jams at lever 1d 1. Make sure that the machine has stopped printing. 2. Open the finisher left cover. 3. Move lever 1d upwards and remove the jammed paper. Note If paper is torn, check inside the machine and remove it. 4. -
Page 345: Paper Jams At Lever 1B
If paper is torn, check inside the machine and remove it. 4. Move the lever 1b to the original position. 5. Close the finisher left cover completely. Note The machine will not operate if the cover is open even slightly. Xerox ® D95/D110/D125/D136 Copier/Printer 22-17 User Guide... -
Page 346: Paper Jams At Lever 3B And 3D
Standard/Booklet Maker Finisher Paper jams at lever 3b and 3d 1. Make sure that the machine has stopped printing. 2. Open the right cover on the finisher. 3. Move the levers 3b and 3d; remove the jammed paper. Note If paper is torn, check inside the machine and remove it. 4. -
Page 347: Paper Jams At Lever 3E And Knob 3C
4. Return the lever 3e its original position. 5. Close the right cover on the finisher. Note A message will display and the machine will not operate if the right cover is open even slightly. Xerox ® D95/D110/D125/D136 Copier/Printer 22-19 User Guide... -
Page 348: Paper Jams At Lever 3G And Knob 3F
Standard/Booklet Maker Finisher Paper jams at lever 3g and knob 3f 1. Make sure that the machine has stopped printing. 2. Open the right cover on the finisher. 3. Move the lever 3g and turn the knob 3f and remove the jammed paper. Note If paper is torn, check inside the machine and remove it. -
Page 349: Paper Jams At Lever 4B And Knob 3A
4. Return the lever 4b to its original position. 5. Close the right cover on the finisher. Note A message will display and the machine will not operate if the right cover is open even slightly. Xerox ® D95/D110/D125/D136 Copier/Printer 22-21 User Guide... -
Page 350: Paper Jams At Lever 2A And Knob 3A
Standard/Booklet Maker Finisher Paper jams at lever 2a and knob 3a 1. Make sure that the machine has stopped printing. 2. Open the right cover on the finisher. 3. Move the lever 2a and turn the knob 3a; remove the jammed paper. Note If paper is torn, check inside the machine and remove it. -
Page 351: Paper Jams At Lever 2B And Knob 2C
4. Return the lever 2b to its original position. 5. Close the right cover on the finisher. Note A message will display and the machine will not operate if the right cover is open even slightly. Xerox ® D95/D110/D125/D136 Copier/Printer 22-23 User Guide... -
Page 352: Paper Jams At 2C, 2E, 2F, And 2D
Standard/Booklet Maker Finisher Paper jams at 2c, 2e, 2f, and 2d 1. Make sure that the machine has stopped printing. 2. Open the right cover on the finisher. 3. Pull out the folder output tray ( 2d), swing lever 2e/2f to the right, and remove the jammed paper. -
Page 353: Paper Jams At 2D And Lever 2G
1. Make sure that the machine has stopped printing. 2. Open the right cover on the finisher. 3. Pull out the folder output tray ( 2d), swing lever the 2g, and remove the jammed paper. Xerox ® D95/D110/D125/D136 Copier/Printer 22-25 User Guide... -
Page 354: Paper Jams At Unit 4 And Knob 4A
Standard/Booklet Maker Finisher Note If paper is torn, check inside the machine and remove it. 4. Return the opened lever ( 2g) to its original position, and close the output tray ( 2d). 5. Close the right cover on the finisher. Note A message will display and the machine will not operate if the right cover is open even slightly. -
Page 355: Paper Jams At Finisher Top Tray
Paper jams at finisher top tray 1. Make sure that the machine has stopped printing. 2. Remove jammed paper from the finisher top tray. Note If paper is torn, check inside the machine and remove it. Xerox ® D95/D110/D125/D136 Copier/Printer 22-27 User Guide... -
Page 356: Paper Jams At Finisher Stacker Tray
Standard/Booklet Maker Finisher 3. Open and close the finisher right cover. Note The machine will not operate if the cover is open even slightly. Paper jams at finisher stacker tray 1. Make sure that the machine has stopped printing. 2. Remove jammed paper from the finisher stacker tray. Note If paper is torn, check inside the machine and remove it. -
Page 357: Paper Jams At The Optional Booklet Maker Tray
If paper is torn, check inside the machine and remove it. 4. Close the right cover on the finisher. Note A message will display and the machine will not operate if the right cover is open even slightly. Xerox ® D95/D110/D125/D136 Copier/Printer 22-29 User Guide... -
Page 358: Stapler Faults
Standard/Booklet Maker Finisher Stapler faults Follow the procedures provided when the output is not stapled or the staples are bent. Contact our Customer Support Center if the problem persists after you have tried the following solutions. Stapler faults on output may look similar to the ones shown in the following illustration. - Page 359 4. Check the inside of the finisher for any remaining staples, and if necessary, remove them. 5. Open the staple cartridge unit as shown and remove the jammed staple. Warning To avoid injury to your fingers, carefully remove the jammed staples from the cartridge. Xerox ® D95/D110/D125/D136 Copier/Printer 22-31 User Guide...
-
Page 360: Staple Jams In The Booklet Maker Cartridge
Standard/Booklet Maker Finisher 6. Reinstall the cartridge unit to its original position in the finisher. 7. Close the right cover on the finisher. Note A message will display and the machine will not operate if the right cover is open even slightly. - Page 361 To avoid injury to your fingers, carefully remove the jammed staples from the cartridge. 6. While holding the tabs of a new staple cartridge, push it into the unit. 7. Push the staple cartridge unit to its original position in the machine. Xerox ® D95/D110/D125/D136 Copier/Printer 22-33 User Guide...
-
Page 362: Reinserting The Standard Staple Cartridge
Standard/Booklet Maker Finisher 8. Close the right cover on the finisher. Note A message will display and the machine will not operate if the right cover is open even slightly. Reinserting the standard staple cartridge Use this procedure if the standard staple cartridge is inserted incorrectly into the machine. Note Always check inside the finisher for any individual staples or staple remnants. - Page 363 5. Move the lever on the rear of the staple cartridge unit in the downward direction. 6. While holding the lever down, turn over the unit and remove the staple cartridge from the unit. 7. Detach the outside staples along the line. Xerox ® D95/D110/D125/D136 Copier/Printer 22-35 User Guide...
-
Page 364: Fault Codes
If an error code appears that is not listed in the table below, or if an error persists after following the listed solution, then contact your Xerox Customer Support Center. If an error code is displayed, all print data of the machine as well as print data stored in the machine’s built-in memory is discarded. - Page 365 Check for any obstructions in the paper path and clear them. 012-215 Cause: The finisher malfunctioned. Remedy: Perform the following: Power off/on the machine, and if necessary, resend/restart your print job. If the error persists, contact the Customer Support Center. Xerox ® D95/D110/D125/D136 Copier/Printer 22-37 User Guide...
- Page 366 Standard/Booklet Maker Finisher Check for any obstructions in the paper path and clear them. 012-216 Cause: The finisher malfunctioned. Remedy: Perform the following: Power off/on the machine, and if necessary, resend/restart your print job. If the error persists, contact the Customer Support Center. Check for any obstructions in the paper path and clear them.
- Page 367 Power off/on the machine, and if necessary, resend/restart your print job. If the error persists, contact the Customer Support Center. Check for any obstructions in the paper path and clear them. 012-229 Cause: The finisher malfunctioned. Xerox ® D95/D110/D125/D136 Copier/Printer 22-39 User Guide...
- Page 368 Standard/Booklet Maker Finisher Remedy: Perform the following: Power off/on the machine, and if necessary, resend/restart your print job. If the error persists, contact the Customer Support Center. Check for any obstructions in the paper path and clear them. 012-230 Cause: The finisher malfunctioned. Remedy: Perform the following: Power off/on the machine, and if necessary, resend/restart your print job.
- Page 369 Remedy: Perform the following: Power off/on the machine, and if necessary, resend/restart your print job. If the error persists, contact the Customer Support Center. Check for any obstructions in the paper path and clear them. Xerox ® D95/D110/D125/D136 Copier/Printer 22-41 User Guide...
- Page 370 Standard/Booklet Maker Finisher 012-247 Cause: The finisher malfunctioned. Remedy: Perform the following: Power off/on the machine, and if necessary, resend/restart your print job. If the error persists, contact the Customer Support Center. Check for any obstructions in the paper path and clear them. 012-248 Cause: The finisher malfunctioned.
- Page 371 If the error persists, contact the Customer Support Center. Check for any obstructions in the paper path and clear them. 012-264 Cause: The finisher malfunctioned. Remedy: Perform the following: Power off/on the machine, and if necessary, resend/restart your print job. Xerox ® D95/D110/D125/D136 Copier/Printer 22-43 User Guide...
- Page 372 Standard/Booklet Maker Finisher If the error persists, contact the Customer Support Center. Check for any obstructions in the paper path and clear them. 012-265 Cause: The finisher malfunctioned. Remedy: Perform the following: Power off/on the machine, and if necessary, resend/restart your print job. If the error persists, contact the Customer Support Center.
- Page 373 Cause: Finisher staple fault Remedy: Check staples and reset correctly. 024-977 Cause: Finisher staple feeding is not ready. Remedy: Check staples and reset correctly. 024-978 Cause: Booklet maker finisher staple operation is not ready. Xerox ® D95/D110/D125/D136 Copier/Printer 22-45 User Guide...
- Page 374 Standard/Booklet Maker Finisher Remedy: Check staples and reset correctly. 024-979 Cause: The staple cartridge is empty Remedy: Check staples. Follow procedures to remove and replace staple cartridge. 024-980 Cause: The stacker tray is full Remedy: Remove all paper from the stacker tray. 024-981 Cause: The top tray is full.
-
Page 375: Specifications
Tray Type Top Tray: Collated/Uncollated Note Transparencies can be sent to the TOP tray of the finisher ONLY. Transparencies cannot be sent to the stacker (middle) tray. Stacker (middle) Tray: Collated/Uncollated (Offset available) Xerox ® D95/D110/D125/D136 Copier/Printer 22-47 User Guide... - Page 376 Standard/Booklet Maker Finisher Item Specification Supported Paper Size Top Tray: Maximum: SRA3, 13 x19 in., 12.6 x19.2 in., 330 x 488 mm (custom size) Minimum: 100 x 148 mm (SEF), 4 x 6 in. (SEF), A6 (SEF) postcards Stacker (middle) Tray: Maximum: 13 x 19 in.
- Page 377 Maximum number of sheets: Fold Fold and Staple: 25 sheets Fold only: 5 sheets When using Xerox 20 lb./75 gsm paper, only 14 sheets can be stapled if adding a cover. Paper size: Maximum: A3, 13 x 18 in. Minimum: A4 SEF, 8.5 x 11 in. SEF...
-
Page 378: Optional C/Z Folder
Z-Fold Half Sheet Z-paper size: 11 x 17 in./A3, 10 x 14 in./B4, 8K Capacity: Maximum: 80 sheets (A3/11 x 17 in. Xerox 20 lb./75 gsm paper Z folding) 20 sheets for 8K and 10 x 14 in./B4 Paper type: 16-24 lb./64-90 gsm... -
Page 379: Squarefold Trimmer Module
SquareFold Trimmer Module already assembled. Any adjustments to the image of the original and its placement on the booklet page must be done from the machine UI, your print driver, or from the print server. Xerox ® D95/D110/D125/D136 Copier/Printer 23-1 User Guide... -
Page 380: Identifying The Components
SquareFold Trimmer Module Note Always refer to the SquareFold Trimmer Module Hints and Tips section before using the SquareFold Trimmer Module. The hints and tips section provides valuable information about setting up your jobs, which in turn ensures the best possible output for your print/copy jobs. -
Page 381: Paper Path
Booklets exiting/leaving the SquareFold Trimmer Module may contain trim remnants/scraps from the previously trimmed booklet. This is due to static electricity build-up and is normal. If booklets contain trim remnants/scraps, simply remove and discard them. Xerox ® D95/D110/D125/D136 Copier/Printer 23-3 User Guide... -
Page 382: Control Panel
SquareFold Trimmer Module Control panel The control panel consists of the following: 1. Fault indicators: These indicators light when a fault or jam occurs in a particular area of the SquareFold Trimmer Module. This indicator lights when a jam occurs as the booklet is leaving the exit area of the finisher. -
Page 383: Square Fold Options
4. +1/High/High 1: Use this setting when you want a greater amount of pressure applied to the spine of the booklet, but not as much pressure as the +2 setting uses. 5. Auto/Normal: This is the machine default setting and is used for most jobs. Xerox ® D95/D110/D125/D136 Copier/Printer 23-5 User Guide... -
Page 384: Accessing The Square Fold Options
SquareFold Trimmer Module 6. -1/Low/Low 1: Use this setting when you want less pressure applied to the spine of the booklet. The less pressure applied to the booklet, the more rounded the booklet spine will be. 7. -2/Lower/Low 2: Select this setting when your finished booklet is five pages or less and on lighter weight paper (100 gsm or lower). -
Page 385: Accessing The Square Fold Options For Copy Jobs
SquareFold Trimmer Module. Trimmer options When using the Trimmer options, always consider the following: Booklets exiting/leaving the SquareFold Trimmer Module may contain trim remnants/scraps from the previously trimmed booklet. This is due to static electricity Xerox ® D95/D110/D125/D136 Copier/Printer 23-7 User Guide... - Page 386 SquareFold Trimmer Module build-up and is normal. If booklets contain trim remnants/scraps, simply remove and discard them. The Trimmer feature can be switched on or off based on user preference. When the feature is switched on, you can adjust the trim setting in 0.1 mm/0.0039 in. increments depending on your requirements for the finished booklet job.
-
Page 387: Trim Guidelines
210 x 297 mm) 12 x 18 in./305 x 6 x 9 in./152 x 80 lbs./120 458 mm 229 mm 12 x 18 in./305 x 6 x 9 in./152 x 80 lbs./120 458 mm 229 mm Xerox ® D95/D110/D125/D136 Copier/Printer 23-9 User Guide... -
Page 388: Accessing The Trimmer Options
SquareFold Trimmer Module Number of Approximate Scenario Finished booklet Paper weight pages in Paper Size trim setting number size (lbs./gsm) finished (mm) booklet 12 x 18 in./305 x 6 x 9 in./152 x 80 lbs./120 458 mm 229 mm 12 x 18 in./305 x 6 x 9 in./152 x 28 lbs./105 458 mm... -
Page 389: Hints And Tips
Does the booklet contain full-page images? Are you using preprinted covers with full-page images? Are you trimming the booklet? Do you need to shift any full-page images in order to ensure they fit on the finished booklet? Xerox ® D95/D110/D125/D136 Copier/Printer 23-11 User Guide... -
Page 390: Follow These Tips
SquareFold Trimmer Module These are important questions which can affect the output of your booklet jobs, especially if you are using full-page images and trimming the booklet edges. Follow these tips Follow these tips to ensure you get your desired output: Always run one or more test prints of your job before running a larger output quantity. -
Page 391: Clearing Jams
Use the following procedure to clear jams when the E1 and/or E2 LED is lit on the SquareFold Trimmer Module control panel. 1. Make sure that the machine is not in operation, and press the button on the left cover of the Trimmer unit to open the cover. Xerox ® D95/D110/D125/D136 Copier/Printer 23-13 User Guide... - Page 392 SquareFold Trimmer Module 2. Remove the jammed paper. 3. If you cannot remove the paper in Step 2, open the right cover of the finisher. 4. Turn the knob 4a to the right, and then remove the jammed paper. 5. Close the left cover of the Trimmer unit. 6.
-
Page 393: Clearing E3 Jams
1. Make sure that the machine is not in operation, and press the button on the right cover of the Trimmer unit to open the cover. 2. Remove the jammed paper. 3. Close the right cover of the Trimmer unit. Xerox ® D95/D110/D125/D136 Copier/Printer 23-15 User Guide... -
Page 394: Fault Codes
SquareFold Trimmer Module Fault codes If a jam/fault occurs in the SquareFold Trimmer Module, the machine’s UI displays a jam/fault message. The following table provides a list of fault codes for the SquareFold Trimmer Module and a list of related finisher fault codes. Note The top covers cannot be opened during normal operation or when the machine is idle. - Page 395 2. Carefully remove all sheets and paper scraps from jam clearance areas. 3. Close the SquareFold Trimmer Module Top Left and Right Covers. 4. Check the Trimmer Waste Container: If full, empty the container and reinsert it in the SquareFold Trimmer Module. Xerox ® D95/D110/D125/D136 Copier/Printer 23-17 User Guide...
- Page 396 SquareFold Trimmer Module If the container is partially pulled out, push it completely in. 5. If necessary, follow any remaining instructions on the machine’s UI. 6. If fault persists, repeat the previous steps; if fault persists after that, call for service. 013-103 Cause: Jam/fault with the SquareFold Trimmer Module Remedy: Perform the following:...
- Page 397 Remedy: Perform the following: 1. Power off/on the machine. 2. If fault persists, call for service. 013-223 Cause: Jam or communication error with the SquareFold Trimmer Module Remedy: Perform the following: 1. Power off/on the machine. Xerox ® D95/D110/D125/D136 Copier/Printer 23-19 User Guide...
- Page 398 SquareFold Trimmer Module 2. If fault persists, call for service. 013-224 Cause: Jam or communication error with the SquareFold Trimmer Module Remedy: Perform the following: 1. Power off/on the machine. 2. If fault persists, call for service. 013-225 Cause: Jam or communication error with the SquareFold Trimmer Module Remedy: Perform the following: 1.
- Page 399 Cause: Jam or communication error with the SquareFold Trimmer Module Remedy: Perform the following: 1. Power off/on the machine. 2. If fault persists, call for service. 013-237 Cause: Jam or communication error with the SquareFold Trimmer Module Xerox ® D95/D110/D125/D136 Copier/Printer 23-21 User Guide...
- Page 400 SquareFold Trimmer Module Remedy: Perform the following: 1. Power off/on the machine. 2. If fault persists, call for service. 013-238 Cause: Jam or communication error with the SquareFold Trimmer Module Remedy: Perform the following: 1. Power off/on the machine. 2. If fault persists, call for service. 013-239 Cause: Jam or communication error with the SquareFold Trimmer Module Remedy: Perform the following:...
- Page 401 If full, empty the container and reinsert it in the SquareFold Trimmer Module. If the container is partially pulled out, push it completely in. 5. If necessary, follow any remaining instructions on the machine’s UI. Xerox ® D95/D110/D125/D136 Copier/Printer 23-23 User Guide...
- Page 402 SquareFold Trimmer Module 6. If fault persists, repeat the previous steps; if fault persists after that, call for service. 013-916 Cause: Jam/fault with the SquareFold Trimmer Module Remedy: Perform the following: 1. Open the Top Left and Right Covers of the SquareFold Trimmer Module. 2.
- Page 403 Cause: Booklet Tray on the SquareFold Trimmer Module is full Remedy: Perform the following: 1. Remove any booklets from the tray. 2. If fault persists, power off/on the machine. 3. If fault persists, call for service. Xerox ® D95/D110/D125/D136 Copier/Printer 23-25 User Guide...
-
Page 404: Technical Data
SquareFold Trimmer Module Technical data Specifications Item Specifications Paper size Maximum: 13 x 18 in./330 x 457 mm Minimum: 8.5 x 11 in./A4 SEF Note The SquareFold Trimmer Module requires both the Interface Cooling Module and the Booklet Maker Finisher. Trim capacity 5-20 sheet booklet (up to 80 imaged sides) at 24 lb./90 gsm 5-25 sheet booklet (up to 100 imaged sides) at 200 lb./80 gsm... -
Page 405: Standard Finisher Plus
Note The Standard Finisher Plus requires either the Interface Module or the Interface Cooling Module (depending on your product and machine configuration). Note The Standard Finisher Plus is not available with the D95 Copier/Printer configuration. Xerox ® D95/D110/D125/D136 Copier/Printer 24-1... -
Page 406: Finisher Module
Standard Finisher Plus The Standard Finisher Plus consists of these two modules: 1. Finisher Module 2. Finishing Transport Output prints are fed from the machine (and any attached optional finishing device) to the Finisher Module. The Finishing Transport serves as an interface to transfer paper from the Finisher Module and the attached third-party output device. -
Page 407: Folding Feature
The option folds your prints in half (single or bi-folding) or in thirds (C-fold or Z-fold types). The folding option is selected from the print driver. Xerox ® D95/D110/D125/D136 Copier/Printer 24-3 User Guide... -
Page 408: Fold Types
Standard Finisher Plus Note In order to use the folding option, the orientation of documents must be short-edge feed (SEF). You must select a paper tray that contains SEF stock. Fold types Important The Single Fold (Bi-Fold) option is available only with the Booklet Maker Finisher. The C-Fold and Z-Fold options are available only with the C/Z Folder. -
Page 409: Loading Paper/Tabs In Tray 8/T1 (Post-Process Inserter)
If the media is tab stock, load the tab side to be fed first (in the direction of the arrow as shown in the above illustration). 4. From the Tray Properties window, enter the correct paper information, including size, type, weight, and if necessary, decurler and/or alignment option Xerox ® D95/D110/D125/D136 Copier/Printer 24-5 User Guide... -
Page 410: Finishing Transport
Standard Finisher Plus If enabled by your System Administrator, the Paper Tray Properties screen may be displayed on the UI. 5. Select OK to save the information and close the Tray Properties window. Finishing Transport Finishing Transport main components The Finishing Transport is comprised of the following components: Component Function Finishing Transport... -
Page 411: Finishing Transport Status Indicators
Paper jam indication Open front door Area 1 Paper jam in Area 1 Area 2 Paper jam in Area 2 Area 3 Paper jam in Area 3 Area 4 Paper jam in Area 4 Xerox ® D95/D110/D125/D136 Copier/Printer 24-7 User Guide... -
Page 412: Standard Finisher Plus Maintenance
Standard Finisher Plus Standard Finisher Plus maintenance Standard Finisher Plus consumable supplies Xerox supplies, paper, and throughput material can be ordered from Xerox by going to www.xerox.com and clicking on either the Contact Us link for specific contact information/telephone numbers in your area or by clicking on the Supplies and entering/selecting your specific machine information (product family and model type). - Page 413 6. Reinstall the cartridge unit to its original position in the finisher. 7. Close the right cover on the finisher. Note A message will display and the machine will not operate if the right cover is open even slightly. Xerox ® D95/D110/D125/D136 Copier/Printer 24-9 User Guide...
-
Page 414: Replacing The Staple Waste Container On The Finisher
Standard Finisher Plus Replacing the Staple Waste Container on the finisher The machine displays a message indicating that the Staple Waste Container is full. To replace the container: 1. Make sure that the machine has stopped printing. 2. Open the right cover on the finisher. 3. - Page 415 7. Push R5 until the lock lever moves to the locked position. 8. Close the right cover on the finisher. Note A message will display and the machine will not operate if the right cover is open even slightly. Xerox ® D95/D110/D125/D136 Copier/Printer 24-11 User Guide...
-
Page 416: Empty The Punch Waste Container
Standard Finisher Plus Empty the Punch Waste Container The UI displays a message indicating when it is time to empty the Punch Waste Container. Caution Only remove the Punch Waste Container while the system is powered ON. If you switch off the power when emptying the container, the machine cannot detect that the container was emptied. -
Page 417: Problem Solving
Paper jams in the Finisher Module Paper jams in Tray 8/T1 (Post-Process Inserter) 1. Press the Cover button. 2. Open cover 1e and then remove the jammed paper and all paper loaded in the tray. Xerox ® D95/D110/D125/D136 Copier/Printer 24-13 User Guide... -
Page 418: Paper Jams Inside The Finisher Left Cover
Standard Finisher Plus Note If paper is torn, check inside the machine and remove it. 3. Fan the paper you removed, making sure that all four corners are neatly aligned, and then load them again. 4. Push cover 1e until you hear it click into place. Note A message is displayed and the machine does not operate if the cover is open even slightly. - Page 419 Note The machine will not operate if the cover is open even slightly. Paper jams at lever 1d 1. Make sure that the machine has stopped printing. 2. Open the finisher left cover. Xerox ® D95/D110/D125/D136 Copier/Printer 24-15 User Guide...
- Page 420 Standard Finisher Plus 3. Move lever 1d upwards and remove the jammed paper. Note If paper is torn, check inside the machine and remove it. 4. Move the lever 1d to the original position. 5. Close the finisher left cover completely. Note The machine will not operate if the cover is open even slightly.
-
Page 421: Paper Jams Inside The Finisher Right Cover
Paper jams at lever 3b and 3d Always ensure that all paper jams, including any small ripped pieces of paper, are cleared before proceeding with your print jobs. 1. Make sure that the machine has stopped printing. Xerox ® D95/D110/D125/D136 Copier/Printer 24-17 User Guide... - Page 422 Standard Finisher Plus 2. Open the right cover on the finisher. 3. Move the levers 3b and 3d; remove the jammed paper. Note If paper is torn, check inside the machine and remove it. 4. Return the levers 3b and 3d to their original positions. 5.
- Page 423 3. Move the lever 3e and turn the knob 3c; remove the jammed paper. Note If paper is torn, check inside the machine and remove it. 4. Return the lever 3e its original position. Xerox ® D95/D110/D125/D136 Copier/Printer 24-19 User Guide...
- Page 424 Standard Finisher Plus 5. Close the right cover on the finisher. Note A message will display and the machine will not operate if the right cover is open even slightly. Paper jams at lever 3g and knob 3f Always ensure that all paper jams, including any small ripped pieces of paper, are cleared before proceeding with your print jobs.
- Page 425 1. Make sure that the machine has stopped printing. 2. Open the right cover on the finisher. 3. Move the lever 4b and turn the knob 3a; remove the jammed paper. Xerox ® D95/D110/D125/D136 Copier/Printer 24-21 User Guide...
-
Page 426: Paper Jams At The Optional C/Z Folder
Standard Finisher Plus Note If paper is torn, check inside the machine and remove it. 4. Return the lever 4b its original position. 5. Close the right cover on the finisher. Note A message will display and the machine will not operate if the right cover is open even slightly. - Page 427 4. Return the lever 2a to its original position. 5. Close the right cover on the finisher. Note A message will display and the machine will not operate if the right cover is open even slightly. Xerox ® D95/D110/D125/D136 Copier/Printer 24-23 User Guide...
- Page 428 Standard Finisher Plus Paper jams at lever 2b and knob 2c Always ensure that all paper jams, including any small ripped pieces of paper, are cleared before proceeding with your print jobs. 1. Make sure that the machine has stopped printing. 2.
- Page 429 2. Open the right cover on the finisher. 3. Pull out the folder output tray ( 2d), swing lever 2e to the right, and remove the jammed paper. Note If paper is torn, check inside the machine and remove it. Xerox ® D95/D110/D125/D136 Copier/Printer 24-25 User Guide...
- Page 430 Standard Finisher Plus 4. If you cannot remove the paper, return the lever 2e to its original position. Swing the lever 2e, turn the knob 2c to the right, and remove the jammed paper. Note If paper is torn, check inside the machine and remove it. 5.
- Page 431 4. Return the opened lever ( 2g) to its original position, and close the output tray ( 2d). 5. Close the right cover on the finisher. Note A message will display and the machine will not operate if the right cover is open even slightly. Xerox ® D95/D110/D125/D136 Copier/Printer 24-27 User Guide...
- Page 432 Standard Finisher Plus Paper jams in areas 4b and 4c Always ensure that all paper jams, including any small ripped pieces of paper, are cleared before proceeding with your print jobs. 1. Make sure that the machine has stopped printing. 2.
-
Page 433: Paper Jams At The Finisher Output Area
Note If paper is torn, check inside the machine and remove it. 3. Open and close the finisher right cover. Note The machine will not operate if the cover is open even slightly. Xerox ® D95/D110/D125/D136 Copier/Printer 24-29 User Guide... -
Page 434: Paper Jams In The Finishing Transport
Standard Finisher Plus Paper jams at finisher stacker tray 1. Make sure that the machine has stopped printing. 2. Remove jammed paper from the finisher stacker tray. Note If paper is torn, check inside the machine and remove it. 3. Open and close the finisher right cover. Note The machine will not operate if the cover is open even slightly. - Page 435 5. Close the Finishing Transport front door. 6. Ensure that the paper jam indication is cleared from the Finishing Transport status display. 7. Follow the instructions on the UI to restart your print job. Xerox ® D95/D110/D125/D136 Copier/Printer 24-31 User Guide...
-
Page 436: Paper Jams In Area 2
Standard Finisher Plus Paper jams in area 2 Remedies differ according to the paper jam location. Follow the instructions displayed to remove the jammed paper. Always ensure that all paper jams, including any small ripped pieces of paper, are cleared before proceeding with your print jobs. -
Page 437: Paper Jams In Area 3
5. Close the Finishing Transport front door. 6. Ensure that the paper jam indication is cleared from the Finishing Transport status display. 7. Follow the instructions on the UI to restart your print job. Xerox ® D95/D110/D125/D136 Copier/Printer 24-33 User Guide... -
Page 438: Paper Jams In Area 4
Standard Finisher Plus Paper jams in area 4 Remedies differ according to the paper jam location. Follow the instructions displayed to remove the jammed paper. Always ensure that all paper jams, including any small ripped pieces of paper, are cleared before proceeding with your print jobs. -
Page 439: Stapler Faults
Perform the following procedure to clear staple jams in the standard staple cartridge. Note Always check inside the finisher for any individual staples or staple remnants. 1. Make sure that the machine has stopped printing. Xerox ® D95/D110/D125/D136 Copier/Printer 24-35 User Guide... - Page 440 Standard Finisher Plus 2. Open the right cover on the finisher. 3. Grasp the Staple Cartridge handle located at R1, and pull out the staple cartridge from the finisher. 4. Check the inside of the finisher for any remaining staples, and if necessary, remove them.
-
Page 441: Standard Finisher Plus Fault Codes
Finisher Module fault codes If an error code appears that is not listed in the table below, or if an error persists after following the listed solution, then contact your Xerox Customer Support Center. 013-108 Cause: The transport in sensor in the Finishing Transport did not switch ON within a specified amount of time. -
Page 442: Finishing Transport Fault Codes
If the fault persists, contact the Customer Support Center. Finishing Transport fault codes If an error code appears that is not listed in the table below, or if an error persists after following the listed solution, then contact your Xerox Customer Support Center. 051-100 Cause: Paper jam... - Page 443 If the fault persists, contact the Customer Support Center. 051-105 Cause: Paper jam Remedy: Perform the following: Check for any obstructions or paper jams in the Finishing Module and Finishing Transport paper paths and clear them. Xerox ® D95/D110/D125/D136 Copier/Printer 24-39 User Guide...
- Page 444 Standard Finisher Plus If necessary, power Off/On the machine, and if necessary, resend/restart your print job. If the fault persists, contact the Customer Support Center. 051-106 Cause: Paper jam Remedy: Perform the following: Check for any obstructions or paper jams in the Finishing Module and Finishing Transport paper paths and clear them.
- Page 445 051-310 Cause: Finishing Transport firmware fault upgrade Remedy: Perform the following: If necessary, power Off/On the machine, and if necessary, resend/restart your print job. If the fault persists, contact the Customer Support Center. Xerox ® D95/D110/D125/D136 Copier/Printer 24-41 User Guide...
-
Page 446: Third-Party Dfa Fault Codes
Document Finishing Architecture (DFA) device. If an error code appears that is not listed in the table below, or if an error persists after following the listed solution, then contact your Xerox Customer Support Center. 051-910... - Page 447 If necessary, refer to the DFA user documentation for setting/changing profile values. If necessary, power Off/On the machine, and if necessary, resend/restart your print job. If the fault persists, contact the Customer Support Center. Xerox ® D95/D110/D125/D136 Copier/Printer 24-43 User Guide...
-
Page 448: Specifications
Standard Finisher Plus Specifications This section provides specifications on the Standard Finisher Plus. Finisher Module specifications Item Specification Tray Type Top Tray: Collated/Uncollated Stacker (middle) Tray: Collated/Uncollated (Offset available) Supported Paper Size Top Tray: Maximum: SRA3, 13 x19 in., 12.6 x19.2 in., 330 x 488 mm (custom size) Minimum: 100 x 148 mm (SEF), 4 x 6 in. - Page 449 *: Angled stapling for A3 and A4 Hole Punching Supported paper size: Maximum: A3/11 x 17 in. Minimum: B5 LEF (2 holes), A4 LEF (4 holes) Number of holes: 2, 4, 3 (optional) Paper type: 55-220 gsm Xerox ® D95/D110/D125/D136 Copier/Printer 24-45 User Guide...
- Page 450 Maximum number of sheets: Fold Fold and Staple: 25 sheets Fold only: 5 sheets When using Xerox 20 lb./75 gsm paper, only 14 sheets can be stapled if adding a cover. Paper size: Maximum: A3, 13 x 18 in. Minimum: A4 SEF, 8.5 x 11 in. SEF...
-
Page 451: Optional C/Z Folder
Z-Fold Half Sheet Z-paper size: 11 x 17 in./A3, 10 x 14 in./B4, 8K Capacity: Maximum: 80 sheets (A3/11 x 17 in. Xerox 20 lb./75 gsm paper Z folding) 20 sheets for 8K and 10 x 14 in./B4 Paper type: 16-24 lb./64-90 gsm... - Page 452 Standard Finisher Plus 24-48 User Guide...
- Page 453 World Wide Web 2-1 Selecting DFA copy options 4-3 High Capacity Feeder (HCF) Document glass Problem solving 15-1, 17-3 basic copying using the document glass High Capacity Stacker (HCS) 1-12 components 20-2 control panel 20-3 Xerox ® D95/D110/D125/D136 Copier/Printer User Guide...
- Page 454 Index fault codes 20-10 Machine serial number hints and tips 20-9 Current System Software overview 20-1 Machine Configuration paper jams Software Version E1, E2, and E3 20-5 Paper Tray Status E4, E5, and E6 20-6 Print Reports E7 20-7 Overwrite Hard E8 20-8 Disk power, loss of 20-10...
- Page 455 2d and lever 2g 24-26 loading in the OHCF (Trays 6/7) 18-6, 18-7 finisher stacker tray 22-28, 24-30 loading in Trays 1, 2, 3, and 4 3-4 finisher top tray 22-27, 24-29 Print Reports 13-2 Xerox ® D95/D110/D125/D136 Copier/Printer User Guide...
- Page 456 Index Print server trimming guidelines 23-9 overview 1-7 trimmer options 23-7 Printed output problems Standard Finisher 1-12 paper curl settings on the Interface Module Standard Finisher Plus 1-14, 24-1 19-4 fault codes printing 11-1 Finisher Module 24-37 Problem solving Finishing Transport 24-38 High Capacity Stacker (HCS) 20-5 third-party DFA 24-42 Interface Module problem solving...
- Page 457 Usage Counters Tools User Account Billing Information 13-5 Paper Tray Attributes 13-6 Tools tab 13-6 Transparencies loading in the OHCF (Trays 6/7) 18-5 World Wide Web help loading in Trays 1-4 3-5 www.xerox.com 2-1 Xerox ® D95/D110/D125/D136 Copier/Printer User Guide...
- Page 458 Index User Guide...