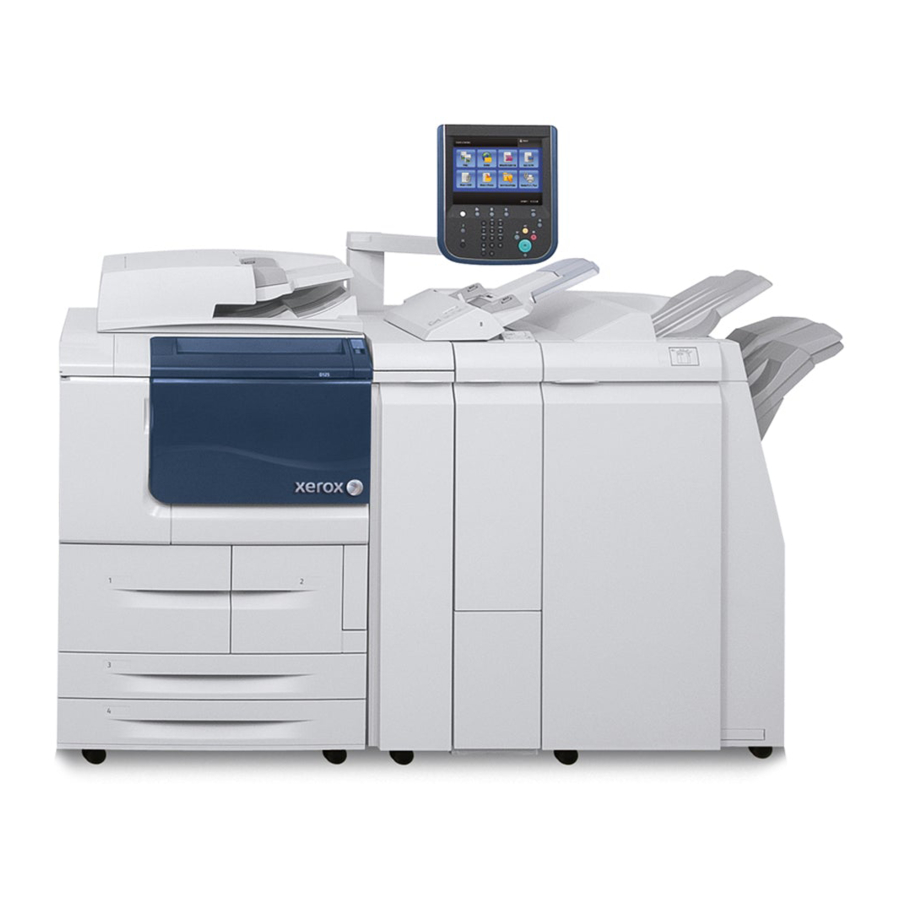
Xerox D95 Supplementary Manual
Xerox d95/d110/d125 copier/printer security function supplementary guide
Hide thumbs
Also See for D95:
- User manual (460 pages) ,
- System administration manual (250 pages) ,
- Installation manual (14 pages)

Related Manuals for Xerox D95


Summary of Contents for Xerox D95
- Page 1 Version 1.0 February 2012 ® Xerox D95/D110/D125 Copier/Printer Security Function Supplementary Guide...
- Page 3 ©2012 Xerox Corporation. All rights reserved. Xerox®, Xerox and Design®, CentreWare® and FreeFlow® are trademarks of Xerox Corporation in the United States and/or other countries. Microsoft® and Windows® and registered trademarks of Microsoft Corporation. BR3663...
-
Page 5: Table Of Contents
Set Self Test ............................14 Set Software Download ........................15 ® ® Initial Settings Procedures Using Xerox CentreWare Internet Services ........................17 ® ® Preparations for Settings on the Xerox CentreWare Internet Services ....17 ® Xerox D95/D110/D125 Copier/Printer Security Function Supplementary Guide... - Page 6 Create/View User Accounts ......................36 Change User Passcode by General User ................... 37 Job Deletion by System Administrator ..................38 Folder / Stored File Settings ......................38 Folder Service Settings ......................38 ® Xerox D95/D110/D125 Copier/Printer Security Function Supplementary Guide...
- Page 7 Folder Setup ..........................48 Import the files ........................49 Printing Job Deletion ......................... 49 ® ® Change User Passcode by System Administrator (Using Xerox CentreWare Internet Services) ..........................49 Problem Solving ....................51 Fault Clearance Procedure ......................51 Fault Codes............................52 Security @ Xerox ....................
-
Page 9: Before Using The Security Function
For information on the other features available for the machine, refer to your User Guide or your System Administrator Guide. ® The security features of the Xerox D95/D110/D125 Copier/Printer are supported by the following ROM versions. Controller + P S ROM Ver. -
Page 10: Security Features
Security Features ® Xerox D95/D110/D125 Copier/Printer have the following security features: Hard Disk Data Overwrite • Hard Disk Data Encryption • User Authentication • System Administrator’s Security Management • Customer Engineer Operation Restriction • Security Audit Log • Internal Network data protection •... -
Page 11: Settings For The Secure Operation
When a problem occurs in the hard disk. • Without the correct encryption key. • Without the correct System Administrator ID and passcode when setting [Service Rep. • Restricted Operation] to [On]. ® Xerox D95/D110/D125 Copier/Printer Security Function Supplementary Guide... -
Page 12: Starting Use Of The Data Encryption Feature And Changing The Settings
If the machine is powered off during the overwriting operation, unfinished files may remain on the hard disk. When the power is restored, the overwriting operation will resume with the unfinished files remaining on the hard disk. ® Xerox D95/D110/D125 Copier/Printer Security Function Supplementary Guide... -
Page 13: Service Representative Restricted Operation
Important: If the System Administrator’s user ID and the passcode are lost when [Service Rep. Restricted Operation] is set to [On], neither you nor the Xerox representative will be able to change any setting in the System Administration mode. For Optimal Performance of the Security... - Page 14 The encryption method of SNMPv3 is fixed to DES. Set [Message Digest Algorithm] to [SHA1]. Important: ® ® For secure operation, while you are using the Xerox CentreWare Internet Services, do • not access other web sites. For secure operation, when you change [Authentication Type], initialize the hard disk by •...
-
Page 15: Confirm The Machine Rom Version And The System Clock
You can check the time and the date of the internal clock. If you need to change the time and the date, refer to the following procedures. Select the required option. Select [Change Settings]. Change the required setting. Use the scroll bars to switch between screens. Select [Save]. ® Xerox D95/D110/D125 Copier/Printer Security Function Supplementary Guide... -
Page 17: Initial Settings Procedures Using Control Panel
4. On the [Passcode Policy] screen, select [Passcode Entry from Control Panel]. 5. Select [Change Settings]. 6. On the [Passcode Entry from Control Panel] screen, select [On]. 7. Select [Save]. 8. To exit the [Passcode Policy] screen, select [Close]. ® Xerox D95/D110/D125 Copier/Printer Security Function Supplementary Guide... -
Page 18: Change The System Administrator's Passcode
6. Select [On]. 7. Select [Maintenance Passcode]. 8. Select [New Passcode]. 9. Enter a new passcode of 9 or more characters by using the keyboard displayed, and then select [Save]. 10. Select [Save]. ® Xerox D95/D110/D125 Copier/Printer Security Function Supplementary Guide... -
Page 19: Set Overwrite Hard Disk
8. Enter a new encryption key of 12 characters by using the keyboard displayed, and then select [Save]. 9. Select [Re-enter the Encryption Key] 10. Enter the same passcode, and then select [Save]. ® Xerox D95/D110/D125 Copier/Printer Security Function Supplementary Guide... -
Page 20: Set Authentication
7. Select [Service Access]. 8. On the [Service Access] screen, select an item and then select [Change Settings]. 9. Select [Locked]. 10. Select [Save]. Perform steps 8 and 10 for each item. 11. Select [Close]. ® Xerox D95/D110/D125 Copier/Printer Security Function Supplementary Guide... -
Page 21: Set Private Print
1. Select [Authentication/Security Settings] on the [Tools] screen. 2. Select [Authentication]. 3. Select [Passcode Policy]. 4. On the [Passcode Policy] screen, select [Minimum Passcode Length]. 5. Select [Change Settings]. 6. On the [Minimum Passcode Length] screen, select [Set]. ® Xerox D95/D110/D125 Copier/Printer Security Function Supplementary Guide... -
Page 22: Set Auto Clear
2. Select [Common Service Settings]. 3. Select [Maintenance]. 4. Select [Power on Self Test]. 5. Select [On. 6. Select [Save]. 7. To exit the [Maintenance] screen, select [Close]. 8. Select [Reboot now] on the confirmation screen. ® Xerox D95/D110/D125 Copier/Printer Security Function Supplementary Guide... -
Page 23: Set Software Download
5. Select [Change Settings]. 6. Select [Disabled]. 7. Select [Save]. 8. To exit the [Common Service Settings] screen, select [Close]. 9. To exit the [Tools] screen, press the <Services> button on the control panel. ® Xerox D95/D110/D125 Copier/Printer Security Function Supplementary Guide... -
Page 25: Initial Settings Procedures Using Xerox Centreware Internet Services
CentreWare Internet Services. ® Preparations for Settings on the Xerox CentreWare Internet Services ® Prepare a computer supporting the TCP/IP protocol to use Xerox CentreWare Internet Services. ® Xerox CentreWare Internet Services supports the browsers that satisfy "SSL/TLS" conditions. 1. Open your Web browser, enter the TCP/IP address of the machine in the Address or Location field, and press the <Enter>... -
Page 26: Set Xerox ® Freeflow
3. Uncheck the [Receive E-mail] box. 4. Click [Apply] . Set IPP 1. Click [Connectivity] on the [Properties] screen. 2. Click [Port Setting]. 3. Check the [Enabled] box for [IPP]. 4. Click [Apply]. ® Xerox D95/D110/D125 Copier/Printer Security Function Supplementary Guide... -
Page 27: Set Ldap Server
In the [System Administrator Access Group] boxes, enter a name for the group. Entries should be in base DN format (for instance, cn=admin, cn=users, dc=xerox, dc=com). You can also restrict the use of the Copy, Scan, Print, and other features by entering a name for the group in [Service Access Group] boxes. -
Page 28: Set Ssl/Tsl
4. Enter a file name for the file you want to import, or select the file to be imported by clicking [Browse]. 5. Enter a password in [Password], and then retype the password in [Retype Password] for confirmation. 6. Click [Import]. ® Xerox D95/D110/D125 Copier/Printer Security Function Supplementary Guide... -
Page 29: Set Ipsec
Note: When you select [Enabled] from the [Communicate with Non-IPSec Device] dropdown list, the machine allows communications with non-IPSec devices other than the devices that are specified in [Specify Destination IPv4 Address] or [Specify Destination IPv6 Address]. ® Xerox D95/D110/D125 Copier/Printer Security Function Supplementary Guide... -
Page 30: Set Snmpv3
SNMPv3 according to the procedures in "Set IPSec Address" and enter the IP Address in the [Specify Destination IPv4/IPv6 Address] box. Since the machine cannot communicate by SNMPv1/v2, you need to uncheck [SNMP status Enabled] for the port setting on the client’s printer driver. ® Xerox D95/D110/D125 Copier/Printer Security Function Supplementary Guide... -
Page 31: Set S/Mime
19. Click [Apply]. Set Browser Refresh 1. Click [General Setup] on the [Properties] screen. 2. Click [Internet Services Settings]. 3. Enter the “0” in the [Auto Refresh Interval] box. 4. Click [Apply]. ® Xerox D95/D110/D125 Copier/Printer Security Function Supplementary Guide... -
Page 32: Set Job Deletion
Allows the user to pause an active copy, print, scan job while it is being processed by the machine. But only system administrators can cancel the paused job. For secure operation, please delete the job completely. ® Xerox D95/D110/D125 Copier/Printer Security Function Supplementary Guide... -
Page 33: Regular Review By Audit Log
This section describes the setting procedure and the importing method of the Audit Log ® ® feature using the System Administrator client via Xerox CentreWare Internet Services. The Audit Log is regularly reviewed by the Security Administrator, often with the aid of third party analyzing tools. -
Page 34: Import The Audit Log File
Import the Audit Log File The following describes methods for importing the Audit Log. The audit logs are only available ® to system administrators and can be downloaded via Xerox CentreWare Internet Services for viewing and analyzing. The logged data cannot be viewed from the local UI. -
Page 35: Self Testing
4. Select [Power on Self Test]. 5. Select [On]. 6. Select [Save]. 7. To exit the [Maintenance] screen, select [Close]. 8. To exit the [Tools] screen, select [Close] in the upper right corner of the screen. ® Xerox D95/D110/D125 Copier/Printer Security Function Supplementary Guide... -
Page 37: Authentication For The Secure Operation
To enter the System Administration mode, enter the Machine Administrator ID into the user ID entry field on the authentication screen. ® Xerox D95/D110/D125 Copier/Printer Security Function Supplementary Guide... -
Page 38: Authenticated Users (With System Administrator Privileges)
Remote Accounts) Remote authentication uses a remote authentication server (LDAP or Kerberos Server) and authenticates users based on the user information managed on the server. User information cannot be registered on the machine. ® Xerox D95/D110/D125 Copier/Printer Security Function Supplementary Guide... -
Page 39: Functions Controlled By Authentication
The system administrator can limit print & copy quota per user via the control panel and ® ® Xerox CentreWare Internet Services. When print or copy volume exceeds the registered number, the user cannot use the function. The counted number needs to be cleared by system administrator. ® Xerox D95/D110/D125 Copier/Printer Security Function Supplementary Guide... -
Page 40: Authentication For Folder
Xerox CentreWare Internet Services ® If the Authentication feature is enabled, authentication is required to access the Xerox CentreWare Internet Services home page even if you are not using the Authentication feature for any service. Authentication for Folder The following explains the restricted operations on job flow sheets and Folder when the Authentication feature is enabled. - Page 41 System Administrator and Authenticated Users Machine Administrator Personal Folder Personal Folder (other) Shared Folder (owner) Create Display Delete Change Settings Display File Delete File Store File*1 Print File*1 Display Flow Link Sheet Auto Run Manual ® Xerox D95/D110/D125 Copier/Printer Security Function Supplementary Guide...
- Page 42 Folder, you can still use them except for changing/copying them. If you remove the link, the job flow sheets will no longer be displayed and will be disabled. ® Xerox D95/D110/D125 Copier/Printer Security Function Supplementary Guide...
-
Page 43: Operation Using Control Panel
In a remote authentication server, on the other hand, the Machine Administrator’s ID is not pre-registered. Although "admin" can be registered as a user ID, it cannot be registered as the Machine Administrator’s ID in the machine. ® Xerox D95/D110/D125 Copier/Printer Security Function Supplementary Guide... -
Page 44: Create/View User Accounts
Change Account Limit - Displays the [Account No. xxx - {Service} Limit] screen. Enter an account limit for [Color] and [Black] to specify the maximum number of pages allowed to be processed by that account. The maximum number of pages that can be entered is 9,999,999. ® Xerox D95/D110/D125 Copier/Printer Security Function Supplementary Guide... -
Page 45: Change User Passcode By General User
4. On the [Change Passcode] screen, select [Keyboard]. 5. Enter a new passcode of 9 or more characters in [New Passcode], and select [Next]. 6. In [Retype Passcode], select [Keyboard]. 7. Enter the same passcode, and select [Save] twice. ® Xerox D95/D110/D125 Copier/Printer Security Function Supplementary Guide... -
Page 46: Job Deletion By System Administrator
Specifies when and how to delete files in Folder after they are retrieved. Print & Delete Confirmation Screen Specifies whether to display a confirmation message screen when deleting a file. Quality/File Size for Retrieval Specifies the Quality/File Size level. ® Xerox D95/D110/D125 Copier/Printer Security Function Supplementary Guide... -
Page 47: Stored File Settings
4. Select [Off] for [Check Folder Passcode]. 5. Change the required settings. 6. Select [Close]. Note: By selecting [Delete Folder], you can delete all files in the Folder and all job flow sheets created through the Folder. ® Xerox D95/D110/D125 Copier/Printer Security Function Supplementary Guide... -
Page 48: Send From Folder
Updates the list of files in the Folder. Select All Selects all the files in the Folder so that you can print or delete them all at once. Print Prints the selected file(s). Delete Deletes the selected file(s). ® Xerox D95/D110/D125 Copier/Printer Security Function Supplementary Guide... -
Page 49: Private Charge Print
Prints a file selected in the list. After being printed, the file is deleted. Note: The displayed jobs are sent from a PC via the print driver. For more information, refer to Print Driver Online Help. ® Xerox D95/D110/D125 Copier/Printer Security Function Supplementary Guide... -
Page 51: Operation Using Xerox Centreware Internet Services
Xerox CentreWare Internet Services ® feature, refer to the System Administration Guide. Some of the Xerox CentreWare Internet Services features have restricted access. Contact a System Administrator for further assistance. ®... - Page 52 Note: When the Authentication feature is enabled, you are required to enter your user ID and ® your password. You need to enter your user ID and your password to access Xerox CentreWare Internet Services to configure and use the security functions of the machine.
-
Page 53: Print
Follow the steps below to select the features available on the [Scan] tab. 1. Click [Scan] on the Main Panel of the home page. 2. Select [Folder] on the [Scan] screen. 3. The [Folder] page is displayed. ® Xerox D95/D110/D125 Copier/Printer Security Function Supplementary Guide... -
Page 54: File List
If you click [Delete], the selected Folder is displayed. Edit If you click [Edit], the [Edit Folder] page for the selected Folder is displayed. Create If you click [Create], the [Folder Setup] page for the selected Folder is displayed. ® Xerox D95/D110/D125 Copier/Printer Security Function Supplementary Guide... -
Page 55: Folder: List Of Files
Quantity Selects the number of copies to print. 2 Sided Printing Selects whether to print only on one side or both sides of paper. Delete Deletes the selected files in the folder. ® Xerox D95/D110/D125 Copier/Printer Security Function Supplementary Guide... -
Page 56: Edit Folder
Print or Retrieve Note: Retrieved files are not deleted. Delete Expired Allows you to set whether to automatically delete files when they reach the specified expiration dates. Files ® Xerox D95/D110/D125 Copier/Printer Security Function Supplementary Guide... -
Page 57: Import The Files
7. Enter the user number in [Account Number] and click [Edit]. 8. Enter a new passcode of 9 or more characters in [Passcode]. 9. Enter the same passcode in [Retype Passcode] and click [Apply]. ® Xerox D95/D110/D125 Copier/Printer Security Function Supplementary Guide... -
Page 59: Problem Solving
Note: Even when the power of the machine fails, all the queued jobs will be saved because the machine is equipped with the hard disk drive. The machine will resume processing the queued jobs when the power of the machine is turned back on. ® Xerox D95/D110/D125 Copier/Printer Security Function Supplementary Guide... -
Page 60: Fault Codes
[Cause] Unable to resolve the POP3 server name when sending email. ® [Remedy] Check on Xerox CentreWare Internet Services if the POP3 server settings are correct. Also, check the DNS server settings. are correct. ® Xerox D95/D110/D125 Copier/Printer Security Function Supplementary Guide... - Page 61 FTP server could not be resolved. [Remedy] Check the connection to the DNS server. Check if the FTP server name is registered correctly on the DNS server. ® Xerox D95/D110/D125 Copier/Printer Security Function Supplementary Guide...
- Page 62 [Cause] The machine failed to transfer data using [FTP] of the [Scan to PC] feature because file deletion was not successful on the FTP server after connection. [Remedy] Check the access privilege to the FTP server. ® Xerox D95/D110/D125 Copier/Printer Security Function Supplementary Guide...
- Page 63 [Cause] The passcode entered does not match the passcode set on the folder. [Remedy] Enter the correct passcode. 016-714 [Cause] The specified folder does not exist. [Remedy] Create a new folder or specify an existing folder. ® Xerox D95/D110/D125 Copier/Printer Security Function Supplementary Guide...
- Page 64 018-405 [Cause] An error occurred during LDAP authentication. [Remedy] The account is disabled in the active directory of the authentication server, or the access is set to disabled. Consult your network administrator. ® Xerox D95/D110/D125 Copier/Printer Security Function Supplementary Guide...
- Page 65 The server returned RFC2251 Result Message for Address Book query. 018-783 [Remedy] Have your network administrator confirm the LDAP server status. 018-784 018-785 018-786 018-787 018-788 018-789 018-790 018-791 018-792 018-793 018-794 018-795 018-796 018-797 ® Xerox D95/D110/D125 Copier/Printer Security Function Supplementary Guide...
- Page 66 [Remedy] Ask the sender to send the e-mail with a reliable S/MIME certificate. 027-717 [Cause] Unable to obtain SMTP server address for e-mail transmissions from the DNS server. [Remedy] Check whether the DNS server is set correctly. ® Xerox D95/D110/D125 Copier/Printer Security Function Supplementary Guide...
-
Page 67: Security @ Xerox
Security @ Xerox For the latest information on security and operation concerning your device, see the Xerox Security Information website located at www.xerox.com/security. ® Xerox D95/D110/D125 Copier/Printer Security Function Supplementary Guide... -
Page 68: Appendix
[Authentication/Security Settings] > [Authentication] > [Charge/Private Print Settings]. Set User Passcode [Authentication/Security Settings] > [Security] > [User Details Minimum Length [Authentication] > [Passcode Policy] > Setup] > [Minimum [Minimum Passcode Length] Passcode Length] ® Xerox D95/D110/D125 Copier/Printer Security Function Supplementary Guide... - Page 69 [System Settings] > [Connectivity & [Security] > [SSL/TLS Network Setup] > [Security Settings] > Settings] > [S/MIME [S/MIME Settings] Communication] Set Browser Refresh [General Setup] > [Internet Services Settings] > [Auto Refresh Interval] ® Xerox D95/D110/D125 Copier/Printer Security Function Supplementary Guide...
- Page 70 [Setup Menu] > [Create Folder] Scan Tab > [Folder] > [Create] Change User [Authentication/Security Settings] > [Security] > Passcode by [Authentication] > [Create/View User [Authentication System Accounts] Configuration] > [Next]> Administrator [Account Number] > [Edit] ® Xerox D95/D110/D125 Copier/Printer Security Function Supplementary Guide...