Sharp XE-A107 Instruction Manual
Electronic cash register
Hide thumbs
Also See for XE-A107:
- Instruction manual (36 pages) ,
- User manual (4 pages) ,
- Manual de instrucciones (2 pages)
Table of Contents
Advertisement
Advertisement
Table of Contents

Related Manuals for Sharp XE-A107


Summary of Contents for Sharp XE-A107
- Page 1 ELECTRONIC CASH REGISTER MODEL XE-A107 FULL DETAILED INSTRUCTION MANUAL...
- Page 2 CAUTION: The cash register should be securely fitted to the supporting platforms to avoid instability when the drawer is open. CAUTION: The socket-outlet shall be installed near the equipment and shall be easily accessible. VORSICHT: Die Netzsteckdose muß nahe dem Gerät angebracht und leicht zugänglich sein. ATTENTION: La prise de courant murale devra être installée à...
-
Page 3: Introduction
INTRODUCTION Thank you very much for your purchase of the SHARP Electronic Cash Register, Model XE-A107. Please read this manual carefully before operating your machine in order to gain full understanding of functions and features. Please keep this manual for future reference. It will help you if you encounter any operational problems. -
Page 4: Table Of Contents
CONTENTS INTRODUCTION......................1 IMPORTANT........................1 CONTENTS........................2 Parts.and.their.Functions.....................3 When.an.Error.Occurs....................5 Preparing.the.Cash.Register..................6 1 Initializing the Cash Register ..................6 2 Installing Batteries ......................6 3 Installing a Paper Roll ....................7 Quick.Start.Operations....................8 1 Programming Date and Time ..................9 2 Programming Tax ...................... -
Page 5: Parts List
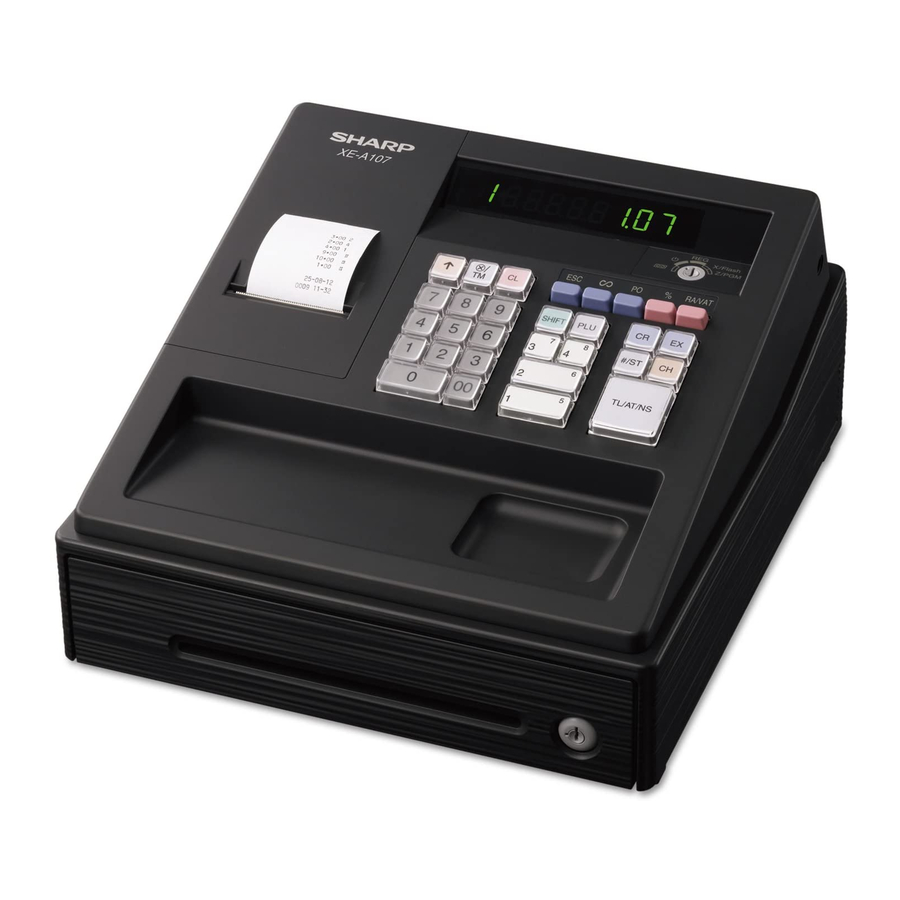
Parts.and.their.Functions . ■ Part.Names Plug the AC adapter connector into the Mode switch AC adapter jack, then plug the AC adapter into the wall outlet. Display AC adapter Printer cover Keyboard AC adapter connecter AC adapter jack Drawer Cheque slot Drawer lock . -
Page 6: Mode Switch
. ■ Mode.Switch Insert the mode key (the same key as drawer lock key) into the mode switch and move the key to get an appropriate mode. Turns the display off. No operations are possible. REG: Permits transaction entry. Permits correction after finalizing a transaction. -
Page 7: Errors
When.an.Error.Occurs When your register goes into an error state, it displays the error message “ ”. Clear the error state by pressing and take the appropriate action. When.you.enter.an.over.7-digit.number.to.the.department.or.an.over.8-digit.number. (79999999).to.RA(Received-on.Account),.PO(Paid-Out),.credit.or.cheque: Press and make a correct entry. When.you.make.an.error.in.key.operation: Press and make a correct entry. When.you.make.an.entry.beyond.a.programmed.entry.digit.limit: Check if the entered amount is correct. -
Page 8: Preparing.the.cash.register
Preparing.the.Cash.Register Please do the following before using the register for the first time. For installing the cash register, find a stable surface near an AC outlet where the cash register will not subject to water sources or direct sunlight, then install the register. 1. -
Page 9: Installing A Paper Roll
Open the battery cover next to the paper roll cradle. Install three new LR6 (“AA” size) batteries. B e sure that the positive (+) and negative (-) poles of NOTE each battery are facing in the proper direction for installation. Confirm the no battery symbol “ ” lights off. Close the battery cover. Replace the printer cover. Be careful with the paper cutter, so as not to cut yourself. 3. -
Page 10: Quick.start.operations
(For.journal.printing.only) Remove the paper holding plate from the spool. Insert the end of the paper into the slit in the spool. Paper holding (Press to feed more paper if required.) plate Wind the paper two or three turns around the spool shaft. -
Page 11: Programming Date And Time
1. Programming.Date.and.Time For setting the date, enter the date in 6 digits using the day-month-year format. For setting the time, enter the time in 4 digits using the 24-hour format. Set the mode switch to the Z/PGM position, then operate the following key sequences. -
Page 12: Programming Department Status
3. Programming.Department.Status Merchandise can be classified into eight departments. Items sold with use of the department keys can later be printed on a report that shows the quantities sold and sales amounts classified by department. The data is useful for making purchasing decisions and other store operations. When using a department key, you must set the parameters to specify the department status, such as plus or minus sign and tax status. -
Page 13: Making Basic Sales Entries (Department Entries)
4. Making.Basic.Sales.Entries.(Department.Entries) In this section, the basic sales entry method using department key with simple correction (void) method is explained. For more information such as PLU entries, VAT(tax) entries and entries using function keys, please refer to “Utilizing Various Features for Sales Entries” section on page 13. Selling a 15.00 item (dept. -
Page 14: Reading/Resetting Sales Data
5. Reading/Resetting.Sales.Data In order to check sales, you can read a sales report. Also you should reset sales data after you practicing your cash register. To read a sales report, you should take an X report; set the mode switch to the X/Flash position, and press To reset sales, you should take a Z report;... -
Page 15: Utilizing.various.features.for.sales.entries
Utilizing.Various.Features.for.Sales.Entries Before making sales entries, make sure that a paper roll is installed in case receipt function is on. Also make sure to turn the mode switch to the REG position. PLU.Entries Enter the PLU code of a PLU item and press . -
Page 16: Convenient Sales Entries
Convenient.Sales.Entries When.selling.only.item.by.cash.(Single Item Cash Sale (SICS) entry) When a sale is for only one item paid by cash, such as a pack of cigarettes, you can use SICS function. It is applicable only to department keys programmed for SICS or to PLUs associated with such departments. -
Page 17: Vat (Tax) Calculation
VAT.(Tax).Calculation Your cash register provides the following six tax systems. Your cash register is pre-programmed as manual VAT 1 to 4 system. Auto.VAT.1.to.4.system.(automatic.operation.method.using.programmed.percentages) This system, at settlement, calculates VAT for taxable 1 through 4 subtotals by using the corresponding programmed percentages. Auto.tax.1.to.4.system.(automatic.operation.method.using.programmed.percentages) This system, at settlement, calculates taxes for taxable 1 through 4 subtotals by using the corresponding programmed percentages, and also adds the calculated taxes to those subtotals, respectively. -
Page 18: Discounts And Premiums Using The Percent Key
Discounts.and.Premiums.Using.the.Percent.Key If you want to apply a discount or a premium for an item, enter the percent rate and press the percent key. If you want to apply a discount or premium for the subtotal, enter all the items, press and then press the percent key following the percent rate. -
Page 19: Currency Exchange
Currency.Exchange Your register allows payment entries of foreign currency when you programmed a currency exchange rate. After items entries or during tendering entries, press , the subtotal in foreign currency can be displayed. Then enter the tendered amount in foreign currency if not exact amount payment, and press a finalization key ( when programmed). -
Page 20: Received-On Account And Paid-Out Entries
Received-on.Account.and.Paid-out.Entries When you receive an account from a customer or when you pay amount to a vendor, it is a good idea to use respectively. For the received-on-account entry, enter the amount, and press For the paid-out entry, enter the amount, and press The entry limit is 8 digits (79999999), though it is different if you programmed. -
Page 21: Reading.and.resetting.of.sales
Reading.and.Resetting.of.Sales All the data on all of your registrations as well as other transaction information will remain in the memory of your cash register as long as your cash register has power (Be sure you have live batteries installed in case of a power failure). This information can be printed in the form of a report which can be helpful to you in running your business. -
Page 22: Z Reports For Reading And Resetting Of Sales
Z.reports.for.reading.and.resetting.of.sales This report, when taken in the Z/PGM mode, prints the same information as an X report. Once this report had been printed, the cash register’s memory of daily information is cleared and all the transaction totals are reset to zero. Be sure to issue a Z report at the end of each day. -
Page 23: Euro.migration.function
EURO.Migration.Function Your register can be modified to correspond with each period set for the introduction of EURO, and in your register each currency is treated as shown on the table below depending on which period you are in. Basically your register can be automatically modified to correspond to the introduction of EURO by executing automatic EURO modification operation shown below in Z/PGM mode. - Page 24 Items A=1. A=2. A=3. (EURO status 1) (EURO status 2) (EURO status 3) General Z report Issue Issue Issue GT memory Clear Clear Conversion of preset prices of Dept./PLU Exchange amount printing for total and change Exchange calculation method Division Multiplication Multiplication Domestic currency symbol...
-
Page 25: Advanced.programming
Advanced.Programming Before starting programming, set the mode switch to the Z/PGM mode. Also if necessary, enter the secret code and press • Y ou can continue programming without printing the programming NOTE report by not pressing at the end of each program step. However, you must program PLUs independent from other programming. • Unless otherwise specified, programming options marked with * indicate factory setting. In case of values or number settings, the factory settings are shown with the word, “Default”. Department.Preset.Unit.Price.Programming Unit prices can be assigned directly to department keys for frequently purchased items, which enables you to enter the prices by simply pressing the department keys. -
Page 26: Percent Key Programming
Percent.Key.Programming can be programmed as a discount key or premium key. As a default, is programmed as a discount key. Also you can program a percent rate for When 00.00% is programmed, use of preset percent rate is prohibited. (factory setting) Programming.the.percent.key.function.(discount.or.premium) (for discount) / (for premium) -
Page 27: Miscellaneous Programming
Miscellaneous.Programming You can program miscellaneous settings suitable for use. : to finish programming) ABCDEFGH Parameters: Selection: Entry: A Date format MMDDYY DDMMYY* YYMMDD B Time format 12 hour format 24 hour format* C Decimal point position for domestic currency 0 through 3 (Default: 2) D Resetting receipt no. -
Page 28: Euro Programming
EURO.Programming For the details of EURO programming, please refer to “EURO Migration Function” on pages 21 and 22. : to finish programming) ABCDEFGH Parameters: Selection: Entry: A Automatic conversion of unit prices of Depts. /PLUs by automatic EURO migration operation B Conversion rate printing Exchange amount printing for total &... -
Page 29: Checking.the.programmed.machine.settings
Checking.the.Programmed.Machine.Settings Your machine allows you to print the programmed machine settings, namely, general & tax programming report and PLU programming report. Set the mode switch to the Z/PGM position, and press to print a general & tax programming report, or press to print a PLU programming report. -
Page 30: Maintenance
Maintenance Drawer.Handling . ■ Locking.the.Drawer. Develop the habit of locking the drawer when not using the register for any extended period of time. To lock the drawer, use the mode key. To.lock: Insert the key into the drawer lock and turn it 90 degrees Mode key counter-clockwise. -
Page 31: Replacing The Paper Roll
Replacing the Paper Roll When a dye appears on the paper roll, it is time to replace the paper roll with new one. Be sure to use the paper roll specified in “Specifications” section on page 32. In case of journal printing Set the mode switch to the REG position. -
Page 32: Replacing The Batteries
REG position, then replace the batteries with new ones referring to “Installing Batteries” section on page 6. Replacing.the.Ink.Roller When printing becomes faded, replace the existing ink roller with a new one available from SHARP. Precautions:. • Be sure to use an ink roller available from SHARP. -
Page 33: Before.calling.for.service
Before.Calling.for.Service If you encounter any of the following problems, please read below before calling for service. Fault Checking • The display does not illuminate. • Is power supplied to the electric outlet? • Is the AC adapter plug out or loosely connected to the electric outlet? •... -
Page 34: Specifications
Specifications Model: XE-A107 Size: 335(W) × 360(D) × 190(H) mm Weight: Approx. 4.0 kg Power Source: Official (nominal) voltage and frequency Power Stand-by: 1.5 W (The official voltage : 220 to 230 V [50Hz/60Hz] and 230 to Consumption: 240 V [50Hz]) Operating: 2.3 W (max.) (The official voltage : 220 to 230 V [50Hz/60Hz] and... - Page 35 Noise.level.LpA:.65.9.dB(A-weighted) Measured.according.to.EN.ISO.7779:2001. [Maximum.value.if.the.cash.drawer.springs.open.LpAI:.78.0.dB(A-weighted)]...
- Page 36 SHARP ELECTRONICS (Europe) GmbH Postbox 105504 20038 Hamburg, Germany...