Sharp XE-A101 Instruction Manual
Hide thumbs
Also See for XE-A101:
- Instruction manual (100 pages) ,
- Service manual (25 pages) ,
- Quick start manual (2 pages)
Table of Contents
Advertisement
Advertisement
Table of Contents

Related Manuals for Sharp XE-A101


Summary of Contents for Sharp XE-A101
- Page 1 ELECTRONIC CASH REGISTER ELEKTRONISCHE REGISTRIERKASSE CAISSE ENREGISTREUSE ELECTRONIQUE MODEL CAJA REGISTRADORA ELECTRONICA MODELL XE-A101 MODELE MODELO INSTRUCTION MANUAL MANUEL D’INSTRUCTIONS BEDIENUNGSANLEITUNG MANUAL DE INSTRUCCIONES XE-A101(Hyo-1,4) 03.9.12, 7:26 AM...
- Page 2 A101_01-HYO2-3 03.9.12 7:27 AM Page C_2 CAUTION: The cash register should be securely fitted to the supporting platforms to avoid instability when the drawer is open. CAUTION: The socket-outlet shall be installed near the equipment and shall be easily accessible. VORSICHT: Die Netzsteckdose muß...
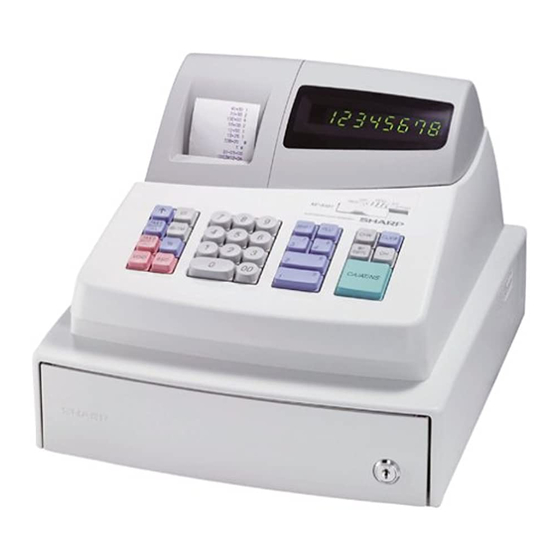
- Page 3 XE-A101 ELECTRONIC CASH REGISTER Thank you for purchasing the SHARP Electronic Cash Register Model XE-A101. Please read this manual carefully before operating your machine. Keep this manual for future reference. It will help you solve operational problems that you may encounter.
-
Page 4: Table Of Contents
A101_01(E) 03.9.12 7:28 AM Page 2 Contents Parts and their Functions ..............3 Before Operation ................4 Reset the Cash Register ...............4 Install Batteries ..................4 Install the Paper Roll ................5 Set Time and Date.................6 Check the Time and Date..............6 Program Necessary Items ..............6 When an Error Occurs ...............7 Basic Sales Entry Operation .............8 Before Sales Entries ................8... -
Page 5: Parts And Their Functions
A101_01(E) 03.9.12 7:28 AM Page 3 Parts and their Functions Mode Switch Turns the display off. No operations are possible. Z/PGM REG: Permits transaction entry. : Permits correction after finalizing a transaction. X/F: Permits printing of sales reports and displaying Slide the switch to get an appropriate mode. -
Page 6: Before Operation
A101_01(E) 03.9.12 7:28 AM Page 4 Parts and their Functions Symbols and figures appearing on the display: Error: Appears with an alarm sound when an error is made. If this occurs during a transaction because of an extra digit entry, simply press c and re-enter correctly. Program: Appears when the cash register is being programmed in the “Z/PGM”... -
Page 7: Install The Paper Roll
A101_01(E) 03.9.12 7:28 AM Page 5 Before Operation 1. Push the printer cover forward and detach it. 2. Open the battery cover next to the paper roll cradle. 3. Insert three new R6 or LR6 batteries (“AA”size). 4. Confirm the no battery symbol “ ”... -
Page 8: Set Time And Date
A101_01(E) 03.9.12 7:28 AM Page 6 Before Operation Step 4 Set Time and Date 1. Set the mode switch to the Z/PGM position. 2. Enter the time in 4 digits (“hhmm” format) using the 24 hour system. In case of 2:30 p.m.: 3. -
Page 9: When An Error Occurs
A101_01(E) 03.9.12 7:28 AM Page 7 When an Error Occurs When your register goes into an error state, it displays the error message “ ” accompanied with a warning beep. Clear the error state by pressing c and take the appropriate action. 1. -
Page 10: Basic Sales Entry Operation
A101_01(E) 03.9.12 7:28 AM Page 8 Basic Sales Entry Operation Before Sales Entries 1. Set the mode switch to the REG position. 2. Make sure that a paper roll is installed. (Excepting you set the receipt off function) Basic Sales Entry When selling a department item An operation example (paid by cash) is shown below. -
Page 11: Other Features For Sales Entries
A101_01(E) 03.9.12 7:28 AM Page 9 Basic Sales Entry Operation When entering more than one of the same department or PLU items You can enter two or more of the same department or PLU item by pressing department or PLU key repeatedly (repetitive entry), or by using the multiplication key (multiplication entry). -
Page 12: Discounts And Premiums Using The Percent Key
A101_01(E) 03.9.12 7:28 AM Page 10 Other Features for Sales Entries Manual VAT 1 system (manual entry method for subtotals that uses VAT 1 preset percentages) This system enables the VAT calculation for the subtotal. This calculation is performed using the VAT 1 preset percentage when V is pressed just after S. -
Page 13: No Sale
A101_01(E) 03.9.12 7:28 AM Page 11 Other Features for Sales Entries Example Selling a department 3 item (price 79.50) in a foreign currency. (Preset exchange rate: 1.550220) 7950# E 130: t Amount tendered in foreign currency No Sale When you need to open with no sale, for example to make changes, just press t. The drawer will open. -
Page 14: Reading And Resetting Of Sales
A101_01(E) 03.9.12 7:28 AM Page 12 Other Features for Sales Entries • Correction of earlier entries (indirect void) With this function, you can correct department or PLU entry incorrectly made during a transaction if you find it before finalizing the transaction by pressing t, R or C. To correct 3P entry to 4P after another correct entry has been made, enter the Example following:... -
Page 15: Flash Reports For Viewing On The Display
A101_01(E) 03.9.12 7:28 AM Page 13 Reading and Resetting of Sales Flash reports for viewing on the display Use this function for on-the-spot checking of individual cash register’s sales data. The sales total is shown on the display but is not printed nor cleared from the cash register’s memory. To display the flash report for each individual item, press the following keys in the X/F mode: Individual department sales Department key... -
Page 16: Euro Migration Function
A101_01(E) 03.9.12 7:28 AM Page 14 EURO Migration Function Your register can be modified to correspond with each period set for the introduction of EURO, and in your register each currency is treated as shown on the table below depending on which period you are in. - Page 17 A101_01(E) 03.9.12 7:28 AM Page 15 EURO Migration Function Items (EURO status 1) (EURO status 2) (EURO status 3) General Z report Issue Issue Issue GT memory Clear Clear * Conversion of preset prices of Dept./PLU Yes * Exchange amount printing for total and change Exchange calculation method Division...
-
Page 18: Programming
A101_01(E) 03.9.12 7:28 AM Page 16 Programming Preparations for Programming 1. Set the mode switch to the Z/PGM mode. 2. If necessary, enter the secret code and press t. • You can continue programming without printing the programming report by not pressing S at the end of each program step. -
Page 19: Plu Programming
A101_01(E) 03.9.12 7:28 AM Page 17 Programming Programming the department status ABCDEFG* ➜ ➜ ( ➜ ) Department key (➜ (Press s to program departments 5 to 8.) Parameters: Selection: Entry: Sign +/- + sign* - sign Normal/SICS (Single Item Cash Sale) Normal* SICS VAT4 or TAX4... -
Page 20: Percent Key Programming
A101_01(E) 03.9.12 7:28 AM Page 18 Programming Percent Key Programming % can be programmed as a discount key or premium key. As a default, % is programmed as a discount key. Also you can program a percent rate for %. When 00.00% is programmed, use of preset percent rate is prohibited. -
Page 21: Miscellaneous Programming
A101_01(E) 03.9.12 7:28 AM Page 19 Programming Miscellaneous Programming You can program miscellaneous settings suitable for use. ➜ ➜ ABCDEFGH ➜ (➜ Parameters: Selection: Entry: Date format MMDDYY DDMMYY* YYMMDD Time format 12 hour format 24 hour format* Decimal point position for domestic currency 0 though 3 (Default: 2) Resetting receipt no. -
Page 22: Euro Programming
A101_01(E) 03.9.12 7:28 AM Page 20 Programming EURO Programming For the details of EURO programming, please refer to “EURO Migration Function” on pages 14 and ➜ ➜ ABCDEFGH ➜ (➜ Parameters: Selection: Entry: Automatic conversion of unit prices of Depts. /PLUs by automatic EURO migration operation Conversion rate printing Exchange amount printing for... -
Page 23: Checking The Programmed Machine Settings
A101_01(E) 03.9.12 7:28 AM Page 21 Checking the Programmed Machine Settings Your machine allows you to print the programmed machine settings, namely, general & tax programming report and PLU programming report. Set the mode switch to the Z/PGM position, and press S to print a general & tax programming report, or press P to print a PLU programming report. -
Page 24: Maintenance
A101_01(E) 03.9.12 7:28 AM Page 22 Maintenance Drawer Handling Locking the Drawer Develop the habit of locking the drawer when not using the register for any extended period of time. To lock the drawer, turn 90 degrees counter-clockwise, and to unlock the drawer, turn 90 degrees clockwise. -
Page 25: Replacing The Batteries
REG position, then replace the batteries with new ones referring to “Install Batteries” section on page 4. Replacing the Ink Roller When printing becomes faded, replace the existing ink roller with a new one available from SHARP. Precautions: • Be sure to use an ink roller available from SHARP. The use of any other ink rollers could cause troubles in the printer. -
Page 26: Before Calling For Service
• Is there a paper jam? • Printing is faded or illegible. • Isn’t the ink roller used up? • Is the ink roller installed properly? Specifications Model: XE-A101 Size: 330(W) x 363(D) x 253(H) millimeters Weight: 5.0 kg Power Source:...