Table of Contents
Advertisement
Quick Links
Advertisement
Table of Contents

Related Manuals for Canon FAX-L220


Summary of Contents for Canon FAX-L220
- Page 1 Canon FAX-L220/L295 User’s Guide...
- Page 2 • H12250 (FAX L295) Copyright Copyright © 2003 by Canon, Inc. All rights reserved. No part of this publication may be reproduced, transmitted, transcribed, stored in a retrieval system, or translated into any language or computer language in any form or by any means, electronic, mechanical, magnetic, optical, chemical, manual, or otherwise, without the prior written permission of Canon, Inc.
-
Page 3: Laser Safety Information
* Approximately three seconds per page document transmission time based on Canon FAX Standard Chart No. 1 (Standard Mode) at 33.6 Kbps modem speed. The Public Switched Telephone Network (PSTN) currently supports 28.8 Kbps modem speeds or lower, depending on telephone line conditions. -
Page 4: Table Of Contents
Contents Chapter 1: Introduction Type Conventions Used in This Guide............. Customer Support ..................... Important Safety Instructions................Chapter 2: Setting Up Unpacking the FAX ..................Removing Shipping Materials..............Assembling the FAX ..................Making Connections ..................Connecting the Telephone Line Cord and External Devices ...... Connecting the Power Cord ................ - Page 5 Chapter 5: Paper Handling Paper Requirements ..................Printable Area....................Selecting Paper for Your FAX................Loading Paper ....................Selecting Face Up or Face Down Paper Delivery ..........Changing the Paper Size Setting ............... Adjusting the Toner Saver Setting ..............Chapter 6: Speed Dialling What is Speed Dialling?..................
- Page 6 Chapter 8: Receiving Faxes Receiving Methods ................... Receiving Faxes Automatically: FAX ONLY MODE ....... Setting FAX ONLY MODE..............Receiving Both Faxes and Telephone Calls Automatically: Fax/Tel Mode Setting Fax/Tel Mode ................Setting the Options for Fax/Tel Mode........... Receiving Faxes Manually: MANUAL MODE ......... Setting MANUAL MODE ..............
- Page 7 Chapter 10: Copying Documents You Can Copy ................10 2 Making Copies ....................10 2 Making a Quick Single Copy................10 3 Chapter 11: Reports and Lists Summary of Reports and Lists................11 2 ACTIVITY REPORT ..................11 3 TX (Transmission) REPORT................11 4 MULTI TX/RX (Transaction) REPORT ............
- Page 8 Chapter 14: Summary of Settings Understanding the Menu System..............14 2 Printing a List to Check the Current Settings..........14 2 Accessing the Menus................... 14 3 USER SETTINGS Menu .................. 14 4 REPORT SETTINGS Menu................14 5 TX (Transmission) SETTINGS Menu.............. 14 6 RX (Reception) SETTINGS Menu..............
-
Page 9: Chapter 1: Introduction
Chapter 1 Introduction ❏ Type Conventions Used in This Guide ............❏ Customer Support ..................❏ Important Safety Instructions..............Chapter 1 Introduction... -
Page 10: Type Conventions Used In This Guide
Type Conventions Used in This Guide Please read the list below of symbols, terms, and abbreviations used in this guide. Cautions tell you how to avoid actions that could injure you or damage your FAX. In order to use your unit safely, always observe these cautions. Notes provide advice on using your FAX more effectively, describe operating restrictions, and tell you how to avoid minor difficulties. -
Page 11: Customer Support
Chapter 13. If you cannot solve the problem or if you think your FAX needs servicing, contact your local authorised Canon dealer or the Canon help line. Chapter 1... -
Page 12: Important Safety Instructions
Never attempt to disassemble the unit: opening and removing its interior covers will expose you to dangerous voltages and other risks. For all service, contact your local authorised Canon dealer or the Canon help line. ■ Handling and Maintenance •... - Page 13 • Unplug the FAX from the wall outlet and contact your local authorised Canon dealer or the Canon help line in any of the following cases: – When the power cord or plug is damaged or frayed. – If liquid has spilled into the unit.
-
Page 14: Power Supply
If you notice anything unusual (smoke, strange odours, noises) around the FAX, unplug the unit immediately. Contact your local authorised Canon dealer or the Canon help line. • Do not allow anything to rest on the power cord, and do not place the unit where the cord will be walked on. -
Page 15: Unpacking The Fax 2
Chapter 2 Setting Up ❏ Unpacking the FAX ................... • Removing Shipping Materials ............... ❏ Assembling the FAX.................. ❏ Making Connections .................. • Connecting the Telephone Line Cord and External Devices....• Connecting the Power Cord..............❏ Setting the Language and Country............. ❏... -
Page 16: Unpacking The Fax
Unpacking the FAX Before unpacking your FAX, be sure to choose a suitable location for it ( p. 1 5). Carefully remove all items from the box. You should have someone help you hold the box while you lift out the FAX and its protective packaging. Save the carton and packaging in case you need to transport the FAX in the future. -
Page 17: Removing Shipping Materials
If any items are damaged or missing, notify your local authorised Canon dealer or the Canon help line immediately. • Important! Save your sales receipt for proof of purchase in case your unit requires warranty service. • If you have purchased the optional handset, see Appendix C for the items included. -
Page 18: Assembling The Fax
Assembling the FAX Follow this procedure to assemble your FAX: Attach the paper Insert the tabs on the loading warning paper rest into the label to the left of the slots on the unit. multi-purpose tray. Slide the multi- purpose tray cover over the paper rest. -
Page 19: Making Connections
Making Connections Connecting the Telephone Line Cord and External Devices Your FAX has three jacks on the side for connection of the following: • Telephone line cord • Optional handset or telephone • Additional telephone, answering machine, or data modem If you only have one telephone line and plan to use your FAX for receiving both faxes and voice calls, you will need to connect the optional handset, a telephone, or an answering machine to your unit. - Page 20 • Canon cannot guarantee that all answering machines will be compatible with your unit, due to varying specifications. • If you have connected an external device to your FAX, be sure to set the correct receive mode ( Chapter 8).
-
Page 21: Connecting The Power Cord
Connecting the Power Cord Before connecting the power cord, see Power Supply, p. 1 6. Follow this procedure to connect the power cord: Connect the supplied power cord to the power cord connector. Then connect the other end into a properly grounded 200-240 V AC three-prong outlet.* The FAX has no power switch, so its power is on as long as it is plugged in. -
Page 22: Setting The Language And Country
Setting the Language and Country* When you connect the power cord to an AC outlet for the first time, you need to select the language for the LCD display. For some countries, you also need to select the country where you are using the FAX machine. The FAX machine automatically switches the selectable settings and the default settings in the menus to suit the selected country. - Page 23 Press OK. DATA ENTRY OK The FAX enters standby mode. PUT IN CARTRIDGE 15:00 FaxOnly Once you have selected the language and country, these setting menus will not appear next time you connect the power cord. • To check the settings made by the country selection, you can print the USER’S DATA LIST ( p.
-
Page 24: Main Components Of The Fax
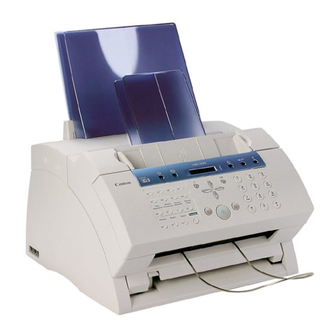
Main Components of the FAX MULTI-PURPOSE TRAY COVER PAPER REST SUPPORT TRAYS FACE-DOWN DELIVERY PAPER GUIDES SLOT DOCUMENT GUIDES MULTI-PURPOSE TRAY LATCH ADF (AUTOMATIC DOCUMENT FEEDER) FRONT COVER OPERATION PANEL PAPER DELIVERY SELECTOR FACE-UP DELIVERY SLOT DOCUMENT SUPPORT FX-3 TONER CARTRIDGE COMPARTMENT TRANSFER CHARGING ROLLER... -
Page 25: Operation Panel
Operation Panel The language used for the Operation Panel varies depending on the country of purchase. The following illustration shows the Operation Panel in English. • Directory Button • LCD • Coded Dial Button p. 6 16) pp. 6 2, 6 7,6 14) •... -
Page 26: Installing The Toner Cartridge
Installing the Toner Cartridge This section describes how to install the toner cartridge in the FAX for the very first time. If you are replacing a used toner cartridge, see p. 12 6. Before installing the toner cartridge, be sure to read the following: •... - Page 27 Follow this procedure to install the toner cartridge in the FAX: Make sure the FAX is plugged in. Lift the latch and open the front cover. Do not open the front cover without lifting the latch since this may damage your unit. Remove the new FX 3 toner cartridge from its protective bag.
- Page 28 Place and support the toner cartridge on a flat, clean surface, then gently pull on the plastic tab to remove the plastic seal. • Use a firm, even pull to avoid breaking the seal. SIDE VIEW PULL WITHIN THIS RANGE TOP VIEW PULL WITHIN THIS RANGE...
-
Page 29: Loading Paper
Loading Paper This section explains how to load plain paper in the multi purpose tray. For complete details on paper requirements and selecting paper for your FAX, see Chapter 5. Before loading paper, be sure to read the following: The laser printing process uses high temperatures to fuse toner to the paper. Use paper that will not melt, vaporize, discolour, or emit dangerous fumes at temperatures near 170°C. -
Page 30: Testing The Fax
Follow this procedure to load a stack (maximum 10 mm stack height) of A4 size plain paper in the multi purpose tray: Remove the multi purpose tray cover from the FAX. Prepare a stack of paper by tapping it on a flat surface to even its edges. -
Page 31: Guidelines For Entering Numbers, Letters, And Symbols 3
Chapter 3 Registering Information ❏ Guidelines for Entering Numbers, Letters, and Symbols ......• Correcting a Mistake................❏ Registering Sender Information ..............• What is Sender Information? ..............• Entering the Date and Time..............• Registering Your FAX Number and Name ........... ❏... -
Page 32: Guidelines For Entering Numbers, Letters, And Symbols
Guidelines for Entering Numbers, Letters, and Symbols When you come to a step that requires you to enter a name or number, refer to the table below to determine which numeric button to press for the character you want: Button Uppercase Letter Lowercase Letter Number Mode... -
Page 33: Entering Letters
■ Changing Between Number and Letter Modes Press to select number mode (:1), uppercase letter mode (:A), or lowercase letter mode (:a) (Number mode) (Uppercase letter mode) (Lowercase letter mode) ■ Entering Letters Press to switch to uppercase letter mode (:A) or lowercase letter mode (:a). -
Page 34: Entering Numbers
■ Entering Numbers Press to switch to number mode (:1). Press the numeric button that contains the number you want. • To enter a space, press Function then Space. Continue entering other numbers using the numeric buttons. ■ Entering Symbols Press # repeatedly until the symbol you want appears. -
Page 35: Registering Sender Information
Registering Sender Information What is Sender Information? When you receive a fax, the name of the person or company who sent you the fax, their fax/telephone number, and the date and time of transmission may be printed in small type at the top of each page. This information is called the Sender information or the Transmit Terminal Identification (TTI). -
Page 36: Entering The Date And Time
Entering the Date and Time Follow this procedure to set the current date and time: Press Function. Press Data Registration. DATA REGSTRATION Press OK three times. USER SETTINGS • The date and time currently set for your FAX are displayed. DATE &... - Page 37 Press OK twice. DATA ENTRY OK UNIT NAME Use the numeric buttons to enter your CANON _ name or company name (max. 24 characters, including spaces). • If you are unsure how to enter characters, see p. 3 2.
-
Page 38: Setting The Telephone Line Type
Setting the Telephone Line Type Before using your FAX, make sure it is set for the telephone line type of your telephone system. If you are unsure of your telephone line type, check with your local telephone company. Follow this procedure if you need to change the telephone line type setting: Press Function. -
Page 39: Dialling Through A Switchboard
Dialling Through a Switchboard A PBX (Private Branch Exchange) is an on site telephone switchboard. If your FAX is connected through a PBX or other telephone switching system, you have to dial the outside line access number first, and then the number of the party you are calling. To facilitate this procedure, you can register the PBX access type and the outside line access number under the R button so that you only need to press this button before dialling the fax/telephone number you want to reach. - Page 40 ■ If you selected HOOKING in step 8: Press OK. REPORT SETTINGS Press Stop to return to standby mode. 15:00 FaxOnly ■ If you selected PREFIX in step 8: Press OK. Use the numeric buttons to enter the 123456 outside line access number (max. 19 digits).
-
Page 41: Setting The Summer Time
Setting the Summer Time* Some countries adopt the summer time system that shifts the clock time ahead or back according to the change in seasons. You can select if the time information in your FAX changes to match your country’s summer time system and set the day and time when the summer time begins and ends. - Page 42 ■ If you selected ON in step 8: Press OK three times. BEGIN DATE/TIME MONTH MARCH to select the month in APRIL which the summer time starts. Press OK twice. WEEK LAST WEEK to select the week in FIRST WEEK which the summer time starts.
- Page 43 Press OK three times. END DATE/TIME MONTH OCTOBER and OK to select the month, week, day of the week, and time when the summer time ends, as in steps 10 to 16 for the BEGIN DATE/TIME settings. (e.g. OCTOBER LAST WEEK, SUNDAY and 03:00) Press OK.
- Page 44 3 14 Registering Information Chapter 3...
-
Page 45: Document Requirements 4
Chapter 4 Document Handling ❏ Document Requirements................• Scanned Area of a Document ..............❏ Loading Documents ................... • Adding Pages to the Document in the ADF .......... Chapter 4 Document Handling... -
Page 46: Document Requirements
Document Requirements The documents you load in the ADF for sending and copying must meet the following requirements: One page document Multipage document of the same thickness and weight Max. 216 mm × Approx. 1 m Max. 216 × 355.6 mm Size (W ×... -
Page 47: Loading Documents
Loading Documents Follow this procedure to load documents in the ADF: Adjust the document guides to the width of the document. Gently insert the top of the document, face down, in the ADF until you hear a beep. • Tap multipage documents on a flat surface to even the edges before inserting them in the ADF. -
Page 48: Adding Pages To The Document In The Adf
Adding Pages to the Document in the ADF If you need to add pages to your document in the ADF, wait until the last page starts feeding, then load up to 30 additional pages (10 legal size). The last and first page should overlap by about 2.5 cm. -
Page 49: Paper Requirements 5
Chapter 5 Paper Handling ❏ Paper Requirements ................... • Printable Area ..................❏ Selecting Paper for Your FAX..............❏ Loading Paper .................... ❏ Selecting Face Up or Face Down Paper Delivery........❏ Changing the Paper Size Setting..............❏ Adjusting the Toner Saver Setting ............. Chapter 5 Paper Handling... -
Page 50: Paper Requirements
Paper Requirements You can load the following paper in the multi purpose tray: Size (W × L) Paper Size Setting Weight Quantity Min. 92.4 × 127 mm 64 90 g/m Max. stack height: Max. 216 × 356 mm 1 sheet: 64 105 g/m2 10 mm (Approx. -
Page 51: Printable Area
Printable Area The shaded area shows the printable MAX. 4 mm area of A4 size paper. FEED DIRECTION MAX. 10 mm MAX. 4 mm MAX. 5 mm Selecting Paper for Your FAX Follow these guidelines when selecting paper: • To prevent paper jams in the multi purpose tray, do not use any of the following: –... -
Page 52: Selecting Face Up Or Face Down Paper Delivery
Selecting Face-Up or Face-Down Paper Delivery ■ Paper Path Understanding how paper feeds through the FAX will help you determine which paper delivery slot is appropriate for the task you are performing. First, the paper travels to the toner cartridge where a laser beam “draws” the print image on the drum, which in turn applies toner to the paper. -
Page 53: Selecting Paper Delivery
■ Selecting Paper Delivery Before selecting paper delivery, be sure to take note of the following: • Always set the paper delivery selector before printing ( below). • Changing paper delivery while the unit is printing will cause problems. Wait for the printout to exit the unit completely before changing paper delivery. -
Page 54: Changing The Paper Size Setting
Changing the Paper Size Setting The multi purpose tray is factory set for loading A4 size paper. If you want to load a different paper size ( p. 5 2), follow this procedure to change the paper size setting: Press Function. Press Data Registration. - Page 55 to select the custom paper size setting. • You can select from the following: – CUSTOM1/LONG (Default) – CUSTOM2/SHORT • For details on the paper sizes above, see p. 5 2. Press OK. ECONOMY PRT Press Stop to return to standby mode. 15:00 FaxOnly Chapter 5...
-
Page 56: Adjusting The Toner Saver Setting
Adjusting the Toner Saver Setting By enabling the toner saver setting, you can reduce toner consumption of the toner cartridge by approximately 30% to 40%. This will extend the toner cartridge life. By enabling this setting, print quality will be reduced. For highest print quality, disable this setting. -
Page 57: What Is Speed Dialling? 6
Chapter 6 Speed Dialling ❏ What is Speed Dialling?................• Speed Dialling Methods ................ ❏ Registering One Touch Speed Dialling ............. ❏ Registering Coded Speed Dialling............. ❏ Registering Group Dialling................ 6 11 ❏ Using Speed Dialling ................. 6 14 • Sending a Document With Speed Dialling ..........6 14 •... -
Page 58: What Is Speed Dialling
What is Speed Dialling? Instead of having to dial a fax or telephone number using regular dialling (i.e. with the numeric buttons), you can simplify the dialling procedure by registering the fax/ telephone number for speed dialling. This will reduce the number of buttons you need to press to dial the fax/telephone number, making it convenient for frequently dialled numbers. -
Page 59: Registering One Touch Speed Dialling
Registering One-Touch Speed Dialling By registering a fax/telephone number under a one touch speed dialling button, you can simplify dialling of that number to the press of a single button. When you register one touch speed dialling, you will: – assign one of the 15 one touch speed dialling buttons for the fax/telephone number you want to register. - Page 60 Press OK twice. DATA ENTRY OK NAME Use the numeric buttons to enter a name for Canon EUROPA _ the one touch speed dialling button (max. 16 characters, including spaces). • If you are unsure how to enter characters, see p.
- Page 61 This completes the basic one touch speed dialling settings. To continue registering other one touch speed dialling buttons, press Function then Data Registration and repeat the procedure from step 5. 15:00 FaxOnly To end registering one touch speed dialling buttons, press Stop to return to standby mode. To register the transmission type for the current button you are registering, continue with the steps below.
- Page 62 ■ If you selected PSWD/SUBADDRESS in step 15: The other party’s fax machine may require an ITU T standard subaddress and/or password to receive faxes. The subaddress/password you register here must match exactly the one(s) registered on the other party’s fax machine. Contact the other party to check their settings.
-
Page 63: Registering Coded Speed Dialling
Registering Coded Speed Dialling By registering a fax/telephone number under a coded speed dialling code, you can simplify dialling of that number to pressing Coded Dial and entering the registered two digit code. When you register coded speed dialling, you will: –... - Page 64 Press OK twice. DATA ENTRY OK NAME Use the numeric buttons to enter a name for Canon Inc. _ the coded speed dialling code (max. 16 characters, including spaces). • If you are unsure how to enter characters, see p.
- Page 65 Press OK. DATA ENTRY OK OPTIONAL SETTING This completes the basic coded speed dialling settings. To continue registering other coded speed dialling codes, press Function then Data Registration and repeat the procedure from step 7. 15:00 FaxOnly To end registering coded speed dialling codes, press Stop to return to standby mode.
- Page 66 ■ If you selected PSWD/SUBADDRESS in step 17: The other party’s fax machine may require an ITU T standard subaddress and/or password to receive faxes. The subaddress/password you register here must match exactly the one(s) registered on the other party’s fax machine. Contact the other party to check their settings.
-
Page 67: Registering Group Dialling
Registering Group Dialling If you frequently send documents to the same group of fax numbers, you can “group” these numbers under a one touch speed dialling button or coded speed dialling code. You can then send to all the fax numbers in the group in one quick and simple operation. - Page 68 ❏ To register a group under a coded speed dialling code: Press Coded Dial, then use the numeric buttons to enter the coded speed dialling code (00 to 99) under which you want to register the group. • If a coded speed dialling code has already been registered, CODED SPEED or GROUP DIAL appears.
- Page 69 All fax numbers and the name of the group registered under that button or code will be deleted. Press OK twice. NAME Use the numeric buttons to enter a name for Canon GROUP 2_:1 the group (max.16 characters, including spaces). • If you are unsure how to enter characters, see p.
-
Page 70: Using Speed Dialling
Using Speed Dialling Once you have registered fax/telephone numbers for one touch speed dialling p. 6 3), coded speed dialling ( p. 6 7), or group dialling ( p. 6 11), you can begin to send documents or make telephone calls with speed dialling. Sending a Document With Speed Dialling Follow this procedure to send a document using one touch speed dialling, coded speed dialling, or group dialling:... -
Page 71: Making A Telephone Call With Speed Dialling
Making a Telephone Call With Speed Dialling Follow this procedure to dial a telephone number registered for one touch or coded speed dialling on your FAX: Make sure you have connected the optional handset or a telephone to the FAX p. -
Page 72: Dialling With The Directory
To adjust the resolution and contrast, see pp. 7 2, 7 3. Press Directory. 1ST LETT OF NAME Use the numeric buttons to enter the first 04=Canon EUROPA letter of the other party’s name you are looking for. Press to scroll through the names 01=Canon Inc. -
Page 73: Printing Speed Dialling Lists
Printing Speed Dialling Lists To check the fax/telephone numbers and names registered for speed dialling, you can print the speed dialling lists. You may want to keep these lists near your FAX to refer to them when dialling. Follow this procedure to print speed dialling lists: Press Function. -
Page 74: Speed Dialling
REGULAR TX 2 887 0166 Canon AUSTRALIA REGULAR TX 905 795 1111 Canon CANADA REGULAR TX GROUP DIAL Canon GROUP 2 2 50921 Canon ITALIA REGULAR TX 1 432 2060 Canon OPTICS PSWD/SUBADD. IF YOU PRESS # IN STEP 7... -
Page 75: Coded Speed Dial List
Canon FRANCE REGULAR TX 516p488 6700 Canon U.S.A. REGULAR TX 2131 1250 Canon DEUTSCH. REGULAR TX GROUP DIAL Canon GROUP 1 1 49 39 25 25 Canon FRANCE REGULAR TX 81 773 3173 Canon UK PSWD/SUBADD. GROUP DIAL Canon GROUP 1... -
Page 76: Group Dial List
GROUP DIAL LIST 27/12 2002 17:23 FAX 123 4567 CANON ★★★★★★★★★★★★★★★★★★★★★★★★★★★★★★★★★★★★★★★★★★★★★★ ★★★★★★★★★★★★★★★★★★★★★★★★★★★★★★★★★★★★★★★★★★★★★★ GROUP DIAL LIST ★★★★★★★★★★★★★★★★★★★★★★★★★★★★★★★★★★★★★★★★★★★★★★ 03] Canon GROUP 2 04] 2 50921 Canon ITALIA 00] 2131 1250 Canon DEUTSCH. 02] 1 49 39 25 25 Canon FRANCE 32] 81 773 3173... -
Page 77: Preparing To Send A Fax 7
Chapter 7 Sending Faxes ❏ Preparing to Send a Fax ................• Documents You Can Fax............... • Setting the Scanning Resolution ............• Setting the Scanning Contrast..............• Dialling Methods ................... ❏ Sending Methods..................• Memory Sending ................... • Manual Sending Via the Handset ............❏... -
Page 78: Preparing To Send A Fax
Preparing to Send a Fax Documents You Can Fax For information on the types of documents you can fax, their requirements, and details on loading documents, see Chapter 4. Setting the Scanning Resolution You can set the scanning resolution of documents you send. The higher the resolution the higher the output quality at the other end, but the slower the transmission speed. -
Page 79: Setting The Scanning Contrast
Setting the Scanning Contrast You can adjust the degree of contrast at which your document is scanned for sending and copying. Adjust according to how light or how dark your document is. Follow this procedure to set the scanning contrast for sending and copying: Press Function. -
Page 80: Dialling Methods
Dialling Methods There are several ways of dialling the fax number(s) you want to send to. They are as follows: • Regular Dialling Dial a fax number by using the numeric buttons, similar to dialling a telephone number. • One Touch Speed Dialling Dial a fax number by pressing the one touch speed dialling button (01 to 15) assigned to the fax number. -
Page 81: Sending Methods
If you are connected to a PBX and need to first dial an outside line access number (“9”, for example), add a pause after that number by pressing Redial/Pause p. 9 2). Based on Canon FAX Standard Chart No. 1, standard mode. Chapter 7 Sending Faxes... -
Page 82: Manual Sending Via The Handset
Press Start/Copy to begin scanning for sending, or if you used speed dialling, wait a few seconds for the FAX to begin scanning automatically. • If you do not want the FAX to begin scanning automatically after a few seconds, disable the TIME OUT setting ( p. - Page 83 Dial the other party’s fax/telephone number. TEL= 7654321 • For dialling methods, see p. 7 4. • If you make a mistake during dialling, press Hook or hang up the handset and start again from step 3. ■ If you hear a high pitched signal instead of a voice: Press Start/Copy to begin sending the document.
-
Page 84: Cancelling Sending
Cancelling Sending Follow this procedure if you want to stop sending a document before transmission is completed: ■ If you are sending a document using manual sending via the handset: Press Stop. • The transmission is cancelled. • The FAX prints an ERROR TX REPORT ( p. -
Page 85: Redialling When The Line Is Busy
Redialling When the Line is Busy There are two methods of redialling: Manual redialling and Automatic redialling. This section explains these two methods. Manual Redialling Press Redial/Pause to dial the last number you dialled with the numeric buttons. (This starts redialling regardless of whether automatic redialling is enabled.) Cancelling Manual Redialling To cancel manual redialling, press Stop. -
Page 86: Setting The Options For Automatic Redialling
Press Stop. CANCEL? YES #NO • The FAX asks you to confirm that you want to cancel automatic redialling. YES=( ) NO=(#) Press to cancel redialling. • Redialling is not cancelled until you press . • If you change your mind and want to continue redialling, press #. •... - Page 87 Use ▼ or ▲ to select the setting you want. • You can select from the following: – Enables automatic redialling. – Disables automatic redialling. ■ If you selected OFF in step 8: Press OK. TIME OUT Press Stop to return to standby mode. 15:00 FaxOnly ■...
-
Page 88: Sending The Same Document To Several Fax Numbers (Sequential Broadcasting)
Sending the Same Document to Several Fax Numbers (Sequential Broadcasting) This feature, also called Sequential Broadcasting, allows you to send the same document to several fax numbers in one operation. Simply load the document, enter the fax numbers, and the FAX will then scan the document into its memory and send the document to all the fax numbers you entered, one after the other. - Page 89 ❏ Regular dialling: TEL= 2 887 0166 Use the numeric buttons to enter the fax number you want, then press OK. • You can only enter one fax number this way. ❏ Dialling with the directory: Look up the other party’s name. •...
-
Page 90: Delayed Sending
Delayed Sending Your FAX allows you to scan a document into its memory and send it automatically to as many as 116 fax numbers at a preset time within the next 24 hours. This is called Delayed sending or Timer sending. By using this feature, you can take advantage of lower long distance rates at night, for example. - Page 91 Enter up to 116 fax numbers you want to send to using any of the following methods: ❏ One touch speed dialling: Press the one touch speed dialling TEL=905 795 1111 button(s) you want. ❏ Coded speed dialling: Press Coded Dial, then use the numeric buttons to enter the two digit code you want.
-
Page 92: Printing A Document Set For Delayed Sending
Printing a Document Set for Delayed Sending Follow this procedure to print a document stored in memory for delayed sending: When you print a document stored in memory for delayed sending using the following procedure, the print is reduced to 90% of the original. Press Function. -
Page 93: Deleting A Document Set For Delayed Sending
Deleting a Document Set for Delayed Sending Follow this procedure to delete a document stored in memory for delayed sending: Press Function. Press Delayed Transmission. REGISTER to select DELETE FILE. DELETE FILE Press OK. TX/RX NO. 0 _ 001 to select the transaction number TX/RX NO. - Page 94 7 18 Sending Faxes Chapter 7...
-
Page 95: Receiving Methods 8
Chapter 8 Receiving Faxes ❏ Receiving Methods ..................• Receiving Faxes Automatically: FAX ONLY MODE ......Setting FAX ONLY MODE ............... • Receiving Both Faxes and Telephone Calls Automatically: Fax/Tel Mode..................Setting Fax/Tel Mode ................. Setting the Options for Fax/Tel Mode ..........•... -
Page 96: Receiving Methods
Receiving Methods The FAX provides you with several modes for receiving faxes. To determine which mode best suits your requirements, refer to the table below: Receive Mode Main Use Operation Requirements Details The FAX answers all Separate telephone line p. 8 2 FAX ONLY calls as fax calls. - Page 97 If FAX ONLY MODE does not appear in the LCD when you press Receive Mode, follow this procedure to set this mode: Press Function. Press Data Registration. DATA REGSTRATION Press OK. USER SETTINGS to select RX SETTINGS. RX SETTINGS Press OK. ECM RX to select RX MODE.
-
Page 98: Setting Fax/Tel Mode
Receiving Both Faxes and Telephone Calls Automatically: Fax/Tel Mode Set this mode if you only have one telephone line for fax and telephone use and want your FAX to automatically switch between fax and voice calls. For this mode, you need to connect the optional handset or a telephone to your FAX p. -
Page 99: Setting The Options For Fax/Tel Mode
Setting the Options for Fax/Tel Mode If you set Fax/Tel Mode, you can control precisely how the FAX handles incoming calls by adjusting the following settings: – RING START TIME setting: Adjust the time the FAX takes to check whether a call is from a fax machine or from a telephone (default: 8 seconds). - Page 100 Follow this procedure to set the Fax/Tel Mode options: Follow steps 1 to 9 on page 8 4. RING START TIME Press OK. 8SEC Use the numeric buttons to enter the RING 9SEC START TIME duration. • You can select from 0 to 30 seconds.* •...
-
Page 101: Receiving Faxes Manually: Manual Mode
Receiving Faxes Manually: MANUAL MODE Set this mode if you only have one telephone line that you use mainly for voice calls, and only occasionally to receive faxes. For this mode, you will need to connect the optional handset or a telephone to your FAX to be able to receive voice calls and also to manually activate reception of documents. - Page 102 ■ If you hear a beep tone or silence: Someone is trying to send you a fax. Press Start/Copy on your FAX and hang up to begin receiving the document. • If you are using the telephone and it is located away from your unit, dial 25 (the default remote receiving ID) on your telephone and hang up.
-
Page 103: Receiving With An Answering Machine: Ans.machine Mode
Receiving With an Answering Machine: ANS.MACHINE MODE Connecting an answering machine to the FAX allows you to receive faxes and telephone messages while you are out. In ANS.MACHINE MODE, the FAX allows the answering machine to answer incoming calls, then listens for the fax tone and automatically receives the fax if it detects this tone. -
Page 104: Receiving While Performing Other Tasks
Receiving While Performing Other Tasks The FAX is a multitasking device so it can receive faxes and voice calls while you are performing other tasks. If the FAX cannot print a received fax because it is performing another task that prevents it from doing so, it will receive the fax in memory. -
Page 105: Cancelling Receiving
Receiving is not cancelled until you press TX/RX NO. 5003 • If you change your mind and want to continue receiving, press #. * Based on Canon FAX Standard Chart No. 1, standard mode. Chapter 8 Receiving Faxes 8 11... - Page 106 8 12 Receiving Faxes Chapter 8...
-
Page 107: Special Dialling 9
Chapter 9 Special Features ❏ Special Dialling..................• Entering Pauses in a Fax/Telephone Number........• Switching Temporarily to Tone Dialling..........• Dialling Through a Switchboard ............❏ Documents Stored in Memory ..............• Printing a List of Documents Stored in Memory........•... -
Page 108: Special Dialling
Special Dialling Entering Pauses in a Fax/Telephone Number You may need to enter pauses in a fax/telephone number in the following situations: – When you dial or register an overseas number. The length and position of the pause depends on the telephone system of your country. –... -
Page 109: Switching Temporarily To Tone Dialling
Switching Temporarily to Tone Dialling Many information services for banks, airline reservations, hotel reservations, etc., require tone dialling for their services. If your FAX is set for pulse dialling p. 3 8), follow this procedure to set the unit temporarily for tone dialling: To talk to the other party, you will need to connect the optional handset or a telephone to your FAX ( p. -
Page 110: Documents Stored In Memory
02] Canon FRANCE 0048 DEL SQ BDCST 04] Canon ITALIA 1 27/12 21:39 23:00 03] Canon U.S.A. 23:00 0049 DELAYED TX 05] Canon OPTICS 2 27/12 21:45 23:00 0050 B’CAST 03] Canon GROUP 2 1 27/12 21:49 Special Features Chapter 9... -
Page 111: Printing A Document Stored In Memory
Printing a Document Stored in Memory Follow this procedure to print a document stored in memory: When you print a document stored in memory using the following procedure, the print is reduced to 90% of the original. Press Function. Press Memory Reference. DOC. -
Page 112: Sending A Document Stored In Memory
Sending a Document Stored in Memory Follow this procedure to send a document received in memory: Press Function. Press Memory Reference. DOC. MEMORY LIST to select RESEND DOCUMENT. RESEND DOCUMENT Press OK. TX/RX NO. 0 _ 001 to select the transaction number TX/RX NO. - Page 113 ❏ Regular dialling: Use the numeric buttons to enter the fax TEL= 2 887 0166 number you want, then press OK. • You can only enter one fax number this way. • If you enter a wrong destination, press C, then enter the correct destination. •...
-
Page 114: Deleting A Document Stored In Memory
Deleting a Document Stored in Memory Follow this procedure to delete a document stored in memory: Press Function. Press Memory Reference. DOC. MEMORY LIST to select DELETE DOCUMENT. DELETE DOCUMENT Press OK. TX/RX NO. 0 _ 001 to select the transaction number TX/RX NO. -
Page 115: Polling
• If the other party is using a Canon fax machine and their unit does not support subaddress/password transactions, ask them to set the polling ID on their fax machine to 255 or 11111111 binary. - Page 116 Follow this procedure to poll one or several fax machine(s): Press Function. Press Polling. POLLING TX to select POLLING RX. POLLING RX Press OK. Enter up to 116 fax numbers you want to poll using any of the following methods: ❏...
-
Page 117: Cancelling Polling Receiving
Cancelling Polling Receiving To cancel polling receiving, follow the same procedure as for cancelling receiving p. 8 11). Polling Sending In polling sending, your FAX holds a document in its polling box so that other fax machines can retrieve it. You may find polling sending convenient in the following situations: –... - Page 118 Press OK three times. SETUP FILE FILE NAME Use the numeric buttons to enter a name for Canon Dpt. 1_ :1 the polling box (max. 24 characters, including spaces). • If you are unsure how to enter characters, see p. 3 2.
- Page 119 Press OK twice. ERASE AFTER TX to select if the document remains in the FAX’s memory after it is polled. • You can select from the following: – The document in the polling box is deleted after it is retrieved by one fax machine.
-
Page 120: Scanning A Document Into The Polling Box
Scanning a Document into the Polling Box Follow this procedure to store a document in the polling box so that other fax machines can retrieve it: You need to set up the polling box before you can scan a document into the polling box p. - Page 121 Press Data Registration. DATA REGSTRATION Press OK. USER SETTINGS to select POLLING BOX. POLLING BOX Press OK. SETUP FILE to select the setting you want. • You can select from the following: – CHANGE DATA Select this setting if you want to change the polling box settings.
-
Page 122: Restricting Use Of Your Fax
Restricting Use of Your FAX By enabling this feature, you can prevent unauthorised use of your FAX to make calls and send faxes. Enabling Restriction of Your FAX Follow this procedure to enable restriction of your FAX: Press Function. Press Data Registration. DATA REGSTRATION Press OK. -
Page 123: Cancelling Restriction Of Your Fax
Press Stop to return to standby mode. 15:00 FaxOnly Restriction of your FAX is now enabled. No one can make calls or send faxes. (This setting does not restrict incoming calls or faxes.) Cancelling Restriction of Your FAX Follow this procedure to cancel restriction of your FAX: Press Function. - Page 124 Press OK. PASSWORD Press Stop to return to standby mode. 15:00 FaxOnly Restriction of your FAX is now disabled. Anyone can make calls or send faxes. 9 18 Special Features Chapter 9...
-
Page 125: Restricting Reception
Restricting Reception By enabling this feature, you can restrict reception of faxes to only the numbers registered for speed dialling on your FAX. This feature is useful to prevent reception of unsolicited faxes (e.g. junk mail). Follow this procedure to enable or disable receiving restriction: Press Function. - Page 126 Press OK. DATE SETUP Press Stop to return to standby mode. 15:00 FaxOnly ■ If you selected OFF in step 8: Press OK. DATE SETUP Press Stop to return to standby mode. 15:00 FaxOnly 9 20 Special Features Chapter 9...
-
Page 127: Chapter 10: Copying
Chapter 10 Copying ❏ Documents You Can Copy ................ 10 2 ❏ Making Copies ................... 10 2 ❏ Making a Quick Single Copy..............10 3 Chapter 10 Copying 10 1... -
Page 128: Documents You Can Copy
Documents You Can Copy For information on the types of documents you can copy, their requirements, and details on loading documents, see Chapter 4. Making Copies Follow this procedure to make copies: Adjust the paper delivery selector if necessary p. 5 4). Load the document, face down in the ADF MEMORY USED 0% p. -
Page 129: Making A Quick Single Copy
If you want to make multiple copies, use the COPY 80% 05 numeric buttons to enter the number of copies. • You can make up to 99 copies. The FAX copies at 400 × 300 dpi for single copies, and at 200 × 300 dpi for multiple copies. - Page 130 10 4 Copying Chapter 10...
- Page 131 Chapter 11 Reports and Lists ❏ Summary of Reports and Lists..............11 2 ❏ ACTIVITY REPORT ................11 3 ❏ TX (Transmission) REPORT..............11 4 • MULTI TX/RX (Transaction) REPORT..........11 5 ❏ RX (Reception) REPORT................11 5 Chapter 11 Reports and Lists 11 1...
-
Page 132: Summary Of Reports And Lists
Summary of Reports and Lists The table below shows the lists and reports that can be printed from your FAX. Refer to the pages indicated for more details. Report or List Description Details USER’S DATA LIST Lists the current settings of your FAX and the registered p. -
Page 133: Activity Report
★★★★★★★★★★★★★★★★★★★★★★★★★★★★★★★★★★★★★★★★ CONNECTION ID MODE PGS. RESULT CONNECTION TEL ST. TIME * 27/12 13:43 905 795 1111 Canon CANADA 5001 AUTO RX 1 OK 00'33 * 27/12 13:45 905 795 1111 Canon CANADA 0001 POLLING RX 0 OK 00'00 0 STOP... -
Page 134: Reports And Lists
ERROR TX REPORT ★★★★★★★★★★★★★★★★★★★★★★★★★★★★★★★★★★★★★★★★★★★★★★ TX FUNCTION WAS NOT COMPLETED TX/RX NO 0004 CONNECTION TEL 20 545 8545 SUBADDRESS CONNECTION ID Canon EUROPA ST.TIME 27/12 14:59 USAGE T 00’18 PGS. SENT RESULT THE SLEREXE COMPANY LIMITED SAPORS LANE·BOOLE·DORSET·BH25 8ER TELEPHONE BOOLE (945 13) 51617 – FAX 123456 Our Ref. -
Page 135: Multi Tx/Rx (Transaction) Report
★★★★★★★★★★★★★★★★★★★★★★★★★★★★★★★★★★★★★★★★ TX/RX NO 0054 PGS. TX/RX INCOMPLETE ______ TRANSACTION OK 01] 905 795 1111 Canon CANADA 01] 03 3758 2111 Canon TOKYO 02] 1 49 39 25 25 Canon FRANCE ERROR INFORMATION ______ RX (Reception) REPORT The FAX is factory set not to print an RX (reception) REPORT even if an error occurs during reception. - Page 136 11 6 Reports and Lists Chapter 11...
- Page 137 Chapter 12 Maintenance ❏ Periodic Cleaning..................12 2 • Cleaning the FAX’s Exterior ..............12 2 • Cleaning the FAX’s Interior ..............12 3 • Cleaning the Scanner Components ............12 4 ❏ Replacing the Toner Cartridge..............12 6 Chapter 12 Maintenance 12 1...
-
Page 138: Periodic Cleaning
Periodic Cleaning This section describes the necessary cleaning procedures for your FAX. Please note the following before cleaning your unit: • Be sure to disconnect the power cord before cleaning the FAX. Since documents in memory are erased when the power is disconnected, print or send any documents stored in memory before disconnecting the power cord ( p. -
Page 139: Cleaning The Fax's Interior
Cleaning the FAX’s Interior To prevent toner powder and paper dust from accumulating inside the FAX and affecting print quality, clean the unit’s print area periodically. Follow this procedure to clean inside the FAX: Disconnect the power cord from the FAX. -
Page 140: Cleaning The Scanner Components
When you are finished, reinsert the toner cartridge. Hold the toner cartridge by its handle and insert it into the FAX as far as it will go, making sure that its tabs are aligned with the rails inside the unit. •... - Page 141 • If the scanner components are dirty, the documents you send or copy will also be dirty. • Be sure to use a soft cloth to avoid scratching the components. • Do not use tissue paper, paper towels, or similar materials for cleaning;...
-
Page 142: Replacing The Toner Cartridge
FAX. To purchase this toner cartridge, contact your local authorised Canon dealer or the Canon help line. When CHANGE CARTRIDGE appears in the LCD, you may need to replace the toner cartridge. - Page 143 Hold the toner cartridge by its handle and remove it from the FAX. • Discard the old toner cartridge immediately according to the local laws and regulations for disposal of consumables. To recycle your used toner cartridge, simply follow the instructions included with your new FX 3 toner cartridge.
- Page 144 Hold the toner cartridge by its handle and insert it into the FAX as far as it will go, making sure that its tabs are aligned with the rails inside the unit. • Always hold the toner cartridge by its handle. Use both hands to close the front cover.
- Page 145 Chapter 13 Troubleshooting ❏ Clearing Jams..................... 13 2 • Jams in the ADF ..................13 2 • Paper Jams ..................... 13 3 Jams in the Paper Delivery Slots ............13 3 Jams Inside the Unit................13 3 ❏ LCD Messages ................... 13 8 ❏...
-
Page 146: Clearing Jams
ADF. If the paper does not pull out easily, do not force it. Contact your local authorised Canon dealer or the Canon help line. When you are finished, close the operation panel by pressing it down from the centre. -
Page 147: Paper Jams
Paper Jams When paper jams in the FAX, the LCD displays . Try clearing the CLEAR PAPER JAM jam by following the procedure in Jams in the Paper Delivery Slots below. If this does not clear the jam, follow the procedure in Jams Inside the Unit. Jams in the Paper Delivery Slots Follow this procedure to clear a paper jam in the paper delivery slots: You do not need to unplug the FAX when clearing paper jams. - Page 148 Hold the toner cartridge by its handle and remove it from the FAX. • To avoid exposing the toner cartridge to light, place it in its protective bag or wrap it in a thick cloth. HANDLE Move the paper release lever back. •...
- Page 149 Locate the paper jam and clear it as explained on the following pages. MULTI-PURPOSE TRAY AREA FIXING ASSEMBLY AREA Multi purpose tray area: Hold the unit steady and carefully pull the jammed paper straight out from the unit. • Do this carefully to prevent tearing the jammed paper.
- Page 150 Fixing assembly area: Top edge of the jammed paper in the fixing assembly: Push the jammed paper back ~, then pull it carefully towards you to remove it Ä. The fixing assembly becomes extremely hot when the unit is in use.
- Page 151 When you finished, reinsert the toner cartridge. Hold the toner cartridge by its handle and insert it into the FAX as far as it will go, making sure that its tabs are aligned with the rails inside the unit. • Always hold the toner cartridge by its handle.
-
Page 152: Lcd Messages
LCD Messages The following messages are displayed in the LCD when the FAX is performing a task, or when it encounters an error. The error code appears in the ACTIVITY REPORT ( p. 11 3). Messsage Error Code Cause Action —... - Page 153 In either case, if the error does not clear, try unplugging the unit. Wait five seconds, then plug it back in. If the message remains in the LCD, contact your local authorised Canon dealer or the Canon help line. Chapter 13 Troubleshooting 13 9...
- Page 154 Messsage Error Code Cause Action #083/12 You attempted to send a Contact the other party to check their CHK SUBADDR/PSWD document or poll another settings. Change your settings if fax machine with the necessary ( pp. 6 3, 6 7, 9 9). incorrect subaddress and/or password.
- Page 155 Messsage Error Code Cause Action — Shows the percentage of If you need more space, wait for the MEMORY USED nn % memory currently in use. unit to send any faxes. Also, print, send, or delete any documents in memory you no longer need p.
- Page 156 Messsage Error Code Cause Action — The unit received the fax in Load paper in the multi purpose tray REC’D IN MEMORY memory because paper or p. 2 15), replace the toner toner ran out, or a paper cartridge ( p.
-
Page 157: Paper Feeding Problems
Paper Feeding Problems ■ Paper does not feed properly. The multi purpose tray may contain too many sheets. • Make sure you load the correct quantity ( p. 5 2). The paper may not be loaded correctly. • Make sure the paper stack is loaded correctly in the multi purpose tray p. - Page 158 You dialled or have been provided with an incorrect number. • Dial the number again, or check that you have the correct number. The other party’s fax machine may be out of paper. • Contact the other party and ask them to make sure paper is loaded in their fax machine.
-
Page 159: Receiving Problems
If none of these solutions solve the problem, unplug the FAX and wait for at least five seconds. Then plug it back in and try sending again. If you still cannot send, contact your local authorised Canon dealer or the Canon help line. Receiving Problems ■... - Page 160 An error may have occurred during reception. • Check the LCD for an error message ( p. 13 8). • Print an ACTIVITY REPORT and check for an error code ( p. 11 3). The multi purpose tray may be empty. •...
-
Page 161: Copying Problems
Toner may be low or unevenly distributed. • Redistribute the toner inside the toner cartridge ( p. 12 6). If the problem persists, replace the toner cartridge ( p. 12 6). ■ Cannot receive using Error Correction Mode (ECM). The other party’s fax machine may not support ECM. •... -
Page 162: Telephone Problems
• If the FAX has no paper jam, unplug the unit and wait 5 seconds, then plug it back in. If the Alarm light remains lit, contact your local authorised Canon dealer or the Canon help line. ■ Nothing prints. - Page 163 You may not have removed the plastic seal from the toner cartridge. • Make sure you install the toner cartridge properly ( p. 2 12). The toner cartridge may need to be replaced. • Replace the toner cartridge ( p. 12 6). ■...
-
Page 164: General Problems
If the LCD remains blank, unplug the unit and wait five seconds, then plug it back in. If the LCD still remains blank, contact your local authorised Canon dealer or the Canon help line. 13 20... -
Page 165: If You Cannot Solve A Problem
Canon dealer or the Canon help line. Do not attempt to disassemble or repair the unit yourself. If you need to contact Canon directly, make sure you have the following information: • Product name FAX L220 or FAX L295 •... -
Page 166: If A Power Cut Occurs
★★★★★★★★★★★★★★★★★★★★★★★★★★★★★★★★★★★★★★★★ ★★★★★★★★★★★★★★★★★★★★★★★★★★★★★★★★★★★★★★★★ MEMORY FILES DELETED TX/RX NO MODE CONNECTION TEL/ID PGS. SET TIME ST. TIME 0046 TRANSMIT 01] Canon TOKYO 3 27/12 16:03 0047 B’CAST 01] Canon CANADA 1 27/12 16:08 02] Canon FRANCE 0048 DEL SQ BDCST 03] Canon ITALIA... - Page 167 Chapter 14 Summary of Settings ❏ Understanding the Menu System ............... 14 2 • Printing a List to Check the Current Settings ........14 2 • Accessing the Menus ................14 3 ❏ USER SETTINGS Menu ................14 4 ❏ REPORT SETTINGS Menu ..............14 5 ❏...
-
Page 168: Understanding The Menu System
The FAX prints the USER’S DATA LIST. The sender information is shown at the beginning of the list. The current settings of the FAX are listed after this. 27/12 2002 17:23 FAX 123 4567 CANON ★★★★★★★★★★★★★★★★★★★★★★★★★★★★★★★★★★★★★★★★ ★★★★★★★★★★★★★★★★★★★★★★★★★★★★★★★★★★★★★★★★ USER’S DATA LIST ★★★★★★★★★★★★★★★★★★★★★★★★★★★★★★★★★★★★★★★★... -
Page 169: Accessing The Menus
Accessing the Menus Follow this procedure to access the different menus: Press Function. Press Data Registration. DATA REGSTRATION Press OK. USER SETTINGS to select the menu you want. • You can select from the following: – USER SETTINGS ( p. 14 4) –... -
Page 170: User Settings Menu
USER SETTINGS Menu For details on accessing the settings below, see p. 14 3. The selectable settings and the default settings vary depending on the country where you have purchased the FAX. The values shown here are average values. Setting Description Sub Settings Sets the current date and time (... -
Page 171: Report Settings Menu
REPORT SETTINGS Menu For details on accessing the settings below, see p. 14 3. The selectable settings and the default settings vary depending on the country where you have purchased the FAX. The values shown here are average values. Setting Description Sub Settings Enables/disables automatic printing of a TX... -
Page 172: Tx (Transmission) Settings Menu
TX (Transmission) SETTINGS Menu For details on accessing the settings below, see p. 14 3. The selectable settings and the default settings vary depending on the country where you have purchased the FAX. The values shown here are average values. Setting Description Sub Settings... -
Page 173: Rx (Reception) Settings Menu
RX (Reception) SETTINGS Menu For details on accessing the settings below, see p. 14 3. The selectable settings and the default settings vary depending on the country where you have purchased the FAX. The values shown here are average values. Setting Description Sub Settings... -
Page 174: Printer Settings Menu
PRINTER SETTINGS Menu For details on accessing the settings below, see p. 14 3. The selectable settings and the default settings vary depending on the country where you have purchased the FAX. The values shown here are average values. Setting Description Sub Settings Enables/disables reduction of faxes to fit on the paper... -
Page 175: Polling Box Menu
POLLING BOX Menu For details on accessing the settings below, see p. 14 3. The selectable settings and the default settings vary depending on the country where you have purchased the FAX. The values shown here are average values. Setting Description Sub Settings Sets up the polling box to hold a document to be polled... -
Page 176: System Settings Menu
SYSTEM SETTINGS Menu For details on accessing the settings below, see p. 14 3. The selectable settings and the default settings vary depending on the country where you have purchased the FAX. The values shown here are average values. Setting Description Sub Settings Enables/disables restriction of the FAX (... - Page 177 Setting Description Sub Settings Selects the speed at which the FAX starts receiving. RX START SPEED 33600bps 14400bps 9600bps 7200bps 4800bps 2400bps Selects the country where you are using the FAX to COUNTRY SELECT* automatically switch the selectable settings and the GERMANY default settings to suit the selected country ( p.
- Page 178 14 12 Summary of Settings Chapter 14...
-
Page 179: Appendix A Specifications
Appendix A Specifications ❏ General Specifications ................❏ Facsimile ....................❏ Copier......................❏ Telephone....................❏ Printer......................Appendix A Specifications... -
Page 180: General Specifications
Liquid Crystal Display (LCD) 16 × 1 Display Languages English/French/Spanish/German/Italian/Dutch/ Finnish/Portuguese/Norwegian/Swedish/Danish/ Slovene/Czech/Hungarian/Russian * This standard is applicable for Europe only. ** This standard is not applicable for Australia. *** Based on Canon FAX Standard Chart No. 1, standard mode. Specifications Appendix A... -
Page 181: Copier
600 × 600 dpi Reduction 70%, 80%, 90% Copy Speed Approx. 6 pages/minute No. of Copies Max. 99 copies * This feature is available for certain countries only. ** Based on Canon FAX Standard Chart No. 1, standard mode. Appendix A Specifications... - Page 182 Specifications Appendix A...
-
Page 183: Appendix Bfax-L295 Instructions
Appendix B FAX-L295 Instructions ❏ Introduction....................❏ Differences Between the FAX L295 and FAX L220........ ❏ Using Your Documentation ............... ❏ Unpacking the FAX L295 ................. ❏ Connecting the FAX L295 to Your PC ............. ❏ Print Media Requirements ................. •... -
Page 184: Introduction
In addition to the items shipped with your FAX, you will need to purchase a printer cable to connect your FAX to a PC ( p. B 3). * Based on Canon FAX Standard Chart No. 1, standard mode. FAX L295 Instructions Appendix B... -
Page 185: Connecting The Fax L295 To Your Pc
PC: • A USB cable no longer than 5 metres You can purchase the cable from your local authorised Canon dealer. Follow this procedure to connect the USB cable: Connect the USB cable to the... -
Page 186: Print Media Requirements
Print Media Requirements In addition to the paper listed in Chapter 5, you can also load the following print media in the multi purpose tray: Print Media Size Quantity Envelopes European DL 7 envelopes (220 × 110 mm/ 8.66 × 4.33 in.) U.S. -
Page 187: Selecting Print Media
• You may be able to load other size envelopes than those listed on the previous page. However, Canon cannot guarantee consistent performance on these. When printing on envelopes, be sure to use face up delivery ( p. 5 4). - Page 188 ❏ Remove any curling from the envelopes by holding the edges diagonally and bending them gently. ❏ Run a pen or other rounded object FLAP along the back flaps to flatten them. • The flaps should not bulge more than 5 mm. Remove the multi purpose tray cover from the FAX.
-
Page 189: Loading Transparencies
Replace the multi purpose tray cover. • Be sure to replace this cover to prevent dust accumulating inside the unit. Adjust the paper delivery selector to (face up delivery). For details, see p. 5 4. The FAX is now ready to print. Loading Transparencies Load transparencies in the multi purpose tray as for paper. - Page 190 FAX L295 Instructions Appendix B...
-
Page 191: Appendix C Options
Appendix C Options ❏ Optional Handset..................• Package Contents................... • Attaching the Handset to Your FAX ............. • Maintaining Your Handset ..............Appendix C Options... -
Page 192: Optional Handset
(HI, LO, or OFF). If any items are damaged or missing, notify your local authorised Canon dealer or the Canon help line immediately. * The optional handset is available for certain countries only. -
Page 193: Attaching The Handset To Your Fax
Attaching the Handset to Your FAX Follow this procedure to attach the handset to your FAX: Use a screwdriver to remove the two covers on the left side of the unit. Remove the screws from the plugs and insert the plugs into the holes on the handset cradle. -
Page 194: Maintaining Your Handset
Maintaining Your Handset To maintain your handset in top working condition, be sure to follow these guidelines: • Do not leave your handset exposed to direct sunlight. • Do not install your handset in hot or humid conditions. • Do not spray aerosol polishes on your handset since they may enter the holes on your handset and cause damage. -
Page 195: Index
Index button 2 11, 14 3 button 2 11, 3 4 Broadcasting, sequential 7 12, 7 13 button 2 11, 3 4 BUSY/NO SIGNAL message 13 8 button 2 11, 14 3 p. n nn), definition 1 2 1 TOUCH SPD DIAL LIST 1 C (Clear) button 2 11, 3 4 description 11 2 CALLING VOLUME setting 14 4... - Page 196 Contrast 7 3 DOC. TOO LONG message 13 10 Conventions, type 1 2, 1 3 Document Copying 10 2, 10 3 adding pages in ADF 4 4 document requirements 4 2 definition 1 2 problems 13 17 guide 2 10 quick 10 3 loading 4 3, 4 4 Cord...
- Page 197 Fax/Tel Mode Latch 2 10 description 8 2 LCD 2 11 setting 8 4 definition 1 2 setting options for 8 5, 8 6 messages 13 8 to 13 12. See also individual message FaxAbility. See Telecom FaxAbility names FaxStream™ Duet. See Telstra FaxStream™ Duet Letter mode FILE NAME setting 9 12, 14 9 lowercase 3 2, 3 3...
- Page 198 Messages. See LCD messages Paper delivery MID PAUSE SET setting 14 6 face down 5 4, 5 5 Mistake, correcting 3 4 face up 5 4, 5 5 MULTI TX/RX (Transaction) REPORT 11 5 selecting 5 4, 5 5 description 11 2 selector 2 10, 5 5 sample 11 5 slot, jams in 13 3...
- Page 199 Problems Resolution cannot solve 13 21 button 2 11, 7 2, 10 2 copying 13 17 copying, setting 10 2 document 4 2 sending, setting 7 2 general 13 20 Rest, paper 2 2, 2 4, 2 10 multipage document 4 3 Restricting paper feeding 13 13 reception 9 19, 9 20...
- Page 200 Sending at preset time. See Delayed sending ) button 9 3 cancelling 7 8 TEL LINE TYPE setting 3 8, 14 4 delayed. See Delayed sending Telephone document in memory 9 6, 9 7 connecting 2 5, 2 6 document requirements 4 2 making call with speed dialling 6 15 manual via the handset 7 6, 7 7 problems 13 18...
- Page 201 UN/LOCK PHONE setting 9 16, 9 17, 14 10 UNIT NAME setting 3 7, 14 4 UNIT TELEPHONE # setting 3 7, 14 4 Unpacking FAX 2 2, 2 3 Uppercase letter mode 3 2, 3 3 USER SETTINGS menu 14 3, 14 4 USER’S DATA LIST description 11 2 printing 14 2...