Yamaha MOTIF RACK ES Owner's Manual
Yamaha motif rack es synthesizer: owners manual
Hide thumbs
Also See for MOTIF RACK ES:
- Supplementary manual (37 pages) ,
- Owner's manual (300 pages) ,
- Step-by-step tutorial (4 pages)
Table of Contents
Advertisement
Quick Links
Advertisement
Table of Contents

Related Manuals for Yamaha MOTIF RACK ES


Summary of Contents for Yamaha MOTIF RACK ES
- Page 1 OWNER’S MANUAL TONE GENERATOR...
- Page 2 For longer extension cords, consult a local electrician. This product should be used only with the components supplied or; a cart, rack, or stand that is recommended by Yamaha. If a cart, etc., is used, please observe all safety markings and instructions that accompany the accessory product.
- Page 3 This product, when installed as indicated in the instructions contained in this manual, meets FCC requirements. Modifications not expressly approved by Yamaha may void your authority, granted by the FCC, to use the product. 2. IMPORTANT: When connecting this product to accessories and/or another product use only high quality shielded cables.
- Page 4 • Use the specified adaptor (PA-300 or an equivalent recommended by Yamaha) only. Using the wrong adaptor can result in damage to the instrument or overheating. • Check the electric plug periodically and remove any dirt or dust which may have accumulated on it.
- Page 5 If you experience any hearing loss or ringing in the ears, consult a physician. Yamaha cannot be held responsible for damage caused by improper use or modifications to the instrument, or data that is lost or destroyed. Always turn the power off when the instrument is not in use.
-
Page 6: Congratulations
• An enhanced new user bank, with the addition of 128 Normal Voices to the included wide range of dynamic and authentic Voices of the original top-of-the-line Yamaha MOTIF ES Synthesizer – to give you whatever sound you need, for any musical style. -
Page 7: About This Manual
• This product incorporates and bundles computer programs and contents in which Yamaha owns copyrights or with respect to which it has license to use others' copyrights. Such copyrighted materials include, without limitation, all computer software, styles files, MIDI files, WAVE data and sound recordings. -
Page 8: Table Of Contents
Congratulations! ........6 Package Contents ........6 Main Features . -
Page 9: Application Index
Listening to the MOTIF-RACK ES • Playing demo songs................... . . Page 22 •... - Page 10 Application Index Changing the pan position • Setting the stereo pan position............. Pan (Output display) on pages 66, 80 •...
- Page 11 Resetting parameters (Initializing) • Initializing Voice/Performance/Multi parameters ............... Page 47 •...
-
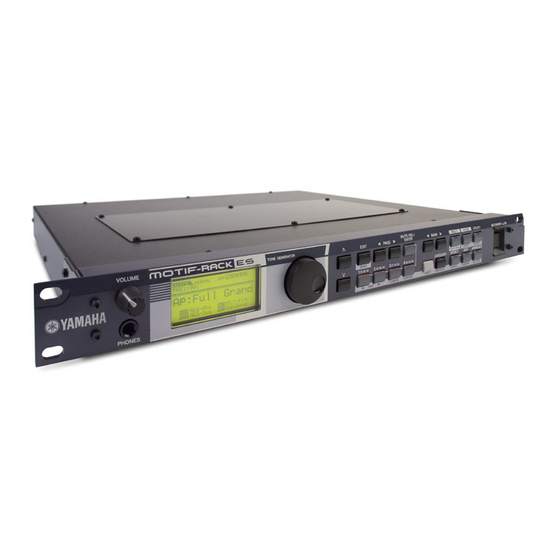
Page 12: The Controls & Connectors
The Controls & Connectors Front panel 1 [VOLUME] knob (page 14) 2 PHONES jack (page 15) 3 LCD (Liquid Crystal Display) The MOTIF-RACK ES’s backlit LCD displays the parameters and values related to the currently selected operation or mode. 4 Data dial For editing (changing the value of) the currently selected parameter. -
Page 13: Rear Panel
WITH CANADIAN ICES-003. CET APPAREIL NUMÉRIQUE DE LA CLASSE B AC POWER ADAPTOR: EST CONFORME À LA NORME NMB-003 YAMAHA PA-300 DU CANADA. % DC IN terminal (page 14) ^ USB terminal (page 18) & MIDI IN/OUT/THRU terminals (page 16) -
Page 14: Starting Up
DC IN n Follow this procedure in reverse order when disconnecting the power adaptor. CAUTION Use the specified adaptor (PA-300 or an equivalent recommended by Yamaha) only. Using the wrong adaptor can result in damage to the instrument or overheating. -
Page 15: Connections
Connections Connecting to external audio equipment Since the MOTIF-RACK ES has no built-in speakers, you’ll need an external audio system or a set of stereo headphones to properly monitor it. Alternatively, you could use a pair of headphones. There are several methods of connecting to external audio equipment, as described in the following illustrations. -
Page 16: Connecting External Midi Equipment
Connections Connecting external MIDI equipment Connecting a digital device The sound output through the OUTPUT jacks via analog signal can also be output via digital through the OPTICAL OUTPUT jack and the DIGITAL OUTPUT jack. Using these digital output jacks, you can record the playback of this synthesizer to external media (e.g., an MD recorder) with exceptionally high-quality, noise-free sound. - Page 17 Playback using an external MIDI sequencer In this case, make sure that the MOTIF-RACK ES is set to the Multi mode. If the instrument is set to the Voice mode or to the Performance mode in which multi-channel MIDI messages are not recognized, the external sequence data (containing multi-channel data) will not play back properly on the MOTIF-RACK ES.
-
Page 18: Connecting To A Computer
Connections Connecting to a computer Connecting to a computer Connecting this instrument to a computer via MIDI opens up a whole world of musical possibilities — such as using sequencer software to record and play back compositions with the MOTIF- RACK ES sounds or using the included Voice Editor software to create and edit your own custom Voices. - Page 19 About the Thru Port Setting MIDI ports can be used to divide playback among multiple synthesizers, as well as expand the MIDI channel capacity beyond sixteen. In the example below, a separate synthesizer connected to the MOTIF-RACK ES is played by MIDI data via port 5, as set in the “ThruPort”...
-
Page 20: Quick Guide
Modes of MOTIF-RACK ES and basic operation In this section, we’ll take a look at the fundamental operating conventions of the MOTIF-RACK ES. Here, you’ll learn the basics – how to select modes and call up the various functions. You can play the MOTIF-RACK ES in the three modes below. You can select the desired mode, to suit your particular playing style, music genre or production environment. -
Page 21: How To Leave The Current Display
The functions of each mode and how to enter each are as follows: [MULTI] button/ [PERFORM] button [EFFECT] button/ [BYPASS] button Mode Function Voice/Performance mode Play Playing a Voice/Performance Edit Editing/creating a Voice/Performance Effect Edit Editing the effect settings Arpeggio Edit Editing the Arpeggio settings Store Saving a Voice/Performance... -
Page 22: Demo Playback
Demo playback How to play back the Demo Songs Demo playback The MOTIF-RACK ES features a variety of demo songs, showcasing its dynamic sound and sophisticated functions. Here's how to play them back. n Make sure the MOTIF-RACK ES is ready for playback. Details are given in the section “Starting Up” on page 14. How to play back the Demo Songs Simultaneously hold the [SHIFT] button and press the [DEMO] button. -
Page 23: Voice Mode
Voice mode In this section, you’ll learn about the Voice mode, the most basic mode of the MOTIF-RACK ES. Playing the Voices In the Voice Play mode, you can select and play a single Voice. The Voices of the MOTIF-RACK ES are divided into the following three types: Normal Voices Normal Voices are mainly pitched musical instrument-type sounds... - Page 24 Voice mode Playing the Voices Plug-in Board Voice Banks When installing Plug-in Boards, select the Plug-in Board (PLG1, PLG2) by the BANK [E][F] buttons, and then select the following Banks by the [SHIFT] + BANK [E][F] buttons. • Plug-in Preset Voice Bank (PLGPRE) •...
-
Page 25: Voice Editing
CAUTION When you exit from the Favorite Category function, the parameter you changed in the display is automatically stored. However, this edited data is lost if you turn off the power without properly exiting from the display. CAUTION Never attempt to turn off the power while data is being stored (while a “Please keep power on”... - Page 26 Voice mode Voice Editing Calling up the Common Edit display Simultaneously hold down hold down the [SHIFT] button and press the [COMMON] button to call up the Common Edit display. Indicates a Common Edit display Calling up the Element Edit display To call up the Element Edit display, make sure to turn the [MUTE/ SEL/ENTER] button LED off, and then select the desired Element with the corresponding the [1/5/9/13]-[4/8/12/16] buttons.
- Page 27 Repeat steps 3 - 4 as desired. Name the edited Normal Voice. Select the General display in the Common Edit, and then input a name in the Name parameter. For detailed instructions on naming, refer to page 50. Store the edited Voice to the User Bank (USR1-3) for Normal Voice.
-
Page 28: Setting The Drum Keys For Independent Open And Closed Hi-Hat Sounds
Voice mode Voice Editing Assigning drum/percussion instruments to individual keys [SHIFT] + [DRUM] select Drum Voice OSC display “Number” In the Drum Voice Edit mode, you can create your own original drum kits by assigning specific instrument sounds to individual keys (in any desired order) and edit detailed parameters for each key’s sound. -
Page 29: Using Voice Effects
Determining how the Drum Voice responds when the key is released [SHIFT] + [DRUM] select Drum Voice [EDIT] OSC display “RcvNoteOff” (Receive Note Off) You can determine whether or not the selected Drum key responds to MIDI Note Off messages. Setting the “RcvNoteOff”... -
Page 30: Performance Mode
Performance mode Playing the Performances 3 System Effects (Reverb, Chorus) ReverbType (Reverb Type) For setting the Reverb Effect Parameters. RevSend (Reverb Send) ReverbRtn (Reverb Return) ReverbPan (Reverb Pan) ChoCtgry (Chorus Category) For setting the Chorus Effect Parameters. ChoType (Chorus Type) ChoSend (Chorus Send) ChoRtn (Chorus Return) ChoPan (Chorus Pan) -
Page 31: Assigning Desired Voices To Each Part
Selecting Performances from a computer As in the Voice mode, you can select Performances on this instrument from your computer software by specifying the following MIDI messages (page 24). The Bank Select MSB/LSB values for changing the Performance are following: •... - Page 32 Performance mode Assigning desired Voices to each Part Select the Voice display with the PAGE [E][F] buttons. Assign the desired Voice to each Part. Move the cursor to the desired setting with the cursor [L][M] buttons. Set the parameters with the data dial. Part Switch (PartSw) Voice Bank (Bank)
-
Page 33: Performance Edit
Performance Edit The Performance Edit mode ([SHIFT] + [PERFORM] you create your own original Performances – containing up to four different Parts (Voices) – by editing the various parameters. The Voices can be selected from the internal tone generator or the installed Plug-in Boards. - Page 34 Performance mode Performance Edit Switching Part On/Off (Mute) and selecting the Part Each time you press the [MUTE/SEL/ENTER] button, the on/off status of the LED changes. When the LEDs are lit (Mute) You can mute any Part by pressing the corresponding Part/ Element button [1/5/9/13] to [4/8/12/16].
-
Page 35: Using Performance Effects
Using Performance effects In the final stages of programming, you can set the effects parameters to further change the sound's character. In the Performance Mode, you can set up and store the effects with each Performance. For details on the structure of the effects, see page 59. -
Page 36: Multi Mode
For more information, refer to the owner’s manual of your sequencer. n The MIDI ports 1-8 of USB are shown as “YAMAHA USB IN/OUT 0-1” - “YAMAHA USB IN/OUT 0-8” in Windows and “YAMAHA MOTIF-RACK ES Port 1” - “YAMAHA MOTIF-RACK ES Port 8” in the Macintosh. -
Page 37: Simple Mixer Functions (Mixing Edit Mode)
Select a Multi with the data dial or cursor [L][M] buttons. Set the Voice for assigning to the each Multi Part, Receive Channels, and Effects for the desired song. For more information, refer to “Simple Mixer functions (Mixing Edit mode)” on page 37 and “Detailed Mixing functions (Multi Edit mode)”... -
Page 38: In The Multi Mode
Multi mode Simple Mixer functions (Mixing Edit mode) Select the desired display, then edit the desired parameters. The Mixing Edit mode has three edit displays: Voice, Output, and Effect. Select the desired display by using the PAGE [E][F] buttons. Voice From this display you can select a Voice for each Part. -
Page 39: Detailed Mixing Functions (Multi Edit Mode)
Detailed Mixing functions (Multi Edit mode) The Multi Edit mode has a detailed mixing function that lets you change the Multi parameter settings in the same way as the Voice Edit mode. There are two types of Multi Edit displays: those for Common Edit, and those for editing individual Parts (Part Edit). -
Page 40: Using Multi Effects
Multi mode Using Multi effects Set the Effects. For an application example showing how to use the effects, see below. Store the edited Multi. You can save up to 128 Multis to internal memory. For details about storing Multis, see page 57. n Please note that the Multi-part Plug-in Part (17-32) settings cannot be stored. - Page 41 Set the Reverb/Chorus Effect Level for each Part ( There are three parameters: “RevSend” (Reverb Send), “ChoSend” (Chorus Send), and “DryLevel.” Select the desired parameter using the cursor [L][M] buttons and select the Part you wish to edit by using the Part/Element buttons ([1/5/9/13]-[4/8/12/16]).
-
Page 42: Using The Arpeggio Function
Using the Arpeggio function What is the Arpeggio function? Using the Arpeggio function What is the Arpeggio function? This function automatically triggers preset arpeggio phrases, riffs, and rhythmic patterns according to the notes you play. It is particularly useful in playing dance, pop, and techno music styles. You can assign the desired five Arpeggio Types to each Voice. -
Page 43: Arpeggio Playback
Arpeggio playback Select a Voice/Performance/Multi. To turn the Arpeggio function on, press the [ARPEGGIO] button. n If Arpeggio is switched on and ready for use, the [ARPEGGIO] button LED will light when you select the Voice, Performance, or Multi. Select the desired Arpeggio from the available five types while playing back. - Page 44 Using the Arpeggio function Change the Arpeggio settings Store the type selected in Step 3 to Arpeggios 1-5. Simultaneously hold down the [SHIFT] button and press the [MUTE/SEL/ENTER] button to enter the Arpeggio Store display. In this display, you can store the type selected in Step 3 to any of the Arpeggios 1-5 or delete any types stored in Arpeggios 1-5.
-
Page 45: Controlling From An External Midi Keyboard
MIDI controllers on the keyboard – pitch bend wheel, modulation wheel, ribbon controller, knobs, sliders, etc. In addition, you can also control the MOTIF-RACK ES using an optional Yamaha BC3 Breath Controller, FC4/5 Footswitch, FC7 Foot Controller, etc. by connecting these controllers to the external device. -
Page 46: Assigning Control Numbers
Controlling from an external MIDI keyboard Assigning Control numbers For example, in the instructions below, we'll control panning with an external assignable controller. Select the “Set1Source” parameter to “AS1” (ASSIGN 1) in the CtrlSet display, then confirm the Control Number of the “AS1.”... -
Page 47: Using The Jobs
Using the Jobs There are six data-related operations (Jobs) in the Utility mode: Initialize, Copy, Bulk Dump, Plug-in Save, Plug-in Load and Factory Set. Here for example, you can initialize Voices/Performance/Multis to their original settings (including those currently being edited) or copy Elements/Parts. -
Page 48: Copy
Using the Jobs Copy Copy From this display you can copy the Element/Key/Part parameter settings from any Voice/Performance/Multi to the Voice/ Performance/Multi you are editing. In the Performance/Multi mode, you can also copy the effect settings. n If you wish to copy an entire Voice/Performance/Multi, use the Store function (page 49). -
Page 49: Saving Board Voices (Plug-In Save)
Saving Board Voices (Plug-in Save) This lets you save the Board Voices edited with the Editor for a Plug-in Board on computer – called Board Custom Voices – to the MOTIF-RACK ES. Because the Plug-in Boards do not have user memory and the edited Voice data will be lost when turning the power off, the edited Board Custom Voice data should be saved with this operation. - Page 50 Saving the settings (Store) Edit Indicator If you alter any parameters, the indicator will appear in the top right of the display. This indicates that the current Voice/Multi has been modified but not yet stored. CAUTION When you select another program number or another mode, the Edit indicator will disappear and all edited data will be lost.
-
Page 51: Basic Structure
This section gives you an easy-to-understand overview of the MOTIF-RACK ES — its wide range of sophisticated features, its MIDI control and performance functions. System overview This synthesizer is made up of several blocks, as shown here. Computer with Application Software MIDI IN External MIDI keyboard MIDI transmitting device... - Page 52 AWM2 (Advanced Wave Memory 2) AWM2 (Advanced Wave Memory 2) is a synthesis system based on sampled waves (sound material), and is used in many Yamaha synthesizers. For extra realism, each AWM2 Voice uses multiple samples of a real instrument’s waveform. Furthermore, a wide variety of parameters –...
-
Page 53: Voice, Performance, And Multi
Voice, Performance, and Multi This instrument features three different types of programs that form the basis for creating and playing sounds. Voice A program that contains the sonic Elements for generating a specific musical instrument sound is referred to as a “Voice.” Each Voice consists of up to four Elements (Normal Voice) or up to 73 keys (Drum Voice). - Page 54 Tone generator block Voice, Performance, and Multi The following illustrations may help in understanding the memory structure of the Voices, Performances, and Multis. Voices Preset Voice Normal Voices: 768 Drum Voices: 64 GM Voice Normal Voices: 128 Drum Voice: 1 User Voice Normal Voices: 256 Drum Voices: 32...
-
Page 55: Tone Generator Parameters That Produce The Voice Sound
Normal Voices & Drum Voices Internally, there are two Voice Types: Normal Voices and Drum Voices. Normal Voices are mainly pitched musical instrument-type sounds that can be played over the range of the keyboard. Drum Voices are mainly percussion/drum sounds that are assigned to individual notes on the keyboard. - Page 56 Tone generator block Tone generator parameters that produce the Voice sound Attack Level Pitch Decay 1 Hold Level Level Sustain Level (Decay 2 Level) Hold Attack Decay 1 Decay 2 Time Time Time Time Pressing the key (Note on) Filter [VOICE] select Voice [EDIT]...
-
Page 57: Single Timbre Tone Generator (Voice/Performance Mode) And Multi-Timbral Tone Generator (Multi Mode)
Amplitude [VOICE] select Voice [EDIT] [MUTE/SEL/ENTER] (LED turns off) select Element/Key AMP display, AEG display This unit controls the output level (amplitude) of the sound output from Filter. The signals are then sent at this level to the Effect block. Also, by setting the AEG (Amplitude Envelope Generator), you can control how the volume changes over time. -
Page 58: Part Structure Of The Tone Generator Block
Tone generator block Part structure of the tone generator block Part structure of the tone generator block The MOTIF-RACK ES plays the sounds in its tone generator block in response to MIDI messages received from external controllers or sequencer. The MIDI messages are assigned to sixteen independent channels, and the instrument is capable of simultaneously playing sixteen separate Parts, via the sixteen MIDI channels. -
Page 59: Effect Block
This example applies when installing one Multi- part Plug-in Board and one Single-part Plug-in Board, and assigning the Multi-part Plug-in Board to “Port 1” and the Single-part Plug-in Board to “Port 3.” When using the internal tone generator of the MOTIF-RACK ES, set the MIDI port of each track on the sequencer to “1.”... - Page 60 Effect block Effect structure Master Effect This block applies effects to the final stereo output signal of the entire sound. A total of 8 different Master Effect types are available. Bypassing the Effects (Effect Off) From the display which is shown by pressing the [SHIFT]+[BYPASS] buttons, you can select the specific effect(s) to be bypassed.
-
Page 61: Effect Connection In Each Mode (Effect Connection Edit)
EQ for which all bands are set to peaking type Gain Q (frequency bandwidth) – 3 bands LOWMID HIGHMID Effect connection in each mode (Effect Connection Edit) Select the desired parameter for editing by using the cursor [L][M] buttons and change the settings with the data dial. Voice mode The Effect parameters in the Voice mode are set for each Voice and the settings are stored as a User Voice. - Page 62 Effect block Effect connection in each mode (Effect Connection Edit) Performance mode The Effect parameters in the Performance mode are set for each Performance and the settings are stored as a User Performance. [SHIFT]+[PERFORM] select Performance select Effect Connection Edit by pressing [EFFECT] once or twice Tone Generator block...
-
Page 63: Arpeggio
Arpeggio This function lets you automatically trigger musical and rhythmic phrases using the current Voice by simply pressing a note or notes on the keyboard. The Arpeggio sequence also changes in response to the actual notes or chords you play, giving you a wide variety of inspiring musical phrases and ideas –... -
Page 64: Arpeggio Related Parameters
Arpeggio Arpeggio related parameters Playback only of the played notes (assigned drum instruments) Playing a note or notes will trigger a rhythm pattern using only the notes played (assigned drum instruments). Keep in mind that even if you play the same notes, the triggered rhythm pattern differs depending on the order of the notes played. -
Page 65: Reference
This section of the manual covers in detail all of the parameters and settings available on the MOTIF-RACK ES. Voice mode Voice Edit (for Normal Voice) When a Normal Voice is selected, the Voice Edit parameters are divided into Common Edit (parameters common to all four Elements), and Element Edit (parameters of individual Elements). - Page 66 Voice mode Voice Edit (for Normal Voice) Output Volume Volume RevSend Reverb Send ChoSend Chorus Send EG/FLT (Envelope Generator/Filter) AEG Attack/Decay/ AEG Attack Time/Decay Time/ Sustain Level/Release Time Sustain/Release FEG Attack/Decay/ FEG Attack Time/Decay Time/Release Time/Depth Release/Depth Cutoff/Resonance Cutoff/Resonance CtrlSet (Controller Set) Set1-6ElmSw Controller Set Element Switch Selects whether the controller will affect each individual Element.
- Page 67 KeyReset Key On Reset Phase Phase Delay Delay FadeIn Fade In Hold Hold FadeOut Fade Out Dest1-3ElmSw LFO Destination Element Switch Dest1-3Dest LFO Destination Dest1-3Depth LFO Depth Determines whether or not the LFO is reset each time a Note On message is received. The following three settings are available.
- Page 68 Voice mode Voice Edit (for Normal Voice) LFO USR (User LFO) Template User Wave Template TotalStep User Wave Total Step Slope User Wave Slope Step1-16Val User Wave Step Value [VOICE] Element Edit 13]-[4/8/12/16] These parameters are for editing the individual Elements that make up a Normal Voice. OSC (Oscillator) ElementSw (ElmSw) Element Switch...
- Page 69 RandomTune Random (Random) PitchVelSns (VelSns) Pitch Velocity Sensitivity FlwPchSns (FlwSns) Pitch Key Follow Sensitivity FlwCntrKey (CntrKy) Pitch Key Follow Sensitivity Center Key PEG (Pitch Envelope Generator) Hold Time (HoldTm) PEG Hold Time AttackTime (AtkTm) PEG Attack Time Decay1/2Time PEG Decay Time (Dcy1/2Tm) ReleaseTime (RelTm) PEG Release Time...
- Page 70 Voice mode Voice Edit (for Normal Voice) Filter Type Filter Type Gain Filter Gain Cutoff Filter Cutoff Resonance (Reso) Filter Resonance Distance (Dstnce) Filter Distance CutofVelSns (CtofVl) Filter Cutoff Velocity Sensitivity ResoVelSns (ResoVl) Filter Resonance Velocity Sensitivity FlwFltSns (FlwSns) Filter Cutoff Key Follow Sensitivity ScaleBP1-4 (BP1-4) Filter Cutoff Scaling Break...
- Page 71 FlwEGTmSns FEG Time Key Follow Sensitivity (FlwSns) FlwCntrKey (CntrKy) FEG Time Key Follow Sensitivity Center Key AMP (Amplitude) Level Level AltnatePan (AltPan) Alternate Pan RandomPan Random Pan (RdmPan) ScalingPan (SclPan) Scaling Pan LvlFlwSns (FlwSns) Level Key Follow Sensitivity ScaleBP1-4 (BP1-4) Level Scaling Break Point ScaleOfst1-4 (Ofst1-4) Level Scaling Offset...
- Page 72 Voice mode Voice Edit (for Normal Voice) LFO (Low Frequency Oscillator) Wave LFO Wave Speed LFO Speed KeyOnSync LFO Key On Sync (KOnSyn) KeyOnDelay LFO Key On Delay Time (KOnDly) Pmod LFO Pitch Modulation Depth Fmod LFO Filter Modulation Depth Amod LFO Amplitude Modulation Depth...
-
Page 73: Voice Edit (For Drum Voice)
Voice Edit (for Drum Voice) When a Drum Voice is selected, Voice Edit parameters are divided into Common Edit (parameters common to all keys, up to 73), and Key Edit (parameters of individual keys). [SHIFT]+[DRUM] Common Edit [E][F] These parameters are for making global (or common) edits to all keys of the selected Drum Voice. General Output InsRevSend... - Page 74 Voice mode Voice Edit (for Drum Voice) RcvNoteOff Receive Note Off AltnateGrp Alternate Group Pitch CoarseTune Coarse FineTune Fine PitchVelSns Pitch Velocity Sensitivity Filter Cutoff LPF Cutoff Resonance LPF Resonance CutofVelSns LPF Cutoff Velocity Sensitivity HPF Cutoff HPF Cutoff AMP (Amplitude) Level Level AltnatePan...
-
Page 75: Voice Edit (For Plug-In Voice)
Voice Edit (for Plug-in Voice) These parameters are basically the same as in Normal Voice Edit. Unlike with Normal Voices, the Plug-in Voices only have one Element for editing. n Depending on the particular Plug-in Board you are using, some of the parameters described here may not be available. n For details on the current lineup of available Plug-in Boards, see page 52. - Page 76 Voice mode Voice Edit (for Plug-in Voice) Element Edit [VOICE] n Unlike with Normal Voices, the Plug-in Voices only have one Element for editing. OSC (Oscillator) Bank Bank Number Number VelSensDpt Velocity Sensitivity Depth VelSensOfst Velocity Sensitivity Offset NoteShift Note Shift PEG (Pitch Envelope Generator) AttackTime PEG Attack Time...
-
Page 77: Supplementary Information
Supplementary information Micro Tuning List [VOICE] select Normal Voice [EDIT] [SHIFT]+[COMMON] M.TuningNo. Type Equal Temp (Equal temperament) PureMaj (Pure major) PureMin (Pure minor) Werckmeist (Werckmeister) Kirnberger Vallot&Yng (Vallotti & Young) 1/4 Shift (1/4 shifted) 1/4 tone 1/8 tone Indian Arabic 1 Arabic 2 Arabic 3 Filter Type List... - Page 78 Voice mode Supplementary information BPF6 (6dB/oct Band Pass Filter) Resonance Level Cutoff range Cutoff range 6db/oct Frequency Range passed BEF12 (12dB/oct Band Elimination Filter) BEF6 (6dB/oct Band Elimination Filter) Level Cutoff range Frequency Range passed Range passed Center frequency Dual LPF (Dual Low Pass Filter) Two 12dB/oct low-pass filters connected in parallel.
-
Page 79: Performance Mode
Performance mode Performance Voice Assign [SHIFT]+[PERFORM] select Performance Performance Edit by pressing [EDIT] once or twice each display with PAGE [E][F] From this mode you can select a Voice for each Part and determine the note range it can be played from. The display shown at right appears. - Page 80 Performance mode Performance Edit Low/LowMid/Mid/ Frequency HighMid/High Freq Low/LowMid/Mid/ Gain HighMid/High Gain Low/LowMid/Mid/ Frequency Characteristic HighMid/High Q MEF (Master Effect) Switch Switch Type Type CtrlAsn (Control Assign) Breath Controller Ribbon Controller AS1/AS2 Assign FC1/FC2 Foot Controller Output Volume Volume RevSend/ChoSend Reverb Send/Chorus Send EG (Envelope Generator) AEG Attack/Decay/...
- Page 81 NoteLimitL/H Note Limit Low/High (NtLmtL/H) VelLimitL/H Velocity Limit Low/High (VlLmtL/H) PortaSwitch (PrtSw) Portamento Switch PortaTime (PrtTm) Portamento Time PortaMode (PrtMd) Portamento Mode PB Upper/Lower Pitch Bend Upper/Lower (PB Up/Low) VelSensDpt (VelDpt) Velocity Sensitivity Depth VelSensOfs (VelOfs) Velocity Sensitivity Offset Output Volume Volume VoiceELPan (ELPan)
- Page 82 Performance mode Performance Edit Tone NoteShift (NTShft) Note Shift Detune (Detune) Detune Cutoff (Cutoff) Cutoff Resonance (Reso) Resonance FEG Depth (FEGDpt) FEG Depth FEG Attack (FEGAtk) FEG Attack FEG Decay (FEGDcy) FEG Decay FEG Sustain (FEGSus) FEG Sustain FEG Release (FEGRel) FEG Release AEG Attack (AEGAtk) AEG Attack...
-
Page 83: Multi Mode
Multi mode Multi Mixing [MULTI] (LED lights in green) select Multi Voice VoiceNo. Voice Number Bank MSB/Bank LSB Bank Select MSB/LSB Output Volume Volume Effect RevSend/ChoSend Reverb Send/Chorus Send DryLvl Dry Level InsEF Insertion Effect Switch (VarSend) Variation Send Multi Voice Edit [MULTI] (LED lights in green) select Multi Part... -
Page 84: Multi Edit
Multi mode Multi Edit Multi Edit [MULTI] (LED lights in green) Common Edit [E][F] Use Common Edit to edit the settings common to all Parts. n Common Edit operations cannot be performed on the Multi-part Plug-in Parts 17 - 32. General Name Name... -
Page 85: Effect
Output Tone EQ (Equalizer) RcvSw (Receive Switch) Effect From this mode you can edit the effect settings for the Voice, Performance, and Multi modes. The display shown at right appears. For details about effect connections, see page 61. n These displays are shown in the Voice mode (Normal Voice). When selecting the other Voices or other modes, the shown displays may differ. n About Master Effect •... -
Page 86: Voice Effect Edit (For Drum Voice)
Effect Voice Effect Edit (for Drum Voice) ChoToRev Chorus to Reverb ChoPan Chorus Pan ReverbType Reverb Type ReverbRtn Reverb Return ReverbPan Reverb Pan Effect Parameter Edit [VOICE] Ins1, Ins2 (Insertion Effect 1, 2) Cho (Chorus) Rev (Reverb) Voice Effect Edit (for Drum Voice) Same as in Effect Edit for the Normal Voice. -
Page 87: Multi Effect Edit
Multi Effect Edit The Multi effect settings are common to all Parts. Effect Connection Edit [MULTI] For details about the effect connection in the Multi mode, see page 62. For details on the effect types, refer to the separate Data List. ChoCtgry/ChoType Category/Type ChoRtn... -
Page 88: Arpeggio
Arpeggio Arpeggio You can store up to five Arpeggio types to each Voice/Performance/Multi. For more information on Arpeggio, refer to page 42. Arpeggio Edit Voice/Performance/Multi mode Determines the Arpeggio settings for each Voice, Performance, and Arpeggio. Parameters other than “Category” and “Type” are common to the five Arpeggios assigned to each Voice/Performance/Multi. -
Page 89: Utility
QuntStrngth Quantize Strength VelocityRt Velocity Rate GateTimeRt Gate Time Rate OutputSw Output Switch TransmitCh Transmit Channel Voice/Performance/Multi mode Arpeggio Store [SHIFT]+[MUTE/SEL/ENTER] You can store up to five Arpeggio types to each Voice/Performance/Multi. You can select the desired Arpeggio form the Arpeggios stored in each Voice/Performance/Multi with the PAGE [E][F] buttons while playing back. - Page 90 Utility CtrlReset Controller Reset LCD Cntrst LCD Contrast PlgAutoLoad Plug-in Auto Load BulkIntrval Bulk Interval Output L&R Gain L Gain and R Gain Asn1/2Gain Assignable 1/2 Gain Asn3/4Gain Assignable 3/4 Gain MEQ (Master Equalizer) MEF (Master Effect) Voice ArpOutSw Arpeggio Output Switch ArpTransCh Arpeggio Transmit Channel AS1/2 Assign...
- Page 91 MIDI BasicRcvCh Basic Receive Channel TransmitCh Transmit Channel DeviceNo. Device Number BankSelSw Bank Select Switch PgmChangeSw Program Change Switch CC Mode Control Change Mode RcvBulkSw Receive Bulk Switch MIDI Sync MIDI Sync MIDI IN/OUT MIDI In/Out ThruPort Through Port PLG1Sys, PLG2Sys (Plug-in Board System) PolyExpand Poly Expand DeviceNo.
-
Page 92: Appendix
Display Messages Messages Are you sure? Bulk protected. Completed. Device number is off. Device number mismatch. Effect plug-in is not supported. Executing... MIDI buffer full. MIDI checksum error. MIDI data error. Multi plug-in is not in PLG2. Now checking plug-in board. Please keep power on. -
Page 93: About Midi
About MIDI MIDI is an acronym that stands for Musical Instrument Digital Interface, which allows electronic musical instruments to communicate with each other, by sending and receiving compatible Note, Control Change, Program Change and various other types of MIDI data, or messages. The MOTIF-RACK ES can control a MIDI device by transmitting note related data and various types of controller data. - Page 94 About MIDI MIDI Messages Transmitted/Recognized Main Volume (Control #007) Messages which control the volume of each Part. Setting the value to 127 produces maximum volume and 0 results in volume off. Pan (Control #010) Messages which control the stereo panning position of each Part (for stereo output).
- Page 95 Reset All Controllers (Control #121) The values of the following controllers will be reset to the defaults. CONTROLLER VALUE Pitch Bend Change 0 (center) Aftertouch 0 (off) Polyphonic Aftertouch 0 (off) Modulation 0 (off) Expression 127 (max) Hold1 0 (off) Portamento 0 (off) Sostenuto...
-
Page 96: Midi Data Format
MIDI Data Format MIDI Data Format Many MIDI messages listed in the MIDI Data Format section are expressed in hexadecimal or binary numbers. Hexadecimal numbers may include the letter “H” as a suffix. The letter “n” indicates a certain whole number. The chart below lists the corresponding decimal number for each hexadecimal/binary number. - Page 97 Voice. Bank Select will be actually executed when the Program Change message is received. Bank Select and Program Change numbers that are not supported by Yamaha will be ignored, but transmitted to the Plug-in Board. (3-1-4) PROGRAM CHANGE...
- Page 98 Sets the MASTER VOLUME value. The value “mm” is used to set the master volume (the value “ll” should be ignored). (3-6-3) PARAMETER CHANGE (3-6-3-1) XG SYSTEM ON 11110000 Exclusive Status 01000011 YAMAHA ID 0001nnnn Device Number 01001100 Model ID 0aaaaaaa Address High...
-
Page 99: Optional Plug-In Board Installation
Loose screws inside the instrument can cause improper operation or serious damage. If you are unable to retrieve a dropped screw, consult your Yamaha dealer for advice. • Install the optional units carefully as described in the procedure below. Improper installation can cause shorts which may result in irreparable damage and pose a fire hazard. - Page 100 Optional Plug-in Board installation Installing the Plug-in Board Carefully plug the cable connector into the Plug-in Board connector until the two notches on the cable connector lock into the sockets on the board as shown in the illustration. Mount the Plug-in Board onto the plate as detailed in the following steps.
-
Page 101: Removing Rubber Stoppers For Rack Mount Installation
Removing the Plug-in Board from the MOTIF- RACK ES Press down hooks 2 in the direction as shown in the illustration and take the board out from hooks 2 by lifting up the one side. Pull out the other side of the board from hooks 1 while pressing down hook 1 as shown in the illustration. -
Page 102: Troubleshooting
No sound? Wrong sound? When a problem like this occurs, please check the following points before assuming that the product is faulty. In many cases you’ll find the solution to your problem here. If the problem persists, then contact your Yamaha dealer or service center (page 111). -
Page 103: In The Voice Mode
Distorted sound • Are the effect settings appropriate? Use of an effect at certain settings may produce distortion........... pages 29, 35, 40 •... - Page 104 Troubleshooting Data communication between the computer and the MOTIF-RACK ES does not work properly. • Check whether the Port setting on the computer is appropriate or not. • Is the MIDI IN/OUT setting appropriate? [UTILITY] MIDI display “MIDI IN/OUT” If the instrument is connected to the MIDI IN/OUT terminals, set the switch to “MIDI.” If the instrument is connected to the USB terminal, set the switch to “USB”...
-
Page 105: Specifications
Weight * Specifications and descriptions in this owner’s manual are for information purposes only. Yamaha Corp. reserves the right to change or modify products or specifications at any time without prior notice. Since specifications, equipment or options may not be the same in every locale, please check with your Yamaha dealer. -
Page 106: Index
Index Index A.PhraseNo. (Audition Phrase Number) ...20, 65 A.PhrNtSft (Audition Phrase Note Shift) ...20, 65 A.PhrVelSft (Audition Phrase Velocity Shift) ...20, 65 AC AMod (Assignable Control Amplitude Modulation Depth) ... 75 AC Filter (Assignable Control Filter) ...75 AC FMod (Assignable Control Filter Modulation Depth) ... - Page 107 EG (Envelope Generator) ...34, 80 EG/FLT (Envelope Generator/Filter) ...26, 66, 73, 75 EGLvVelSns (EG Velocity Level Sensitivity) ...69, 70, 71 EGTmVelSns (EG Time Velocity Sensitivity) ...69, 70, 71 EL 1-4 ... 47 EL C0-C6 ... 47 EL1-4InsEFOut (Element 1-4 Effect Output) ...68, 85 EL1InsEFOut - EL4InsEFOut (Insertion Effect Out) ...29 Element ...
- Page 108 Index Multi-part Plug-in Board ... 52, 62 Multi-timbral Tone Generator ... 57 Mute ... 26, 31, 34 [MUTE/SEL/ENTER] button ...12, 26, 34 MW (Modulation Wheel) ...46, 66, 82 MW AMod (Modulation Wheel Amplitude Modulation Depth) ... 75 MW Filter (Modulation Wheel Filter) ...75 MW FMod (Modulation Wheel Filter Modulation Depth) ...
- Page 109 Swing ... 88 Switch ... 80, 88 Synchronizing ... 17 System ... 48 System Effect ... 59, 61, 62, 83 System Exclusive Message ... 95 System Message ... 95 System Overview ... 51 System Realtime Message ... 95 Template (User Wave Template) ...68 Tempo ...
- Page 110 Memo Owner’s Manual...
- Page 111 For details of products, please contact your nearest Yamaha representative or the authorized distributor listed below. Pour plus de détails sur les produits, veuillez-vous adresser à Yamaha ou au distributeur le plus proche de vous figurant dans la liste suivante.
- Page 112 Yamaha Web Site (English only) http://www.yamahasynth.com Yamaha Manual Library http://www2.yamaha.co.jp/manual/english/ U.R.G., Pro Audio & Digital Musical Instrument Division, Yamaha Corporation © 2004 Yamaha Corporation WD57960 411MWAP23.2-01A0 This document is printed on recycled chlorine free (ECF) paper with soy ink. Printed in Japan...