Table of Contents
Advertisement
Quick Links
SUMMARY
1
PRODUCT IDENTIFICATION ................................................................................................................... 3
1.1
APPLICATION, GENERAL FUNCTIONS AND INTENDED USE .............................................................. 3
1.2
NAME AND ADDRESS OF MANUFACTURER OR DISTRIBUTOR ......................................................... 3
SMEG S.P.A. ............................................................................................................................................. 3
1.3
DECLARATION OF CONFORMITY TO PRODUCT STANDARDS ........................................................... 3
1.4
DESCRIPTION OF THE APPLIANCE ................................................................................................... 4
2
SYMBOLS USED IN THE MANUAL ......................................................................................................... 5
3
SAFETY PRECAUTIONS AND INSTRUCTIONS ......................................................................................... 6
3.1
CORRECT INSTALLATION ................................................................................................................ 6
3.2
SAFE USE ....................................................................................................................................... 7
3.3
CORRECT MAINTENANCE ............................................................................................................... 8
4
PRODUCT CHARACTERISTICS ................................................................................................................ 9
4.1
OVERALL DIMENSIONS ................................................................................................................... 9
4.2
OVERALL DIMENSIONS (H 720) .....................................................................................................10
4.3
OVERALL DIMENSIONS (RAISED MODELS) .....................................................................................11
4.4
TECHNICAL CHARACTERISTICS .......................................................................................................12
5
PREPARING THE APPLIANCE FOR USE .................................................................................................13
5.1
POSITIONING AND INSTALLATION .................................................................................................13
5.2
CONNECTION TO THE WATER SUPPLY ...........................................................................................15
5.3
DRAIN CONNECTION .....................................................................................................................15
5.4
CONNECTION TO THE ELECTRICITY SUPPLY ...................................................................................16
6
FIRST START-UP ...................................................................................................................................17
6.1
FIRST START-UP ............................................................................................................................17
6.2
PREPARING FOR USE ( IMPORTANT ) ............................................................................................17
6.3
USING THE WATER SOFTENER (ON MODELS WITH THIS FEATURE ONLY) .......................................17
7
CONTROL PANEL .................................................................................................................................18
7.1
SET-UP (AUTHORISED STAFF ONLY) ..............................................................................................19
7.2
MODIFIABLE PARAMETERS ...........................................................................................................20
7.3
CIRCUIT. ..................................................................................................................................................23
8
MALFUNCTIONS SHOWN ON THE DISPLAY (FOR THE TECHNICIAN) ....................................................24
9
INSTRUCTIONS FOR THE USER .............................................................................................................26
9.1
BEFORE WASHING ........................................................................................................................27
9.2
FIRST USE EACH DAY (TANK AND BOILER EMPTY) ..........................................................................28
9.3
OPERATING ANOMALIES ...............................................................................................................29
9.4
PROGRAM CHANGE ......................................................................................................................30
10
CHOSING THE PROGRAM .................................................................................................................31
11
BASKETS PROVIDED .........................................................................................................................32
12
MAINTENANCE AN CLEANING .........................................................................................................32
12.1 DAILY FILTER CLEANING ................................................................................................................33
12.2 CLEANING THE FILTER DURING THE DAY .......................................................................................34
12.3 TOTAL PUMP-OUT AT THE END OF THE DAY..................................................................................35
12.4 TOPPING UP WITH REGENERATING SALT (FOR MODELS WITH SOFTENER) ....................................35
12.5 ROUTINE INSPECTION OF THE SPRAY ARM (ONCE A WEEK ) ..........................................................36
12.6 LENGTHY PERIODS OUT OF USE ....................................................................................................36
13
TROUBLESHOOTING ........................................................................................................................37
14
MALFUNCTIONS SHOWN ON THE DISPLAY (FOR THE USER) ............................................................39
TRANSLATION OF THE ORIGINAL INSTRUCTIONS
1
Advertisement
Table of Contents

Related Manuals for Smeg UD515D


Summary of Contents for Smeg UD515D
-
Page 1: Table Of Contents
PRODUCT IDENTIFICATION ........................3 APPLICATION, GENERAL FUNCTIONS AND INTENDED USE .............. 3 NAME AND ADDRESS OF MANUFACTURER OR DISTRIBUTOR ............3 SMEG S.P.A.............................. 3 DECLARATION OF CONFORMITY TO PRODUCT STANDARDS ............3 DESCRIPTION OF THE APPLIANCE ....................4 SYMBOLS USED IN THE MANUAL ......................5 SAFETY PRECAUTIONS AND INSTRUCTIONS .................. - Page 2 SMEG thanks you for choosing one of its products. This manual is an integral part of the appliance. Take good care of it and keep it to hand throughout the appliance’s life cycle, since it contains important information about assembly, safety, use and maintenance.
-
Page 3: Product Identification
Electrical and Electronic Equipment (WEEE). For information on the treatment, recovery and recycling of this product, contact the local authority, domestic waste collection service, or your Smeg reseller. Make sure that this product is scrapped correctly to safeguard the environment and... -
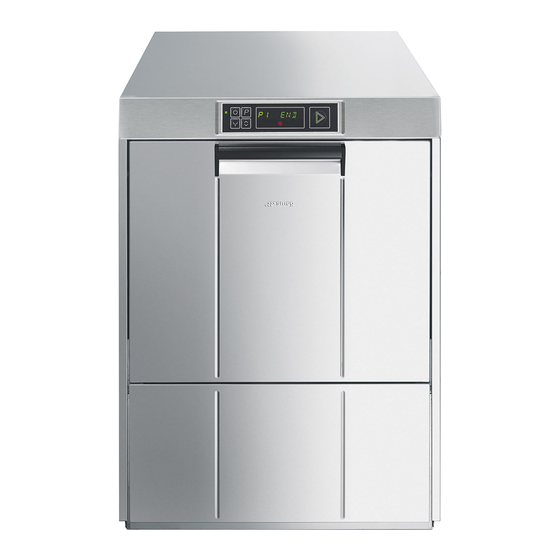
Page 4: Description Of The Appliance
1.4 Description of the appliance U COVER (TOP) D DISPLAY AND CONTROL PANEL A FRONT LOADING/UNLOADING DOOR V SERVICE COMPARTMENT F ADJUSTABLE FEET... -
Page 5: Symbols Used In The Manual
2 SYMBOLS USED IN THE MANUAL This symbol instructs the user to read the instructions in the manual with care. This symbol appears next to information important for the safety of people and the appliance. This symbol is applied to some parts which contain live electrical components and indicates the risk of electric shock. -
Page 6: Safety Precautions And Instructions
3 SAFETY PRECAUTIONS AND INSTRUCTIONS The precautions and instructions below contain important information and must be read with care. The manufacturer does not accept responsibility for damage caused by failure to comply with the safety precautions and instructions. 3.1 Correct installation ... -
Page 7: Safe Use
3.2 Safe use The staff assigned to use the dishwasher must be suitably trained and instructed. The appliance is not suitable for use by juveniles or persons with reduced physical, sensorial or mental capacities, or those without the necessary knowledge and experience. Such persons may only use the appliance under the supervision of a person responsible for their safety. -
Page 8: Correct Maintenance
3.3 Correct maintenance Do not clean the machine with a water jet machine, high-pressure or steam cleaners. Before performing any maintenance procedure on the appliance disconnect it from the mains electricity supply. Touching live electrical components, even accidentally, may be very dangerous. -
Page 9: Product Characteristics
4 PRODUCT CHARACTERISTICS 4.1 Overall dimensions LOWER BACK PANEL ELECTRICITY SUPPLY CABLE FILLER HOSE PERISTALTIC HOSES TERMINAL FOR EXTERNAL DRAIN HOSE EQUIPOTENTIAL CONDUCTOR. EXTERNAL DISPENSER POWER CABLE ENTRY POINT... -
Page 10: Overall Dimensions (H 720)
4.2 Overall dimensions (H 720) LOWER BACK PANEL ELECTRICITY SUPPLY CABLE FILLER HOSE PERISTALTIC HOSES EARTH TERMINAL DRAIN HOSE EXTERNAL DISPENSER POWER CABLE ENTRY POINT... -
Page 11: Overall Dimensions (Raised Models)
4.3 Overall dimensions (raised models) LOWER BACK PANEL FILLER HOSE EARTH TERMINAL ELECTRICITY SUPPLY CABLE PERISTALTIC HOSES DRAIN HOSE EXTERNAL DISPENSER POWER CABLE ENTRY POINT... -
Page 12: Technical Characteristics
4.4 Technical characteristics Electricity supply See technical data plate and Intake water pressure electrical wiring Intake water temperature diagram supplied with the appliance Indoor Max. working altitude 2000 Working ambient temperature °C 10 - 35 Relative humidity 80% for temperatures up to 25°C with linear decrease to 50% at the... -
Page 13: Preparing The Appliance For Use
5 PREPARING THE APPLIANCE FOR USE Convey the dishwasher to the installation site, remove the packaging and check the appliance and components for damage; any damage found must be reported to the transporter in writing. The packaging components (plastic bags, expanded polystyrene, nails, etc.) must not be left within reach of children and pets since they are potentially dangerous. -
Page 15: Connection To The Water Supply
5.2 Connection to the water supply Check that the intake water pressure, flow rate and temperature are as stated in the dishwasher's technical characteristics. If the dynamic pressure exceeds the limit stated in the technical characteristics, a pressure reducer must be installed. If the pressure is lower, it might be necessary to fit a special pump to ensure optimal performance. -
Page 16: Connection To The Electricity Supply
5.4 Connection to the electricity supply The dishwasher must be connected to the electrical system by authorised, skilled staff, in accordance with the relevant regulations. Also comply with the technical instructions for the connection provided with the appliance. The dishwasher's rated electrical characteristics are provided on its technical data plate. -
Page 17: First Start-Up
6 FIRST START-UP 6.1 First start-up The electrical protection system must undergo a functional test before the appliance is put into operation. The appliance must be installed and/or inspected by qualified staff, who will start it up for the first time and provide the relevant operating instructions. -
Page 18: Control Panel
7 CONTROL PANEL On-off button Program selection button Start CONFIRM/PAUSE button Total emptying button (tank and boiler) Additional function selection button L1 Mains power on light L2 Light indicating dishwasher in operation, cycle running, FILL running…. (blue), ready (green), malfunction (red) L3 Pump-out in progress light No rinse-aid symbol (if a system for monitoring outside the dishwasher is provided) Tank heating element on symbol... -
Page 19: Set-Up (Authorised Staff Only)
When the display control panel is switched on, the display shows the type of dishwasher (PRF 400, PRF 500, CAPOTE…….), followed by the firmware version and update installed. If the dishwasher is already powered up, press the on/off button for direct display of the firmware version and update installed. -
Page 20: Modifiable Parameters
7.2 Modifiable parameters The illustrations are purely guideline. The minimum and maximum temperatures available depend on the model (glass washer, dishwasher, undercounter or hood- type model, ..). Rinsing temperature Washing temperature (boiler temperature) (tank temperature) Warning: The tank and boiler temperatures shown on the display may be different from the actual temperatures by a few degrees, especially in transient phases (just after the FILL is completed, just after the end of the cycle, etc.) due to the inertia of the measurement probe. - Page 21 Regeneration frequency setup (models with softener) * (Default value: H03; modify the parameter to suit the mains water hardness. At first use, the salt tank has to be filled. It is subsequently sufficient simply to fill up with regenerating salt when necessary. Mains water hardness setting table Hardness Hardness...
- Page 22 "Clean water" cycle When this option is activated, the appliance pumps out all the water from the tank and then refills it with clean water at every wash cycle. How long this operation takes depends on the washing water temperature. On: enabled –...
-
Page 23: Starting The Peristaltic Pumps - Rapid Filling Of Detergent And Rinse Aid Delivery Circuit
USER program duration customisation (optional, only if installed) USER. is the only program which can be customised. Scroll through the setup parameters to display USER.P1, P2….. followed by two dashes (e.g. P2--). Keep pressing the P button until USER appears followed by the duration (e.g. -
Page 24: Malfunctions Shown On The Display (For The Technician)
8 MALFUNCTIONS SHOWN ON THE DISPLAY (FOR THE TECHNICIAN) The dishwasher is able to identify a number of malfunctions and show them on the display. If the problem persists after the dishwasher has been switched off and back on, proceed as described below: Tank temperature probe Tank temperature probe disconnected or not working. - Page 25 Boiler temperature probe Boiler temperature probe disconnected or not working malfunction Boiler water filling The boiler wasn’t filled in the expected time: check the malfunction water supply tap, the dynamic supply pressure, cleanliness of the inlet water filter, any damage of the water charging hose, or check the following in this order: - faulty boiler pressure switch (it always detects “empty”), - leakage or unbinding of the tube (water runs inside the...
-
Page 26: Instructions For The User
9 INSTRUCTIONS FOR THE USER Control panel On-off button Program selection button Start CONFIRM/PAUSE button Total emptying button (tank and boiler) Additional function selection button L1 Mains power on light L2 Light indicating dishwasher in operation, cycle running, FILL running…. (blue), ready (green), malfunction (red) L3 Pump-out in progress light No rinse-aid symbol (if a system for monitoring outside the dishwasher is provided) -
Page 27: Before Washing
Use only detergents and rinse aids for industrial dishwashers. Do not use detergents intended for hand washing. We recommend the use of Smeg products, specially developed for this dishwasher. When topping up the tanks, take care not to swap the products; this might damage the dishwasher and cause malfunctions. -
Page 28: First Use Each Day (Tank And Boiler Empty)
9.2 First use each day (tank and boiler empty) With the door/hood closed: Press and hold it down. The display shows the firmware version and update installed, then the tank and boiler temperatures. This is followed by FILL and the boiler water temperature. The boiler heating element symbol remains lit until heating finishes. -
Page 29: Operating Anomalies
At the end of the program “END” flashes Unload the dishes. When the dishwasher is closed again, the system offers the last program run. 9.3 Operating anomalies Open door. If the door is opened with the cycle in progress, “CLOSE” flashes and the program stops. -
Page 30: Program Change
9.4 Program change With program started, press and hold it down to interrupt it. Change the program by pressing Confirm the program start by pressing and hold it down for 1 second (light L2 turns blue again). N.B.: During heating of the water in the boiler and tank with the cycle running, the tank heating element and boiler heating element symbols may appear on the display. -
Page 31: Chosing The Program
10 CHOSING THE PROGRAM When you scroll through the available programs, the program number (P1, P2, ..etc.) and its duration are shown first, alternating with the wash and rinse temperatures. PROGRAM TYPE OF DIRT DURATION (*) DISHES Short P1 Lightly soiled plates 1 min CUPS P2 Large and small cups... -
Page 32: Baskets Provided
12 MAINTENANCE AN CLEANING We recommend regular servicing by a SMEG authorised service centre at least once a year, to guarantee optimal performance at all times. Consumables (e.g. peristaltic pump hoses) and/or parts subject to wear and tear must be replaced with genuine SMEG parts. -
Page 33: Daily Filter Cleaning
12.1 Daily filter cleaning 1. Lift the upper filter “S” to remove it 2. Turn the handle “M” anti-clockwise in order to release the central filter “C” 3. Lift the filter “C”, which will also release the filter (rectangular) “F”... -
Page 34: Cleaning The Filter During The Day
Remove the filters (simply lift them out as shown here), taking care that no large residues fall into the sump underneath. Clean them to remove residues and rinse with plenty of water, then put them correctly back in place; do not use sharp or pointed tools. Clean away any limescale deposits to prevent excessive build-ups;... -
Page 35: Total Pump-Out At The End Of The Day
12.3 Total pump-out at the end of the day The dishwasher is able to perform an automatic cleaning cycle at the end of the day. Press the button to start draining the appliance completely. "UNL" and the duration will appear on the display. -
Page 36: Routine Inspection Of The Spray Arm (Once A Week )
12.5 Routine inspection of the spray arm (once a week ) Remove the washing and rinsing spray arms (upper and lower) as shown in the figures: - unscrew the central ring nut 1: - unscrew the plugs at the ends; do not unscrew the nozzles; - clean the spray arms under clean running water;... -
Page 37: Troubleshooting
13 TROUBLESHOOTING In case the pump is not working properly, follow the steps below: Empty the dishwasher out using a container and disconnect the power. Remove screw A, release tab B and lift it upwards. Make sure that the covered drain pump impeller can rotate freely, and that there are no dirt residues, limestone, or pieces of glass. - Page 38 Increase the duration of the washing Improper set cycle cycle, especially if the load is very dirty or partially dried. - Verify that the nozzles are clean and Clogged nozzles that the water softener, if present, is working correctly. Boiler incrusted with - Verify that the filter of the tube limescale placed inside the rinse aid jerrycan is...
-
Page 39: Malfunctions Shown On The Display (For The User)
14 MALFUNCTIONS SHOWN ON THE DISPLAY (FOR THE USER) The dishwasher can show a series of malfunctions on display. After the machine has been switched off and restarted, if the problem is not solved, follow the steps below: ( FOR A MORE PROFICIENT AFTER-SALES SERVICE, ALWAYS TAKE NOTE OF THE INDICATED ERROR ) Err04 Tank temperature probe anomaly Contact After-sales Service...