Kodak EasyShare 5500 User Manual
Kodak easyshare 5500: users guide
Hide thumbs
Also See for EasyShare 5500:
- User manual (157 pages) ,
- User reference (49 pages) ,
- Start here manual (32 pages)
Table of Contents
Advertisement
Advertisement
Table of Contents
Troubleshooting

Related Manuals for Kodak EasyShare 5500


Summary of Contents for Kodak EasyShare 5500
- Page 1 EasyShare 5500 All-in-One Printer User’s Guide for Windows...
- Page 2 Rochester, New York 14650 © Eastman Kodak Company, 2007 Kodak and EasyShare are trademarks of Eastman Kodak Company. Windows is a registered trademark of Microsoft Corporation in the United States and other countries. The Bluetooth word mark and logos are owned by the Bluetooth SIG, Inc. and any use of such marks is under license.
-
Page 3: Table Of Contents
Table of Contents Product Overview... 1 Main Components... 1 Control Panel Layout... 2 Status Lights... 3 LCD Display Screen... 8 Memory Card Slots and USB Port ... 9 Automatic Document Feeder ... 10 Home Center Software... 10 Getting Started ... 13 Connect Power ...13 Install the Printhead ...13 Install Ink Cartridges ...15... - Page 4 Printhead ... 142 Support ...147 Contact Kodak... 147 Limited Warranty ... 147 Telephone Customer Support... 149 Messages...151 Troubleshooting... 154 Appendix ...165 Computer Requirements ...165 Paper Types ...165 Safety...167 Regulatory Compliance... 168 Glossary ... 173 Index... 175 Kodak EasyShare 5500 AiO...
-
Page 5: Product Overview
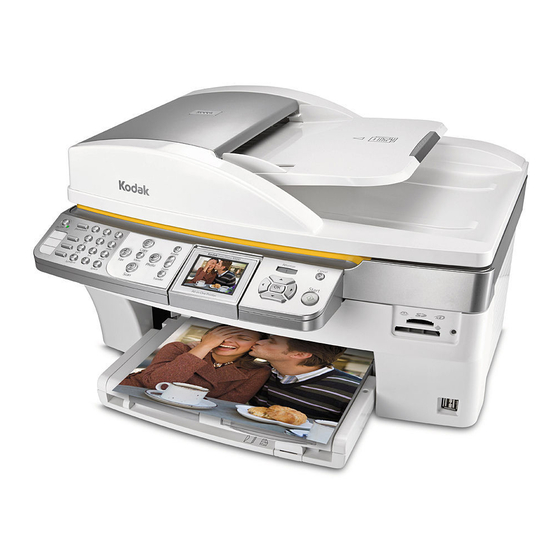
Product Overview Product Overview The Kodak EasyShare 5500 All-in-One (AiO) Printer allows you to print, copy, scan, and fax photos or documents. Many functions can be operated directly from the Control Panel. You can print, store, manage, and share your digital photos with family members and friends with the Kodak EasyShare software. You can buy optional accessories to enhance your Kodak EasyShare AiO experience. -
Page 6: Control Panel Layout
When the EasyShare AiO is in Photo Preview mode, pressing enters Multiview. – Zoom Button When a photo has been magnified with the Zoom decreases the magnification in 0.5X increments. , Down , Left , and Right . button, pressing Kodak EasyShare 5500 AiO... -
Page 7: Status Lights
The following tables contain information on the EasyShare AiO lights. Light Status All lights are off. The On/Off light is flashing and the Display has the following message: Kodak EasyShare System Starting Up (Please Wait) The five boxes at the bottom are flash walking left to right. User’s Guide... - Page 8 Have your wall outlet checked by a qualified electrician. Visit Kodak.com for additional troubleshooting steps or contact your local Kodak Call Center. Ensure that the power cord is properly plugged into the back of the printer. Kodak EasyShare 5500 AiO...
- Page 9 (about 30 seconds). If the flashing green persists, you may have an issue with the printer. Visit Kodak.com for additional troubleshooting steps or contact your local Kodak Call Center. Disconnect power for 5 seconds and reconnect power.
- Page 10 None: Please wait and allow the printer to complete the initialization process. If the flashing green persists, you may have an issue with the printer. Visit Kodak.com for additional troubleshooting steps or contact your local Kodak Call Center. Kodak EasyShare 5500 AiO...
- Page 11 Light Status Light is off. Light is blinking steady. Light is blinking rapidly. Light is on. User’s Guide Attention Light Cause No Error. Recoverable Error. Warning Non-Recoverable Error Product Overview Action/Solution None Paper jam while printing. Main tray empty. Photo tray empty. Carrier stall during pick.
-
Page 12: Lcd Display Screen
Remove and reinsert the SD/MMC card. None None Remove the card and make sure the card is not “write” protected or damaged. Reinsert the card or replace with a new card if necessary. symbol, positioned in Kodak EasyShare 5500 AiO... -
Page 13: Memory Card Slots And Usb Port
EasyShare AiO, or connect your camera directly through one of the two USB ports on the front panel, using a USB cable. Your Kodak EasyShare AiO can read the contents of the memory card while it is still in the camera. -
Page 14: Automatic Document Feeder
The EasyShare AiO Home Center software is an application that runs on the computer. It enables you to copy, scan, and configure your EasyShare AiO from the computer. You can also launch Kodak EasyShare software for transferring, viewing, and working with your digital pictures/videos. - Page 15 Order Supplies There are three small icons in the upper right corner of the window: Displays the Status Monitor Displays information about the Kodak AiO Home Center Displays a Help panel for the Home Center software User’s Guide Product Overview...
-
Page 17: Getting Started
Getting Started Getting Started It is important to find a good location for your AiO Printer. Place the printer on a clean flat surface, in a dry location, and out of direct sunlight. Make sure the printer has proper ventilation. Avoid areas where ventilation ducts, open doors, or high traffic might expose the EasyShare AiO and paper to high levels of dust and debris. - Page 18 Remove and discard the clear plastic casing and the orange protective cap. Place the printhead into the carriage. Push against the back wall of the printhead until it clicks into place. 7 Install the ink cartridges Kodak EasyShare 5500 AiO...
-
Page 19: Install Ink Cartridges
Install Ink Cartridges After installing the printhead, you need to install the black and color ink cartridges. 1 Printhead 2 Color ink cartridge 3 Black ink cartridge Tear open the black ink cartridge bag at the notch and remove the ink cartridge. IMPORTANT: Insert the ink cartridge immediately to prevent any drying of the ink. -
Page 20: Install The Duplexer
85° F (30° C). Install the Duplexer The Kodak EasyShare AiO supports an optional duplexer (Kodak EasyShare 5000 Series Two-Sided Printing Accessory) that enables printing on both sides of the paper. When installed, the duplexer is automatically detected by the printer and computer system software. -
Page 21: Startup
Center (See General Settings). Startup When you power on your Kodak EasyShare All-in-One, status information is displayed on the LCD. After the startup is complete, the EasyShare AiO enters the Copy mode, unless a photo device is attached. If a photo device is attached or memory card inserted, the EasyShare AiO enters Photo mode. -
Page 22: Menus
Chapter 2 Menus The Kodak EasyShare AiO menus are accessed by the Menu, Photo, Copy, Scan, and Fax buttons. Menu Button Help Photo Print Settings Control Panel Settings Ink Levels Proofsheet Fax Settings Inserting Ink Cartridges Making a Copy Printing a Photo... - Page 23 Fax Header Print Fax Cover Page Start Print Fax Activity Start Report Clean Printhead Calibrate Printer Format Memory Card Print Demo Sheet Print Diagnostic Sheet Date and Time Reset all Settings User’s Guide Dialing Mode Disable Call-Waiting Error Correction Fax Speed Fax Header Form Prints fax cover page with fax header.
- Page 24 Borderless Bordered 2 per Page 3 per Page 4 per Page 9 per Page Index 2x2 Poster 3x3 Poster 4x4 Poster Quantity 1 - 99 Color Color Black & White Quality Normal Best Draft Save Settings Kodak EasyShare 5500 AiO...
-
Page 25: Copy Button
Copy Button Quantity 1 - 99 Color Black & White Color Quality Normal Draft Best Output Same Size Fit to Page Scale Percent Photo Layouts Size Output = Scale Percent 10 - 500 Output = Photo Layouts Borderless Bordered 2 per Page 3 per Page 4 per Page 9 per Page... -
Page 26: Demo Sheet
You can safely remove a card only when the status light next to the slots is not blinking. Press Transfer. Press Start to transfer. Complete the transfer with the Transfer dialog on your computer. Kodak EasyShare 5500 AiO... -
Page 27: Printer Status
A Warning icon is displayed over the ink level icon when a low ink condition exists. A Critical icon is displayed over the ink level icon when an out of ink condition exists. Click Order... to buy supplies from Kodak online. User’s Guide... -
Page 28: Configuring Settings
The following options are displayed when you select Options in the menu. Always display the Status Monitor Only display the Status Monitor when an error occurs Configuring Settings You can configure settings for your Kodak EasyShare AiO using the Control Panel and the AiO Home Center software. Kodak EasyShare 5500 AiO... - Page 29 DPOF file that identifies which photos have been tagged for printing. Your Kodak EasyShare AiO can read the DPOF file from the memory card in a camera so you do not have to re-select the photos to print.
- Page 30 You can configure your EasyShare AiO to emit an audio feedback beep when you press a button on the Control Panel. The default setting is to beep. Press Menu to display the main menu. Press until Control Panel Settings is selected. Press OK. Press or to enable or disable button sounds. Press OK. Kodak EasyShare 5500 AiO...
-
Page 31: Date And Time
Press OK. Date and Time Your Kodak EasyShare All-in-One contains a clock for stamping the date and time on scans to a memory card and faxes. 1 Press Menu to display the main menu. -
Page 32: General Settings
Press OK. Reset All Settings You can restore the original factory settings to your Kodak EasyShare All-in-One. NOTE: Restoring the factory defaults will not change the date and time information you set. Press Menu to display the Main Menu. - Page 33 To enable or disable the date and time synchronization On the main Home Center window, click Configure Settings to display the settings options. Click AiO Printer. On the General tab, select or clear the Synchronize to this computer checkbox to enable or disable date and time synchronization.
-
Page 34: Fax Connections
If you have Digital Subscriber Line (DSL) service through your phone company, use the instructions in this section to connect a DSL filter between the telephone wall jack and your Kodak EasyShare AiO. This filter removes the digital signal that would block your EasyShare AiO from communicating properly with the telephone line. - Page 35 Separate Fax Line (no voice) Connect your Kodak EasyShare AiO to the phone line as shown in the illustration if you have a separate fax line on which you receive no voice calls, and you have no other equipment connected on this phone line.
- Page 36 Fax Line with Modem Connect your Kodak EasyShare AiO to the phone line as shown in the illustration if you have a fax line on which you receive no voice calls, and you also have a modem connected on this line.
- Page 37 Shared Voice/Fax with Modem Connect your Kodak EasyShare AiO to the phone line as shown in the illustration if you receive both voice calls and fax calls at the same phone number, and you also have a modem connected on this phone line.
- Page 38 Incoming Fax. Shared with Answering Machine Connect your Kodak EasyShare AiO to the phone line as shown in the illustration if you receive both voice calls and fax calls at the same phone number with an answering machine. Disconnect the phone cord from the wall jack that connects your modem to the telephone wall jack and plug it into the port labeled 2-EXT on your All-in-One..
- Page 39 NOTE: Since your modem shares the telephone line with your EasyShare AiO, you will not be able to use both your computer modem and your All-in-One simultaneously. For example, while you are sending and receiving faxes, you will not be able to Email or access the Internet. Disconnect the phone cord from the wall jack that connects your modem to the telephone wall jack and plug it into the port labeled 2-EXT on your All-in-One.
-
Page 41: Handling And Loading Paper
Keep paper away from direct sunlight, and out of high-temperature environments (such as a vehicle parked in the sun). You can load many different types and sizes of paper in your Kodak EasyShare AiO, including letter paper, photo paper, transparencies, and envelopes (see Paper Types in the Appendix). The EasyShare AiO automatically detects the size and type of paper you load in the input tray, and then adjusts to generate the highest quality output for that paper. -
Page 42: Load Main Tray
Insert the stack of paper into the input tray with the short edge forward and the print side down. Slide the stack of paper forward until it stops. Slide the paper-width and paper-length guides inward until they stop at the edges of the paper. Kodak EasyShare 5500 AiO... -
Page 43: Load Photo Tray
Lower the output tray. Pull the extender tray out. Load Photo Tray You can load up to 20 sheets of 10 mil thick 4x6 inch (101x150 mm) photo paper into the photo tray. TIP: To avoid fingerprints, handle the paper by the edges or by the perforated tabs. Avoid touching the glossy side of the paper. -
Page 44: Load Envelopes
Close the photo tray lid. Load Envelopes You can load plain envelopes into the main input tray of your Kodak EasyShare AiO. Do not use envelopes with cutouts or cellophane windows. Lift the output tray. Remove any paper in the input tray. -
Page 45: Load Labels
Slide the stack of envelopes forward until it stops. Slide the paper guides inward against the stack of envelopes until they stop. Close the output tray. Load Labels Use letter or A4 (designed for use with ink jet printers) label sheets. Ensure that none of the pages are sticking together. -
Page 47: Print
Print Print The memory card slots accept most of the popular memory cards (see Supported Memory Cards). When you insert a memory card into the card slot, connect PTP camera, or USB flash drive, the first photo is displayed on the LCD display. When you press the Photo button the Photo Print menu is displayed. The Photo button toggles between displaying photos and the Photo Print menu. -
Page 48: Print Photos From A Camera
The Photo Print mode is initiated by pressing the Photo button, inserting a memory card, or connecting a USB device to the Kodak EasyShare All-in-One. Insert a memory card into the appropriate slot, a mass storage device into the USB port, or connect a digital camera to the USB port. -
Page 49: Index Print
Index Print The purpose of an index print is to catalog contents of a memory card or USB flash drive. An Index print contains the following: Sequence numbers for the relative position of each photo within the defined set of photos, incrementing from 001 and continuing progressively across all pages of a multi-page index print. -
Page 50: Print Photos From A Proofsheet
DPOF file that identifies which photos have been tagged for printing. Your Kodak EasyShare AiO can read the DPOF file from the memory card in a camera so you do not have to re-select the photos to print. -
Page 51: Bluetooth Printing
Bluetooth Printing Bluetooth is a short-range radio technology that enables wireless connectivity between electronic devices. This feature supports an optional Kodak USB Bluetooth Adapter that accepts JPEG/EXIF image file types from the following types of Bluetooth enabled devices. Mobile camera phones... -
Page 52: Print With Computer
Start again to print the panoramic images. Layouts The photo layouts on your Kodak EasyShare AiO “snap” to the nearest standard print size whenever possible based on the combination of layout and paper size loaded. Otherwise the layouts are based on a standard 2x3 aspect ratio. - Page 53 US photo paper sizes 3.5 X 5 inches 4 X 6 inches 5 X 7 inches 8 X 10 inches ISO 216 paper sizes A4 (21 X 30 centimeters) A5 (15 X 21 centimeters) A6 (10 X 15 centimeters) B5 (17.6 X 25 centimeters) The international paper size standard, ISO 216, consists of an A series and a less common B series.
- Page 54 Chapter 4 Kodak EasyShare 5500 AiO...
- Page 55 Set Print Layout Press Photo. The Print menu is displayed with Layout selected. Press to change the print layout. Press OK to set the selected layout and continue to set options, press Photo to preview, or Start to print. User’s Guide Print...
- Page 56 Chapter 4 3.5x5 Inch Paper 1 per page borderless 3 per page 1 per page bordered 4 per page 2 per page 9 per page Kodak EasyShare 5500 AiO...
- Page 57 4x6 Inch Paper 1 per page borderless 3 per page User’s Guide 1 per page bordered 4 per page Print 2 per page 9 per page...
- Page 58 Chapter 4 5x7 Inch Paper 1 per page borderless 3 per page 1 per page bordered 4 per page 2 per page 9 per page Kodak EasyShare 5500 AiO...
- Page 59 Print 8x10 Inch Paper 1 per page borderless 1 per page bordered 2 per page 3 per page 4 per page 9 per page User’s Guide...
- Page 60 Chapter 4 US Letter 1 per page borderless 3 per page 1 per page bordered 4 per page 2 per page 9 per page Kodak EasyShare 5500 AiO...
- Page 61 Print Panoramic User’s Guide...
- Page 62 Chapter 4 A4 Paper 1 per page borderless 1 per page bordered 2 per page 3 per page 4 per page 9 per page Kodak EasyShare 5500 AiO...
- Page 63 Print A5 Paper 1 per page borderless 1 per page bordered 2 per page 3 per page 4 per page 9 per page User’s Guide...
- Page 64 Chapter 4 A6 Paper 1 per page borderless 3 per page 1 per page bordered 4 per page 2 per page 9 per page Kodak EasyShare 5500 AiO...
- Page 65 Print B5 Paper 2 per page 1 per page borderless 1 per page bordered 3 per page 4 per page 9 per page Index Sheet The Index Sheet layout shows thumbnail images, filenames, and sequence numbers of each photo on a memory card.
- Page 66 Chapter 4 US Letter/A4 Index Sheet Kodak EasyShare 5500 AiO...
-
Page 67: Setting Print Options
4x6 Index Sheet Setting Print Options Before you print photos you may want to change the following default settings. Layout: Borderless Quantity: 1 print Color: Color print Quality: Normal Save Settings: No The Photo Print menu contains parameters that allow you to specify other options. Set Number of Prints You can increase the number of prints of each photo from the Photo Print menu. -
Page 68: Save Settings
Press OK to set the selected layout and continue to set options, press Photo to preview, or Start to print. Set Print Quality The Kodak EasyShare All-in-One provides three options that affect print speed and quality for plain paper. Print quality is automatically set to Kodak Picture Quality when photo paper is detected. Draft Produces the fastest print speed, but the lowest quality. - Page 69 Print Quality Kodak picture quality is automatically selected when photo paper is detected in the main or photo input trays. The following print quality options are available for printing on plain paper. Draft Produces the fastest print speed, but the lowest quality.
- Page 70 Click OK or Apply. Print Options The photo layouts on your Kodak EasyShare AiO “snap” to the nearest standard print size based on the combination of layout and paper size loaded whenever possible. Otherwise the layouts are based on a standard 2x3 aspect ratio.
-
Page 71: Previewing Photos
Automatically apply screen balance to digital camera pictures: Scene balance is the ability to adjust the color and density of digital images for brighter color and truer flesh tones. Enable printing of tagged pictures: Enables the Kodak EasyShare AiO to detect tagged photo files (DPOF) and prompt you for options. - Page 72 Press Zoom + to enlarge the photo in .25X increments up to 5X magnification. Pressing Zoom – decreases magnification in .25X increments down to 1X. Use the 4-way Navigation button to display the part of the picture you want to print. Kodak EasyShare 5500 AiO...
- Page 73 Press OK when finished. The photo is displayed with a crop box around the magnification and position you selected. Press to select the number of prints, and press Start to print the area displayed in the crop box. Multiview The Multiview screen shows thumbnails of nine photos. The current photo number and the total photo number are also displayed.
- Page 74 Chapter 4 Press OK to preview the selected photo Press Start to print. Kodak EasyShare 5500 AiO...
-
Page 75: Copy
Scale Percent: The default copy scale is 100%, however you can scale copies from 10% to 500%. Scaling is anchored to the upper left corner of the original. Photo Layouts: You can set the layout for making copies of photos on your Kodak EasyShare All-in-One. The following layouts are supported. - Page 76 If desired, make changes to the following copy options with the Copy menu. See Set Number of Copies See Set Color See Set Quality See Change Brightness See Set Preview Press Start. If you turned preview on, the EasyShare AiO enters Preview mode, otherwise it starts making copies. Kodak EasyShare 5500 AiO...
- Page 77 Scale Percent Copy The default copy scale is 100%, however you can scale copies from 10% to 500%. Scaling is anchored to the upper left corner of the original. Place your original face down on the left rear corner of the scanner glass. If you have more than one original, place them face up in the automatic document feeder.
- Page 78 Chapter 5 Photo Layout Copy You can set the layout for making copies of photos on your Kodak EasyShare All-in-One. The following layouts are supported. Borderless (default) Bordered 2 per Page 3 per Page 4 per Page 9 per Page...
-
Page 79: Setting Copy Options
Press OK to set and continue setting options, or Start to copy. Set Quality Kodak picture quality is automatically selected when photo paper is detected in the main or photo input trays. The Kodak EasyShare All-in-One provides three options that affect speed and quality for copying documents to plain paper. -
Page 80: Previewing Copies
Copy Preview mode is entered when the following conditions exist. The EasyShare AiO is in Copy mode. Preview is set to Yes. The Start button is pressed. The Copy Preview feature can be used for photos or documents. until Preview is selected. Kodak EasyShare 5500 AiO... - Page 81 Zoom and Crop To zoom and crop a photo before making a copy you must be in Preview mode (see Turning Copy Preview On). With Preview set to Yes on the Copy menu, press Start to enter Preview mode. The photo on the glass is scanned and displayed with a crop box.
-
Page 82: Copy With Computer
Chapter 5 Copy with Computer You can make copies of pictures on your Kodak EasyShare AiO with Home Center Software. Copy Pictures Copying pictures with the AiO Home Center allows you to set copy options not available on the Control Panel. - Page 83 Kodak Perfect Touch technology also enhances the desirable qualities of photos, for vibrant color and richer detail. NOTE: Color restoration and Kodak Perfect Touch can be used together to enhance pictures. Paper size: Select the paper size loaded. The default selection is Current Tray. When the Photo Tray is engaged, it becomes the current tray.
-
Page 84: Copy Settings
Copy Pictures window controls the copies you make from the Home Center (see Copy Pictures). Output Quality Kodak picture quality is automatically selected when photo paper is detected in the main or photo input trays. The following print quality options are available for printing on non-photo paper. - Page 85 Click the Copy tab. Select Draft, Normal, or Best. Click OK or Apply. Copy Options On the main Home Center window, click Configure Settings to display the settings options. Click AiO Printer to open the AiO Printer dialog. Click the Copy tab. Set the following options as desired.
-
Page 87: Scan
You can start a scan from the Kodak AiO Control Panel or your computer. Scan with Control Panel Pressing Scan places the Kodak EasyShare AiO in Scan mode and displays the Scan menu on the screen. Save Scan Settings When you change scan settings from the control panel, the settings apply only to the current scan job. To apply scan settings to all future scan jobs, you can save your changes. -
Page 88: Scanning Documents
Press Scan to display the Scan menu. Press to select Photo. Press to select Scan To. Press to select Memory Card. Press Start. Scanning Documents With the Control Panel Scan menu, you can scan documents to a file, application, or memory card. Kodak EasyShare 5500 AiO... - Page 89 Press to select Document. Press Start. The document is scanned and saved based on the Kodak AiO Home Center scan document settings (see Scan Document Settings). Scan to Application Load your original face down on the left rear corner of the scanner glass. If you have more than one original, load them face up in the automatic document feeder.
-
Page 90: Scan With Computer
Scan status light blinks during data transfer. To use the scan features, your EasyShare AiO and computer must be connected and turned on. The Kodak AiO Home Center software must also be installed and running on your computer prior to scanning. - Page 91 Scan to File Place your photo or photos face down on the scanner glass. Your Kodak All-in-One Printer can detect multiple photos. On the main Home Center window, click Scan Pictures and Documents to open the Basic Scan window. Click Go to Advanced to open the Advanced Scan window.
- Page 92 Scan to Printer Place your photo or photos face down on the scanner glass. Your Kodak All-in-One Printer can detect multiple photos. On the main Home Center window, click Scan Pictures and Documents to open the Basic Scan window.
- Page 93 Red Eye reduction: Select to automatically minimize red eye in flash photos. This checkbox is available when scanning color pictures. Kodak Perfect Touch: Automatically corrects for common image flaws and "mistakes," such as shadows, and backlighting. Kodak Perfect Touch technology also enhances the desirable qualities of photos, for vibrant color and richer detail.
- Page 94 Click Print to print the scanned picture(s) to your EasyShare AiO. Scan to EasyShare Place your photo or photos face down on the scanner glass. Your Kodak All-in-One Printer can detect multiple photos. On the main Home Center window, click Scan Pictures and Documents to open the Basic Scan window.
- Page 95 Click Send to Destination to send the scanned picture(s) to Kodak EasyShare. Scan to Application Place your photo or photos face down on the scanner glass. Your Kodak All-in-One Printer can detect multiple photos. On the main Home Center window, click Scan Photos and Documents to open the Basic Scan window.
- Page 96 Red Eye reduction: Select to automatically minimize red eye in flash photos. This checkbox is available when scanning color pictures. Kodak Perfect Touch: Automatically corrects for common image flaws and "mistakes," such as shadows, and backlighting. Kodak Perfect Touch technology also enhances the desirable qualities of photos, for vibrant color and richer detail.
- Page 97 Click Continue to select output options. Select an application from the Destinations list box. To add or delete applications from the list, click Modify List (see Scan Pictures Settings). Click Send to Destination to save the scanned picture(s) to the selected application. If you select all the scanned pictures, they are inserted as separate pictures.
- Page 98 Sharpening: This drop-down list is available when scanning color pictures. It contains a list of supported sharpen levels for enhancing fuzzy images; None, Normal, High, and Exaggerated. Kodak Perfect Touch technology: Automatically corrects for common image flaws and "mistakes," such as shadows, and backlighting. Kodak Perfect Touch technology also enhances the desirable qualities of photos, for vibrant color and richer detail.
- Page 99 Scanning Documents The AiO Home Center software allows you to scan documents to a file, Email, or an application. Scan to File Place your original face down on the left rear corner of the scanner glass. If you have more than one original, place them face up in the automatic document feeder.
- Page 100 If you have more pages to scan, place the next page on the scanner glass and click Scan Next or Preview>. When you have finished scanning, click Continue to select output options. Kodak EasyShare 5500 AiO...
- Page 101 Make sure File is selected in the Destinations list box. Select a folder for saving the file from the Location drop-down list, or click Browse to select a folder from the Open dialog. Enter a name for the file in the Filename edit box. Select a file format from the File type drop-down list.
- Page 102 Click Go to Advanced to open the Advanced Scan window. Select Document. Select Color, Grayscale, or Black & White. If desired, change the Resolution. If you changed the Resolution, you can save it as a scan shortcut. Kodak EasyShare 5500 AiO...
- Page 103 Click Scan Now to start the scan. The page on the scanner glass or the document in the ADF is scanned and scan progress information appears that shows the progress of the scan. When the scan is completed, scan complete information and controls appear. If you have more pages to scan, place the next page on the scanner glass and click Scan Next or Preview>.
- Page 104 If you selected JPEG (.jpg) as the File type, select the quality of the output file from the Quality drop-down list. The higher the quality the larger the file size. If desired, select Combine selected pages into single document. Click Send to Destination to save the scanned page(s) to the selected location. Kodak EasyShare 5500 AiO...
- Page 105 Scan to Printer Place your original face down on the left rear corner of the scanner glass. If you have more than one original, place them face up in the automatic document feeder. On the main Home Center window, click Scan Pictures and Documents to open the Basic Scan window.
- Page 106 The picture is scanned and scan progress information appears that shows the progress of the scan. When the scan is completed, scan complete information and controls appear. If you have more pages to scan, place the next page on the scanner glass and click Scan Next or Preview>. Kodak EasyShare 5500 AiO...
- Page 107 When you have finished scanning, click Continue to select output options. Select Printer in the Destinations list box. Click Print to print the scanned picture(s) to your EasyShare AiO. Scan to EasyShare Place your original face down on the left rear corner of the scanner glass. If you have more than one original, place them face up in the automatic document feeder.
- Page 108 If you changed the Resolution, you can save it as a scan shortcut. Click Scan Now to start the scan. The document is scanned and scan progress information appears that shows the progress of the scan. When the scan is completed, scan complete information and controls appear. Kodak EasyShare 5500 AiO...
- Page 109 If you have more pictures to scan, place the next one on the scanner glass and click Scan Next or Preview>. Click Continue to select output options. Select Kodak EasyShare in the Destinations list box. User’s Guide Scan...
- Page 110 Enter a base filename in the edit box. If desired, select Open EasyShare software. Click Send to Destination to send the scanned page(s) to Kodak EasyShare. Scan to Application Place your original face down on the left rear corner of the scanner glass. If you have more than one original, place them face up in the automatic document feeder.
- Page 111 Select Color, Grayscale, or Black & White. If desired, change the Resolution. If you changed the Resolution, you can save it as a scan shortcut. Click Scan Now to start the scan. The page on the scanner glass or the document in the ADF is scanned and scan progress information appears that shows the progress of the scan.
-
Page 112: Scan Settings
Modify List (see Scan Documents Settings). Click Send to Destination to save the scanned page(s) to the selected application. Scan Settings You can use the AiO Home Center to change the default scan settings and establish applications for scanning. Kodak EasyShare 5500 AiO... - Page 113 Scan General Settings On the Home Center main window, click Configure Settings. Click Scan. User’s Guide Scan...
- Page 114 Application List: Opens a dialog where you can add and remove applications from the destination list for scanned items. Click OK or Apply. Scan Document Settings Basic Settings On the Home Center main window, click Configure Settings. Click Scan. Kodak EasyShare 5500 AiO...
- Page 115 Click the Document tab. Set the following options as desired. Scan as: Select a color from the drop-down list. Color Sets the AiO to scan a color photo in color. Grayscale Sets the AiO to scan a black and white photo and convert it to grays. Black &...
- Page 116 Save into new folder with current date as file name: Select to save scanned files to the base name and location you specified. Click Apply or OK. Scan Picture Settings Basic Settings On the Home Center main window, click Configure Settings. Click Scan. Kodak EasyShare 5500 AiO...
- Page 117 Click the Picture Tab. Set the following options as desired. Scan as: Select a color from the drop-down list. Color Sets the AiO to scan a color photo in color. Black & White Sets the AiO to scan in black and white. Automatically detect picture: When this checkbox is selected, your EasyShare AiO automatically detects how you arranged pictures on the scanner glass.
- Page 118 Location: Edit field and Browse button for choosing a folder. Save into new folder with current date as file name: Select to save scanned files to the base name and location you specified. Click OK or Apply. Kodak EasyShare 5500 AiO...
-
Page 119: Fax
You can use your Kodak EasyShare AiO to send and receive faxes, including color faxes. You can set up speed dials to send faxes quickly and easily to frequently used numbers. From the control panel, you can also set a number of fax options. -
Page 120: Print Fax Cover Page
Print Fax Activity Report Press Menu to display the main menu. Press until Print Fax Activity Report is selected. Press Start. Setting Fax Options The Fax menu allows you to set the following fax options. Resolution Color Brightness Kodak EasyShare 5500 AiO... - Page 121 Additional fax options are available from the Main menu. Ans. Machine Mode Rings to Answer Busy Redial Attempts Redial if No Answer Fax Speaker Print Fax Confirmation Page Dialing Mode Disable Call-Waiting Error Correction Fax Speed Setting with Control Panel You can assign speed dials, setup fax options, and manage your phonebook with AiO Control Panel menus.
- Page 122 Press Fax to display the Fax menu. Press until Save Settings is selected. Press to set Save Settings to Yes. Press OK to set and continue setting options, or Start to fax. Kodak EasyShare 5500 AiO...
- Page 123 Fax Setup Options The following setup options are available for setting up your Kodak AiO Printer to send and receive faxes. Answering Machine Mode Rings to Answer Busy Redial Attempts Redial If No Answer Fax Speaker Print Fax Confirmation Page...
- Page 124 Yes or No. Rings to Answer You can specify how many rings should occur before your Kodak EasyShare AiO automatically answers an incoming call. This setting only applies if Answering Machine Mode is set to On. The Rings to Answer setting is important if you have an answering machine on the same phone line as your EasyShare AiO.
- Page 125 Busy Redial Attempts You can set your Kodak EasyShare AiO to redial a busy number from 0 to 14 times. The default number of attempts is 5. Press Menu to display the main menu. Press until Fax Settings is displayed.
- Page 126 Chapter 7 Dialing Mode You can set the dial mode for your Kodak EasyShare All-in-One to either tone dialing or pulse dialing. The default setting is Tone Dialing. Most telephone systems work with either type of dialing. If your telephone system does not require pulse dialing, we recommend using tone dialing.
- Page 127 Fax Speed You can set the fax speed used to communicate between your Kodak EasyShare All-in-One and other fax machines when sending and receiving faxes. The default fax speed is 33.6K Baud (v.34). If you use one of the following, setting the fax speed to a slower speed might be required:...
- Page 128 Setting with Computer You can use your Kodak EasyShare AiO to send and receive faxes, including color faxes. You can set up speed dials to send faxes quickly and easily to frequently used numbers. From the AiO Home Center, you can also set a number of fax options.
- Page 129 Click Fax. The Fax dialog opens with the Fax Settings tab selected. Enter a Senders name, Phone number, and Fax number in the text boxes. Select Print Date on cover page to print the date on the cover page. Click OK. Data Fax Mode To select a fax mode...
- Page 130 If the Current selected printer is not the one you want to configure, click Select and choose another one from the list. Click Fax. The Fax dialog opens with the Fax Settings tab selected. Select or clear the Print confirmation page check box. Click OK. Kodak EasyShare 5500 AiO...
- Page 131 Click OK. Rings to Answer You can specify how many rings should occur before your Kodak EasyShare AiO automatically answers an incoming call. This setting only applies if Answering Machine Mode is set to On. The Rings to Answer setting is important if you have an answering machine on the same phone line as your EasyShare AiO.
- Page 132 Chapter 7 Answering Machine Mode Your Kodak EasyShare AiO can be set up to receive faxes automatically or manually, depending on your phone line setup. If you set up the EasyShare AiO to answer faxes automatically, it answers all incoming calls and receives faxes.
- Page 133 Recommended Equipment/services Answering Machine sharing your fax line Mode setting None. (You have a separate Enabled fax line on which you receive only fax calls.) A shared voice and fax line and no answering machine. Disabled (You have a shared phone line in which you receive both voice and fax calls.)
- Page 134 Click OK. Dialing You can set the dial mode for your Kodak EasyShare AiO to either tone dialing or pulse dialing. The default setting is Tone Dialing. Most telephone systems work with either type of dialing. If your telephone system does not require pulse dialing, we recommend using tone dialing.
- Page 135 Phone Book Entries To add a phone book entry On the Home Center main window, click Configure Settings. If the Current selected printer is not the one you want to configure, click Select and choose another one from the list. Click Fax to open the Fax dialog.
- Page 136 On the Home Center main window, click Configure Settings. If the Current selected printer is not the one you want to configure, click Select and choose another one from the list. Click Fax to open the Fax dialog. Click the Phone Book tab. Kodak EasyShare 5500 AiO...
-
Page 137: Sending A Fax
Press Start. After all the pages are scanned, the EasyShare AiO re-dials the last number dialed. Send a Fax with Speed Dial You can quickly send a fax from the Kodak EasyShare AiO using speed dials. Speed dial entries will not appear until you have set them up. For more information, see Assign Speed Dials. -
Page 138: Receiving A Fax
Press Start. After all the pages are scanned, the EasyShare AiO dials the number of the selected entry. Receiving a Fax Depending on the Auto Answer setting, your Kodak AiO Printer can receive faxes automatically or manually. If you have set the Auto Answer option to No, you will need to receive faxes manually. If the Auto Answer option is set to Yes, your EasyShare AiO will automatically answer incoming calls and receive faxes. - Page 139 Set the Rings to Answer setting to a high number to allow you to answer the incoming call before the AiO Printer answers. Or, set the Auto Answer setting to No so that the EasyShare AiO does not automatically answer incoming calls. For information on setting the number of Rings to Answer, see Rings to Answer Setup.
-
Page 141: Maintenance
Maintenance Maintenance The Kodak EasyShare All-in-One requires little maintenance. However, you should clean the glass and lid backing to remove dust and fingerprints. Fingerprints and other debris on the glass or lid backing could slow down performance and affect the accuracy of scanning. -
Page 142: Clean The Scanner Lid
Dry the glass with a lint fee cloth. Clean the Scanner Lid Minor debris can accumulate on the document backing located underneath the scanner lid of the Kodak EasyShare AiO. Turn off the EasyShare AiO and raise the lid. -
Page 143: Firmware Upgrade
Click Firmware Upgrade. Ink Cartridges Your Kodak EasyShare AiO uses separate black and color ink cartridges. The ink levels are displayed on the Control Panel and the printer software. When replacing, use genuine Kodak ink cartridges to ensure best results and avoid printhead damage not covered under warranty. -
Page 144: Replace Ink Cartridges
85° F (30° C). WARNING Use genuine Kodak ink cartridges to ensure best results and avoid printhead damage not covered under warranty. Third party ink cartridges may not contain the necessary Smart Chip information to notify you before the ink cartridge is empty. - Page 145 Remove the bagged ink cartridge from the box and tear open the bag at the notch and remove the ink cartridge. IMPORTANT: Insert the ink cartridge immediately to prevent any drying of the ink. Remove the orange cap from the cartridge by grasping the top edge and pulling/rotating it off the ink cartridge.
-
Page 146: Printhead
Clean the printhead Calibration The Kodak EasyShare AiO performs a calibration every time you install or replace a printhead. However, you can run a calibration if you are seeing changes in the image quality. Calibration aligns the printheads and performs a nozzle health check to enable high-quality prints. - Page 147 To clean printhead from control panel Press Menu to display the Main Menu. Press until Clean Printhead is selected. Press OK to go to the Clean Printhead menu. Press OK to perform a Basic Clean. Press to select Deep Clean and press OK to perform a Deep Clean. Replace Printhead Make sure the AiO printer is on.
- Page 148 Chapter 8 Remove the old printhead. Remove the printhead from its bag. Remove and discard the black plastic casing and the orange protective cap. Place the printhead into the carriage. Kodak EasyShare 5500 AiO...
- Page 149 Maintenance Push against the back wall of the printhead until it clicks into place. Reinstall the ink cartridges. User’s Guide...
-
Page 151: Support
You may be required to ship Products, at your expense, to the authorized service facility for the country where the Products were purchased. Kodak will repair or replace Products if they fail to function properly during the warranty period, subject to any conditions and/or limitations stated herein. Warranty service will include all labor as well as any necessary adjustments and/or replacement parts. -
Page 152: Your Rights
Chapter 9 Kodak along with proof of the purchase price paid. Repair, replacement, or refund of the purchase price are the sole remedies under this warranty. If replacement parts are used in making repairs, those parts may be remanufactured. or may contain remanufactured materials. -
Page 153: Telephone Customer Support
Amount of memory (MB) and free hard disk space Printer serial number Version of Kodak EasyShare software Version of Kodak Home Center software Print a Diagnostics Page Exact error message you received Your unit's Kodak Service Number (under the printer access door). User’s Guide Support... -
Page 154: Customer Support Phone Numbers
020 346 9372 0800 440 786 23 16 21 33 021 415 4125 91 749 76 53 08 587 704 21 01 838 53 51 0870 243 0270 1 800 235 6325 / 1 800 23 KODAK Kodak EasyShare 5500 AiO... -
Page 155: Messages
Support Action/Solution Check the ink levels. You will need a replacement Ink cartridge soon. Install a new Kodak approved Ink Cartridge for best results. Install a new Kodak approved Ink Cartridge for best results. Upgrade your printer’s firmware for best results. - Page 156 Proofsheet is printed. When the printer scans Action/Solution IMPORTANT: For best result, use only Kodak ink cartridges & paper for your printer. 1 Disengage the photo paper tray if engaged. 2 Turn the AiO off for 5...
- Page 157 Message Load plain paper for duplexing. Message Printhead missing or not installed correctly. Printer requires calibration. Calibration unsuccessful Cannot read calibration sheet. Some photos may not be visible. Maximum number of photos exceeded. Ink overflow container is full. Printer error. Print job unsuccessful.
-
Page 158: Troubleshooting
If you are using a power strip, make sure it is turned on. If you are using a switched power outlet, make sure the switch is on. Make sure the power outlet is supplying power. If none of the above corrects the problem, contact Kodak support. Printer Access Door Message Cause... -
Page 159: Device Not Recognized
Corrective Action Enter a PIN of 1111 into the sending device. Device not Recognized Any of the following can cause the prevent your Kodak EasyShare AiO from reading a connected digital camera or memory card. The camera is turned OFF. -
Page 160: Multiple Paper Feed
After checking connections, restart your computer. Make sure your computer meets the minimum system requirements. Upgrade your system if necessary. For more information on connecting your Kodak AiO printer to your computer, see the Setup Poster that came with your unit. No Paper Feed Paper does not feed. -
Page 161: Paper Jam
Check the paper Disengage the Photo tray. Inspect the paper and make sure paper no sheets are damaged in any way. Reload with new paper if necessary. Carefully "fan" the paper to keep the sheets from sticking together. Reload the paper tray(s). Do not overfill. ngage the Photo tray, if printing 4 x 6 Photo’s, then press Start to resume printing. -
Page 162: Transfer Pictures Failure
Make sure your computer meets the minimum system requirements. Upgrade your system if necessary. NOTE: The Kodak AiO printer is compatible with the Kodak 8-in-1-card reader (sold separately). Other Kodak USB card readers may work with the printer; however, other manufacturers’ card readers are not supported. Wrong Paper Size The paper you selected does not match the active paper tray. - Page 163 Change the picture quality setting (or resolution) on your digital camera to 3:2. See your camera user’s guide for details. Adjust cropped pictures using Kodak EasyShare software on your computer. If you are printing from an application on your computer, select the proper paper size in print options.
- Page 164 Adjust the exposure compensation on your camera, and try re-taking the picture. See your camera user’s guide for details. Edit the picture using Kodak EasyShare software on your computer. See the EasyShare software Help for details. Make sure the printer is not placed in direct sunlight or is not operating in a high-temperature environment.
-
Page 165: Copy Troubleshooting
Check the paper Disengage the photo tray if engaged. Check the paper access on the back of the printer. Remove any loose paper from the printer. Inspect the paper supplies and reload with new paper if necessary. Carefully "fan" the paper to keep the sheets from sticking together. Reload the paper trays. -
Page 166: Scan Troubleshooting
Connect your EasyShare AiO to your computer with a standard USB cable. Probable Cause 3 The EasyShare AiO Home Center software is not installed. Insert the Kodak EasyShare 5000 All-in-One Printer installation CD and install the software. Probable Cause 4 Your computer system resources may be low. -
Page 167: Fax Troubleshooting
Scanned Image Blank Your original is not placed correctly on the scanner glass. Place your original face down on the left rear corner of the scanner glass. Proofsheet Scan Unsuccessful Probable Cause 1 The scanner glass is dirty. Make sure the scanner glass is completely clean or the proofsheet might not scan properly (see Clean the Scanner Glass). - Page 168 Probable Cause 1 Your answering machine is not properly connected to the Kodak All-in-One. When you have an answering and Kodak All-in-One on the same phone line, they must be connected as shown below. Make sure your AiO printer is set to automatically receive faxes and the Rings to Answer settings is correct.
-
Page 169: Appendix
Available Disk Space Monitor Resolution Color Depth Interface Removable Drive Paper Types The following tables show the paper types and sizes the Kodak EasyShare AiO supports for copying and printing. 20 to 24 lb Plain paper (64 to 90 gsm) Photo paper... - Page 170 3.5x7.25 in. (89x184 mm) Greeting Card 4x5.5 in. (101x140 mm) 4x8 in. (101x203 mm) Hagaki (100x148 mm) Supported Paper Sizes Tray Main Main Main Main Main Photo Photo Main Main Main Main Main Main Main Main Kodak EasyShare 5500 AiO...
-
Page 171: Safety
AiO and its associated AC adapter will be left unused for long periods of time, unplug the AC adapter from the power outlet and the phone line from the modem. WARNING The use of an accessory attachment that is not recommended by Kodak, such as an AC adapter, could cause fire, electric shock, or injury. WARNING Pushing objects through the equipment openings can result in an electric shock or risk of fire. -
Page 172: Regulatory Compliance
WARNING Do not expose this product to liquid, moisture, or extreme temperatures. KODAK AC adapters are intended for indoor use only. The use of controls, adjustments, or procedures other than those specified herein may result in exposure to shock and/or electrical or mechanical hazards. -
Page 173: Fcc And Industry Canada
Observation des normes-Class B - Cet appareil numérique de la classe B est conforme à la norme NMB- 003 du Canada. Hereby, Eastman Kodak Company declares that this Kodak Wi-Fi card is in compliance with the essential requirements and other relevant provisions of Directive 1999/5/EC. -
Page 174: Notice To Users In The European Economic Area
(PSTN). Please connect the TAE N telephone connector plug, provided with the Kodak EasyShare All-in- One Series 5000 into the wall socket (TAE 6) code N. This Kodak fax product can be used as a single device and/or in combination (in serial connection) with other approved terminal equipment. - Page 175 If trouble is experienced with this KODAK EASYSHARE 5500 All-in-One Printer, for repair or warranty information, please contact Eastman Kodak - Rochester NY. If the equipment is causing harm to the telephone network, the telephone company may request that you disconnect the equipment until the problem is resolved.
-
Page 177: Glossary
JPEG is a compressed image file format. JPEG is a "lossy" format, which means some quality is lost when the image is compressed. KPT: Kodak Perfect Touch PictBridge: A Camera and Imaging Products Association standard that enables direct printing between any PictBridge compliant digital cameras and any PictBridge compliant printer. - Page 178 Glossary WEP: Wired Equivalent Privacy Wi-Fi: Wireless Fidelity WLAN: Wi-Fi Local Area Network WPA: Wi-Fi Protected Access Kodak EasyShare 5500 AiO...
-
Page 179: Index
Index Index 2-Sided Printing Accessory ...16 4x6 Copy ... 78 8.5x11 Copy ... 78 8x10 Copy ... 78 A6 Paper...60 Answering Machine ... 34, 119 Audible Phone... 124 Audio Feedback... 26 B5 Paper...61 Backup Fax ... 124 Bluetooth ... 47, 155 Borderless ... - Page 180 Speed... 123, 124 Speed Dial... 117, 133 Standby... 27 Startup ... 17 Status ... 23 Support ...147 Tagged Images ... 25 Tagged Photos... 46 Text...115 Time... 27 Tone Dialing ...122 Transfer ...22, 158 USB Port ...9 Kodak EasyShare 5500 AiO...
- Page 181 Voice... 33, 34 White Edges ... 161 User’s Guide Zoom ...68 Zoom and Crop...77 *1K2107* *1K2107* Index 1K2107...