Kodak 5500 ALL-IN-ONE PRINTER User Manual
Hide thumbs
Also See for 5500 ALL-IN-ONE PRINTER:
- User manual (181 pages) ,
- User reference (49 pages) ,
- Start here manual (32 pages)
Table of Contents
Advertisement
Quick Links
Advertisement
Table of Contents
Troubleshooting

Related Manuals for Kodak 5500 ALL-IN-ONE PRINTER


Summary of Contents for Kodak 5500 ALL-IN-ONE PRINTER
- Page 1 EasyShare 5500 All-in-One Printer User’s Guide...
- Page 2 Windows is a registered trademark of Microsoft Corporation in the United States and other countries. The Bluetooth word mark and logos are owned by the Bluetooth SIG, Inc. and any use of such marks is under license. ©1989-2007 I.R.I.S. (Image Recognition Integrated Systems), All Rights Reserved...
-
Page 3: Table Of Contents
Product Overview............................ 1 Main Components.............................. 1 Control Panel Layout............................2 Status Lights................................ 3 LCD Display Screen............................8 Memory Card Slots and USB Port ......................... 9 Automatic Document Feeder ........................10 Getting Started ............................11 Connect Power ..............................11 Install the Printhead ............................11 Install Ink Cartridges ............................13... - Page 4 Table of Contents Scan ................................ 69 Scan with Control Panel..........................69 Fax ................................73 Fax Functionality.............................. 73 Print Fax Cover Page............................73 Print Fax Activity Report..........................73 Setting Fax Options............................73 Sending a Fax..............................80 Receiving a Fax..............................81 Maintenance ............................83 General Care..............................
-
Page 5: Product Overview
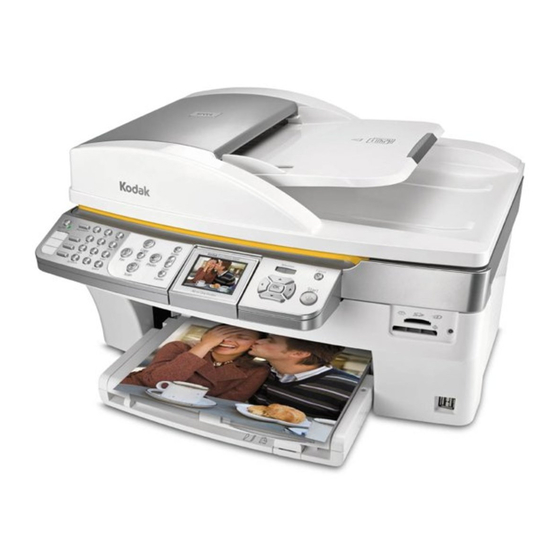
Product Overview Product Overview The Kodak EasyShare 5500 All-in-One (AiO) Printer allows you to print, copy, scan, and fax photos or documents. Many functions can be operated directly from the Control Panel. You can print, store, manage, and share your digital photos with family members and friends with the Kodak EasyShare software. You can buy optional accessories to enhance your Kodak EasyShare AiO experience. -
Page 6: Control Panel Layout
Flashes red when in an error state. Is not lit when in Sleep mode. Phonebook When in fax mode, the list of stored phone numbers is displayed on the Button LCD. The keypad is used to dial phone numbers and entering alpha numeric Keypad characters. -
Page 7: Status Lights
Pressing a speed dial button causes the EasyShare AiO to enter fax mode, Speed Dial place the associated number into the display, and immediately begin Buttons and scanning and sending a fax to the associated number if paper is loaded in Displays the ADF or scanner glass. Status Lights The following tables contain information on the EasyShare AiO lights. - Page 8 Have your wall outlet checked by a qualified electrician. There may be an issue with the Visit Kodak.com for additional power supply. troubleshooting steps or contact your local Kodak Call Center.
- Page 9 The printer needs attention. Check to see if the Photo Tray light is on. If the Photo Tray light is on for more that 20 seconds and the On/Off light does not come on, disconnect the power for 5 seconds and reconnect the power.
- Page 10 Photo tray light is Off. The photo tray is not engaged. Push the photo tray in to engage if you want to print 4 x 6 inch pictures. The printer is not turned on. Press the On/Off button to turn the printer on.
- Page 11 Media type mismatch. Paper jam during pick. Carrier stall while printing. Change color ink cartridge. Change black ink cartridge. Color ink cartridge not readable. Black ink cartridge not readable. Change both ink cartridges. Printhead not calibrated. Calibration sheet needs scanning.
-
Page 12: Lcd Display Screen
When a second page of display text is present, it is indicated by the down arrow symbol, positioned in the lower right corner of the menu area. When the second or subsequent page of text is in view, the presence of a previous page is indicated by the up arrow symbol in the top of right corner of the menu area. -
Page 13: Memory Card Slots And Usb Port
USB ports on the front panel, using a USB cable. Your Kodak EasyShare AiO can read the contents of the memory card while it is still in the camera. If your EasyShare AiO beeps three times when you plug a device into the USB Port, it means the device is not supported. -
Page 14: Automatic Document Feeder
The Automatic Document Feeder on the scanner has a tray capacity of 35 sheets of 20-24 lb plain paper. The paper dimensions you can use are from 7 to 8.5 inches (17.8 to 6 cm) wide, and from 10 to 14 inches (25.4 to 35.6 cm), including 8.5 x 11 pages. -
Page 15: Getting Started
Getting Started Getting Started It is important to find a good location for your AiO Printer. Place the printer on a clean flat surface, in a dry location, and out of direct sunlight. Make sure the printer has proper ventilation. - Page 16 Remove and discard the clear plastic casing and the orange protective cap. Place the printhead into the carriage. Push against the back wall of the printhead until it clicks into place. 7 Install the ink cartridges Kodak EasyShare 5500 AiO...
-
Page 17: Install Ink Cartridges
2 Color ink cartridge 3 Black ink cartridge Tear open the black ink cartridge bag at the notch and remove the ink cartridge. IMPORTANT: Insert the ink cartridge immediately to prevent any drying of the ink. Remove and discard the orange cap. -
Page 18: Two-Sided Printing Accessory
The Two-sided Printing Accessory is limited to plain paper (no photo paper). The paper dimensions that can be used are from 6.9 to 8.5 inches (17.5 to 21.6 cm) wide and from 9.8 to 11.7 inches (24.9 to 29.7 cm) long. -
Page 19: Startup
Insert the bottom of the duplexer into the printer and press the top in until it clicks. You can control how long the printer waits before a sheet is flipped by the duplexer with the AiO Home Center (See General Settings). -
Page 20: Menus
Chapter 2 Menus The Kodak EasyShare AiO menus are accessed by the Menu, Photo, Copy, Scan, and Fax buttons. Menu Button Help Installing Ink Cartridges Making a Copy Printing a Photo Making a Scan Calibrating Printer Photo Print Settings Use Print Order if Found... - Page 21 Print Fax Settings Prints current fax settings. Fax Header Fax Header Form Print Fax Cover Page Prints fax cover sheet. Print Fax Activity Log Prints a report of fax activities. Clean Printhead Basic Clean Deep Clean Calibrate Printer Print Calibration Page...
- Page 22 Borderless Bordered 2 per Page 3 per Page 4 per Page 9 per Page Index 2x2 Poster 3x3 Poster 4x4 Poster Quantity 1 - 99 Color Color Black & White Quality Normal Best Draft Save Settings Kodak EasyShare 5500 AiO...
-
Page 23: Copy Button
Normal Draft Best Output Same Size Fit to Page Scale Percent Photo Layouts Size Output = Scale Percent 10 - 500 Output = Photo Layouts Borderless Bordered 2 per Page 3 per Page 4 per Page 9 per Page Index... -
Page 24: Demo Sheet
Demo Sheet You can print a sample page on US Letter or A4 size paper to evaluate print quality. The Demo Sheet is a single sheet of paper that displays information about the features and capabilities of your EasyShare AiO printer. -
Page 25: Configuring Settings
DPOF file that identifies which photos have been tagged for printing. Your Kodak EasyShare AiO can read the DPOF file from the memory card in a camera so you do not have to re-select the photos to print. - Page 26 Scene Balance. Press OK. Add Date to Prints You can set your EasyShare AiO to print the date a picture was taken on the photo print. The default is to not print the date. Press Menu to display the main menu.
-
Page 27: Date And Time
Press OK. Date and Time Your Kodak EasyShare All-in-One contains a clock for stamping the date and time on scans to a memory card and faxes. 1 Press Menu to display the main menu. -
Page 28: Fax Connections
EasyShare AiO from communicating properly with the telephone line. CAUTION If you have a DSL line and do not connect the DSL filter, you will not be able to send and receive faxes with your EasyShare AiO. Obtain a DSL filter from your DSL provider. - Page 29 Separate Fax Line (no voice) Connect your Kodak EasyShare AiO to the phone line as shown in the illustration if you have a separate fax line on which you receive no voice calls, and you have no other equipment connected on this phone line.
- Page 30 Fax Line with Modem Connect your Kodak EasyShare AiO to the phone line as shown in the illustration if you have a fax line on which you receive no voice calls, and you also have a modem connected on this line.
- Page 31 Connect your Kodak EasyShare AiO to the phone line as shown in the illustration if you receive both voice calls and fax calls at the same phone number, and you also have a modem connected on this phone line. NOTE: Since your modem shares the telephone line with your EasyShare AiO, you will not be able to use both your computer modem and your All-in-One simultaneously.
- Page 32 Chapter 2 Shared with Answering Machine Connect your Kodak EasyShare AiO to the phone line as shown in the illustration if you receive both voice calls and fax calls at the same phone number with an answering machine. Disconnect the phone cord from the wall jack that connects your modem to the telephone wall jack and plug it into the port labeled 2-EXT on your All-in-One..
- Page 33 The EasyShare AiO will not automatically answer calls. Instead, the answering machine will answer the call and the EasyShare AiO will monitor the line. If the EasyShare AiO detects fax tones, the EasyShare AiO will receive the fax. If the call is a voice call, the EasyShare AiO ignores the call.
- Page 34 Chapter 2 Kodak EasyShare 5500 AiO...
-
Page 35: Handling And Loading Paper
Lift the lid and place your original face down on the left rear corner of the scanner glass or place a stack of originals (up to 35 sheets of 20 lb plain paper) in the automatic document feeder face up. -
Page 36: Load Main Tray
Load Main Tray You can load the main paper tray with various types of paper from 3 to 8.5 inches wide and 5 to 14 inches long, with a capacity of 100 sheets of 20 lb plain paper (clean stack of new paper). -
Page 37: Load Photo Tray
Load Photo Tray You can load up to 20 sheets of 10 mil thick 4x6 inch (101x150 mm) photo paper into the photo tray. TIP: To avoid fingerprints, handle the paper by the edges or by the perforated tabs. Avoid touching the glossy side of the paper. -
Page 38: Load Envelopes
Chapter 3 Insert the stack of photo paper into the photo tray glossy side down. Slide the photo tray with the stack of photo paper in until it stops. Engaging the photo tray turns the photo tray light on. Close the photo tray lid. -
Page 39: Load Labels
Use letter or A4 (designed for use with ink jet printers) label sheets. Ensure that none of the pages are sticking together. Place a stack of label sheets on top of standard paper in the input tray, label side down. User’s Guide... - Page 40 Chapter 3 Kodak EasyShare 5500 AiO...
-
Page 41: Print
Prints without any margin on the printed media. Orientation You can print a document with the short edge of the paper at the top of the page (portrait), or with the long edge of the paper at the top of the page (landscape). -
Page 42: Print Photos From A Camera
You can safely remove a card only when the status light next to the slots is not blinking. Load the main tray (see Load Main Tray in Chapter 3) or photo tray (See Load Photo Tray in Chapter 3) with photo paper. -
Page 43: Index Print
Print Index Print The purpose of an index print is to catalog contents of a memory card or USB flash drive. An Index print contains the following: Sequence numbers for the relative position of each photo within the defined set of photos, incrementing from 001 and continuing progressively across all pages of a multi-page index print. -
Page 44: Print Photos From A Proofsheet
Proofsheet printing is a two step process. In the first step, you connect a PTP camera or insert a memory card and print a proofsheet. In the second step, you select pictures to print from the proofsheet and then scan the proofsheet into the EasyShare AiO. -
Page 45: Bluetooth Printing
Print If a DPOF file is detected when you insert a memory card, the EasyShare AiO displays a message asking if you want to print tagged images. Bluetooth Printing Bluetooth is a short-range radio technology that enables wireless connectivity between electronic devices. -
Page 46: Panoramic Photos
Panoramic images are detected based on the aspect ratio of the image. A panoramic image is displayed in a "fit to page" manner with blank space above and below the image. The crop box is adjusted for a 300 x 100 mm (12 x 4") aspect ratio and initially encompasses the entire image. - Page 47 Print User’s Guide...
- Page 48 Press Photo. The Print menu is displayed with Layout selected. Press to change the print layout. Press OK to set the selected layout and continue to set options, press Photo to preview, or Start to print. Kodak EasyShare 5500 AiO...
- Page 49 Print 3.5x5 Inch Paper 1 per page borderless 2 per page 1 per page bordered 3 per page 4 per page 9 per page User’s Guide...
-
Page 50: X6 Inch Paper
Chapter 4 4x6 Inch Paper 1 per page borderless 1 per page bordered 2 per page 3 per page 4 per page 9 per page Kodak EasyShare 5500 AiO... -
Page 51: X7 Inch Paper
Print 5x7 Inch Paper 1 per page borderless 1 per page bordered 2 per page 3 per page 4 per page 9 per page User’s Guide... -
Page 52: X10 Inch Paper
Chapter 4 8x10 Inch Paper 1 per page borderless 1 per page bordered 2 per page 3 per page 4 per page 9 per page Kodak EasyShare 5500 AiO... - Page 53 Print US Letter 1 per page borderless 1 per page bordered 2 per page 3 per page 4 per page 9 per page User’s Guide...
- Page 54 Chapter 4 Panoramic Kodak EasyShare 5500 AiO...
- Page 55 Print A4 Paper 1 per page borderless 1 per page bordered 2 per page 3 per page 4 per page 9 per page User’s Guide...
- Page 56 Chapter 4 A5 Paper 1 per page borderless 1 per page bordered 2 per page 3 per page 4 per page 9 per page Kodak EasyShare 5500 AiO...
- Page 57 Print A6 Paper 1 per page borderless 1 per page bordered 2 per page 4 per page 9 per page 3 per page User’s Guide...
-
Page 58: Index Sheet
9 per page Index Sheet The Index Sheet layout shows thumbnail images, filenames, and sequence numbers of each photo on a memory card. It also prints a date range and the sequence numbers continue incrementing across multiple pages. Index pages can be printed on US Letter/A4 paper or 4x6 paper. - Page 59 Print US Letter/A4 Index Sheet User’s Guide...
-
Page 60: Setting Print Options
The Photo Print menu contains parameters that allow you to specify other options. Set Number of Prints You can increase the number of prints of each photo from the Photo Print menu. The default is 1 print. On the Print menu, select Quantity. -
Page 61: Previewing Photos
A checkmark is placed in the checkbox when the photo is selected along with the number of copies to be printed. All photos selected are given the number of copies specified in the Quantity parameter on the Print menu by default. For example, if the Quantity parameter is set to 2, all selected photos are initially be given a number-to-print value of 2. -
Page 62: Preview Mode
Additionally, the Print Preview screen displays an icon of a printer and the total number of photos to be printed. For example if you select 2 photos, each set to print 2 copies, the number next to the printer icon will be 4. - Page 63 The Multiview screen shows thumbnails of nine photos. The current photo number and the total photo number are also displayed. Insert a memory card into the appropriate slot, a mass storage device into the USB port, or connect a digital camera to the USB port. The last photo is displayed.
- Page 64 Multiview. The current photo is indicated by a red selection box. Use the 4-way Navigation button to move the red selection box to another photo. Pressing when in the rightmost column displays the next Multiview screen. Pressing when in the leftmost column displays the previous Multiview screen.
-
Page 65: Copy
Fit to Page: The image is copied and fit to the paper size loaded. There may be cropping on the sides or top/bottom depending on the difference in the aspect ratios of the image and the page size. - Page 66 Chapter 5 Fit to Page Copy The image is copied and fit to the paper size loaded. There may be cropping on the sides or top/bottom depending on the difference in the aspect ratios of the image and the page size.
- Page 67 The default copy scale is 100%, however you can scale copies from 10% to 500%. Scaling is anchored to the upper left corner of the original. Place your original face down on the left rear corner of the scanner glass. If you have more than one original, place them face up in the automatic document feeder.
- Page 68 3x3 Poster 4x4 Poster Place your original face down on the left rear corner of the scanner glass. If you have more than one original, place them face up in the automatic document feeder. Press Copy to display the Copy menu.
-
Page 69: Setting Copy Options
Preview Save Settings Set Number of Copies You can set the number of copies to make from the copy menu. The default is 1 copy. On the Copy menu, select Quantity. Press or hold to change the number of copies you want to make. -
Page 70: Previewing Copies
Press OK to set and continue setting options, or Start to copy. Save Copy Settings When you change copy settings from the control panel, the settings apply only to the current copy job. To apply copy settings to all future copy jobs, you can save the setting changes. - Page 71 Copy Zoom and Crop To zoom and crop a photo before making a copy you must be in Preview mode (see Turning Copy Preview On). With Preview set to Yes on the Copy menu, press Start to enter Preview mode. The photo on the glass is scanned and displayed with a crop box.
- Page 72 Chapter 5 Kodak EasyShare 5500 AiO...
-
Page 73: Scan
Pressing Scan places the Kodak EasyShare AiO in Scan mode and displays the Scan menu on the screen. Save Scan Settings When you change scan settings from the control panel, the settings apply only to the current scan job. To apply scan settings to all future scan jobs, you can save your changes. -
Page 74: Scanning Documents
WARNING Never attempt to remove a memory card while it is being accessed. Doing so can damage files on the card. You can safely remove a card only when the status light next to the slots is not blinking. Place a photo or photos face down on the scanner glass. - Page 75 Scan Scan to File Load your original face down on the left rear corner of the scanner glass. If you have more than one original, load them face up in the automatic document feeder. Press Scan to display the Scan menu.
- Page 76 WARNING Never attempt to remove a memory card while it is being accessed. Doing so can damage files on the card. You can safely remove a card only when the status light next to the slots is not blinking. Load your original face down on the left rear corner of the scanner glass.
-
Page 77: Fax
When using the Automatic Document Feeder, you can scan up to 35 pages to send as a fax. The AiO can receive up to 100 pages of fax data at 96 dpi. The Fax menu allows you to enter a fax number to dial and make changes to default settings. When you enter a number using the numeric keypad, it is displayed at the top of the screen. - Page 78 Set Color Set Brightness Set Fax Resolution The Resolution setting affects the transmission speed and quality of faxed documents and photos. The following resolution settings are available. Standard Provides the fastest possible fax transmission with the lowest quality. This is the default setting.
- Page 79 Press OK to set and continue setting options, or Start to fax. Set Brightness You can make faxes lighter of darker with the brightness command on the Fax menu. The default is 0, with -3 the darkest and +3 the lightest.
- Page 80 Chapter 7 need to set up the EasyShare AiO to answer fax calls manually. This is because the EasyShare AiO will not be able to distinguish between fax calls and phone calls. Refer to the table below to determine how you should set up your EasyShare AiO to answer incoming fax calls based on your home or office setup.
- Page 81 Busy Redial Attempts You can set your Kodak EasyShare AiO to redial a busy number from 0 to 14 times. The default number of attempts is 5. Press Menu to display the main menu.
- Page 82 Dialing Mode You can set the dial mode for your Kodak EasyShare All-in-One to either tone dialing or pulse dialing. The default setting is Tone Dialing. Most telephone systems work with either type of dialing. If your telephone system does not require pulse dialing, we recommend using tone dialing.
- Page 83 On, this only affects black-and-white faxes that you send; it does not affect faxes that your receive. If you are having problems sending faxes, you can also adjust the fax speed to see if this solves the problem. For more information on fax speed, see Fax Speed.
-
Page 84: Sending A Fax
Chapter 7 Sending a Fax You can send a fax by dialing the number with the Control Panel keypad, with redial, speed dial, or phonebook. Send a Basic Fax You can send a fax by using the control panel. Place your originals face up in the Automatic Document Feeder. -
Page 85: Receiving A Fax
Depending on the Auto Answer setting, your Kodak AiO Printer can receive faxes automatically or manually. If you have set the Auto Answer option to No, you will need to receive faxes manually. If the Auto Answer option is set to Yes, your EasyShare AiO will automatically answer incoming calls and receive faxes. - Page 86 Remove any photos or paper from the scanner glass. Set the Rings to Answer setting to a high number to allow you to answer the incoming call before the AiO Printer answers. Or, set the Auto Answer setting to No so that the EasyShare AiO does not automatically answer incoming calls.
-
Page 87: Maintenance
If the EasyShare AiO has been subjected to inclement weather or you suspect water has gotten inside the EasyShare AiO, turn it off and let it dry out. If this does not resolve the problem, contact customer support (see Telephone Customer Support). -
Page 88: Clean The Scanner Glass
Chapter 8 Clean the Scanner Glass To ensure that your copies and scans remain clear, keep the scanner glass and lid backing clean and dust the exterior. Turn off the EasyShare AiO and raise the lid. Clean the glass with a soft cloth or sponge slightly moistened with a nonabrasive glass cleaner. -
Page 89: Print Diagnostic Sheet
Check Ink Levels You can easily check the ink levels to determine how soon you might need to replace an ink cartridge. The ink level supply screen shows the amount of ink remaining in the ink tanks. -
Page 90: Replace Ink Cartridges
Third party ink cartridges may not contain the necessary Smart Chip information to notify you before the ink cartridge is empty. Open the printer access door by lifting from the front center of the unit. The ink cartridges are located in the print head. - Page 91 Maintenance Remove the bagged ink cartridge from the box and tear open the bag at the notch and remove the ink cartridge. IMPORTANT: Insert the ink cartridge immediately to prevent any drying of the ink. Remove the orange cap from the cartridge by grasping the top edge and pulling/rotating it off the ink cartridge.
-
Page 92: Printhead
The Kodak EasyShare AiO performs a calibration every time you install or replace a printhead. However, you can run a calibration if you are seeing changes in the image quality. Calibration aligns the printheads and performs a nozzle health check to enable high-quality prints. - Page 93 Wait until the printhead is idle and silent, then pinch the pinch latch on the ink cartridge with your thumb and forefinger and lift it out of the print head. Remove both ink cartridges and place them on a flat surface with the ink pads up.
- Page 94 Chapter 8 Place the printhead into the carriage. Push against the back wall of the printhead until it clicks into place. Reinstall the ink cartridges. Kodak EasyShare 5500 AiO...
-
Page 95: Support
Retain the original dated sales receipt. Proof of the date of purchase will be required with any request for warranty repair. -
Page 96: Your Rights
Some states or jurisdictions do not allow limitations on how long an implied warranty lasts, so the above limitation may not apply to you. This warranty gives you specific rights. and you may have other rights which vary from state to state or by jurisdiction. -
Page 97: Telephone Customer Support
Telephone Customer Support If you have questions concerning the operation of your EasyShare software, Home Center software, or EasyShare AiO, you may speak with a customer support representative. When you call, please have the following information available. Computer model, operating system... -
Page 98: Troubleshooting
AiO Fails to Power On The power supply is not properly connected. Make sure the power cord is connected to the power supply and plugged into a grounded power outlet or power strip. If you are using a power strip, make sure it is turned on. -
Page 99: Device Not Recognized
The internal Bluetooth radio in the device may be turned off. Corrective Action Make sure the device is on and within range of the Bluetooth radio signal (30 ft., or 10 meters). NOTE: The Bluetooth technology enabled device must use an BIP, OPP, or FTP profile. -
Page 100: Multiple Paper Feed
Check the connection from your computer to your AiO printer. Ensure that the square end of the USB cable is plugged in to the USB port on the back of your AiO printer, and the flat end into a USB port on your computer. -
Page 101: Paper Jam
Support Check the paper Disengage the Photo tray. Inspect the paper and make sure paper no sheets are damaged in any way. Reload with new paper if necessary. Carefully "fan" the paper to keep the sheets from sticking together. Reload the paper tray(s). Do not overfill. -
Page 102: Transfer Pictures Failure
Wrong Paper Size The paper you selected does not match the active paper tray. The paper selected may be too large or too small than the paper found in the paper tray. Replace the paper in the paper tray with the correct type. - Page 103 A selected picture does not print. The image file may be corrupt. Review the picture on the camera or computer and delete if necessary. The image file may not be JPEG format. The printer can only print JPEG files in standalone mode.
- Page 104 Print Spotted Paper may be dirty. Use a dry, lint-free cloth to wipe clean. For excessive dirt or debris, thoroughly clean the paper tray, and load new paper. NOTE: Keep paper tray covers closed to keep dust and debris from collecting on the paper or inside the printer.
-
Page 105: Copy Troubleshooting
“hide” these small misalignments so that the prints look borderless like they are supposed to. Corrective Action Use the application's Fit to Page/Fill Page option, or resize the picture so it is slightly larger than the paper size. Copy Troubleshooting... -
Page 106: Scan Troubleshooting
See Change Brightness or Copy Settings. Copy Cut Off The original is larger than the paper loaded. When the original is larger than the paper loaded, use the Fit to Page option to reduce your original to the size of the paper loaded. Scan Troubleshooting... -
Page 107: Fax Troubleshooting
Place your original face down on the left rear corner of the scanner glass. Proofsheet Scan Unsuccessful Probable Cause 1 The scanner glass is dirty. Make sure the scanner glass is completely clean or the proofsheet might not scan properly (see Clean the Scanner Glass). Probable Cause 2 Memory Card or Camera Changed Make sure the same memory card inserted or camera connected you used to print the proofsheet. - Page 108 EasyShare AiO. You want the answering machine to answer the phone before the EasyShare AiO. The number of rings to answer for the AiO Printer should be greater than the number of rings to answer for the answering machine. For example, if your answering machine is set to answer in 4 rings and your EasyShare AiO to answer in 5 rings, the answering machine will answer an incoming call first and the EasyShare AiO will monitor the line.
-
Page 109: Appendix
20 sheets of 10 mil thick 4x6 inch (101x150 mm) photo paper Output Tray capacity 50 sheets of 20 lb plain paper or 20 sheets of photo paper Product Operation Environmental Range 5 to 35 degrees C, 15 to 85 % RH (non-... -
Page 110: Computer Requirements
USB 1.1 USB 2.0 Removable Drive CD-ROM CD-ROM Paper Types The following tables show the paper types and sizes the Kodak EasyShare AiO supports for copying and printing. Supported Paper Types 20 to 24 lb Plain paper (64 to 90 gsm) - Page 111 C6 (4.49x6.38 in.) (114x162 mm) A2 (4.37x5.75 in.) (111x146 mm) Envelopes Main DL (designated long) (4.33x8.66 in.) (110x220 mm) US #7 (7x9 in.) (178x127 mm) US #9 (9x12 in.) (127x305 mm) US #10 (4.12x9.5 in) (105x241 mm) 3.5x5 in. (89x127 mm)
-
Page 112: Safety
For added protection from damage during a lightning storm, or any time when your EasyShare AiO and its associated AC adapter will be left unused for long periods of time, unplug the AC adapter from the power outlet and the phone line from the modem. -
Page 113: Regulatory Compliance
FCC Compliance and Advisory This equipment has been tested and found to comply with the limits for a Class B digital device, pursuant to Part 15 of the FCC Rules. These limits are designed to provide reasonable protection against harmful interference in a residential installation. -
Page 114: Fcc And Industry Canada
If this equipment does cause harmful interference to radio or television reception, which can be determined by turning the equipment off and on, you are encouraged to try to correct the interference by one or more of the following measures: 1) reorient or relocate the receiving antenna; 2) increase the separation between the equipment and the receiver;... -
Page 115: Notice To Users In The European Economic Area
(PSTN). Please connect the TAE N telephone connector plug, provided with the Kodak EasyShare All-in- One Series 5000 into the wall socket (TAE 6) code N. This Kodak fax product can be used as a single device and/or in combination (in serial connection) with other approved terminal equipment. - Page 116 Before installing this equipment, users should ensure that it is permissible to be connected to the facilities of the local telecommunications company. The equipment must also be installed using an acceptable method of connection.
-
Page 117: Glossary
Dongle: A small electronic device that plugs into a USB port. DPOF: Digital Print Order File - An ASCII order file that you can generated in a camera that supports DPOF. DPOF files enable you to request simple reprints of the photos in the file. - Page 118 Glossary WEP: Wired Equivalent Privacy Wi-Fi: Wireless Fidelity WLAN: Wi-Fi Local Area Network WPA: Wi-Fi Protected Access Kodak EasyShare 5500 AiO...
-
Page 119: Index
Paper..............98, 106 Paper Feed..............96 Envelopes ..............34 Paper Jam ..............97 Error Correction............79 PBX................24 Fax........26, 27, 28, 79, 80, 81, 82 Phonebook..............81 Fax Activity Report ........... 73 Photo Layout.........45, 46, 47, 48 Fax Brightness............75 Photo Layouts............64 User’s Guide... - Page 120 Voice ..............27, 28 Safety ................108 White Edges .............. 101 Sample Page............... 20 Scale Percent ..............63 Zoom................58 Scan................103 Zoom and Crop ............67 Scan Document (Control Panel) .....71, 72 Scan Photo............69, 70 *1K2107* *1K2107* 1K2107 Kodak EasyShare 5500 AiO...