Table of Contents
Advertisement
Quick Links
We advise you to read this manual carefully, which contains all the instructions for
maintaining the appliance's aesthetic and functional qualities.
For further information on the product: www.smeg.com
Contents
36
36
39
39
40
40
40
41
42
42
43
44
44
46
46
46
47
48
49
50
57
57
57
57
57
57
58
58
59
61
62
62
63
63
66
35
Advertisement
Table of Contents

Related Manuals for Smeg DUSF6300X


Summary of Contents for Smeg DUSF6300X
-
Page 1: Table Of Contents
5.1 Electrical connection 5.2 Cable replacement 5.3 Positioning 5.4 Instructions for the installer We advise you to read this manual carefully, which contains all the instructions for maintaining the appliance's aesthetic and functional qualities. For further information on the product: www.smeg.com... -
Page 2: Instructions
Instructions 1 Instructions • Keep children under the age of 8 away from the appliance when it 1.1 General safety instructions is in use. • Cleaning and maintenance must Risk of personal injury not be carried out by unsupervised • During use the appliance and its children. - Page 3 Instructions • Switch off the appliance • Do not sit on the appliance. immediately after use. • Do not use cleaning products • DO NOT USE OR STORE containing chlorine, ammonia or FLAMMABLE MATERIALS NEAR bleach on parts made of steel or THE APPLIANCE.
- Page 4 Instructions • Remove all trays and racks which Installation and maintenance are not required during cooking. THIS APPLIANCE MUST NOT BE • • Do not cover the bottom of the INSTALLED IN BOATS OR oven cavity with aluminium or tin CARAVANS foil sheets.
-
Page 5: Appliance Purpose
Instructions • If the power supply cable is • Ensure that the appliance is damaged, contact technical switched off before replacing the support immediately and they will bulb. replace it. • Do not place food and/or any • Always use any necessary/ other object directly on the bottom required personal protective of the oven cavity. -
Page 6: This User Manual
Instructions 1.4 This user manual 1.6 Disposal This user manual is an integral part of This appliance must be the appliance and must therefore be disposed of separately from kept in its entirety and within the other waste (Directives user’s reach for the whole working 2002/95/EC, 2002/96/EC, life of the appliance. -
Page 7: How To Read The User Manual
Instructions • Deliver the appliance to the 1.7 How to read the user manual appropriate recycling centre for This user manual uses the following reading electrical and electronic conventions: equipment waste, or return it to the Instructions retailer when purchasing an General information on this user equivalent product, on a one for manual, on safety and final... -
Page 8: Description
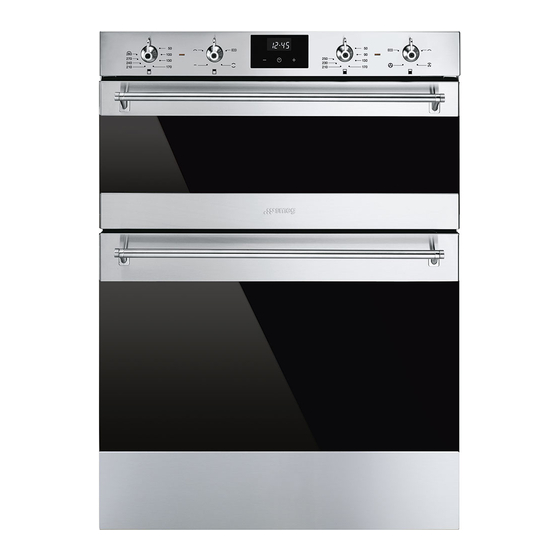
Description 2 Description 2.1 General Description 1 Control panel 2 Oven light 3 Seal 4 Fan 5 Rack/tray support frames Frame shelf... -
Page 9: Control Panel
Description 2.2 Control panel Auxiliary oven temperature knob (1) Programmer clock (4) This knob allows you to select the cooking Useful for displaying the current time, setting temperature. programmed cooking operations and programming the minute minder timer. Turn the knob clockwise to the required value, between the minimum and maximum Main oven temperature knob (5) setting. -
Page 10: Other Parts
Description 2.3 Other parts 2.4 Available accessories Shelves Some models are not provided The appliance features shelves for with all accessories. positioning trays and racks at different heights. The insertion heights are indicated Rack from the bottom upwards (see 2.1 General Description). - Page 11 Description Deep tray Useful for collecting fat from foods placed on the rack above and for cooking pies, pizzas and baked desserts. The oven accessories intended to come into contact with food are made of materials that comply with the provisions of current legislation. Original supplied and optional accessories can be requested to Authorised Assistance Centres.
-
Page 12: Use
3 Use Improper use Risk of damage to enamelled 3.1 Instructions surfaces High temperature inside the oven • Do not cover the bottom of the oven during use cavity with aluminium or tin foil sheets. Danger of burns • If you wish to use greaseproof paper, place it so that it will not interfere with the •... -
Page 13: Using The Accessories
3.3 Using the accessories Tray rack The tray rack has to be inserted into the tray. Racks and trays In this way fat can be collected separately Racks and trays have to be inserted into the from the food which is being cooked. side guides until they come to a complete stop. -
Page 14: Using The Oven
3.4 Using the oven Static As the heat comes from above and Switching on the oven below at the same time, this system To switch on the oven: is particularly suitable for certain 1. Select the cooking function using the types of food. -
Page 15: Cooking Advice
Advice for cooking with the Grill and the Fan + circulaire Fan with grill The combination of the fan and the • Meat can be grilled even when it is put circulaire heating element into the cold oven or into the preheated (incorporated in the rear of the oven if you wish to change the effect of oven) allows you to cook different... -
Page 16: Programmer Clock
Advice for defrosting and proving 3.6 Programmer clock • Place frozen foods without their packaging in a lidless container on the first shelf of the oven. • Avoid overlapping the food. • To defrost meat, use the rack placed on the second level and a tray on the first level. - Page 17 Timed cooking (only for the main oven) Setting the time Timed cooking is the function If the time is not set, the oven will which allows a cooking operation not switch on. to be started and then ended after a specific length of time set by the On the first use, or after a power failure, the user.
- Page 18 7. Press the clock key to reset the 4. Use the key to set the required minutes. (for example 1 hour) programmer clock. 5. Press the menu key . The text It is not possible to set a cooking time of more than 10 hours. will appear on the display in sequence with the pre-set cooking To cancel the set programming...
- Page 19 10. Return the function and temperature Minute minder timer knobs to 0. The minute minder timer does not 11. To turn off the buzzer just press any key stop the cooking operation but of the programmer clock. rather informs the user when the set time has run out.
- Page 20 Modifying the set data 1. Press the clock key 2. Use the value increase and value decrease keys to set the number of minutes required. Deleting the set data 1. Press the clock key 2. Hold down the value increase value decrease keys at the same time.
- Page 21 Main oven cooking information table Runner posi- Temperature Food Weight (Kg) Function tion from the Time (minutes) (°C) bottom Lasagne 3 - 4 Fan + circulaire 210 - 220 45 - 50 Pasta bake 3 - 4 Fan + circulaire 210 - 220 45 - 50 Roast veal...
- Page 22 Auxiliary oven cooking information table Runner Temperature Food Weight (Kg) Function position from Time (minutes) (°C) the bottom Lasagne 3 / 4 Static 1 or 2 220 - 230 50 - 60 Pasta bake Static 1 or 2 220 - 230 Roast veal Static 180 - 190...
-
Page 23: Cleaning And Maintenance
Cleaning and maintenance 4 Cleaning and maintenance 4.4 Food stains or residues Do not use metallic sponges or sharp 4.1 Instructions scrapers as they will damage the surfaces. Use ordinary non-abrasive products with Improper use the aid of wooden or plastic utensils if Risk of damage to surfaces necessary. -
Page 24: Cleaning The Door Glazing
Cleaning and maintenance 2. Grasp the door on both sides with both 4.7 Removing the internal glass hands, lift it forming an angle of around panes 30° and remove it. For easier cleaning the door internal glass panes can be disassembled. 1. -
Page 25: Cleaning The Inside Of The Oven
Cleaning and maintenance 4. Clean the external glass pane and the 4.8 Cleaning the inside of the oven panes previously removed. Use For the best oven upkeep, clean it regularly absorbent kitchen roll. In case of after having allowed it to cool. stubborn dirt, wash with a damp sponge Take out all removable parts. - Page 26 Cleaning and maintenance Removing racks/trays support frames Cleaning the upper part (auxiliary oven) Removing the guide frames enables the High temperature inside the oven sides to be cleaned more easily. This during use operation should be performed each time Danger of burns the automatic cleaning cycle is used (on some models only).
-
Page 27: Extraordinary Maintenance
Cleaning and maintenance 4.9 Extraordinary maintenance 5. Replace the lamp with one of the same type (40W). Live parts 6. Refit the cover correctly, so that the Danger of electrocution moulded part of the glass is facing the door. • Disconnect the oven power supply. 7. -
Page 28: Installation
Installation 5 Installation • 380-415 V 2N~ 5.1 Electrical connection Power voltage Danger of electrocution Use a 4 x 1.5 mm² four-core cable. • Have the electrical connection performed by authorised technical • 380-415 V 3N~ personnel. • The appliance must be connected to earth in compliance with electrical system safety standards. -
Page 29: Cable Replacement
Installation 5.2 Cable replacement 5.3 Positioning Power voltage Heavy appliance Danger of electrocution Danger of crush injuries • Disconnect the main power supply. • Place the appliance into the piece of furniture with the aid of a second person. 1. Unscrew the fastening screws 2 of the Pressure on the open door terminal board cover. - Page 30 Installation Fixing Appliance overall dimensions (mm) To secure the appliance to the counter, screw in 6 screws through the holes in the frame.
- Page 31 Installation Mounting under worktops (mm) The oven is designed for mounting into any piece of furniture as long as it is heat- resistant. Respect the unit dimensions and the oven overall dimensions for positioning. Depending on the type of installation a slot should be foreseen for ventilating the appliance.
-
Page 32: Instructions For The Installer
Installation 5.4 Instructions for the installer • The plug must be accessible after installation. Do not bend or trap the power cable. • The appliance must be installed according to the installation diagrams. • If the appliance does not work correctly after having carried out all the checks, contact your local Authorised Service Centre.