Table of Contents
Advertisement
1.
INSTRUCTIONS PROPER USE ___________________________________________ 4
2.
SAFETY INSTRUCTION _________________________________________________ 5
3.
KNOW YOUR OVEN ____________________________________________________ 6
4.
BEFORE FIRST USE____________________________________________________ 6
5.
ELECTRONIC ANALOGUE CLOCK (ONLY ON SOME MODELS) ________________ 7
6.
ELECTRONIC PROGRAMMER (ONLY ON SOME MODELS) ____________________ 9
7.
OVEN CAVITY ________________________________________________________ 11
8.
AVAILABLE ACCESSORIES_____________________________________________ 12
9.
DESCRIPTION OF CONTROL ___________________________________________ 13
10. COOKING FUNCTION__________________________________________________ 16
11. OVEN TEMPERATURE CONVERSION CHART _____________________________ 19
12. COOKING CHART_____________________________________________________ 20
13. CLEANING AND MAINTENANCE _________________________________________ 21
14. SOMETHING WRONG? ________________________________________________ 24
15. INSTALLATION _______________________________________________________ 25
INSTRUCTIONS FOR THE USER: these contain user advice, description of the commands and the
correct procedures for cleaning and maintenance of the appliance.
install the appliance, set it functioning and carry out an inspection test.
Contents
3
Advertisement
Table of Contents

Related Manuals for Smeg DUCO4SS


Summary of Contents for Smeg DUCO4SS
-
Page 1: Table Of Contents
INSTRUCTIONS PROPER USE ___________________________________________ 4 SAFETY INSTRUCTION _________________________________________________ 5 KNOW YOUR OVEN ____________________________________________________ 6 BEFORE FIRST USE____________________________________________________ 6 ELECTRONIC ANALOGUE CLOCK (ONLY ON SOME MODELS) ________________ 7 ELECTRONIC PROGRAMMER (ONLY ON SOME MODELS) ____________________ 9 OVEN CAVITY ________________________________________________________ 11 AVAILABLE ACCESSORIES_____________________________________________ 12 DESCRIPTION OF CONTROL ___________________________________________ 13 10. -
Page 2: Instructions Proper Use
INSTRUCTIONS PROPER USE ELECTRICAL CONNECTION: PLEASE REFER TO INSTALLATION INSTRUCTION FOR THE GAS & ELECTRICAL SAFETY REGULATIONS AND THE VENTILATION REQUIREMENTS. IN YOUR OWN INTEREST, AND THAT OF SAFETY, IT IS THE LAW THAT ALL GAS APPLIANCES BE INSTALLED AND SERVICED BY COMPETENT PERSONS, WHO WILL COMPLY WITH THE RELEVANT STANDARDS AND REGULATIONS. -
Page 3: Safety Instruction
Safety instruction SAFETY INSTRUCTION INSTRUCTIONS FOR THE INSTALLER: THESE ARE INTENDED FOR THE QUALIFIED TECHNICIAN WHO MUST INSTALL THE APPLIANCE, SET IT FUNCTIONING AND CARRY OUT AN INSPECTION TEST. DO NOT ATTEMP TO MOVE THE APPLIANCE BY PULLING ON THE DOOR HANDLES. OPEN THE DOOR AND GRASP THE FRAME OF THE OVEN TAKING CARE THAT THE DOOR DOES NOT SHUT ON YOUR FINGERS. -
Page 4: Know Your Oven
KNOW YOUR OVEN COOLING SYSTEM The appliance is equipped 1 cooling fan which comes into operation a few minutes after the oven is switched on. Operation of the fan generates a normal air flow which comes out between the control panel and the oven door and may continue for a short time even after the oven is turned off. -
Page 5: Setting The Time
Instructions for the user ELECTRONIC ANALOGUE CLOCK (ONLY ON SOME MODELS) The programmer user instructions are valid only for the large oven. LIST OF FUNCTIONS MINUTE-MINDER BUTTON AUTOMATIC DURATION / AUTOMATIC STAR TIME BUTTON TIME SETTING AND RESET DECREASE TIME BUTTON INCREASE TIME BUTTON 5.1.0 Setting the time... - Page 6 5.1.2 Programming Cooking duration time: the 2 the thermostat to the cooking temperature of choice and the function selector knob to any setting. To set the cooking time, proceed as follows: Press the Use the pressed, 1 minute will be added to the cooking time, and every 12 minutes a new inside segment will light up (figure 2 shows a cooking time of 1 hour).
-
Page 7: Electronic Programmer (Only On Some Models)
Instructions for the user ELECTRONIC PROGRAMMER (ONLY ON SOME MODELS) The programmer user instructions are valid only for the large oven. LIST OF FUNCTIONS MINUTE MINDER BUTTON COOKING DURATION BUTTON END-OF-COOKING BUTTON DECREASE TIME BUTTON INCREASE TIME BUTTON 6.1.0 Clock adjustment When using the oven for the first time, or after a power failure, the display flashes regularly and indicates . - Page 8 6.1.3 End of cooking When cooking is over, the oven will automatically switch off and, at the same time, an intermittent alarm will sound. After switching off the alarm, the display will once again show the right time together with the symbol 6.1.4 Adjusting alarm volume The acoustic alarm has three different settings.
-
Page 9: Oven Cavity
Instructions for the user OVEN CAVITY GRILL UPPER HEATING ELEMENT ROOF OVEN LIGHT Large oven: it comes on when the function switch knob is turned to any position. Small oven: rotate the temperature knob clockwise to the first setting aligned with the lamp symbol ( ). -
Page 10: Available Accessories
Instructions for the user AVAILABLE ACCESSORIES The large oven has 4 supports for positioning plates and racks at various heights and has upper protection. The small oven has 2 supports. Some models do not feature all accessories. Oven shelf: useful for holding cooking vessels. Grill rack: for placing above plate for cooking foods that might drip. -
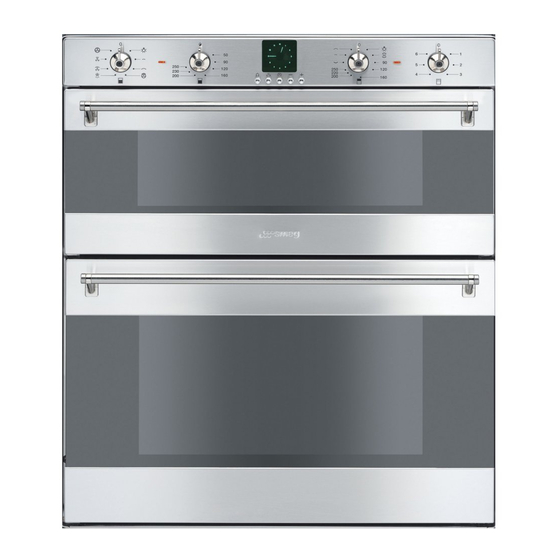
Page 11: Description Of Control
Instructions for the user DESCRIPTION OF CONTROL Large oven function knob Large oven thermostat knob Small oven thermostat knob Small oven variable grill knob Large oven thermostat indicator light Clock and electronic programmer Small oven thermostat indicator light... - Page 12 Large oven function knob Turn the knob in either direction onto one of the following symbols: NO FUNCTION SET OVEN LIGHT No element engaged GRILL ELEMENT: for grilling meat, toasting or browining dishes. WIDE GRILL ELEMENT: for grilling meat, toasting or browining dishes. UPPER VENTILATED HEATING ELEMENT: This function is recommended for cooking...
- Page 13 Instructions for the user Small oven thermostat knob Set to the required temperature, between 50° and 250°C. The oven is switched on by turning the knob clockwise to any one of the following functions except the oven light: No function set OVEN LIGHT No element engaged UPPER...
-
Page 14: Cooking Function
Instructions for the user 10. COOKING FUNCTION UPPER AND LOWER HEATING ELEMENT Keep the oven door closed during cooking. Ideal for all types of cooking, especially baking, fish, terrines and vegetable based dishes. To ensure even heat distribution, we recommend you cook on one level only. - Page 15 Instructions for the user LOWER HEATING ELEMENT Keep the oven door closed during cooking. This function is recommended when blind-baking pastry or cooking pizza. It may also be used to finish off quiches or flans to ensure the base pastry is properly cooked. Preheating is recommended in particular when baking cakes and pizza.
- Page 16 WIDE GRILL ELEMENT + VENTILATION GRILL ELEMENT + VENTILATION Keep the oven door closed during grilling. Fan grilling offers an alternative method of cooking food items normally associated with conventional grilling. The grill element circulating hot air around the food. The need to check and turn the food is reduced.
-
Page 17: Oven Temperature Conversion Chart
Instructions for the user 11. OVEN TEMPERATURE CONVERSION CHART... -
Page 18: Cooking Chart
12. COOKING CHART Beef Lamb Pork & Veal Chicken Turkey/goose Stuffed or rolled meats add 10 mins per 500g to the above cooking times Rich fruit cakes Victoria sponge Scones Bread Fruit pie Meringues Egg Custard Baked sponge Milk pudding FOR ALL FOODS PRE-HEAT OVEN FOR 10 MINS Instructions for the user ROASTING GUIDE... -
Page 19: Cleaning And Maintenance
Instructions for the user 13. CLEANING AND MAINTENANCE CLEANING Before performing any operations requiring access to powered parts, switch off the power supply to the machine. 13.1 Cleaning stainless steel To keep stainless steel in good condition it should be cleaned regularly after use. Let it cool first. - Page 20 13.3.5 Assembling the self-cleaning liners (maxi oven) 1. Remove all accessories from the oven; 2. Remove the side grilles (fig.1); 3. Extract the side liners “C” and “D”(fig. 2); 4. Remove the back panel “A” after undoing the threaded ring-nut “B” (fig. 2). 5.
-
Page 21: Door Glass
Instructions for the user 13.5 Door glass The door glass should always be kept clean. For easier cleaning, the glass parts of the door can be fully removed by proceeding as described below. After opening the door and locking it in place with at least one of the hinges (see point 13.4 Removing door), remove the two panes of glass. -
Page 22: Something Wrong
14. SOMETHING WRONG? PROBLEM The oven doesn’t work The results of cooking are unsatisfactory The oven smokes Steam and condensation settle on the food and the oven cavity The timer keeps flashing The timer does not work Instructions for the user POSSIBLE CAUSES The oven is not wired in or switched on at the wall. -
Page 23: Installation
Instructions for the installer 15. INSTALLATION 15.1 Technical information Oven type Electrical connections Required protection fuse for the oven OVEN RATING Ovens Maximum electrical power Oven grilling Large grilling power Small grilling power Ovens lightings OVEN CAVITY DIMENSIONS Height (cm) Width (cm) Depth (cm) Internal volume (cm... -
Page 24: Instructions For The Installer
Instructions for the installer ∼ For operation on 380-415 V 2N : use an H05RR-F / H05RN-F type four-core cable (4 x 1.5 mm ∼ For operation on 220-240 V : use an H05RR-F / H05RN-F type three- core cable (3 x 4 mm The cable end to be connected to the appliance must be provided with an earth wire (yellow-green) at least 20 mm longer. -
Page 25: Installing The Oven
Instructions for the installer 15.4 Installing the oven The oven is designed for installing into any piece of furniture as long as heat-resistant. Follow the dimensions given in Figure 1-2-3. Tighten the four screws A inside the frame to secure (Fig. 1-3). For the installation procedure shown in figure 1, ensures that the cabinet has the opening B.