Table of Contents
Advertisement
Available languages
Available languages
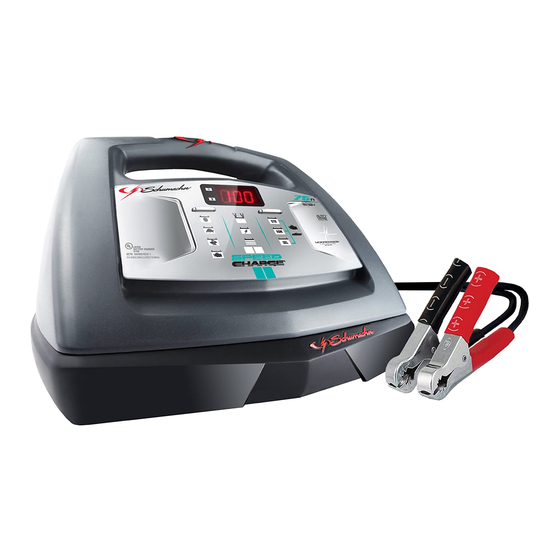
OWNER'S MANUAL • MANUAL DEL USUARIO
Models / Modelos:
Automatic Battery Charger • Cargador de batería automático
•
READ THE ENTIRE MANUAL BEFORE USING THIS PRODUCT.
FAILURE TO DO SO CAN RESULT IN SERIOUS INJURY OR DEATH.
•
LEA EL MANUAL COMPLETO ANTES DE UTILIZAR ESTE PRODUCTO.
CUALQUIER FALLA PODRÍA RESULTAR EN SERIAS LESIONES O PODRÍA SER
MORTAL.
XC75 & XC103
XC75
ADVERTENCIA
XC103
00-99-001038/0610
Advertisement
Table of Contents

Related Manuals for Schumacher Electric XC103


Summary of Contents for Schumacher Electric XC103
- Page 1 READ THE ENTIRE MANUAL BEFORE USING THIS PRODUCT. FAILURE TO DO SO CAN RESULT IN SERIOUS INJURY OR DEATH. • LEA EL MANUAL COMPLETO ANTES DE UTILIZAR ESTE PRODUCTO. CUALQUIER FALLA PODRÍA RESULTAR EN SERIAS LESIONES O PODRÍA SER MORTAL. XC75 & XC103 XC75 ADVERTENCIA XC103 00-99-001038/0610...
- Page 2 DO NOT RETURN THIS PRODUCT TO THE STORE! Call Customer Service for Assistance: 800-621-5485 ¡NO LO DEVUELVA ESTE PRODUCTO A LA TIENDA! Llame a Servicios al Cliente para Asistencia: 800-621-5485...
-
Page 3: Table Of Contents
SECTION IMPORTANT SAFETY INSTRUCTIONS PERSONAL PRECAUTIONS PREPARING TO CHARGE CHARGER LOCATION DC CONNECTION PRECAUTIONS FOLLOW THESE STEPS WHEN BATTERY IS INSTALLED IN VEHICLE FOLLOW THESE STEPS WHEN BATTERY IS OUTSIDE VEHICLE GROUNDING AND AC POWER CORD CONNECTIONS ASSEMBLY INSTRUCTIONS CHARGER CONTROLS OPERATING INSTRUCTIONS CALCULATING CHARGE TIME MAINTENANCE INSTRUCTIONS... - Page 4 SECCIÓN INSTRUCCIONES IMPORTANTES DE SEGURIDAD PRECAUCIONES PERSONALES PREPARACIÓN PARA LA CARGA UBICACIÓN DEL CARGADOR PRECAUCIONES DE CONEXIÓN EN CC SIGA ESTOS PASOS CUANDO LA BATERÍA ESTÉ COLOCADA EN EL VEHÍCULO SIGA ESTOS PASOS CUANDO LA BATERÍA SE ENCUENTRE FUERA DEL VEHÍCULO CONEXIONES A TIERRA Y ENERGÍA DE CA INSTRUCCIONES DE ENSAMBLADO CONTROLES DEL CARGADOR...
- Page 5 IMPORTANT: READ AND SAVE THIS SAFETY AND INSTRUCTION MANUAL. SAVE THESE INSTRUCTIONS – The XC75 and XC103 offer a wide range of features to accommodate your needs. This manual will show you how to use your charger safely and effectively. Please read, understand and follow these instructions and precautions carefully, as this manual contains important safety and operating instructions.
-
Page 6: Important Safety Instructions
Do not expose the charger to rain or snow. Use only recommended attachments. Use of an attachment not recommended or sold by Schumacher® Electric Corporation may result in a risk of fire, electric shock or injury to persons or damage to property. To reduce the risk of damage to the electric plug or cord, pull by the plug rather than the cord when disconnecting the charger. -
Page 7: Personal Precautions
Use this charger for charging LEAD-ACID batteries only. It is not intended to supply power to a low voltage electrical system other than in a starter-motor application. Do not use this battery charger for charging dry-cell batteries that are commonly used with home appliances. These batteries may burst and cause injury to persons and damage to property. -
Page 8: Charger Location
Clean the battery terminals before charging the battery. During cleaning, keep airborne corrosion from coming into contact with your eyes, nose and mouth. Use baking soda and water to neutralize the battery acid and help eliminate airborne corrosion. Do not touch your eyes, nose or mouth. Add distilled water to each cell until the battery acid reaches the level specified by the battery manufacturer. Do not overfill. For a battery without removable cell caps, such as valve regulated lead acid batteries (VRLA), carefully follow... -
Page 9: Follow These Steps When Battery Is Installed In Vehicle
FOLLOW THESE STEPS WHEN BATTERY IS INSTALLED IN VEHICLE Position the AC and DC cables to reduce the risk of damage by the hood, door and moving or hot engine parts. NOTE: If it is necessary to close the hood during the charging process, ensure that the hood does not touch the metal part of the battery clips or cut the insulation of the cables. -
Page 10: Grounding And Ac Power Cord Connections
Over 100 feet long - use a 14 gauge extension cord. ASSEMBLY INSTRUCTIONS Remove all cord wraps and uncoil the cables prior to using the battery charger. Included with your charger are two cord wrap cleats for storage of the clip cables. -
Page 11: Charger Controls
CHARGER CONTROLS LED Indicators CONNECTED (red) LED lit: Indicates that the charger is properly connected to the battery. CHARGING (yellow) LED lit: Indicates the charger has detected a battery and is charging it. CHARGED (green) LED lit: Indicates the battery is fully charged and the charger is in maintain mode. - Page 12 Gel Batteries are best used in VERY DEEP cycle application and may last a bit longer in hot weather applications. If the incorrect battery charger is used on a Gel Cell battery, poor performance and premature failure is certain.
-
Page 13: Operating Instructions
Charge Rate button again, the output will turn back on at the slow charge rate setting. OPERATING INSTRUCTIONS This battery charger must be properly assembled in accordance with the assembly instructions before it is used. The charger does not have an ON/OFF switch. The On and Off commands are controlled by plugging the charger into a 120V AC electrical wall outlet only after the battery connections have been made. - Page 14 Therefore, we do not recommend charging a large battery on the maintenance setting. NOTE: The maintain mode technology utilized in Schumacher’s chargers allows you to safely charge and maintain a healthy battery for extended periods of time.
- Page 15 Using the Engine Start feature Your battery charger can be used to jumpstart your car if the battery is low. Follow these instructions on how to use the ENGINE START feature. Follow all safety instructions and precautions for charging your battery. Wear complete eye protection and clothing protection. Charge your battery in a well-ventilated area.
- Page 16 Using the Battery Voltage Tester Overview This battery charger has a built-in voltmeter to test your battery’s state of charge. The charger does not have a built in load tester. As such, a recently charged battery could have a temporarily high voltage due to what is known as “surface charge.”...
-
Page 17: Calculating Charge Time
Using the Alternator Performance Tester Overview This battery charger has a built-in alternator tester that displays an estimate of the alternator’s relative output compared to normal alternators. The alternator % values displayed should be taken as a general reference, not a precise diagnosis. -
Page 18: Maintenance Instructions
11¾ hrs 140 RC 18 hrs 160 RC 20 hrs 180 RC 22 hrs XC103 CHARGE RATE/CHARGING TIME 3 AMP 6 - 12 AH 1¼ - 2½ hrs 12 - 32 AH 2½ - 6¾ hrs 40 - 60 RC 7½... -
Page 19: Moving And Storage Instructions
MOVING AND STORAGE INSTRUCTIONS 14.1 Store the charger unplugged, in an upright position. The cord will still conduct electricity until it is unplugged from the outlet. 14.2 Store inside, in a cool, dry place (unless you’re using an on-board Marine Charger). 14.3 Do not store the clips on the handle, clipped together, on or around metal, or clipped to cables. - Page 20 PROBLEM The charger is making an audible clicking sound. Charger makes a loud buzz or hum. Short or no start cycle when cranking engine. POSSIBLE CAUSE Circuit breaker is cycling. Battery is defective. Shorted battery cables or clamps. Severely discharged battery, but otherwise it is a good battery.
-
Page 21: Before Returning For Repairs
U.S.A. 7:00 am to 5:00 pm Central Time Monday through Friday LIMITED WARRANTY SCHUMACHER ELECTRIC CORPORATION, 801 BUSINESS CENTER DRIVE, MOUNT PROSPECT, IL 60056-2179, MAKES THIS LIMITED WARRANTY TO THE ORIGINAL RETAIL PURCHASER OF THIS PRODUCT. - Page 22 Manufacturer does not provide any warranty for any accessories used with this product that are not manufactured by Schumacher Electric Corporation and approved for use with this product. This Limited Warranty is void if the product is misused, subjected to careless handling, repaired, or modified by anyone other than Manufacturer or if this unit is resold through an unauthorized retailer.
- Page 23 Nombre de la Tienda donde se Compró_________________Fecha de compra _____ Localización de la Tienda___________________Numero de Serie _______________ Código de barras ________________________ WARRANTY PROGRAM MODEL:___________________ This warranty is not transferable. Schumacher Electric Corporation 801 Business Center Drive Mount Prospect, IL 60056-2179 PROGRAMA DE REGISTRO DE 5-AÑOS DE GARANTÍA MODELO:___________________ Esta garantía no es tranferible.
- Page 24 • •...
- Page 25 IMPORTANTE: LEA Y GUARDE ESTE MANUAL DE INSTRUCCIONES Y SEGURIDAD. GUARDE ESTAS INSTRUCCIONES: Los XC75 y XC103 ofrecen una amplia gama de características para satisfacer sus necesidades. Este manual le mostrará cómo utilizar su cargador en forma segura y efectiva. Por favor, lea, comprenda y siga estas instrucciones y precauciones cuidadosamente, ya que este manual contiene instrucciones operativas y de seguridad de importancia.
-
Page 26: Instrucciones Importantes De Seguridad
No exponga el cargador a la lluvia o a la nieve. Utilice solamente accesorios recomendados. El uso de un accesorio no recomendado o suministrado por Schumacher® Electric Corporation puede provocar riesgo de incendio, descarga eléctrica o lesiones a personas o daño a la propiedad. -
Page 27: Precauciones Personales
RIESGO DE GASES EXPLOSIVOS. 1.10 RESULTA PELIGROSO TRABAjAR EN FORMA CERCANA A UNA BATERÍA DE PLOMO. LAS BATERÍAS GENERAN GASES EXPLOSIVOS DURANTE SU NORMAL FUNCIONAMIENTO. POR ESTE MOTIVO, RESULTA DE SUMA IMPORTANCIA qUE SIGA LAS INSTRUCCIONES CADA VEz qUE UTILIzA EL CARGADOR. -
Page 28: Preparación Para La Carga
2.10 Si el ácido de la batería tiene contacto con su piel o su ropa, lave de inmediato el área afectada con agua y jabón. En caso de que ingrese ácido en un ojo, sumerja el mismo de inmediato bajo agua potable corriente por al menos 10 minutos y obtenga atención médica en forma inmediata. -
Page 29: Ubicación Del Cargador
UBICACIÓN DEL CARGADOR Ubique el cargador a la mayor distancia posible de la batería como lo permitan los cables de CC. Nunca ubique el cargador directamente por encima de la batería que se carga; los gases de la batería corroerán y dañarán el cargador. No ubique la batería encima del cargador. -
Page 30: Siga Estos Pasos Cuando La Batería Se Encuentre Fuera Del Vehículo
En un vehículo con descarga a tierra por borne negativo, conecte el gancho POSITIVO (ROJO) del cargador de batería al borne POSITIVO (POS, P, +) sin descarga a tierra de la batería. Conecte el gancho NEGATIVO (NEGRO) al chasis del vehículo o al bloque motor alejado de la batería. No conecte el gancho al carburador, líneas de combustible o cuerpos metálicos. Conecte a una pieza metálica de calibre grueso del marco o del bloque motor. -
Page 31: Conexiones A Tierra Y Energía De Ca
CONEXIONES A TIERRA Y ENERGÍA DE CA Este cargador de batería está destinado a un uso en un circuito con tensión nominal de 120 V y posee un enchufe con descarga a tierra que luce como el enchufe ilustrado. El cargador debe poseer una descarga a tierra para reducir el riesgo de descargas eléctricas. -
Page 32: Controles Del Cargador
CONTROLES DEL CARGADOR Indicadores LEDs LED CONECTADA propiamente conectado a la batería LED CARGANDO detectado una batería y la está cargando. LED CARGADO completa y que el cargador cambió a modo mantener. NOTA: Vea en la sección Instrucciones operativas la descripción completa de los modos del cargador. - Page 33 Botón para establecer diferentes tipos de batería Utilice este botón para establecer el tipo de batería a cargar. • Regular : Establezca el botón en se utiliza en automóviles, camiones y motocicletas. Este tipo de baterías cuentan con tapas de ventilación y a menudo se las clasifica como de “Bajo mantenimiento” o “Libre de mantenimiento”. Este tipo de baterías está diseñado para suministrar rápidas ráfagas de energía (tales como los arranques de motores) y poseen un mayor recuento en placa.
-
Page 34: Instrucciones Operativas
• Arranque de motor un motor con una batería débil o agotada. Siempre utilizar en combinación con una batería. NOTA: Un vez que el cargador ha comenzado a cargar la batería, si presiona el botón de Proporción de Carga (Charge Rate) una vez, la corriente de salida se apaga y la pantalla mostrará OFF (Apagado) y después el voltaje de la batería. - Page 35 NOTA: Este cargador está equipado con un seguro-rectificador. Este no permitirá paso de corriente si las pinzas de la batería no están conectadas en forma correcta. A diferencia de otros cargadores tradicionales, las pinzas no harán corto si se juntan una con otra. Porcentaje y tiempo de carga de la batería: El cargador ajusta el tiempo de carga con el fin de cargar la batería en forma completa, eficiente y segura. El microprocesador lleva a cabo en forma automática las funciones necesarias.
- Page 36 NOTA: El Modo de Mantenimiento es una tecnología utilizada en los cargadores Schumacher, para permitirle cargar y mantener confiadamente segura su batería y para que mantenga su batería saludable por largos períodos de tiempo. Ahora, los problemas con la batería, problemas eléctricos del vehículo, conexiones equivocadas u otras condiciones que surgan,...
- Page 37 Notas sobre el arranque del motor En la secuencia de arranque que figura anteriormente el cargador se configura en uno de estos tres estados: Esperar para dar arranque: El cargador espera hasta que se le de arranque al motor antes de suministrarle amperes para que arranque. El cargador suministra una carga a la proporción de carga lenta cuando se está en espera y se volverá...
- Page 38 Indicación de Voltaje a 6 Voltios 6.4 o Más 6.1 a 6.3 Menos de 6.1 Probador y cargador: Cuando se enciende por primera vez, la unidad funciona sólo como probador, no como cargador. Para seguir utilizándolo como un probador, evite presionar el botón ÍNDICE DE CARGA. Al seleccionar el índice de carga active el cargador de la batería y desactive el probador.
-
Page 39: Calculando El Tiempo De Carga
Arranque el vehículo y encienda las luces delanteras. Lea la tensión de la pantalla digital. Si usted obtiene una lectura de entre 13.4 volts y 14.6 volts, el alternador está trabajando propiamente. Si la lectura es menor a los 13.5 voltios o más de 14.5 volts, pida que el sistema de carga sea supervisado por un técnico calificado. -
Page 40: Instrucciones De Mantenimiento
11¾ hrs 140 RC 18 hrs 160 RC 20 hrs 180 RC 22 hrs XC103 NIVEL DE CARGA/TIEMPO DE CARGA 3 AMP 6 - 12 AH 1¼ - 2½ hrs 12 - 32 AH 2½ - 6¾ hrs 40 - 60 RC 7½... -
Page 41: Instrucciones Para El Manejo Y Almacenamiento
INSTRUCCIONES PARA EL MANEJO Y ALMACENAMIENTO 14.1 Guarde el cargador desenchufado en posición vertical. El cable seguirá conduciendo electricidad hasta que se desenchufe del toma. 14.2 Almacene en el interior, en un lugar fresco y seco (a menos que esté utilizando un cargador marino integrado). 14.3 No guarde los ganchos en asas, enganchados entre sí, en o cerca de metales o enganchados en cables. - Page 42 PROBLEMA El cargador hace un ruido leve pero audible. El cargador hace un fuerte zumbido o murmullo. CAUSA POSIBLE El disyuntor está en ciclo. La batería es defectuosa. Cables o pinzas de la batería están cortocircuitados Batería severamente descargada pero de otro modo buena.
- Page 43 PROBLEMA Ciclo corto o sin comenzar al arrancar el motor. El cargador no se enciende estando debidamente conectado. La batería esta conectada y el cargador encendido, pero no carga. Las pinzas de la batería no hacen corto al juntarse una con otra.
-
Page 44: Antes De Devolver A Reparaciones
ésta se pueda reparar o reemplazar. El Fabricante no presta garantía por lo accesorios utilizados con este producto que no sean los fabricados por Schumacher Electric Corporation y que no estén aprobados para su uso con este producto. La presente Garantía Limitada será... - Page 45 ASUMIR O A ADQUIRIR NINGUNA OTRA OBLIGACIÓN RESPECTO DEL PRODUCTO QUE NO SEA LA PRESENTE GARANTÍA. Servicio de atención al cliente de Schumacher Electric Corporation Lunes-viernes 7:00 a. m. a 5.00 p. m. CST Schumacher y el logo Schumacher son marcas registradas de Para hacer efectiva la garatía, por favor llene la tarjeta de garantía en página 19 y...
- Page 46 • •...
- Page 47 • •...
- Page 48 DO NOT RETURN THIS PRODUCT TO THE STORE! Call Customer Service for Assistance: 800-621-5485 ¡NO LO DEVUELVA ESTE PRODUCTO A LA TIENDA! Llame a Servicios al Cliente para Asistencia: 800-621-5485...