Table of Contents
Advertisement
Available languages
Available languages
OWNER'S MANUAL • MANUAL DEL USUARIO
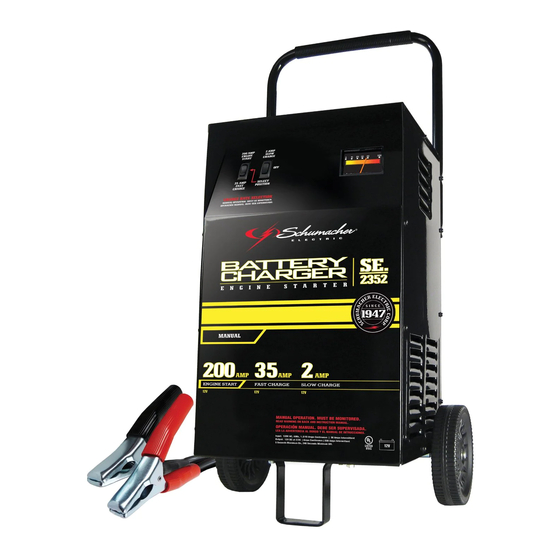
Models / Modelos: SE-2254, SE-2352, SE-3000, SE-4020,
Manual Battery Charger • Cargador de Batería Manual
•
READ THE ENTIRE MANUAL BEFORE USING THIS PRODUCT.
FAILURE TO DO SO CAN RESULT IN SERIOUS INJURY OR DEATH.
•
LEA EL MANUAL COMPLETO ANTES DE UTILIZAR ESTE PRODUCTO.
CUALQUIER FALLA PODRÍA RESULTAR EN SERIAS LESIONES O PODRÍA SER
MORTAL.
SE-4022, SE-6030, SE-8050
ADVERTENCIA
0099001026-1
Advertisement
Table of Contents

Related Manuals for Schumacher Electric SE-2254


Summary of Contents for Schumacher Electric SE-2254
- Page 1 OWNER’S MANUAL • MANUAL DEL USUARIO Models / Modelos: SE-2254, SE-2352, SE-3000, SE-4020, SE-4022, SE-6030, SE-8050 Manual Battery Charger • Cargador de Batería Manual ADVERTENCIA • READ THE ENTIRE MANUAL BEFORE USING THIS PRODUCT. FAILURE TO DO SO CAN RESULT IN SERIOUS INJURY OR DEATH. • LEA EL MANUAL COMPLETO ANTES DE UTILIZAR ESTE PRODUCTO.
- Page 2 DO NOT RETURN THIS PRODUCT TO THE STORE! Call Customer Service for Assistance: 800-621-5485 ¡NO LO DEVUELVA ESTE PRODUCTO A LA TIENDA! Llame a Servicios al Cliente para Asistencia: 800-621-5485...
-
Page 3: Table Of Contents
TABLE OF CONTENTS SECTION PAGE IMPORTANT SAFETY INSTRUCTIONS PERSONAL PRECAUTIONS PREPARING TO CHARGE CHARGER LOCATION DC CONNECTION PRECAUTIONS FOLLOW THESE STEPS WHEN BATTERY IS INSTALLED IN VEHICLE FOLLOW THESE STEPS WHEN BATTERY IS OUTSIDE VEHICLE GROUNDING AND AC POWER CORD CONNECTIONS ASSEMBLY INSTRUCTIONS CONTROL PANEL OPERATING INSTRUCTIONS... - Page 4 ÍNDICE SECCIÓN PÀGINA INSTRUCCIONES IMPORTANTES DE SEGURIDAD PRECAUCIONES PERSONALES PREPARACIÓN PARA LA CARGA UBICACIÓN DEL CARGADOR PRECAUCIONES DE CONEXIÓN EN CC SIGA ESTOS PASOS CUANDO LA BATERÍA ESTÉ COLOCADA EN EL VEHÍCULO SIGA ESTOS PASOS CUANDO LA BATERÍA SE ENCUENTRE FUERA DEL VEHÍCULO CONEXIONES A TIERRA Y ENERGÍA DE CA INSTRUCCIONES DE MONTAJE...
-
Page 5: Important Safety Instructions
IMPORTANT: READ AND SAVE THIS SAFETY AND INSTRUCTION MANUAL. SAVE THESE INSTRUCTIONS – The SE Line of Wheel Chargers offers a wide range of features to accommodate your needs. This manual will show you how to use your charger safely and effectively. Please read, understand and follow these instructions and precautions carefully, as this manual contains important safety and operating instructions. -
Page 6: Personal Precautions
Do not operate the charger with a damaged cord or plug; have the cord or plug replaced immediately by a qualified service person. (Call customer service at: 1-800-621-5485.) Do not operate the charger if it has received a sharp blow, been dropped or otherwise damaged in any way; take it to a qualified service person. (Call customer service at: 1-800-621-5485.) Do not disassemble the charger; take it to a qualified service person when service or repair is required. Incorrect reassembly may result in a risk of fire or electric shock. (Call customer service at: 1-800-621-5485.) RISK OF EXPLOSIVE GASES. 1.10 WORKING IN THE VICINITY OF A LEAD-ACID BATTERY IS DANGEROUS. -
Page 7: Preparing To Charge
PREPARING TO CHARGE RISK OF CONTACT WITH BATTERY ACID. BATTERY ACID IS A HIGHLY CORROSIVE SULFURIC ACID. If it is necessary to remove the battery from the vehicle to charge it, always remove the grounded terminal first. Make sure all of the accessories in the vehicle are off to prevent arcing. Be sure the area around the battery is well ventilated while the battery is being charged. Clean the battery terminals before charging the battery. -
Page 8: Follow These Steps When Battery Is Installed In Vehicle
FOLLOW THESE STEPS WHEN BATTERY IS INSTALLED IN VEHICLE A SPARK NEAR THE BATTERY MAY CAUSE A BATTERY EXPLOSION. TO REDUCE THE RISK OF A SPARK NEAR THE BATTERY: Position the AC and DC cables to reduce the risk of damage by the hood, door and moving or hot engine parts. -
Page 9: Grounding And Ac Power Cord Connections
GROUNDING AND AC POWER CORD CONNECTIONS RISK OF ELECTRIC SHOCK OR FIRE. This battery charger is for use on a nominal 120-volt circuit and has a grounded plug that looks like the plug illustrated. The charger must be grounded to reduce the risk of electric shock. The plug must be plugged into an outlet that is properly installed and grounded in accordance with all local codes and ordinances. -
Page 10: Assembly Instructions
ASSEMBLY INSTRUCTIONS It is important to fully assemble your charger before use. Remove all cord wraps and uncoil the cables prior to using the battery charger. Follow these instructions for assembly. PARTS TOOLS NEEDED (2) 10-32, thread cutting screws 3/8” wrench (for mounting foot) (4) ¼-20, thread cutting screws 5/16” wrench (for mounting wheels) (4) Phillips head sheet metal screws 1/4” wrench (for mounting handle) (2) wheels hammer (1) axle... -
Page 11: Control Panel
Attach the Handle: If the charger came with a plastic grip, slide that onto the handle until it is centered at the top. Turn the charger right side up onto its foot and wheels. Align the handle so the screw holes are aligned with the screw holes on the upper back corners of the charger. -
Page 12: Operating Instructions
Battery Load Tester Switch (Model SE-8050 only) When testing a battery, use this switch to apply a load to it. Battery Tester Switch (Models SE-2254 & SE-4022 only) When testing a battery, use this switch to select between testing a 6 volt battery and testing a 12 volt battery. - Page 13 NOTE: If the engine does turn over but never starts, there is not a problem with the starting system; there is a problem somewhere else with the vehicle. STOP cranking the engine until the other problem has been diagnosed and corrected. Using the Battery Voltage Tester (Models SE-2254 and SE-4022 only) Set the Voltage Selector switch to the correct setting (6V or 12V) to match the battery to be tested.
-
Page 14: Calculating Charge Time
CALCULATING CHARGE TIME Battery Percent and Charge Time: This charger adjusts the charging time in order to charge the battery completely, efficiently and safely. The microprocessor automatically performs the necessary functions. This section includes guidelines that can be used to estimate charging times. The Hydrometer or Electronic Method To find the time needed to fully charge your battery, determine the battery’s charge level with a hydrometer or electronic Percent-of-Charge Tester. - Page 15 Find your battery’s rating on the chart below, and note the charge time given for each charger setting. The times given are for batteries with a 50% charge prior to recharging. Add more time for severely discharged batteries. • •...
-
Page 16: Maintenance Instructions
MAINTENANCE INSTRUCTIONS 13.1 After use and before performing maintenance, unplug and disconnect the battery charger (see sections 6, 7 and 8). 13.2 Use a dry cloth to wipe all battery corrosion and other dirt or oil from the battery clips, cords, and the charger case. 13.3 Ensure that all of the charger components are in place and in good working condition, for example, the plastic boots on the battery clips. - Page 17 PROBLEM POSSIBLE CAUSE REASON/SOLUTION Ammeter reads less than Extension cord is too long or Use a shorter or heavier selected charge rate when wire gauge is too small. gauge extension cord. charging a discharged battery Weak cell or sulfated plate in A sulfated battery will battery.
-
Page 18: Before Returning For Repairs
7:00 am to 5:00 pm Central Time Monday thru Friday LIMITED WARRANTY WARRANTY NOT VALID IN MEXICO. SCHUMACHER ELECTRIC CORPORATION, 801 BUSINESS CENTER DRIVE, MOUNT PROSPECT, IL 60056-2179, MAKES THIS LIMITED WARRANTY TO THE ORIGINAL RETAIL PURCHASER OF THIS PRODUCT. THIS LIMITED WARRANTY IS NOT TRANSFERABLE OR ASSIGNABLE. - Page 19 Manufacturer does not provide any warranty for any accessories used with this product that are not manufactured by Schumacher Electric Corporation and approved for use with this product. This Limited Warranty is void if the product is misused, subjected to careless handling, repaired, or modified by anyone other than Manufacturer or if this unit is resold through an unauthorized retailer.
- Page 20 • •...
- Page 21 The warranty card should be submitted within 30 days of purchase. The customer must keep the ORIGINAL receipt because it will be required for any warranty claims. This warranty is not transferable. Mail To: Schumacher Electric Corporation 801 Business Center Drive Mount Prospect, IL 60056-2179 Name_______________________________________________________________...
- Page 22 • •...
-
Page 23: Instrucciones Importantes De Seguridad
IMPORTANTE: LEA Y GUARDE ESTE MANUAL DE INSTRUCCIONES Y SEGURIDAD. GUARDE ESTAS INSTRUCCIONES: La línea SE de Cargadores de ruedas ofrece una amplia gama de características para satisfacer sus necesidades. Este manual le mostrará cómo utilizar su cargador en forma segura y efectiva. Por favor, lea, comprenda y siga estas instrucciones y precauciones cuidadosamente, ya que este manual contiene instrucciones operativas y de seguridad de importancia. -
Page 24: Precauciones Personales
Para reducir el riesgo de descarga eléctrica, desenchufe el cargador del tomacorriente antes de intentar llevar a cabo cualquier actividad de mantenimiento o limpieza. El simple apagado de los controles no reducirá este riesgo. No utilice el cargador si el mismo posee un enchufe o cable dañado; substituya el cable o el enchufe inmediatamente por una persona calificada en el ramo. (Comuníquese con el servicio al cliente al: 1-800-621-5485.) No utilice el cargador si el mismo recibió... -
Page 25: Preparación Para La Carga
2.10 Si el ácido de la batería tiene contacto con su piel o su ropa, lave de inmediato el área afectada con agua y jabón. En caso de que ingrese ácido en un ojo, sumerja el mismo de inmediato bajo agua potable corriente por al menos 10 minutos y obtenga atención médica en forma inmediata. -
Page 26: Precauciones De Conexión En Cc
PRECAUCIONES DE CONEXIÓN EN CC Conecte y desconecte los ganchos de salida C.C. sólo después de haber establecido todos los interruptores del cargador a la posición de “apagado” (si es aplicable) y de haber desconectado el enchufe de C.A. del tomacorriente eléctrico. Nunca permita que los ganchos tengan contacto entre sí. Sujete los ganchos a la batería y al chasis, como se indica en las secciónes 6 y 7. SIGA ESTOS PASOS CUANDO LA BATERÍA ESTÉ... -
Page 27: Conexiones A Tierra Y Energía De Ca
Conecte el gancho POSITIVO (ROJO) del cargador al borne POSITIVO (POS, P, +) de la batería. Ubíquese junto con el extremo libre del cable que previamente sujetó al borne NEGATIVO (NEG, N, -) de la batería a la mayor distancia posible de la batería. Luego conecte el gancho NEGATIVO (NEGRO) del cargador al extremo libre del cable. No se ubique en posición frontal a la batería al realizar la conexión final. De acuerdo a lo indicado en el 7.4 retire la cara lejos de la batería cuando conecte la pinza negative al cable. Conecte el condón de alimentación del cargador de CA al tomacorriente. Al desconectar el cargador, siempre hágalo en forma inversa al procedimiento de conexión y realice la primera conexión tan lejos de la batería como sea posible. -
Page 28: Instrucciones De Montaje
*Si el consumo nominal del cargador se expresa en vatios en lugar de amperes, el consumo en amperes correspondiente se determinará dividiendo el consumo en vatios por el consumo en tensión, por ejemplo: 1200 watts/120 volts = 10 amperes INSTRUCCIONES DE MONTAJE Es importante ensamblar por completo el cargador antes de utilizar. -
Page 29: Panel De Control
Ensamble el eje al cargador: ubique un extremo de cada abrazadera en la ranura que se encuentra en la parte inferior del cargador. Ubique la unidad del eje debajo de cada abrazadera. Acople las abrazaderas por medio de los dos tornillos de rosca cortante de 10-32 que se suministran. -
Page 30: Instrucciones De Operación
Interruptor del Probador de Carga en la Bateria (Modelo SE-8050 solamente) Utilice este interruptor para probar la carga de la batería. Interruptor de Probador de Bateria (Modelo SE-2254 y SE-4022 solamente) Utilice este interruptor para probar baterías de 6 volts y baterías de 12 volts. - Page 31 NOTA: Si el motor gira, pero no enciende, no existe un problema con el sistema de arranque, sino en cualquier otra parte del vehículo. DEJE de darle arranque al motor hasta que el otro problema se diagnostique y se corrija. Usando el Probador de Voltaje de la Bateria (Modelos SE-2254 y SE-4022 solamente) Fije el interruptor del selector de voltaje al ajuste correcto (6V o 12V) para emparejar la batería a probarse.
-
Page 32: Cálculo De Tiempo De Carga
Tenga presente que esta observación solo es una lectura del voltaje de la batería, una carga falsa, puede engañarle. Sugerimos que encienda las luces por un par de minutos y espere otro par de minutos después de apagarlo, y antes de checar el medidor. Después, siga el color que muetra el código del medidor. - Page 33 Ejemplo: Índice de amperio por hora = Capacidad de reserva + 16 NOTA: La capacidad de reserva se puede obtener de la hoja de especificación de la batería o del manual del usuario. Para calcular el tiempo que se necesita para una carga: Calcule el porcentaje de carga necesario. (Una batería al 50% de la carga que se cargará al 100% necesita otro 50% (50)). Multiplique el índice de amperes por hora por la carga necesaria (0,50) y divida por las configuraciones del Índice de carga. Multiplique los resultados por 1,25 y obtendrá el tiempo total necesario, en horas, para dejar la batería totalmente cargada.
- Page 34 • •...
-
Page 35: Instrucciones De Mantenimiento
INSTRUCCIONES DE MANTENIMIENTO 13.1 Después de usar y antes de realizar mantenimiento, desenchufe y desconecte el cargador de la batería (ver secciones 6, 7 y 8). 13.2 Utilice un paño seco para limpiar la corrosión de toda la batería y otra suciedad o aceite de las pinzas de la batería, cables y carcasa del cargador. 13.3 Asegúrese de que todas las piezas del cargador estén bien instaladas y en buenas condiciones para su función, por ejemplo, los protectores de plástico de las pinzas de la... - Page 36 PROBLEMA POSIBLE CAUSA SOLUCIÓN La lectura en el amperímetro La batería se encuentra Continúe con la carga de la permanece elevada. extremadamente descargada. batería por dos horas más. Si persiste algún problema, haga revisar la batería. Tensión de batería errónea. Verifique que los ajustes del voltaje o los grados de salida en el cargador estén...
- Page 37 PROBLEMA POSIBLE CAUSA SOLUCIÓN Ciclo reducido o sin inicio al Consumo mayor a el índice El tiempo de arranque varía arrancar el motor. de arranque del motor. según la cantidad de corriente consumida. Si el arranque consume más el índice de arranque del motor, el tiempo de arranque podría ser menor a 3 segundos.
-
Page 38: Antes De Devolver A Reparaciones
El Fabricante no presta garantía por lo accesorios utilizados con este producto que no sean los fabricados por Schumacher Electric Corporation y que no estén aprobados para su uso con este producto. La presente Garantía Limitada será nula si el producto se utiliza en forma errónea, se trata de manera inadecuada, es reparado o modificado... - Page 39 Servicio de atención al cliente de Schumacher Electric Corporation 1-800-621-5485 Lunes-viernes 7:00 a. m. a 5.00 p. m. CST Schumacher y el logo Schumacher son marcas registradas de Schumacher Electric Corporation Para hacer efectiva la garatía, por favor llene la tarjeta de garantía en página 17 y evíela, O, visite la página de internet www.batterychargers.com para registrar su producto en la red.
- Page 40 DO NOT RETURN THIS PRODUCT TO THE STORE! Call Customer Service for Assistance: 800-621-5485 ¡NO LO DEVUELVA ESTE PRODUCTO A LA TIENDA! Llame a Servicios al Cliente para Asistencia: 800-621-5485...