
Related Manuals for Konica Minolta CM-36dGV


Summary of Contents for Konica Minolta CM-36dGV
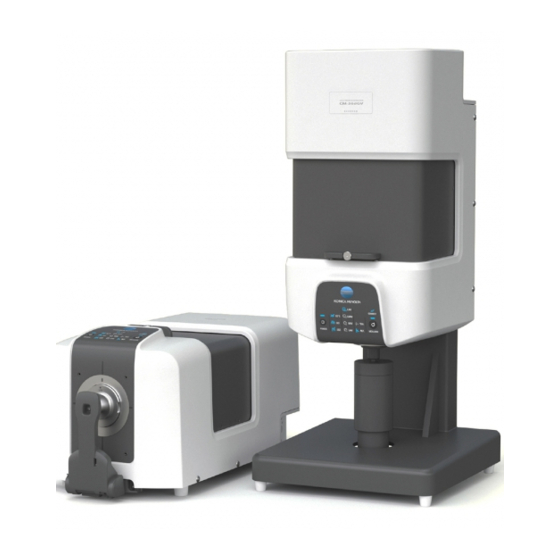
- Page 1 Spectrophotometer CM-36dGV Instruction Manual Please read before using the instrument.
-
Page 2: Safety Symbols
Inc. Notes on this Manual • Copying or reproduction of all or part of the contents of this manual without the permission of KONICA MINOLTA is strictly prohibited. • The contents of this manual are subject to change without prior notice. - Page 3 Always use the AC adapter (AC-A312F) that was supplied as a standard accessory, and connect it to a 100 V (50/60 Hz) AC outlet. If an AC adapter other than those specified by KONICA MINOLTA is used, or if the adapter is connected to an unsupported voltage, it may result in damage to the adapter, fire, or electric shock.
- Page 4 (Failure to adhere to the following points may result in injury or damage to the CAUTION instrument or other property.) Do not place the instrument on an unstable or sloping surface. Doing so may result in the instrument falling or overturning, causing injury. Be careful not to drop the instrument when carrying it as well.
-
Page 5: Introduction
Introduction The CM-36dGV is a high-precision, vertical-type stationary spectrophotometer for use in a variety of industrial fields. It is capable of simultaneously measuring color (reflectance) and gloss of reflective and translucent objects in a single measurement. Packing materials of the product Be sure to keep all packing materials used for shipping the instrument (cardboard box, cushioning material, plastic bags, etc.). -
Page 6: Notes On Use
Notes on Use Operating Environment • This instrument should be installed and used in an environment with an ambient temperature between 13°C and 33°C and a relative humidity of 80% or less (at 33°C) with no condensation. Use of the instrument outside this range will result in unsatisfactory performance. - Page 7 Measurement • Make sure no dust or dirt enters the openings of the instrument. • When the instrument is used over a prolonged period, the measured values may deviate due to changes in the environment or other factors. In order to maintain good measurement accuracy, it is recommended that white calibration and gloss calibration be performed regularly.
-
Page 8: Notes On Storage
If the dirt on the calibration plate does not come off easily, wipe using a soft cloth dampened with ethanol. • If the inside of the integrating sphere becomes dirty, contact a KONICA MINOLTA-authorized service facility. • If you are unable to remove dirt from the instrument through the above procedure, or if the instrument becomes scratched, contact a KONICA MINOLTA-authorized service facility. -
Page 9: Notes On Transporting
Maintenance and Inspection • To maintain measurement accuracy, the instrument should be inspected once a year. For information on inspection, contact the nearest KONICA MINOLTA-authorized service facility. Disposal Method • Make sure that the instrument, all accessories, and the packing materials are either disposed of or recycled... -
Page 10: Table Of Contents
Table of Contents Safety Symbols ............................i Trademarks ..............................i Notes on this Manual ............................i Introduction ............................. 3 Notes on Use ..............................4 Notes on Storage ............................6 Notes on Cleaning ............................6 Notes on Transporting ..........................7 ... -
Page 11: Accessories
Accessories Standard and optional accessories are available with the instrument. Memo The shape of some products may be different from those shown. Standard Accessories White Calibration Plate CM-A288 Used to perform white calibration. Memo When the plate is not being used, close the cover to prevent the plate from becoming dusty or scratched and to protect it from external light. - Page 12 USB Cable (2 m) IF-A17 Used to connect the instrument to a computer. Accessory Case CM-A286 This case is used to store all the accessories in one place. Notes Use it for storage. Do not use it on its own for transport. Dust Cover CM-A118 This can prevent foreign substances from entering the instrument when it is stored in a location where there is much...
-
Page 13: Optional Accessories
Optional Accessories DVD for Color Data Software SpectraMagic NX CM-S100w (Ver. 3.2 or later) This computer software is used to control the instrument and manage data from a computer. UV Control Software for CM-36dG/V This software is used to calculate the UV control coefficient and write it to the instrument when measuring a sample that includes fluorescence. -
Page 14: System Diagram
Transmittance IF-A17 Specimen Holder CM-A96 Opacity Jig CM-A134 AC Adapter AC-A312F Target Mask (LAV) CM-A291 Spectrophotometer CM-36dGV Target Mask (LMAV) CM-A292 Color Plates (14 colors) Target Mask (MAV) CM-A293 Target Mask (SAV) CM-A294 Cleaning Cloth White Calibration Plate Gloss Calibration Plate... -
Page 15: Names And Functions Of Parts
Names and Functions of Parts ① TE R TO ME OP HO SP EC TR -3 6 ② 0 0 0 0 0 0 ⑥ ⑤ ③ ④ AC adapter input terminal ���Connects the provided AC adapter. USB connection terminal (B type) �Used to connect the instrument to a computer with the supplied USB cable (IF-A17). -
Page 16: Opening And Closing The Transmittance Specimen Chamber
Opening and Closing the Transmittance Specimen Chamber Opening the Transmittance Chamber Procedure 1 Pull the knob on the transmittance chamber cover toward you to unlock it. Pulling it up allows the cover to open and close. ② ② ① ① 2 Under those conditions, slide open the cover until a click sound occurs and it fits into place. -
Page 17: Indicators
Indicators Status panel and operation keys Operation keys Power key Used to turn the power ON/OFF. The instrument switches between ON/OFF every time the power key is pressed. The lamp illuminates blue when the power is ON. ON: Press once. OFF: Press and hold. -
Page 18: Cleaning Parts
• Do not touch the white-coated inner surface of the integrating sphere, wipe it with a cloth, or put an object inside it. If it becomes dirty and the dirt cannot be removed by a blower, contact a KONICA MINOLTA-authorized service facility. □ Receptor Window of the Transmittance Specimen Chamber 1 Set the measurement area to SAV from the software. -
Page 19: Measurement Procedure
Measurement Procedure • This manual explains the measurement preparation procedure, specimen setting procedure, and other procedures for measurement with the CM-36dGV. • Control is performed and measurement is executed from the computer connected to the instrument by using the optional SpectraMagic NX (CM-S100w) color data software. -
Page 20: Preparation
Preparation Connecting to a Computer Connect the instrument to the computer with the supplied USB cable IF-A17 (2 m). Notes Be sure to connect the USB cable to the designated USB terminal on the instrument when it is used. Memo •... -
Page 21: Connecting The Ac Adapter
Connecting the AC Adapter Notes • To supply AC power to the instrument, always use the AC adapter (AC-A312F) that was supplied with the instrument. • Insert the AC adapter plug all the way. Operating Procedure 1 Check that the power of both the instrument and computer is OFF (LED lamp is not illuminated). -
Page 22: Installing The Target Mask
Memo • Install the target mask with the black painted surface on the inside (CM-36dGV side). Notes • If the installation direction of the target mask is not correct, it will not fit properly in place. Check the direction and fit the target mask in place, then check that there is no looseness or lifting. -
Page 23: Mask Detection Function
• Check that there is no dirt or scratching on the mounting surface of the target mask. If there is dirt, use a blower to remove any dust, dirt, and other substances. If the dirt does not come off easily, wipe using a soft cloth dampened with ethanol. If the above does not resolve the problem, contact a KONICA MINOLTA-authorized service facility. -
Page 24: Installing The Zero Calibration Box
Installing the Zero Calibration Box The zero calibration box is used to perform zero calibration for reflectance measurement, and to perform haze measurement for transmittance measurement. • Perform this calibration when there is no specimen in the transmittance specimen chamber. •... -
Page 25: Installing The White Calibration Plate
Installing the White Calibration Plate The white calibration plate is used to perform white calibration for reflectance measurement, and to perform transmittance measurement (0% calibration, 100% calibration, measurement). • Perform this calibration when there is no specimen in the transmittance specimen chamber. •... -
Page 26: Installing The Gloss Calibration Plate
Installing the Gloss Calibration Plate The gloss calibration plate is used when performing gloss calibration. • Install the target mask to use for measurement in advance. • From the software in advance, set the same measurement area, specular component (SCI/SCE), and UV output that will be used for measurement. -
Page 27: Installing The Transmittance Zero Calibration Plate (Option)
Installing the Transmittance Zero Calibration Plate (Option) The transmittance zero calibration plate is used when performing 0% calibration for transmittance measurement. • When using the optional SpectraMagic NX, set the measurement method to transmittance in advance. • Install the target mask for LAV measurement and the white calibration plate onto the instrument. Procedure 1 Open the transmittance specimen chamber cover. -
Page 28: Transmittance Measurement 100% Calibration Procedure
Transmittance Measurement 100% Calibration Procedure Transmittance measurement 100% calibration is performed with nothing set in the transmittance specimen chamber. • When using the optional SpectraMagic NX, set the measurement method to transmittance in advance. • Install the target mask for LAV measurement and the white calibration plate onto the instrument. -
Page 29: Setting A Specimen
Setting a Specimen Reflectance Measurement P.28 When measuring the reflectance of a film or plate specimen, install the specimen into the sample holder before setting it onto the instrument. When measuring a specimen that is not fit into the sample holder, remove the sample holder and measure with the specimen measuring port in close contact with the specimen. -
Page 30: Reflective Measurement/Gloss Measurement
Reflective Measurement/Gloss Measurement • Perform this calibration when there is no specimen in the transmittance specimen chamber. • Install the target mask to use for measurement in advance. • From the software in advance, set the measurement area, the specular component and UV output. Procedure 1 Push the sample holder down and hold it so it is opened. -
Page 31: Transmittance Measurement
Transmittance Measurement • When using the optional SpectraMagic NX, set the measurement method to transmittance in advance. • Install the target mask for LAV measurement and the white calibration plate onto the instrument. Procedure 1 Open the transmittance specimen chamber cover. 2 Place the specimen in close contact with the illumination window side. - Page 32 • Perform measurement when the specimen or the inside and outside of the container containing the specimen are free of scratches, fingerprints, and other dirt. If the measurement surface is grasped with a hand, fingerprints will be left on it. Hold the specimen at a part which is not the measurement surface. •...
-
Page 33: Error Messages
SpectraMagic NX (CM-S100w) operating screens. When a message is displayed, perform the correction shown below. If the conditions do not return to normal after performing the correction, contact a KONICA MINOLTA-authorized service facility. Symptom Displayed message... - Page 34 To replace the wavelength source used for wavelength source used for wavelength correction light source, contact correction (WAA) has dropped. correction has dropped. a KONICA MINOLTA-authorized service facility. Error No response from the Communication with the Turn ON the instrument power.
- Page 35 Symptom Displayed message Possible cause Correction Install the gloss calibration Gloss calibration was not Perform gloss calibration using plate and appropriate target performed using the correct the provided gloss calibration mask, and then perform procedure. plate and appropriate target calibration. mask.
- Page 36 ON again. If the message inside the instrument. failed. is displayed again, contact a KONICA MINOLTA-authorized There was an operating failure Charging of the light output service facility. of light output circuit charging circuit is not completed.
-
Page 37: Troubleshooting
If an abnormality has occurred with the instrument, take the necessary actions as given in the table below. If the instrument still does not work properly, turn the power OFF, and then turn it ON again. If the conditions still do not return to normal, contact a KONICA MINOLTA-authorized service facility. Symptom... - Page 38 Symptom Check Point Action Reference Page Measurement Is there a foreign Perform this calibration when results are abnormal. substance in the there is no specimen in the (Reflection (color), transmittance transmittance specimen gloss) specimen chamber? chamber. Is transmittance Refer to the software instruction For details, refer to the measurement manual and perform the...
-
Page 39: Fluorescence Measurement
Fluorescence Measurement This instrument features both a UV full xenon lamp and a UV cut xenon lamp. Fluorescence reflectance is calculated through numerical processing of the reflectance from these two light sources. With fluorescence calibration To ensure accurate fluorescence reflectance measurement, fluorescence calibration can be performed using the UV Control Software that is provided with SpectraMagic NX (Ver. -
Page 40: Specifications
(Based on average for 12 BCRA Series II color tiles; LAV/SCI. Compared to values agreement measured with a master body under Konica Minolta standard measurement conditions) 100% / 0% / Adjusted (Instantaneous numerical adjustment of UV with no mechanical UV setting... - Page 41 (When measured 30 times at 10-second intervals) 0 to 10 GU: ±0.2 GU Inter-instrument 10 to 100 GU: ±0.5 GU agreement (MAV. Compared to values measured with a master body under Konica Minolta standard conditions) JIS Z 8741 (MAV), JIS K 5600, ISO 2813, ISO 7668 (MAV), Geometry ASTM D523-08, ASTM D2457-13, DIN 67530 Approx.
-
Page 42: Dimensions
Dimensions CM-36dGV (Unit: mm) - Page 43 <CAUTION> KONICA MINOLTA WILL NOT BE LIABLE FOR ANY DAMAGES RESULTING FROM THE MISUSE, MISHANDLING, UNAUTHORIZED MODIFICATION, ETC. OF THIS PRODUCT, OR FOR ANY INDIRECT OR INCIDENTAL DAMAGES (INCLUDING BUT NOT LIMITED TO LOSS OF BUSINESS PROFITS, INTERRUPTION OF BUSINESS, ETC.) DUE TO THE USE OF...
- Page 44 9222-AD2X-13 ©2021 KONICA MINOLTA, INC. CBCADA...