Avaya 9640 User Manual
Hide thumbs
Also See for 9640:
- User manual (64 pages) ,
- Developer's manual (56 pages) ,
- End user manual (18 pages)

Related Manuals for Avaya 9640


Summary of Contents for Avaya 9640
- Page 1 ® Avaya one-X Deskphone H.323 for 9640 and 9640G IP Deskphone User Guide 16-601503 January 2013...
- Page 2 Product provided by Avaya including the selection, arrangement and statement or content provided on these sites and does not necessarily design of the content is owned either by Avaya or its licensors and is endorse the products, services, or information described or offered protected by copyright and other intellectual property laws including the within them.
- Page 3 See the Avaya Support website: http://support.avaya.com for product notices and articles, or to report a problem with your Avaya product. For a list of support telephone numbers and contact addresses, go to the Avaya Support website: http://support.avaya.com, scroll to the bottom of the page, and select Contact Avaya Support.
- Page 4 ® Avaya one-X Deskphone H.323 for 9640 and 9640G IP Deskphone User Guide January 2013 Comments? infodev@avaya.com...
-
Page 5: Table Of Contents
Calling a person from the contacts list...................... 34 Calling a person from the call log......................34 Chapter 6: Muting a call...................... Chapter 7: Putting a call on hold..................® Avaya one-X Deskphone H.323 for 9640 and 9640G IP Deskphone User Guide January 2013... - Page 6 Visiting user............................... 66 Logging in as visiting user......................... 67 Logging out of your deskphone extension....................67 Logging out of a locked deskphone extension..................67 Index............................. ® Avaya one-X Deskphone H.323 for 9640 and 9640G IP Deskphone User Guide January 2013...
-
Page 7: Chapter 1: Introduction To The 9640/9640G Deskphone
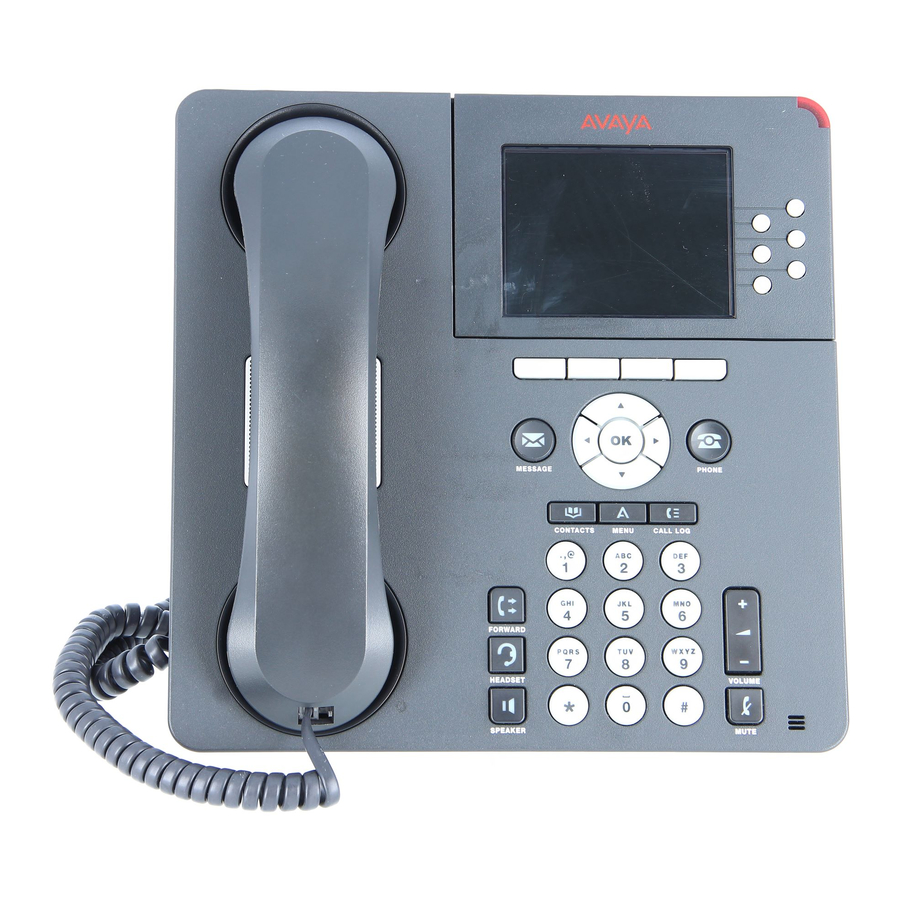
9640/9640G Deskphone provides this information in color. The letter G in 9640G indicates the presence of a built-in Gigabit Ethernet adapter that increases data transmission speed. A deskphone with the "G" designation is otherwise identical to its 9640 counterpart in terms of features and functionality. - Page 8 Introduction to the 9640/9640G Deskphone The following table provides button/feature descriptions for the 9640/9640G deskphone. Name Description USB Port Insert a USB device (also called a memory stick, thumb drive, or flash drive) to transfer contacts between your phone and an external data source;...
-
Page 9: Navigation Tips
Navigation tips When navigating through the options and features on your telephone display, use the navigation arrows to scroll and buttons to select lines or options. ® Avaya one-X Deskphone H.323 for 9640 and 9640G IP Deskphone User Guide January 2013... -
Page 10: About Icons
Scroll left for other options. Scroll right for other options. Scroll up or down when there is more information than can display in the application area. ® Avaya one-X Deskphone H.323 for 9640 and 9640G IP Deskphone User Guide January 2013 Comments? infodev@avaya.com... -
Page 11: Telephone Stand
You can push the screen back to return to the original flat position.Gently push on the display screen to adjust the screen to a previous position. ® Avaya one-X Deskphone H.323 for 9640 and 9640G IP Deskphone User Guide January 2013... - Page 12 You need a small screwdriver to lift the tab after it is reversed. ® Avaya one-X Deskphone H.323 for 9640 and 9640G IP Deskphone User Guide January 2013 Comments? infodev@avaya.com...
-
Page 13: Chapter 2: Avaya Menu
Web-based applications, get information about your phone and network settings, and log out. When you press the Avaya Menu button, you see one of the following menus, depending on how your administrator has set up your system and on the applications available to you: Note: The menus and sub-menus that appear depend on how your extension was administered. -
Page 14: Options & Settings
Procedure 1. Press Avaya Menu. 2. Select Options & Settings or Phone Settings. 3. Press Select or OK. 4. Select Call Settings. ® Avaya one-X Deskphone H.323 for 9640 and 9640G IP Deskphone User Guide January 2013 Comments? infodev@avaya.com... -
Page 15: Setting Go To Phone Screen On Ringing
1. Press Avaya Menu. 2. Select Options & Settings or Phone Settings. 3. Press Select or OK. 4. Select Call Settings. 5. Press Select or OK. ® Avaya one-X Deskphone H.323 for 9640 and 9640G IP Deskphone User Guide January 2013... -
Page 16: Changing The Voice Dialing Setting
2. Select Options & Settings or Phone Settings. 3. Press Select or OK. 4. Select Call Settings. 5. Select Voice Dialing Language. 6. Press Change or OK. ® Avaya one-X Deskphone H.323 for 9640 and 9640G IP Deskphone User Guide January 2013 Comments? infodev@avaya.com... -
Page 17: Setting Redial Options
2. Select Options & Settings or Phone Settings. 3. Press Select or OK. 4. Select Call Settings. 5. Press Select or OK. 6. Select Display Call Timers. ® Avaya one-X Deskphone H.323 for 9640 and 9640G IP Deskphone User Guide January 2013... -
Page 18: Configuring Visual Alerts
4. Select Call Settings. 5. Press Select or OK. 6. Select Audio Path. 7. Press Change or OK to change the Speaker or Headset setting. ® Avaya one-X Deskphone H.323 for 9640 and 9640G IP Deskphone User Guide January 2013 Comments? infodev@avaya.com... -
Page 19: Setting Contact Names To Display During Calls
2. Select Options & Settings or Phone Settings. 3. Press Select or OK. 4. Select Screen & Sound Options. 5. Press Select or OK. 6. Select Brightness or Contrast. ® Avaya one-X Deskphone H.323 for 9640 and 9640G IP Deskphone User Guide January 2013... -
Page 20: Turning Button Click Sounds On And Off
1. Press Avaya Menu. 2. Select Options & Settings or Phone Settings. 3. Press Select or OK. 4. Select Screen & Sound Options. ® Avaya one-X Deskphone H.323 for 9640 and 9640G IP Deskphone User Guide January 2013 Comments? infodev@avaya.com... -
Page 21: Turning Large Text On Or Off
The ringer pattern for an external calls is unique and distinctly ® Avaya one-X Deskphone H.323 for 9640 and 9640G IP Deskphone User Guide January 2013... -
Page 22: Changing The Ringer Pattern
The pattern is played as you navigate across the ringer patterns. 10. Press Save. Note: This feature is not applicable to the 9670 deskphones. ® Avaya one-X Deskphone H.323 for 9640 and 9640G IP Deskphone User Guide January 2013 Comments? infodev@avaya.com... -
Page 23: Changing The Display Language
If the label you want to edit is on the Features menu, scroll right to access the Features menu, and select the label you want to edit. 9. Press Edit. ® Avaya one-X Deskphone H.323 for 9640 and 9640G IP Deskphone User Guide January 2013... -
Page 24: Setting Dialing Options
Press More then Clear to clear all text fields and start over. 11. Press Save or OK. 12. You may revert back to the default button labels by selecting Avaya Menu > Options & Settings > Application Settings > Restore Default Button Labels and pressing Default. -
Page 25: Selecting Handset Audio Equalization
If you have any questions, contact your system administrator. Access the browser through the Avaya Menu. If you do not see the Browser option on the Avaya Menu, Web applications are not available for your deskphone. - Page 26 Avaya Menu 2. Press Browser or OK. ® Avaya one-X Deskphone H.323 for 9640 and 9640G IP Deskphone User Guide January 2013 Comments? infodev@avaya.com...
-
Page 27: Chapter 3: About Features
Press each dialpad key once for each corresponding letter. For example, for Hill, press 4,4,5,5. 3. Select Next to view the names alphabetically in the directory, if necessary. ® Avaya one-X Deskphone H.323 for 9640 and 9640G IP Deskphone User Guide January 2013... -
Page 28: Configuring Simultaneous Ringing For Multiple Phones Using Ec500
1. From the Phone screen, scroll right to access the Features menu. 2. Select EC 500. 3. Press OK to turn simultaneous ringing on or off. ® Avaya one-X Deskphone H.323 for 9640 and 9640G IP Deskphone User Guide January 2013 Comments? infodev@avaya.com... -
Page 29: Chapter 4: Answering A Call
• To automatically display the Phone screen whenever you receive an incoming call, set the Go to Phone Screen on Ringing option to Yes. ® Avaya one-X Deskphone H.323 for 9640 and 9640G IP Deskphone User Guide January 2013... - Page 30 Answering a call ® Avaya one-X Deskphone H.323 for 9640 and 9640G IP Deskphone User Guide January 2013 Comments? infodev@avaya.com...
-
Page 31: Chapter 5: Making A Call
Avaya recommends that for phones connected to SES, only one emergency number should be defined. For use with third-party gateways, refer the relevant Application Notes for necessary provisioning to enable the configuration. -
Page 32: Clearing A Number
To make voice-initiated dialing available each time you access your contacts, see Changing the voice dialing setting on page 16. To change the language you want ® Avaya one-X Deskphone H.323 for 9640 and 9640G IP Deskphone User Guide January 2013 Comments? infodev@avaya.com... -
Page 33: Making A Call Using Edit Dialing
Using the Bksp softkey, you can edit the number before actually dialing it. Procedure 1. From the Phone screen, enter the number you want to call. ® Avaya one-X Deskphone H.323 for 9640 and 9640G IP Deskphone User Guide January 2013... -
Page 34: Calling A Person From The Contacts List
3. Scroll up or down to select the person or number you want to call. 4. Select the person or number you want to call. 5. Press the Call softkey or the OK button. ® Avaya one-X Deskphone H.323 for 9640 and 9640G IP Deskphone User Guide January 2013 Comments? infodev@avaya.com... - Page 35 Depending on how your phone is administered, returning a Missed Call may result in that call history entry being deleted when the call goes through. ® Avaya one-X Deskphone H.323 for 9640 and 9640G IP Deskphone User Guide January 2013...
- Page 36 Making a call ® Avaya one-X Deskphone H.323 for 9640 and 9640G IP Deskphone User Guide January 2013 Comments? infodev@avaya.com...
-
Page 37: Chapter 6: Muting A Call
If a call is on mute and you switch between the handset, headset, or speakerphone, the mute is turned off. When the call is muted, the Mute button light is on and the top line displays the Mute icon. ® Avaya one-X Deskphone H.323 for 9640 and 9640G IP Deskphone User Guide January 2013... - Page 38 Muting a call ® Avaya one-X Deskphone H.323 for 9640 and 9640G IP Deskphone User Guide January 2013 Comments? infodev@avaya.com...
-
Page 39: Chapter 7: Putting A Call On Hold
The phone might display a hold timer when you put a call on hold.For more information, see Configuring call timers on page 17. 4. Press Resume or the line button of the held call to retrieve the call. ® Avaya one-X Deskphone H.323 for 9640 and 9640G IP Deskphone User Guide January 2013... - Page 40 Putting a call on hold ® Avaya one-X Deskphone H.323 for 9640 and 9640G IP Deskphone User Guide January 2013 Comments? infodev@avaya.com...
-
Page 41: Chapter 8: Transferring A Call
4. If unattended transfers have been administered, you can hang up now if you do not want to announce the call. Otherwise, press Complete or OK. ® Avaya one-X Deskphone H.323 for 9640 and 9640G IP Deskphone User Guide January 2013... - Page 42 Transferring a call ® Avaya one-X Deskphone H.323 for 9640 and 9640G IP Deskphone User Guide January 2013 Comments? infodev@avaya.com...
-
Page 43: Chapter 9: About Forwarding Calls
The features are also listed on the Forwarding features menu. Procedure 1. Press Forward to access the main Forwarding menu. 2. Select the forwarding feature you want to activate. ® Avaya one-X Deskphone H.323 for 9640 and 9640G IP Deskphone User Guide January 2013... - Page 44 After you enter the forwarding number, you hear a confirmation tone and the associated LED lights. 4. Press Select or OK to turn the call forwarding feature off if it is already on. ® Avaya one-X Deskphone H.323 for 9640 and 9640G IP Deskphone User Guide January 2013 Comments? infodev@avaya.com...
-
Page 45: Chapter 10: Using The Conference Feature
3. Select the call on hold that you want to add to the conference. 4. Press Resume to take the call off hold. 5. Press Join to add the person to the conference call. ® Avaya one-X Deskphone H.323 for 9640 and 9640G IP Deskphone User Guide January 2013... -
Page 46: Putting A Conference Call On Hold
This feature is applicable only for a conference call of the AST 1 type. Procedure 1. From the Phone screen, select your active call. ® Avaya one-X Deskphone H.323 for 9640 and 9640G IP Deskphone User Guide January 2013 Comments? infodev@avaya.com... -
Page 47: Dropping A Person From A Conference Call
This feature is not available on all systems. Procedure 1. From the Phone screen, select your active call. 2. Press Details. 3. Select the person you want to drop. 4. Press Drop. ® Avaya one-X Deskphone H.323 for 9640 and 9640G IP Deskphone User Guide January 2013... - Page 48 Using the conference feature ® Avaya one-X Deskphone H.323 for 9640 and 9640G IP Deskphone User Guide January 2013 Comments? infodev@avaya.com...
-
Page 49: Chapter 11: Using Bridged Call Appearances
You can join an existing call on a bridged line. Procedure 1. Select the bridged call in progress that you want to join. 2. Press Bridge. ® Avaya one-X Deskphone H.323 for 9640 and 9640G IP Deskphone User Guide January 2013... -
Page 50: Making An Outgoing Call On A Bridged Line
3. Dial the telephone number, or call the person from the Contacts list, or call the person from the Call Log History list. ® Avaya one-X Deskphone H.323 for 9640 and 9640G IP Deskphone User Guide January 2013 Comments? infodev@avaya.com... -
Page 51: Chapter 12: Using The Contacts Feature
3. Press Call to call the person or press More then Edit to edit contact information. Viewing a contact's details Procedure 1. Press Contacts. ® Avaya one-X Deskphone H.323 for 9640 and 9640G IP Deskphone User Guide January 2013... -
Page 52: Adding A New Contact
• Press ABC again to cycle through the options (Abc/123/abc/ABC) until the type you want to use is displayed. • Press More > Symbols to enter characters that are not on your dialpad. ® Avaya one-X Deskphone H.323 for 9640 and 9640G IP Deskphone User Guide January 2013 Comments? infodev@avaya.com... -
Page 53: Editing A Contact
4. Choose the field you want to edit. 5. Use the dialpad and softkeys to make changes to the contact information. 6. Press Save or OK. ® Avaya one-X Deskphone H.323 for 9640 and 9640G IP Deskphone User Guide January 2013... -
Page 54: Deleting A Contact
1. Press Contacts. 2. Select the contact you want to delete. 3. Press More > Delete. 4. Press Delete to confirm or Cancel to cancel. ® Avaya one-X Deskphone H.323 for 9640 and 9640G IP Deskphone User Guide January 2013 Comments? infodev@avaya.com... -
Page 55: Chapter 13: Using Usb Flash Drives With Your Phone
Contacts list of your deskphone to your USB device, which automatically creates a properly formatted file. Avaya also provides a spreadsheet tool that uses macros to convert your Outlook contacts into the Contacts format the phone uses. For information on this tool, ®... -
Page 56: Overwriting Contacts List With An External File
4. Review the statistics displayed, which show the number of valid and invalid entries, and if applicable, the number of entries that exceed the 250 contact phone limit. ® Avaya one-X Deskphone H.323 for 9640 and 9640G IP Deskphone User Guide January 2013 Comments? infodev@avaya.com... -
Page 57: Copying Your Contacts List To A Usb Flash Drive
2. Scroll down to Use contacts file while present. 3. Press Select or OK. 4. Press OK to access the contacts list on your USB flash drive. ® Avaya one-X Deskphone H.323 for 9640 and 9640G IP Deskphone User Guide January 2013... -
Page 58: Using Pictures From Your Usb Device As A Screensaver
Note: If you disconnect the USB device from the telephone, the standard screensaver replaces your pictures after the designated idle period. ® Avaya one-X Deskphone H.323 for 9640 and 9640G IP Deskphone User Guide January 2013 Comments? infodev@avaya.com... -
Page 59: Chapter 14: Call Log
See About icons on page 10 for a description of the icons. 3. Scroll up or down to view the entries on the list. ® Avaya one-X Deskphone H.323 for 9640 and 9640G IP Deskphone User Guide January 2013... -
Page 60: Viewing Call Log Details
4. Edit the name and telephone number, if necessary. 5. Press Save. Removing an entry from the Call Log Procedure 1. Press Call Log. ® Avaya one-X Deskphone H.323 for 9640 and 9640G IP Deskphone User Guide January 2013 Comments? infodev@avaya.com... -
Page 61: Clearing All Entries From The Call Log
To turn off logging your calls, select Log Calls. To turn logging of bridged lines on or off, select Log Bridged Calls. 7. Press Change or OK to turn call logging on or off. ® Avaya one-X Deskphone H.323 for 9640 and 9640G IP Deskphone User Guide January 2013... - Page 62 Call Log 8. Press Save. ® Avaya one-X Deskphone H.323 for 9640 and 9640G IP Deskphone User Guide January 2013 Comments? infodev@avaya.com...
-
Page 63: Chapter 15: Receiving Your Messages
Logging into your voice mail Procedure 1. To log in to your voice mail, press the Message button. 2. Follow the voice prompts from your voice mail system. ® Avaya one-X Deskphone H.323 for 9640 and 9640G IP Deskphone User Guide January 2013... - Page 64 Receiving your messages ® Avaya one-X Deskphone H.323 for 9640 and 9640G IP Deskphone User Guide January 2013 Comments? infodev@avaya.com...
-
Page 65: Chapter 16: About Logging In And Logging Out
Log in from the initial screen when it prompts you for your extension. Procedure 1. Enter your extension. 2. Press Enter or OK. 3. Enter your password. ® Avaya one-X Deskphone H.323 for 9640 and 9640G IP Deskphone User Guide January 2013... -
Page 66: Logging In As A Guest User
When you are logged in to another phone as a visiting user, a preset timer may terminate your login after a predetermined period of inactivity. When you log in to another phone as a ® Avaya one-X Deskphone H.323 for 9640 and 9640G IP Deskphone User Guide January 2013 Comments? infodev@avaya.com... -
Page 67: Logging In As Visiting User
If you use such a locked deskphone and try to login, the deskphone displays a message Press Log Out if you wish to Login as a new user. The telephone displays the Log Out softkey. ® Avaya one-X Deskphone H.323 for 9640 and 9640G IP Deskphone User Guide January 2013... - Page 68 The deskphone logs out the current user and the telephone displays the login screen. 2. Enter your authentication credentials and login to the system. ® Avaya one-X Deskphone H.323 for 9640 and 9640G IP Deskphone User Guide January 2013 Comments? infodev@avaya.com...
-
Page 69: Index
Edit dialing ............changing voice dialing setting ......Emergency call ............Call Timers ..............Error tones ..............displaying ............. turning off ............. Calling a person ............® Avaya one-X Deskphone H.323 for 9640 and 9640G IP Deskphone User Guide January 2013... - Page 70 .............. about ..............changing voice dialing .......... Pictures ..............legal notices ..............from USB files as a screensaver ......Logging in as a guest ..........® Avaya one-X Deskphone H.323 for 9640 and 9640G IP Deskphone User Guide January 2013...
- Page 71 Visual Alerts ..............Telephone display icons ..........configuring ............about ..............Voice dialing ............... Telephone stand ............changing setting ........... about ..............Voice mail, logging in ..........® Avaya one-X Deskphone H.323 for 9640 and 9640G IP Deskphone User Guide January 2013...