Table of Contents

Related Manuals for 3M SCOTT AIR-PAK X3 PRO


Summary of Contents for 3M SCOTT AIR-PAK X3 PRO
- Page 1 OPERATING & MAINTENANCE INSTRUCTIONS 3M™ SCOTT™ AIR-PAK™ X3 PRO Self-Contained Breathing Apparatus (SCBA) NFPA-1981 (2018 Edition) Compliant CGA & SNAP-CHANGE Pressures 2.2, 4.5, 5.5 READ ALL INSTRUCTIONS BEFORE USE P/N 595373-01 Rev C 202004...
- Page 3 3M™ SCOTT™ AIR-PAK™ X3 PRO Self-Contained Breathing Apparatus (SCBA) NFPA-1981 (2018 Edition) Compliant CGA & SNAP-CHANGE Pressures 2.2, 4.5, 5.5 OPERATING & MAINTENANCE INSTRUCTIONS READ ALL INSTRUCTIONS BEFORE USE P/N 595373-01 Rev C 202004...
- Page 4 If you have any questions or concerns regarding these regulations, contact 3M at 1-800-247-7257 (704-291-8300 outside the continental United States). Questions or Concerns If you have any questions or concerns regarding use of this equipment, contact your authorized 3M distributor, or contact 3M at 1-800-247-7257 (704-291-8300 outside the continental United States) or ScottTechSupport@mmm.com.
-
Page 5: Table Of Contents
Before You Begin ............................viii Maintenance and Repairs ........................viii Retirement Criteria and Considerations ..................viii Related Manuals............................viii Safety Information ........................ix All 3M Scott Fire & Safety Products......................ix 3M Scott Air-Pak SCBAs.......................... x Chapter 1 Introduction ............................ 1 Before You Begin ............................1 Overview ................................ - Page 6 CONTENTS Replacing Air Cylinders ........................... 27 Replacing a CGA Cylinder ......................28 Replacing a Snap-Change Cylinder .....................29 Special Use Situations..........................30 Resuming Use of the Respirator ....................30 Using the Respirator in Standby ....................31 Emergency Operation ........................31 Using the RIC/UAC Connection ....................32 Using Alternate Cylinders .......................
- Page 7 CONTENTS Appendix G Facepiece Fitting .........................59 About Fit Testing ............................. 59 CBRN SCBA or APR ..........................60 Fit Testing Procedure ..........................60 Negative Pressure Leak Test ......................60 Quantitative Fit Testing ........................60 Routine Testing ..........................61 Facepiece Sizes............................61 Appendix H Options &...
- Page 8 CONTENTS P/N 595373-01 Rev C 202004...
-
Page 9: About This Manual
3M provides manuals for individuals with different levels of training. This manual is written for Trained Operators. • A Trained Operator is an individual who has had minimum-level training in the use of 3M Scott Fire & Safety equipment in an immediately dangerous to life or health (IDLH) environment. This individual is often a firefighter or the wearer of an SCBA. -
Page 10: Appendices
When performing any maintenance checks or services on any 3M Scott Fire & Safety product or device, proceed only as far as necessary and as instructed by this manual. -
Page 11: Safety Information
If a discrepancy or malfunction cannot be corrected using the procedures contained within this manual, the product must be tagged to indicate that it is unserviceable and referred to a 3M certified technician for evaluation and repair. -
Page 12: 3M Scott Air-Pak Scbas
SAFETY INFORMATION 3M Scott Air-Pak SCBAs The following safety directives, warnings, and cautions apply to 3M Scott Air-Pak respirators. • Improper use of this equipment may result in serious injury or death. Improper use includes, but is not limited to, use without adequate training, disregard of the warnings and instructions contained herein, and failure to inspect and maintain this equipment. - Page 13 Do not perform maintenance beyond the scope of these instructions without proper training, equipment, and authorization from 3M. Use only 3M-approved replacement parts for maintenance and repair of this equipment. Use only those respirator components, accessories, or devices listed on the NIOSH label located on the respirator. Use only approved air cylinders and valve assemblies specified by the NIOSH label located on the respirator.
- Page 14 3M SCOTT AIR-PAK SCBAS ... to reduce the risk associated with... Follow the instructions below... Do not use the respirator if the PASS device fails to function as described. Remove the respirator from service and tag it for repair by authorized personnel.
- Page 15 SAFETY INFORMATION ... to reduce the risk associated with... Follow the instructions below... Do not use the respirator if the heads-up display (HUD) lights do not operate as described. Remove the respirator from service and tag it for repair by authorized personnel. Ensure that you can access the controls on this equipment at all times.
- Page 16 3M SCOTT AIR-PAK SCBAS CAUTION The following table lists hazardous situations which, if not avoided, could result in minor or moderate injury and/or property damage Read all of the caution statements before beginning any of the procedures in this manual.
-
Page 17: Chapter 1 Introduction
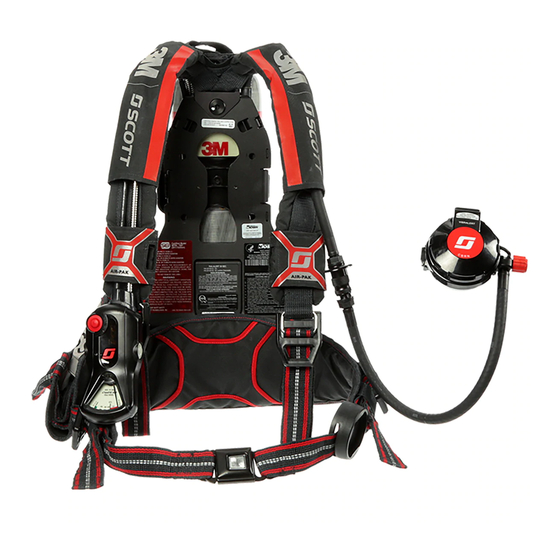
Rev C 202004 CHAPTER 1 P/N 595373-01 INTRODUCTION This chapter describes the 3M Scott Air-Pak X3 Pro respirator and its major components. Before You Begin Carefully read “Safety Information” on page ix before beginning any of the procedures in this manual. -
Page 18: Backframe And Harness Assembly
2. 3M and Scotchlite are registered trademarks of 3M Company and its affiliates. 3. The Universal EBSS fittings are not compatible with older 3M Scott Air-Pak SCBAs. For SCBAs manufactured prior to the NFPA 1981, 2018 edition standard, please contact 3M for upgrade options. -
Page 19: Mask-Mounted Regulator
Quantitative Fit Test (QNFT) protocols deemed acceptable by those standards. For quantitative fit testing, 3M Scott Fire & Safety facepieces require use of a Fit Test Adapter or equivalent and appropriate negative pressure testing equipment. A Mask Seal Kit may also be required to attain a proper fit. - Page 20 INTRODUCTION P/N 595373-01 Rev C 202004...
-
Page 21: Chapter 2 Inspecting The Respirator
INSPECTING THE RESPIRATOR This chapter describes how to perform a regular operational inspection of a 3M Scott Air-Pak X3 Pro respirator. Follow the procedures in this chapter when you first receive the respirator and during daily or periodic inspection of the respirator: •... -
Page 22: Inspecting The Respirator Components
INSPECTING THE RESPIRATOR Inspecting the Respirator Components Inspect the respirator before each use and after each cleaning. Performing a General Inspection To inspect the respirator Inspect the complete respirator for worn or damaged components. a Inspect hoses and rubber parts for cracking, splitting, or brittleness. b Inspect the harness webbing and all elastomeric components for cuts, tears, abrasion, fraying, or indication of heat or chemical damage. -
Page 23: Inspecting The Ric/Uac Connection
The date of manufacture marked on the cylinder is also the date of the first hydrostatic test. All breathing air cyl- inders used with 3M Scott Fire & Safety SCBAs must be visually inspected regularly and hydrostatically tested at the required intervals by a licensed cylinder re-tester. For more information about hydrostatic testing, see "Appendix F: Respirator Testing”... -
Page 24: Inspecting The Facepiece
INSPECTING THE RESPIRATOR To inspect the RIC/UAC connection Remove the dust cap from the RIC/UAC coupling on the respirator. 2 Visually inspect the coupling for dirt or damage. Remove any dirt or contamination from the coupling. See Figure 2-2. a If the RIC/UAC coupling on the respirator appears damaged, remove the respirator from service and tag it for repair by authorized personnel. - Page 25 INSPECTING THE RESPIRATOR COMPONENTS To inspect the facepiece Inspect the facepiece seal and other rubber components for deformation, wear, cracks, or other damage. 2 Inspect the lens and lens frame. a Inspect the lens for scratches, gouges, cracks, crazing, distortion, melting, or any other damage or condition that could impair the user’s vision or the operation of the facepiece.
-
Page 26: Inspecting The Regulator
INSPECTING THE RESPIRATOR Inspecting the Regulator Inspection of the regulator includes checking the regulator gasket, purge valve, Heads-Up Display (HUD), regulator hose, and quick-disconnect. To inspect the regulator Verify that the purge valve (red knob) is not damaged and turns smoothly one-half turn from stop to stop. See Figure 2-5 2 Verify that the regulator gasket is not damaged and is in place around the outlet port of the regulator. - Page 27 INSPECTING THE RESPIRATOR COMPONENTS 5 Verify that the quick-disconnect operates properly. Breathing regulators equipped with a quick disconnect use a pull-back sleeve coupling. a While pushing the plug D into the socket, pull the locking sleeve E back toward the guard. The plug D will separate.
-
Page 28: Performing Operational Testing
INSPECTING THE RESPIRATOR Performing Operational Testing Testing includes checking the basic operation of the respirator, followed by more thorough checks of the regulator, HUD, sensor module lights, and batteries. General Testing Check that the breathing regulator purge valve (red knob on regulator) is closed (the pointer on the knob points up). 2 Fully depress the center of the air saver/donning switch on the top of the E-Z Flo+ regulator or firmly pull the auto air-saver switch on the E-Z Flo C5 regulator latch and release. -
Page 29: Testing The Heads-Up Display
PERFORMING OPERATIONAL TESTING 5 Observe the air supply indicator lights of the HUD and verify that they light properly in descending order. 6 When the gauge needle crosses the one-third mark but before it reaches the beginning of the red empty band, close the purge valve. - Page 30 INSPECTING THE RESPIRATOR The HUD of the E-Z Flo C5 regulator (compatible with the Vision C5 facepiece) includes three additional lights to indicate the following: • Initiation of a PAR request • Initiation of an evacuation command or a system integrity alarm •...
-
Page 31: Testing The Sensor Module Lights
PERFORMING OPERATIONAL TESTING Table 2-1 summarizes the operation of the HUD lights: BEHAVIOR OF LIGHTS MEANING USER ACTION 2 glowing green lights Full Cylinder Continue using respirator 1 glowing green light 3/4 full Cylinder Continue using respirator 1 slowly flashing yellow light 1/2 full Cylinder Continue using respirator 1 rapidly flashing red light... -
Page 32: Testing The Batteries
• Red lights on the control console and sensor module indicate that the batteries are low and must be replaced before the respirator is used again. 3M recommends replacing all batteries before the respirator is used again. “Chapter 5: Replacing Batteries”... -
Page 33: Operating The Respirator
OPERATING THE RESPIRATOR This chapter provides the basic instructions for operating the 3M Scott Air-Pak X3 Pro SCBA. Training and practice with the equipment are required before operation to ensure that you are completely familiar with the operation of the respirator. -
Page 34: Donning The Respirator
OPERATING THE RESPIRATOR You must wear the Air-Pak X3 Pro SCBA over protective garments such as fire fighting turnout gear, but you may wear it under encapsulating protective garments such as hazardous material (HAZ-MAT) suits. Determine what other protective gear you will use and don the SCBA and the facepiece accordingly. If respirator use is expected at temperatures near or below freezing, or if the respirator is to be used after storage at temperatures near or below freezing, refer to “Low Temperature... -
Page 35: Donning The Facepiece
DONNING THE FACEPIECE 5 While still leaning slightly forward, connect the waist pad buckle and adjust the belt by pulling forward on the 2 side-mounted belt ends. Pull on the belt ends to adjust waist belt for firm fit on your hips. Tuck the belt ends into the waist pad. - Page 36 OPERATING THE RESPIRATOR Adjust the head straps to the full outward position. See Figure 3-3. Figure 3-3 Adjusting the head straps to the fill outward position 2 Hold the facepiece in one hand. Fold the head harness over the lens (see Figure 3-4), or hold the head harness up and out of the way...
- Page 37 DONNING THE FACEPIECE Ensure that the chin is properly located in the chin pocket of the facepiece throughout the donning process. 6 Smooth the head harness over the head and ensure that straps are lying smooth and flat against the head and neck with no twists. See Figure 3-7.
- Page 38 OPERATING THE RESPIRATOR 10 Smooth the head harness down the back of the head and make sure the net is flat against the head. If necessary, adjust the bottom of the head harness to sit below the crown of the head. See Figure 3-10.
-
Page 39: Starting The Respirator
STARTING THE RESPIRATOR Head harness not centered Twisted head harness strap Head harness too high Facepiece too low Figure 3-12 Donning problems (Vision C5 facepiece shown) OSHA standard 29 CFR 1910.134 requires teams of at least two people when entering into and operating in an IDLH atmosphere. - Page 40 OPERATING THE RESPIRATOR 3 Slowly open the cylinder valve fully by turning the valve knob counterclockwise until it stops (approximately 2 1/2 full turns of the knob). Figure 3-13 Attaching the regulator (Vision C5 facepiece shown) 4 Observe the operation of the alarms: •...
-
Page 41: Using The Respirator
USING THE RESPIRATOR For additional information, see ANSI/ASSP Z88.2, current edition, American National Standard Practices for Respiratory Protection. If you use the respirator for firefighting, see also NFPA Standard 1500, Standard on Fire Department Occupational Safety, Health, and Wellness Program. Using the Respirator Use the respirator in accordance with your respiratory protection program. - Page 42 The neck carrying strap for the facepiece allows you to hang the facepiece around your neck after doffing (see “Using the Respirator in Standby” on page 31). For more information, contact 3M or your authorized 3M distributor. The air-saver mechanism is intended to prevent a free flow of air and the depletion of the air supply when the facepiece is removed and the cylinder valve is still open.
-
Page 43: Replacing Air Cylinders
REPLACING AIR CYLINDERS Replacing Air Cylinders Replace depleted or partially depleted SCBA cylinders with full cylinders as soon as possible. To change the cylinder, remove the respirator assembly and place it on a solid support. The Air-Pak X3 Pro comes with either a CGA threaded hose coupling or a Snap-Change cylinder coupling (see Figure 3-14). -
Page 44: Replacing A Cga Cylinder
OPERATING THE RESPIRATOR 4 Follow the appropriate instructions to replace your air cylinder: • “Replacing a CGA Cylinder” on page 28 • “Replacing a Snap-Change Cylinder” on page 29 Replacing a CGA Cylinder To replace a CGA cylinder Unthread the pressure reducer hose coupling from the cylinder valve by rotating counterclockwise. 2 Disengage the cylinder retention strap by gripping the latch plate as shown in picture A in Figure 3-15 and lifting... -
Page 45: Replacing A Snap-Change Cylinder
REPLACING AIR CYLINDERS Replacing a Snap-Change Cylinder To replace a Snap-Change cylinder Disengage the cylinder retention strap by gripping the latch plate as shown in picture A in Figure 3-17 and lifting on the end of the latch. 2 Pull both Snap-Change locks horizontally away from the pressure reducer to release the cylinder connector. See picture B in Figure 3-17. -
Page 46: Special Use Situations
OPERATING THE RESPIRATOR 5 Replace with a fully charged cylinder and valve assembly of the appropriate pressure rating. Verify that the replacement cylinder has a protective cap installed on the valve’s CGA fill-fitting and that the cylinder connector is clean and free of dirt and debris. See picture A in Figure 3-19. -
Page 47: Using The Respirator In Standby
SPECIAL USE SITUATIONS Using the Respirator in Standby When the respirator is in standby, it is in place on your body with the shoulder straps properly adjusted and the waist belt buckled. However, the facepiece is not donned and the respirator is not being used. Leave the cylinder valve fully open and verify that the air-saver mechanism is engaged. -
Page 48: Using The Ric/Uac Connection
OPERATING THE RESPIRATOR Using the RIC/UAC Connection The Air-Pak X3 Pro respirator is fitted with a Rapid Intervention Crew/Company Universal Air Connection (RIC/UAC) System in compliance with NFPA 1981 (2013 edition). The RIC/UAC connection permits emergency replenishment of an approved SCBA breathing air supply cylinder from an approved air supply source while in use. The RIC/UAC System is not a quick-charge attachment;... -
Page 49: Using Alternate Cylinders
• If the cylinder is being filled from a portable air supply cylinder (such as a 3M Scott Fire & Safety RIT-Pak portable air supply), the air from the supply cylinder will stop flowing when the pressure in the cylinder equals the remaining pressure in the portable air supply (i.e., pressures will balance). -
Page 50: Low Battery
OPERATING THE RESPIRATOR • A fully charged 3000 psig rated cylinder installed in an Air-Pak model 2.2 SCBA will cause the remote gauge to indicate more than full and the end-of-service indicator alarms will not activate until more than approximately two-thirds of the air supply has been consumed. -
Page 51: Using Scott Sight In Low Temperatures (Av-3000 Ht Facepieces)
Using Scott Sight in Low Temperatures (AV-3000 HT Facepieces) The 3M™ Scott Sight Imaging System assembly may not function properly if the batteries have been exposed to temperatures near or below freezing. Replace with batteries at temperatures that fall within manufacturer's specified operating range. - Page 52 OPERATING THE RESPIRATOR P/N 595373-01 Rev C 202004...
-
Page 53: Chapter 4 Cleaning & Storing The Respirator
202004 CHAPTER 4 P/N 595373-01 CLEANING & STORING THE RESPIRATOR This chapter provides instructions for cleaning and storing the 3M Scott Air-Pak X3 Pro SCBA. Detailed instructions for cleaning the facepiece and mask-mounted regulator are also provided. • “Before You Begin”... -
Page 54: Cleaning The Facepiece
Cleaning the Facepiece You will need the following supplies: • 3M-approved sanitizing or disinfecting cleaner NOTE When using cleaning products, follow all of the manufacturer’s instructions. Improper use or handling of these products may result in damage to the facepiece. -
Page 55: Cleaning The Mask-Mounted Regulator
You will need the following supplies: • Sanitizing or disinfecting cleaner. 3M recommends a properly diluted hypochlorite solution or aqueous solution of iodine: – Hypochlorite solution (50 ppm of chlorine) made by adding approximately one milliliter (1 mL) of laundry bleach to one liter (1 L) of water at 110°... - Page 56 (see Figure 4-1). If excessive dirt or soil is present, forward the regulator assembly to 3M-trained authorized personnel for thorough cleaning. 4 Engage the lock tab or latch. Close the purge knob by turning it fully clockwise.
-
Page 57: Cleaning The Shoulder Harness And Waist Pad
Cleaning the Shoulder Harness and Waist Pad You can launder the shoulder harness and waist pad on the Air-Pak X3 Pro in an industrial washing machine. 3M Scott Air-Pak X3 Pro Inspection and Cleaning Instructions (P/N 595360-01) provides instructions for detaching the shoulder harness and waist pad from the backframe in preparation for laundering and reattaching them to the backframe. - Page 58 CLEANING & STORING THE RESPIRATOR To store the respirator on a wall If a wall storage bracket is used to store the SCBA, follow the instructions of the bracket manufacturer for mounting as well as for placing arms through the shoulder straps and freeing the respirator from the bracket. To store the respirator in a vehicle The method of storage of a respirator in a vehicle must minimize the possibility of injury to persons in or near the vehicle while it is in motion, especially during rapid deceleration or acceleration, sharp turns, or a collision.
-
Page 59: Chapter 5 Replacing Batteries
CHAPTER 5 P/N 595373-01 REPLACING BATTERIES This chapter provides instructions for changing the batteries in an 3M Scott Air-Pak X3 Pro respirator with a Personal Alert Safety System (PASS) device, also known as a distress alarm. Before You Begin Carefully read “Safety... - Page 60 REPLACING BATTERIES Replace the batteries. 5 Using a Phillips screwdriver, remove the Use a screwdriver to Ensure that sealing screws of the battery housing cover as shown loosen the surfaces are clean Figure 5-1. Carefully remove the cover and screw on the before replacing the battery cover cap.
-
Page 61: Chapter 6 Niosh Cautions & Limitations
Rev C 202004 CHAPTER 6 P/N 595373-01 NIOSH CAUTIONS & LIMITATIONS Cautions and Limitations D – AIRLINE RESPIRATORS CAN BE USED ONLY WHEN THE RESPIRATORS ARE SUPPLIED WITH RESPIRABLE AIR MEETING THE REQUIREMENTS OF CGA G-7.1 GRADE D OR HIGHER QUALITY. E –... -
Page 62: Ebss-Special Or Critical User's Instructions
THE REQUIREMENTS OF CGA G-7.1, GRADE D OR HIGHER QUALITY, OR MEETING CE EUROPEAN STANDARD EN 132. EXCEPT AS NOTED HEREIN, ALL MODELS OF THE 3M SCOTT AIR-PAK X3 PRO 2.2, 4.5, OR 5.5 ARE APPROVED FOR RESPIRATORY PROTECTION DURING ENTRY INTO OR ESCAPE FROM OXYGEN DEFICIENT ATMOSPHERES, GASES AND VAPORS, AT TEMPERATURES ABOVE -25°... -
Page 63: Appendix A Air-Pak X3 Pro Models
Rev C 202004 APPENDIX A P/N 595373-01 AIR-PAK X3 PRO MODELS The 3M Scott Air-Pak X3 Pro SCBA (CGA & Snap-Change) are available in the following pressures: • 2.2 SCBA (2216 psig operating pressure) • 4.5 SCBA (4500 psig operating pressure) •... - Page 64 AIR-PAK X3 PRO MODELS To maintain NIOSH approval and NFPA compliance, the following facepieces must include a lower mask module cover and a head harness: • Vision C5 Full Facepiece - Small (P/N 201550-01) • Vision C5 Full Facepiece - Medium (P/N 201550-02) •...
-
Page 65: Appendix B Approvals & Certifications
NIOSH Certification All models of the 3M Scott Air-Pak X3 Pro SCBA described in these instructions conform to the requirements of Title 42 Part 84 of the Code of Federal Regulations and are certified by the National Institute of Occupational Safety and Health (NIOSH). - Page 66 respirator with respect to the NFPA certification requirements. For more information, see the NIOSH/CBRN Approval Label included with these instructions. See also “Chapter 6: NIOSH Cautions & Limitations” on page 45 for the cautions and limitations that apply to NIOSH-certified respirators of this type. P/N 595373-01 Rev C 202004...
-
Page 67: Appendix C Intrinsic Safety
P/N 595373-01 INTRINSIC SAFETY The 3M Scott Air-Pak X3 Pro SCBA respirator equipped with a Heads-Up Display P/N 200280-SERIES and/or a PASS device (distress alarm) P/N 201160-SERIES is listed by SGS U.S. TESTING COMPANY INC. as intrinsically safe per ANSI/UL Std. UL-913 for use in Class I, II, Division 1, Groups C, D, E, F, and G Hazardous Locations. - Page 68 P/N 595373-01 Rev C 202004...
-
Page 69: Appendix D Safety Listings
APPENDIX D P/N 595373-01 SAFETY LISTINGS The following safety listings apply to 3M Scott Air-Pak X3 Pro respirators equipped with a Personal Alert Safety System (PASS) device, also known as a distress alarm. NOTE Do not use a fiberglass-wrapped, one-hour cylinder on a 4.5 SCBA equipped with a PASS device (distress alarm), as the weight will exceed the 35-lb approval limit for SCBAs established by NIOSH. -
Page 70: Industry Canada Compliance
Industry Canada Compliance Industry Canada Statement The term “IC” before the certification/registration number only signifies that the Industry Canada technical specifications were met. The installer of this radio equipment must ensure that the antenna is located or pointed such that it does not emit RF field in excess of Health Canada limits for the general population. -
Page 71: Appendix E Service Life
Rev C 202004 APPENDIX E P/N 595373-01 SERVICE LIFE Each configuration of self-contained breathing apparatus (SCBA) certified by NIOSH is assigned a service life classification for a duration time of each size of air supply cylinder (30-minute, 45-minute, etc.). The service life duration time is determined by NIOSH using a breathing machine designed to simulate an average adult user performing work at a moderate work rate. - Page 72 P/N 595373-01 Rev C 202004...
-
Page 73: Appendix F Respirator Testing
This recommendation is in addition to all other cleaning and maintenance procedures. DOT Specifications In addition, all air cylinders used with 3M Scott Fire & Safety respirators must be periodically visually inspected and hydrostatically tested by a licensed cylinder retester. The cylinder inspection and test must be done in accordance with the appropriate U.S. - Page 74 P/N 595373-01 Rev C 202004...
-
Page 75: Appendix G Facepiece Fitting
Any approved 3M Scott Fire & Safety accessories that will be used with the respirator, such as a communications device installed on the facepiece, must be in place during fit testing. If changing from a standard facepiece to a facepiece with an installed accessory, such as a communications device, it is recommended that a new fit test be performed. -
Page 76: Cbrn Scba Or Apr
To verify the fit factor of the respirator, testing must incorporate an exercise regimen of normal daily activities. 3M requires the following set of fit test exercises, which are based on OSHA Standard 29 CFR Part 1910.134 Appendix A, and ANSI/AIHA/ASSE Z88.10, current edition, with modifications. -
Page 77: Routine Testing
3M requires that users of 3M Scott Fire & Safety respirators and facepieces must achieve a fit factor of at least 500 for CBRN SCBA (Open Circuit) use or at least 2000 for CBRN APR use with their assigned facepiece style and size using the fit test procedures and exercise regimen stated above. - Page 78 P/N 595373-01 Rev C 202004...
-
Page 79: Appendix H Options & Accessories
P/N 595373-01 OPTIONS & ACCESSORIES The 3M Scott Air-Pak X3 Pro may be equipped with one or more accessories or options. The respirator user must determine which accessories or optional components are installed on the respirator. In addition, the respirator user must receive training in the operation of the respirator including the operation of all options and/or accessories incorporated in the respirator. - Page 80 P/N 595373-01 Rev C 202004...
-
Page 81: Appendix I Related Manuals
Rev C 202004 APPENDIX I P/N 595373-01 RELATED MANUALS The following manuals contain additional information related to the 3M Scott Air-Pak X3 Pro PART NUMBER USER INSTRUCTION 595277-01 3M Scott Pak-Alert Distress Alarm, Including the Optional Pak-Tracker Locator System 595278-01... - Page 82 P/N 595373-01 Rev C 202004...
- Page 84 (1) year from the date of original manufacture by 3M SCOTT. 3M SCOTT’s obligation under this warranty is limited to replacing or repairing (at 3M SCOTT’s option) THE PRODUCTS or components shown to be defective in either...