Comdial DXP Plus User Manual
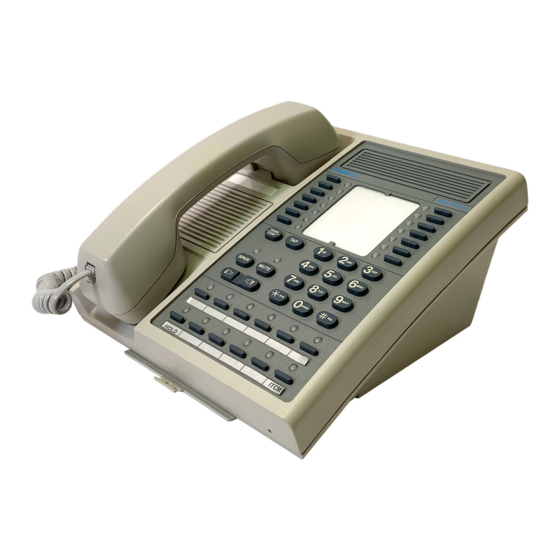
Digital communications system non-lcd multi-line telephone station
Hide thumbs
Also See for DXP Plus:
- Manual (1176 pages) ,
- User manual (80 pages) ,
- Attendant manual (174 pages)

Related Manuals for Comdial DXP Plus


Summary of Contents for Comdial DXP Plus
- Page 1 DXP, DXP Plus, and FX Series Digital Communications System Non-LCD Multi-line Telephone Station User’s Guide AW400p unisyn01.cdr...
- Page 2 Impression models 2122S-** and 2122X-** non-LCD telephones when used with the fol- lowing digital communications systems: DXP with Software Revision 9C DXP or DXP Plus with Software Revision 11A and later FX Series with Software Revision 12A and later NOTE: “S” in the model number means Speakerphone and “X”...
-
Page 3: Table Of Contents
GCA70-314 Contents 1 Introducing the Telephone ....1-1 Introducing this Guide ... 1-1 Introducing The Impression Model 2122S... 1-1 Introducing The Impression Model 2122X ... 1-2 Introducing The DigiTech Model 7714S... - Page 4 Contents 7 Using the Other Features ....7-1 Blocking Voice-Announce Calls... 7-2 Diverting Incoming Calls To Another Station... 7-1 Forwarding Calls... 7-4 Making A Paging Announcement... 7-3 Listening To a Call Over The Telephone’s Speaker (Group Listening) ...
-
Page 5: Introducing The Telephone
GCA70-314 Introducing the Telephone Introducing This Guide Congratulations and thank you for using an Impression or DigiTech telephone! Once you have seen all of the options and benefits that your new telephone offers, you will wonder how you ever did your job without it. -
Page 6: Introducing The Impression Model 2122X
Introducing the Telephone Introducing The Impression Model 2122X Monitor Telephone The Impression Monitor Telephone has the same physical appearance as the Impression Speakerphone. Although they look alike, there is one functional difference in the way the telephones operate. The Monitor Telephone includes a speaker that allows you to listen to incoming calls. -
Page 7: Introducing The Digitech Model 7714X
GCA70-314 Introducing The DigiTech Model 7714X Monitor Telephone The DigiTech Monitor Telephone has the same physical appearance as the DigiTech Speakerphone. Although they look alike, there is one functional difference in the way the telephones operate. The Monitor Telephone includes a speaker that allows you to listen to incoming calls. - Page 8 Introducing the Telephone 1.6.1 Speakerphone User Guidelines Both parties cannot talk at the same time. You must wait for silence out of your loudspeaker before talking. You must stop talking to hear the other party. Background noise may prevent the sound-activated switches from operating properly.
- Page 9 GCA70-314 Introducing the Telephone Place the telephone on a hard surface and away from table edges. Do not place the telephone in corners or enclosures. Do not let obstructions come between you and the microphone. Rooms with hard, flat surfaces that reflect sound may affect the sound-activated switches.
-
Page 10: Understanding What The Lights Mean
Introducing the Telephone Understanding What the Lights Mean The lights on your telephone indicate the status of lines, features, and intercom. — Next to a Direct Station Select (DSS)/ Busy Lamp Field (BLF) button: Steady red = station is in use. Flashing red = station is receiving a call. - Page 11 GCA70-314 1.7.1 Explanation Of Light Patterns The lights on your telephone alert you to different conditions by turning on and off in a certain pattern. You will observe the following light patterns on your speakerphone or monitor telephone: Flashing. The light flashes on and off at equal times (about 1/2 second on and 1/2 second off).
- Page 12 This page remains blank intentionally.
-
Page 13: Answering Calls
GCA70-314 Answering Calls Answering Calls To answer a call that is ringing at your telephone, 1. If the light is flashing orange, lift handset, —OR— if the light is flashing red, press the line button next to it and lift handset. -
Page 14: Answering A Subdued-Off Hook Voice Announcement (Sohva)
Answering Calls To answer a call that is ringing the loud ringer or night transfer station, 1. Hear ringing. 2. Lift handset. 3. Press INTERCOM. 4. Dial 65 through 68 to select ringing zone (1–4) at the location of the bell, or dial 69 to answer any ringing zone. NOTE: This feature is known as Trunk Access From Any Station (TAFAS). - Page 15 GCA70-314 To respond non-verbally, 1. If announcing station has an LCD speakerphone, press a pre- programmed RESPONSE MESSAGE button to send message to calling telephone. The message you sent will appear on the LCD of the announcing telephone and will disconnect the call. NOTE: Announcing station must have LCD speakerphone.
- Page 16 This page remains blank intentionally.
-
Page 17: Making Calls
GCA70-314 Making Calls Making Calls To make a call, 1. Lift handset and select line (unless your telephone selects it for you), or select intercom and listen for dial tone. 2. Either dial number, use speed dial feature, use redial feature, or press Direct Station Select (DSS) if making an intercom call. - Page 18 Making Calls If you have line appearance for a particular line and wish to queue for that line, 1. Note the busy status light (LED). 2. Press INTERCOM. 3. Dial 4. Press line button. 5. Press SPEAKER. To answer queuing ring-back, 1.
-
Page 19: Using Speed Dial
GCA70-314 Using Speed Dial To dial a speed dial number from a preprogrammed DSS button, 1. Press preprogrammed button. If you programmed the number at the second level of a DSS button, press HOLD before pressing button. 2. When called party answers, lift handset. To dial personal or system speed dial numbers from your keypad, 1. -
Page 20: Making A Subdued Off-Hook Voice Announcement (Sohva)
Making Calls To automatically redial the last dialed number once a minute for 10 minutes, 1. Hang up. 2. Press an installer-programmed AUTOMATIC REDIAL button. 3. Listen for ringing or busy tone over the speaker. 4. When called party answers, lift the handset (you must do this to disengage the redial feature). -
Page 21: Camping On At A Station
GCA70-314 Camping On At A Station NOTE: You can camp on at only one station at a time. 3.5.1 Camping On At A Busy Station And Waiting For An Answer (Call Waiting) If the telephone you have called is busy, you can send a call-waiting tone to the telephone and wait on line for an answer (you must be using the handset for this feature to work). - Page 22 Making Calls 3.5.2 Camping On At A Busy Station And Waiting For An Automatic Callback If you call another station and receive a busy signal or a Do Not Disturb tone, you can press a button that will cause the system to ring your telephone when the station is available.
- Page 23 GCA70-314 3.5.3 Camping On At An Idle Station And Waiting For An Automatic Callback If you call another station and hear ringing but receive no answer, you can press a button that will cause the system to ring your telephone when the user at the called station initiates any telephone activity.
- Page 24 This page remains blank intentionally.
-
Page 25: Holding Calls
GCA70-314 Holding Calls Holding Calls To place a call on hold, 1. Press HOLD. 2. Hang up handset. To return to a call that is on hold, 1. Lift handset and press line button with flashing light, —OR— press TAP. To place a call on exclusive hold, 1. - Page 26 Holding Calls To retrieve a held call at another station, 1. Lift handset. 2. Press INTERCOM and dial # 90. 3. Dial extension number of station that has the held call. 4. Answer call. To answer a call at the extension receiving held call, 1.
-
Page 27: Transferring Outside Calls
GCA70-314 Transferring Outside Calls Transferring Outside Screened Calls To announce a call before transferring it (screened), 1. Answer outside call. 2. Press TRANSFER/CONFERENCE (this places the call on hold). 3. Dial station number, or press DSS button for that station. 4. -
Page 28: Making A Hot Transfer
Transferring Outside Calls Making A Hot Transfer To make a hot transfer, 1. Answer call. 2. Press TRANSFER/CONFERENCE (this places the call on hold). 3. Dial extension number of telephone to receive the transfer or press the DSS button for that extension. 4. -
Page 29: Conferencing
5-party conference (including yourself) when using the DXP system. NOTE: When using a DXP Plus system, you can have up to seven parties (including yourself) on a conference call. To retrieve a line from hold and bring that party into the conference, 1. - Page 30 Conferencing To drop out of a conference call you initiated involving outside lines (creating an unsupervised conference), 1. Dial # (lines remain lighted and in use until one or both outside parties disconnect; when one party drops out of an unsupervised conference, the other party remains on hold until hanging up or reconnecting with you on line).
-
Page 31: Using The Other Features
GCA70-314 Using The Other Features Blocking Voice-Announce Calls To block voice-announce calls, 1. Press INTERCOM. 2. Dial To un-block voice-announce calls, 1. Press INTERCOM. 2. Dial # 2. Diverting Incoming Calls To Another Station Call diverting permits you to send an incoming call to another station that you have previously designated. -
Page 32: Forwarding Calls
Using The Other Features Forwarding Calls To forward your calls, 1. Press preprogrammed FORWARD button, —OR— press INTERCOM and dial one of the following codes: 52 = all calls forward immediately, 54 = all calls forward after RNA or Busy, 51 = prime line and personal intercom calls forward immediately, 53 = prime line and personal intercom calls forward... -
Page 33: Making A Paging Announcement
GCA70-314 Making a Paging Announcement To send a paging announcement, 1. Lift handset. 2. Press INTERCOM, then dial 70–77 zones 1–8 [in the default mode, code 70 (zone 1) provides an all-call function], —OR— press a preprogrammed PAGE button. 3. Make announcement. 4. -
Page 34: Listening To A Call Over The Telephone's Speaker (Group Listening)
Using The Other Features Listening To A Call Over The Telephone Speaker (Group Listening) To activate group listening while on a call, 1. Press the preprogrammed GROUP LISTEN button. To cancel group listening, 1. Press the preprogrammed GROUP LISTEN button again. NOTE: You should cancel Group Listening before hanging up the handset to end the call. -
Page 35: Setting A Do Not Disturb Condition At Your Station
GCA70-314 Setting A Do Not Disturb Condition At Your Station To enable DND, 1. Press preprogrammed DND button. The light associated with the DND button turns on when the feature is active. To disable the DND condition, 1. Press preprogrammed DND button. The light associated with the DND button turns off when the feature is disabled. -
Page 36: Setting Your Personal Ringing Tones
Using The Other Features Setting Your Personal Ringing Tones To select one of the ringing tones, 1. Press INTERCOM. 2. Dial 3. Dial number (1–8) to select ring tone. 4. Press SPEAKER to end. 7.10 Using Background Music To turn the music on, 1. -
Page 37: 7.11 Setting The Volume Control
GCA70-314 7.11 Setting The Volume Control There are four ringer loudness levels (plus an Set the level as follows: 1. While your telephone is on-hook and idle, press VOLUME UP or VOLUME DOWN once for each change in loudness that you desire. - Page 38 Using The Other Features There are eight headset loudness levels. Set the level for the current call as follows: 1. While on a call and in headset mode, press VOLUME UP or VOLUME DOWN once for each change in loudness that you desire.
-
Page 39: Using The Messaging Feature
GCA70-314 Using The Messaging Feature Using The Message Waiting Light To turn on the message-waiting light (and a broken dial tone) at an idle telephone, 1. Press INTERCOM. 2. Dial 3. Dial extension number of station you want to alert. The mes- sage-waiting light of that station will flash. -
Page 40: Using Lcd Messaging
Using The Messaging Feature Using LCD Messaging You can set system-supplied messages to display at any calling LCD speakerphone. To turn on LCD messaging, 1. Press INTERCOM. 2. Dial 3. Press # to clear current message if you have one stored. 4. -
Page 41: Programming Your Telephone
GCA70-314 Programming Your Telephone Storing Extension Numbers And Feature Codes To store extension numbers at DSS buttons, 1. Press INTERCOM. 2. Dial 3. Press programmable DSS button to choose storage location. 4. Dial extension number. 5. Press next programmable button and dial another extension number to store. - Page 42 Programming Your Telephone To store a fixed RESPONSE MESSAGE button, 1. Press INTERCOM. 2. Dial 3. Press programmable button for RESPONSE MESSAGE but- ton location. 4. Dial message number (01-30) from list of messages provided by your system attendant or installer. 5.
-
Page 43: Storing Speed Dial Numbers
GCA70-314 Storing Speed Dial Numbers To store an outside number as a speed dial number, 1. Press INTERCOM. 2. Dial 3. Press programmable button (or 1–0 on keypad) to choose stor- age location. NOTE: Remember, you can store another number at a second level at a programmable button by first pressing HOLD. - Page 44 Programming Your Telephone To store an intercom number as a speed dial number, 1. Press INTERCOM. 2. Dial 3. Press the button you want to program (1–0). 4. Press INTERCOM or 8 to preselect intercom. 5. Dial the intercom number you want to store (up to 16 digits that can include # and ).
-
Page 45: Operating Your Telephone With A Dss/Blf
GCA70-314 Operating Your Telephone With A DSS/BLF Console The DSS/BLF console has 32 additional buttons and status lights that extend the memory button capability of an adjacent companion telephone. The console for the Impression models is DU32X and is shown below. The DD32X 32-button console for the DigiTech models is shown on the following page. - Page 46 DSS/BLF Console BLF Lights DD32X – 32-Button DSS/BLF Console 10–2 Non-LCD Station User's Guide GCA70-314 Line Buttons DSS Buttons DD32XA...
-
Page 47: Publication Index
GCA70-314 Publication Index Answering Calls ........2-1 Answering A SOHVA . - Page 48 Index Making Calls........3-1 Messaging .
-
Page 49: Appendix A Quick Reference Guide
GCA70–314 Appendix A Quick Reference Guide This chart provides you with a quick reference guide of the feature dialing codes. If you wish, you can detach these pages and keep them near your telephone to serve as a stand-alone reference. Before dialing a feature code, make sure that you hear intercom dial tone. - Page 50 Quick Reference Guide Feature Line Group 1 Line Groups 2–11 Line Groups 12–16 Line Pick Up From Any Station, Zones 1–4 Line Pick Up From Any Station, All Zones Meet Me Answer Page Message Waiting Message Wait Retrieval Operator Access Paging, All Call Paging, Zones 2–8 Paging, Meet Me...
- Page 51 GCA70–314 The following table details several unique dialing codes that are only applicable to single line proprietary and industry-standard telephones. Feature Pick Up Last Line Broker’s Call S peed Di a l A c cess Code Saved Number Redial Dial Saved Number TAP Dialing Code Quick Reference Guide Enable Code...
- Page 52 This page remains blank intentionally.
- Page 53 Personal Notes...
- Page 54 Personal Notes...
- Page 55 This manual has been developed by Comdial Corporation (the “Company”) and is intended for the use of its customers and service personnel. The information in this manual is subject to change without notice. While every effort has been made to eliminate errors, the Company disclaims liability for any difficul- ties arising from the interpretation of the information contained herein.
- Page 56 Charlottesville, Virginia 22901-2829 World Wide Web: http://www.comdial.com/ Printed in U.S.A. GCA70–314.03 02/97...