Table of Contents
Advertisement
Quick Links
Advertisement
Table of Contents

Related Manuals for E-FLITE Shoestring 15e ARF


Summary of Contents for E-FLITE Shoestring 15e ARF
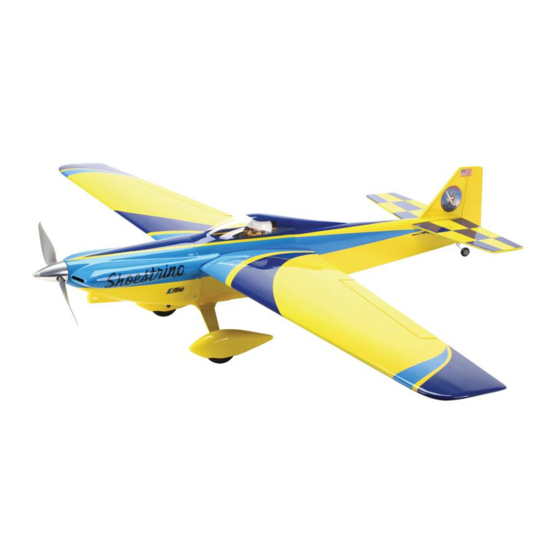
- Page 1 Shoestring 15e ARF Assembly Manual...
-
Page 2: Notice
Model Aeronautics) approved flying sites. Consult local product, personal property and cause serious injury. Safety can never be taken lightly. laws and ordinances before choosing a location to fly your aircraft. • Do not fly near power lines. E-flite Shoestring 15e ARF Assembly Manual... -
Page 3: Table Of Contents
You’ll have a blast! Daily Flight Checks ..........27 Limited Warranty ............ 27 Warranty Services ..........28 Compliance Information for the European Union ..28 Academy of Model Aeronautics National Model Aircraft Safety Code ....29 E-flite Shoestring 15e ARF Assembly Manual... -
Page 4: Contents Of Kit/Parts Layout
Battery (EFLB32003S30) 5/32-inch (4mm) Spinner: 1.5-inch Aluminum Bullet Adhesives Spinner (EFLSP150B) Medium CA PAAPT02 Propeller: 10 x 10E (APC10010E) Thin CA PAAPT08 Threadlock PAAPT42 30-minute epoxy PAAPT39 Plastic Tape, Clear, 3/4 x 125-inch MMM190CL E-flite Shoestring 15e ARF Assembly Manual... -
Page 5: Landing Gear Installation
We highly recommend re-binding the radio system once all the control throws are set. This will keep the servos from moving to their endpoints until the transmitter and receiver connect. E-flite Shoestring 15e ARF Assembly Manual... - Page 6 9. Repeat Steps 4 through 8 to install the remaining wheel and wheel pant on the landing gear. 7. Slide the wheel into the wheel pant. You may need to flex the pant open slightly to get the wheel to fit. E-flite Shoestring 15e ARF Assembly Manual...
-
Page 7: Hinging The Ailerons
The CA must be allowed to soak into the hinge to provide the best bond between the hinge and surrounding wood. 7. Repeat Steps 1 through 7 to hinge the remaining aileron. E-flite Shoestring 15e ARF Assembly Manual... -
Page 8: Installing The Aileron Servos
2mm x 12mm sheet metal screws using a #1 Phillips screwdriver. Do not let the string fall into the wing as it is used to pull the servo lead through the wing. E-flite Shoestring 15e ARF Assembly Manual... - Page 9 11. Apply 1–2 drops of thin CA in each of the holes to harden the surrounding wood for the aileron cover screws. E-flite Shoestring 15e ARF Assembly Manual...
- Page 10 The holes have already been started and are easily found on the bottom of the aileron 16. Repeat steps 1 through 15 to install the remaining aileron servo and linkage. E-flite Shoestring 15e ARF Assembly Manual...
-
Page 11: Hinging The Elevators
wire. This provides a surface for the epoxy to bond to when the joiner is installed. Steps 6 through 13 can be performed while the epoxy is curing on the joiner wire. E-flite Shoestring 15e ARF Assembly Manual... - Page 12 Use a square and felt-tipped pen to mark the center line on the top of the stabilizer. This will help in aligning the stabilizer on the fuselage later. 10. Slide the elevators in position on the stabilizer. E-flite Shoestring 15e ARF Assembly Manual...
-
Page 13: Wing And Stabilizer Installation
the wing panel. The tube will slide in easily, so do not 5. Repeat step 3 to install the second wing panel. force it in any farther than it will easily slide. E-flite Shoestring 15e ARF Assembly Manual... - Page 14 11. Mix 1/2 ounce (15ml) of 30-minute epoxy. Lightly brush epoxy on the stabilizer saddle. E-flite Shoestring 15e ARF Assembly Manual...
-
Page 15: Rudder And Fin Installation
When cutting the covering, make sure not to cut into the underlying wood and weaken the stabilizer. Another option is to use a soldering iron or hot knife to melt the covering, rather than cutting, to avoid damaging the stabilizer. E-flite Shoestring 15e ARF Assembly Manual... - Page 16 9. Place a T-pin in the center of each of the three hinges. This will center the hinges when installed in the rudder. E-flite Shoestring 15e ARF Assembly Manual...
-
Page 17: Servo And Receiver Installation
Position the servo so the edge toward the center is centered in the opening. Use a pencil to transfer the positions for the mounting screws on the servo tray. E-flite Shoestring 15e ARF Assembly Manual... - Page 18 Install the servo horn so it is perpendicular to the servo center line. Secure the horn using the screw from the servo and a #1 Phillips screwdriver. E-flite Shoestring 15e ARF Assembly Manual...
- Page 19 When flying in extreme High-G racing, it may be a good idea to use a tie-wrap (not included) to secure the position of the receiver. E-flite Shoestring 15e ARF Assembly Manual...
-
Page 20: Motor And Speed Control Installation
2.5mm (Power 15) Always use threadlock on metal-to-metal fasteners to prevent them from vibrating loose. 1. Use a #2 Phillips screwdriver to attach the X-mount to the motor using the screws provided with the motor. E-flite Shoestring 15e ARF Assembly Manual... - Page 21 E-flite components. be accessed when the canopy is removed. 6. Connect the wires from the motor to the wires ...
-
Page 22: Cowling Installation
3. Prepare the spinner assembly by sliding the propeller on the adapter shaft. Place the adapter nut on the shaft, but do not tighten it at this time. E-flite Shoestring 15e ARF Assembly Manual... - Page 23 8. Remove the cowl from the fuselage. Place 1–2 drops of thin CA in each hole to harden the surrounding wood. This harder surface makes the screws more secure when installed. E-flite Shoestring 15e ARF Assembly Manual...
-
Page 24: Decal Installation
(60 to 66mm) back from the leading edge of the wing as shown with the battery pack installed. Mark the location of the CG on the bottom of the wing with a felt-tipped pen. E-flite Shoestring 15e ARF Assembly Manual... -
Page 25: Control Throws
This will Down: 3/16-inch keep the servos from moving to their endpoints Elevator until the transmitter and receiver connect. High Rate 9/32-inch Down: 1/4-inch Low Rate 3/16-inch Down: 5/32-inch E-flite Shoestring 15e ARF Assembly Manual... -
Page 26: Preflight
Using the inner holes at the servo will result in the greatest amount of torque being delivered to the control surface. At these speeds, it is good to have a reserve of holding power and extra torque. E-flite Shoestring 15e ARF Assembly Manual... -
Page 27: Daily Flight Checks
While it might seem cool and exciting to execute a pass below, at these speeds there is rarely any time to correct from turbulence before your beloved racer is in the ground. Take heed! E-flite Shoestring 15e ARF Assembly Manual... -
Page 28: Limited Warranty
Notice: Do not ship Lipo batteries to horizon. If you THIS WARRANTY IS THE PURCHASER’S SOLE AND have any issue with a Lipo battery, please contact EXCLUSIVE REMEDY. the appropriate horizon product Support office. E-flite Shoestring 15e ARF Assembly Manual... -
Page 29: Compliance Information For The European Union
4105 Fieldstone Rd equipment for recycling, please contact your local city persons or property. Champaign, Illinois office, your household waste disposal service or where 61822 USA you purchased the product. productsupport@horizonhobby.com 877-504-0233 E-flite Shoestring 15e ARF Assembly Manual... - Page 30 5. The flying area must be clear of all nonessential participants Commission (FCC). Only individuals properly licensed by the and spectators before the engine is started. FCC are authorized to operate equipment on Amateur Band frequencies. E-flite Shoestring 15e ARF Assembly Manual...
-
Page 31: Building And Flying Notes
Building and Flying Notes E-flite Shoestring 15e ARF Assembly Manual... - Page 32 E-flite, DSMX, Celectra and the Horizon Hobby logo are trademarks or registered trademarks of Horizon Hobby, Inc. The Spektrum trademark is used with permission of Bachmann Industries, Inc. All other trademarks, service marks and logos are the property of their respective owners.