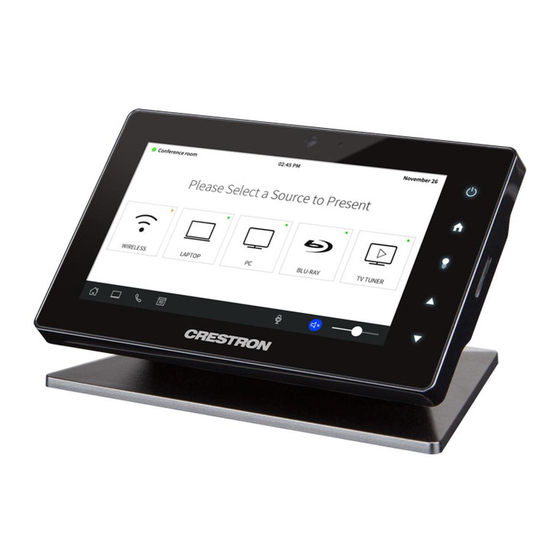
Crestron TSW-560 Supplemental Manual
5", 7", and 10.1"
Hide thumbs
Also See for TSW-560:
- Quick start manual ,
- Product manual (110 pages) ,
- Supplemental manual (84 pages)

Related Manuals for Crestron TSW-560


Summary of Contents for Crestron TSW-560
- Page 1 TSW-560/TSW-760/TSW-1060 5", 7", and 10.1" Touch Screens Supplemental Guide Crestron Electronics, Inc.
- Page 2 Corporation in the United States and/or other countries. Other trademarks, registered trademarks, and trade names may be used in this document to refer to either the entities claiming the marks and names or their products. Crestron disclaims any proprietary interest in the marks and names of others.
-
Page 3: Table Of Contents
Contents Access the Setup Screens Configure the Touch Screen Ethernet Setup ......................3 IP Table Setup ....................... 5 Audio Setup ........................7 Display Setup ........................ 8 Standby Timeout ......................10 Diagnostics ........................11 Test Patterns ......................12 Touch Test ......................12 Mic Test ........................ - Page 4 Connecting to Crestron XiO Cloud Service Claim a Single Device ....................45 Claim Multiple Devices ....................46 ii • Contents Supplemental Guide – DOC. 7927F...
-
Page 5: Access The Setup Screens
The setup screens enable basic configuration prior to regular operation of the Crestron ® TSW-560, TSW-760, and TSW-1060 touch screens. To display the main setup screen, touch the display screen while applying power to the touch screen. The Crestron TSW-560, TSW-760, and TSW-1060 are functionally similar. For simplicity within this guide, the term “touch screen”... - Page 6 ) that can be tapped to return to the Setup screen and a Save & Exit button that can be tapped to save all settings, to exit the setup screens, and to return to the main project. 2 • TSW-560/TSW-760/TSW-1060: 5", 7", and 10.1" Touch Screens Supplemental Guide – DOC. 7927F...
-
Page 7: Configure The Touch Screen
To change to a static IP address, tap Off under DHCP Enabled, and then tap Set Static IP Address Settings to display the Static IP Ethernet Setup screen. NOTE: DHCP is enabled by default. TSW-560/TSW-760/TSW-1060: 5", 7", and 10.1" Touch Screens • 3 Supplemental Guide – DOC. 7927F... - Page 8 If no changes are made, tap < Back to return to the Ethernet Setup screen. • Tap < Back again to return to the Setup screen. 4 • TSW-560/TSW-760/TSW-1060: 5", 7", and 10.1" Touch Screens Supplemental Guide – DOC. 7927F...
-
Page 9: Ip Table Setup
To add or edit an entry, tap the Add/Edit button to its left. The Ethernet Setup - Edit IP Table screen is displayed. Ethernet Setup - Edit IP Table Entry Screen TSW-560/TSW-760/TSW-1060: 5", 7", and 10.1" Touch Screens • 5 Supplemental Guide – DOC. 7927F... - Page 10 Ethernet Setup - IP Table screen. On the Ethernet Setup - Edit IP Table screen, tap the text field below IP Address / Hostname to display the on-screen keyboard. On-Screen Keyboard 6 • TSW-560/TSW-760/TSW-1060: 5", 7", and 10.1" Touch Screens Supplemental Guide – DOC. 7927F...
-
Page 11: Audio Setup
0 to 100%. Tap Beep On or Beep Off to turn the beep volume on or off. Tap < Back to return to the Setup screen. TSW-560/TSW-760/TSW-1060: 5", 7", and 10.1" Touch Screens • 7 Supplemental Guide – DOC. 7927F... -
Page 12: Display Setup
0 to 100%. Tap H/M/L Settings to access the Display High / Medium / Low Settings screen, which can be used to adjust touch screen brightness values. 8 • TSW-560/TSW-760/TSW-1060: 5", 7", and 10.1" Touch Screens Supplemental Guide – DOC. 7927F... - Page 13 Tap the up and down arrows to raise or lower the auto-brightness preset values for the LCD display and the key backlight, from 0 to 100%. • Tap < Back to return to the Display Setup screen. TSW-560/TSW-760/TSW-1060: 5", 7", and 10.1" Touch Screens • 9 Supplemental Guide – DOC. 7927F...
-
Page 14: Standby Timeout
• Tap On or Off next to Enabled to turn the digital clock screensaver on or off during standby timeout. 10 • TSW-560/TSW-760/TSW-1060: 5", 7", and 10.1" Touch Screens Supplemental Guide – DOC. 7927F... -
Page 15: Diagnostics
The Diagnostics screen displays the touch screen's CPU temperature and available memory, and it provides buttons to open various test screens. The test screens are explained in the sections that follow. TSW-560/TSW-760/TSW-1060: 5", 7", and 10.1" Touch Screens • 11 Supplemental Guide – DOC. 7927F... -
Page 16: Test Patterns
Tap < Back to return to the Diagnostics screen. Touch Test On the Diagnostics screen, tap Touch Test to display the touch test screen. Touch Test Screen 12 • TSW-560/TSW-760/TSW-1060: 5", 7", and 10.1" Touch Screens Supplemental Guide – DOC. 7927F... -
Page 17: Mic Test
When the second playback is finished, the display automatically returns to the Diagnostics screen. TSW-560/TSW-760/TSW-1060: 5", 7", and 10.1" Touch Screens • 13 Supplemental Guide – DOC. 7927F... -
Page 18: Lan Test
Additionally, this screen provides controls to test the connection to the default router. Tap On to begin the test, and tap Off to end the test. Tap < Back to return to the Diagnostics screen. 14 • TSW-560/TSW-760/TSW-1060: 5", 7", and 10.1" Touch Screens Supplemental Guide – DOC. 7927F... -
Page 19: Keypad Test
When one of the hard keys is tapped, its respective indicator lights on the screen. Tap < Back to return to the Diagnostics screen. TSW-560/TSW-760/TSW-1060: 5", 7", and 10.1" Touch Screens • 15 Supplemental Guide – DOC. 7927F... -
Page 20: Rava Test
Tap the Rava Setup button to open a second Rava Settings screen for Rava setup. Rava Settings Screen 16 • TSW-560/TSW-760/TSW-1060: 5", 7", and 10.1" Touch Screens Supplemental Guide – DOC. 7927F... -
Page 21: Rtsp Test
0 to 100%, and tap On or Off under Mute to mute or unmute the volume of the video stream. Tap < Back to return to the Diagnostics screen. TSW-560/TSW-760/TSW-1060: 5", 7", and 10.1" Touch Screens • 17 Supplemental Guide – DOC. 7927F... -
Page 22: About
Use the About screen to view information about the touch screen, including the currently loaded firmware and the operating system versions. Tap < Back to return to the Setup screen. 18 • TSW-560/TSW-760/TSW-1060: 5", 7", and 10.1" Touch Screens Supplemental Guide – DOC. 7927F... -
Page 23: Configuration Via Web Interface
TSW-1060, the touch screen configuration utility provides additional configuration options for room scheduling. For more information on configuring the scheduling application, refer to "Configuration via Web Interface" in the Crestron Room Scheduling Panels Operations Guide (Doc. 8205) at www.crestron.com/manuals. The configuration interface provides a Status tab for monitoring touch screen settings and a Settings tab for configuring touch screen settings. -
Page 24: Actions Menu
Restore is selected, a pop-up window displays confirming whether the application settings should be restored. Select Yes to restore the settings or No to cancel the restore. 20 • TSW-560/TSW-760/TSW-1060: 5", 7", and 10.1" Touch Screens Supplemental Guide – DOC. 7927F... -
Page 25: Firmware Upgrade
Click Save Changes to save any changes made to the configuration settings. Revert Click Revert to revert the touch screen back to the last saved configuration settings. TSW-560/TSW-760/TSW-1060: 5", 7", and 10.1" Touch Screens • 21 Supplemental Guide – DOC. 7927F... -
Page 26: Upload User Project
Click the Status tab on the top left of the configuration interface to display selections for viewing the status of device settings, network settings, and the control system connection. Status Tab Selections Each selection is described in the sections that follow. 22 • TSW-560/TSW-760/TSW-1060: 5", 7", and 10.1" Touch Screens Supplemental Guide – DOC. 7927F... -
Page 27: Device
Click + More details at the bottom of the Device tab to display an expanded section that shows additional touch screen information (for Crestron internal use only). If + More Details is selected, click - Less details to collapse the section. -
Page 28: Control System
Port: The port used for the control system connection • Status: The status of the control system connection For more information about configuring a control system connection, refer to "Control System" on page 40. 24 • TSW-560/TSW-760/TSW-1060: 5", 7", and 10.1" Touch Screens Supplemental Guide – DOC. 7927F... -
Page 29: Settings
System Setup Click the System Setup tab to configure general network and device settings for the touch screen. Settings - System Setup (Continued on following page) TSW-560/TSW-760/TSW-1060: 5", 7", and 10.1" Touch Screens • 25 Supplemental Guide – DOC. 7927F... - Page 30 Settings - System Setup (continued) 26 • TSW-560/TSW-760/TSW-1060: 5", 7", and 10.1" Touch Screens Supplemental Guide – DOC. 7927F...
- Page 31 Brightness High Preset: Selects the touch screen LCD high brightness preset value Brightness Medium Preset: Selects the touch screen LCD medium brightness preset value Brightness Low Preset: Selects the touch screen LCD low brightness preset value TSW-560/TSW-760/TSW-1060: 5", 7", and 10.1" Touch Screens • 27 Supplemental Guide – DOC. 7927F...
- Page 32 If connecting to a Crestron Fusion software on-premises server, connections are ® made using either traditional (outbound) or inbound communications. For more information, refer to the Crestron Fusion 10 On-Premises Software Getting Started Guide (Doc. 7685) at www.crestron.com/manuals. • Fusion Cloud Settings...
-
Page 33: Audio
Enabled button to toggle between enabling and disabling the beep volume.) • Beep Volume: If Beep Enabled is turned on, sets the touch screen beep volume level, from 0 to 100% TSW-560/TSW-760/TSW-1060: 5", 7", and 10.1" Touch Screens • 29 Supplemental Guide – DOC. 7927F... -
Page 34: Cloud Settings
Settings - Cloud Settings Click the Cloud Configuration Service Connection button to enable or disable a connection between the touch screen and the Crestron XiO Cloud service. For more information on connecting to the Crestron XiO Cloud service, refer to “Connecting to Crestron XiO Cloud Service”... -
Page 35: Authentication Management
Use the following Authentication Management settings to add, delete, and edit touch screen users and groups. TSW-560/TSW-760/TSW-1060: 5", 7", and 10.1" Touch Screens • 31 Supplemental Guide – DOC. 7927F... - Page 36 Type a new password in the Password field, and then retype the password in the Confirm Password field. Then, tap OK to save the new password or Cancel to cancel the password change. 32 • TSW-560/TSW-760/TSW-1060: 5", 7", and 10.1" Touch Screens Supplemental Guide – DOC. 7927F...
- Page 37 Actions column for that user. Click the information button ( ) in the Actions column to view information for the selected user. The User Details pop-up window opens. TSW-560/TSW-760/TSW-1060: 5", 7", and 10.1" Touch Screens • 33 Supplemental Guide – DOC. 7927F...
- Page 38 A user must be added to an Active Directory group to be selected as an Active Directory user. Click OK to save any changes and to return to the Authentication Management > Users settings. Click Cancel to cancel the changes. 34 • TSW-560/TSW-760/TSW-1060: 5", 7", and 10.1" Touch Screens Supplemental Guide – DOC. 7927F...
- Page 39 Click OK to save any changes and to return to the Authentication Management > Users settings. A growl notification displays stating that the group was created successfully. Click Cancel to cancel the changes. TSW-560/TSW-760/TSW-1060: 5", 7", and 10.1" Touch Screens • 35 Supplemental Guide – DOC. 7927F...
- Page 40 (Administrator, Programmer, Operator, User, or Connect) Additionally, the following actions can be performed for each group with the options provided in the Actions column for that group. 36 • TSW-560/TSW-760/TSW-1060: 5", 7", and 10.1" Touch Screens Supplemental Guide – DOC. 7927F...
- Page 41 Click OK to save any changes and to return to the Authentication Management > Groups settings. A growl notification displays stating that the group was created successfully. Click Cancel to cancel the changes. TSW-560/TSW-760/TSW-1060: 5", 7", and 10.1" Touch Screens • 37 Supplemental Guide – DOC. 7927F...
-
Page 42: 802.1X Configuration
Username: If EAP MSCHAP V2- password is selected for Authentication Method, sets the username required for authentication • Password: If EAP MSCHAP V2- password is selected for Authentication Method, sets the password required for authentication 38 • TSW-560/TSW-760/TSW-1060: 5", 7", and 10.1" Touch Screens Supplemental Guide – DOC. 7927F... - Page 43 CAs are listed in table format, and the following information is provided for each type of CA: • Name: The name of the CA • Expiry Date: The date and time that the CA is set to expire TSW-560/TSW-760/TSW-1060: 5", 7", and 10.1" Touch Screens • 39 Supplemental Guide – DOC. 7927F...
-
Page 44: Control System
802.1x Authentication settings. Control System Click the Control System tab to configure a connection between a control system and the touch screen. Settings - Control System 40 • TSW-560/TSW-760/TSW-1060: 5", 7", and 10.1" Touch Screens Supplemental Guide – DOC. 7927F... -
Page 45: Zoom Rooms
Options are the user project or Zoom Room Mode. The user project is the default setting; Zoom Room Mode is disabled. NOTE: The minimum firmware version required for the touch screen support of this feature is 2.001.0020.001. Settings – Zoom Rooms TSW-560/TSW-760/TSW-1060: 5", 7", and 10.1" Touch Screens • 41 Supplemental Guide – DOC. 7927F... - Page 46 There are two ways to access the Zoom account. Tap the upper left corner (Sign In or Pairing) to toggle between the options. a. Enter the pairing code (supplied by IT). 42 • TSW-560/TSW-760/TSW-1060: 5", 7", and 10.1" Touch Screens Supplemental Guide – DOC. 7927F...
- Page 47 Tap the name of the conference room from the list of available conference rooms. Tap Settings from the Zoom Rooms App to display conference room settings. TSW-560/TSW-760/TSW-1060: 5", 7", and 10.1" Touch Screens • 43 Supplemental Guide – DOC. 7927F...
- Page 48 Tap Speaker and select an available speaker in the conference room. Tap Camera and select an available camera in the conference room. Tap Meet Now to exit. 44 • TSW-560/TSW-760/TSW-1060: 5", 7", and 10.1" Touch Screens Supplemental Guide – DOC. 7927F...
- Page 49 The Crestron XiO Cloud service requires devices to be claimed so they can be managed by the service. To claim a single device or multiple devices, perform one of the following procedures.
- Page 50 NOTE: Use the MAC address labelled “MAC Address.” 2. Open a web browser, and log in to the Crestron XiO Cloud service at https://portal.crestron.io. 3. Click the ENVIRONMENT menu button ( ) to display the Environment menu.
- Page 51 Unassociated Devices. The devices can now be managed or assigned to a group. For information on creating environments, managing devices, and managing users with the Crestron XiO Cloud service, refer to the Crestron XiO Cloud User Guide (Doc. 8214).
- Page 52 Crestron Electronics, Inc. Supplemental Guide – DOC. 7927F 15 Volvo Drive, Rockleigh, NJ 07647 (2047265) Tel: 888.CRESTRON 04.18 Fax: 201.767.7576 Specifications subject to www.crestron.com change without notice.