
Related Manuals for Crestron TSW-732


Summary of Contents for Crestron TSW-732
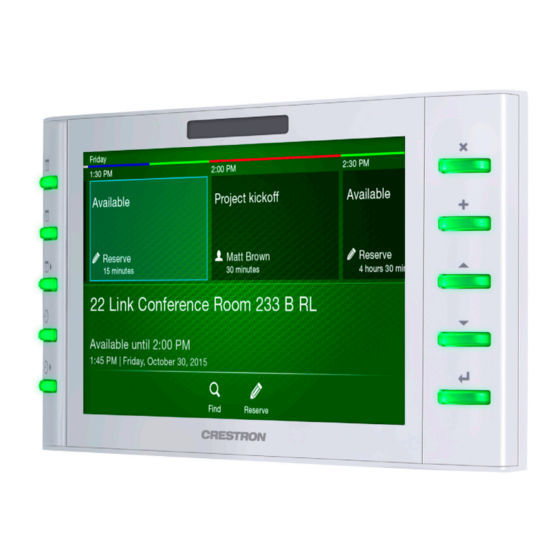
- Page 1 TSW-732 7" Room Scheduling Touch Screen Supplemental Guide Crestron Electronics, Inc.
- Page 2 Other trademarks, registered trademarks, and trade names may be used in this document to refer to either the entities claiming the marks and names or their products. Crestron disclaims any proprietary interest in the marks and names of others. Crestron is not responsible for errors in typography or photography.
-
Page 3: Table Of Contents
Contents Access the Setup Screens Configure the TSW-732 Ethernet Setup ......................2 IP Table Setup ......................3 Audio Setup ......................5 Display Setup ......................6 Standby Timeout ..................... 7 Diagnostics ......................8 Keypad Test ....................8 Touch Test ....................9 Sensor Test.................... -
Page 5: Access The Setup Screens
If no project has been loaded or if an invalid project has been loaded, the touch screen defaults to the main setup screen. During regular operation of the TSW-732, there are two ways to access the setup screens: 1. Place a button on the project main page and assign the reserved join number (17242) that accesses the setup screens. -
Page 6: Configure The Tsw-732
Configure the TSW-732 Ethernet Setup On the TSW-732 Setup screen, tap Ethernet Setup to display the Ethernet Setup screen. Ethernet Setup Screen The Ethernet Setup screen displays the TSW-732’s MAC and IP addresses, subnet mask, default router, primary and secondary DNS, hostname, and domain. There are controls for turning DHCP on and off. -
Page 7: Ip Table Setup
Ethernet Setup screen. again to return to the TSW-732 Setup screen. IP Table Setup On the TSW-732 Setup screen, tap IP Table Setup to display the Ethernet Setup - IP Table screen. Ethernet Setup - IP Table Screen The Ethernet Setup - IP Table screen displays up to four IP table settings, each of which has an Online indicator. - Page 8 Tap Save to save a new entry or to return to the Ethernet Setup - Edit IP Table Entry screen. Tap the field below IP Address/Hostname to display the on-screen keyboard. 4 • TSW-732: 7˝ Room Scheduling Touch Screen Supplemental Guide – DOC. 7669A...
-
Page 9: Audio Setup
TSW-732 Setup screen. Audio Setup On the TSW-732 Setup screen, tap Audio Setup to display the Audio Setup screen. Audio Setup Screen The Audio Setup screen provides controls for muting or unmuting the audio and for adjusting levels for the master volume, media volume, and beep volume. -
Page 10: Display Setup
TSW-732 Setup screen. Display Setup On the TSW-732 Setup screen, tap Display Setup to display the Display Setup screen. Display Setup Screen The Display Setup screen provides controls to adjust the screen’s LCD brightness, green key brightness, and red key brightness. -
Page 11: Standby Timeout
Standby Timeout On the TSW-732 Setup screen, tap Standby Timeout to display the Standby Timeout screen. Standby Timeout Screen The Standby Timeout screen provides controls to adjust standby timeout from 0 to 120 minutes. Tap Screen Saver Options to display the Standby - Screen Saver screen. -
Page 12: Diagnostics
Diagnostics On the TSW-732 Setup screen, tap Diagnostics to display the Diagnostics screen. Diagnostics Screen The Diagnostics screen displays the CPU temperature and the available memory, and it provides controls to open various test screens. The test screens are explained in the sections that follow. -
Page 13: Touch Test
Diagnostics - Sensors Screen The Diagnostics - Sensors screen can be used to view the status of the built-in proximity sensor or any sensors attached to the TSW-732. This screen also provides controls for adjusting the proximity sensor strength. to return to the Diagnostics screen. -
Page 14: Mic Test
Link indicator to show the status of the Ethernet connection and controls to test the connection to the default router. to return to the Diagnostics screen. 10 • TSW-732: 7˝ Room Scheduling Touch Screen Supplemental Guide – DOC. 7669A... -
Page 15: Test Patterns
The Diagnostics - Rava screen provides controls for testing the use of the Rava ® Intercom with the TSW-732. It can be used to call another Rava-capable touch screen and to test projects and settings. To place a call, dial the extension of the desired touch screen and tap Call. -
Page 16: Rtsp Test
Diagnostics screen. again to return to the TSW-732 Setup screen. 12 • TSW-732: 7˝ Room Scheduling Touch Screen Supplemental Guide – DOC. 7669A... -
Page 17: About
TSW-732 Setup screen. Save & Edit On the TSW-732 Setup screen, tap Save & Exit to save all settings, exit the setup screens, and return to the main project. TSW-732: 7˝ Room Scheduling Touch Screen • 13... - Page 18 Crestron Electronics, Inc. Supplemental Guide – DOC. 7669A 15 Volvo Drive Rockleigh, NJ 07647 (2040923) Tel: 888.CRESTRON 08.15 Fax: 201.767.7576 Specifications subject to www.crestron.com change without notice.