Table of Contents
Advertisement
Advertisement
Table of Contents

Related Manuals for Royal 220DX


Summary of Contents for Royal 220DX
- Page 1 220DX Operation Manual...
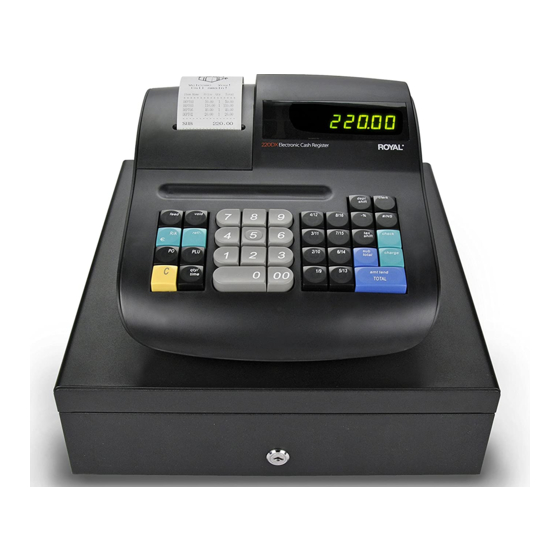
- Page 2 Royal ECR 220DX Operation Manual Introduction Thank you for choosing the Royal-220DX electronic cash register. Its functions are flexible and can preset a quality receipt for your clients, and get detailed reports for your accounts. Works well in retail and hospitality.
- Page 3 Royal ECR 220DX Operation Manual WARNING! In order to ensure years of trouble-free operation, the following points should be noted when handling the cash register. 1. Do not place the cash register where it will be subjected to direct sunlight, high humidity, near water or other liquids, or high temperature.
-
Page 4: Table Of Contents
Royal ECR 220DX Operation Manual CONTENTS MAIN FEATURES ................... 1 Hardware & Software Features ..............1 BEFORE USING ....................2 Model Selection ..................2 Key Layout ....................3 Keys Function .................... 3 Display ....................... 6 CLEAR MEMORY OPERATION..............7 Initial Clear ....................7 Clear the Reports Data................ - Page 5 Royal ECR 220DX Operation Manual Entering Starting Cash Amount (RA/PO)..........33 Department Sale Entries ................33 PLU Operation ..................34 Finalizing a Transaction................37 Split price operation ................. 38 Return Merchandise (RM) Operation............39 Refund Operation ..................40 8.10 Percentage (- %) OPERATION..............42 8.11...
-
Page 6: Main Features
1 MAIN FEATURES 1.1 Hardware & Software Features Standard Hardware Customer display screen 8 digits large size numeric yellow/blue LED Operator display screen 9 digits large size numeric yellow/blue LED Printer 58mm wide 1 station thermal printer Control lock 5- position control lock(P/R/X/Z/L) Keyboard 36 keys with rubber RS-232 Ports... -
Page 7: Before Using
2 BEFORE USING 2.1 Model Selection There are 5 modes: Program mode, Registration mode, X report mode, Z report mode and Lock mode. Each mode has a specific function: LOCK The machine is locked without responding to the key input. To exit this mode, just change the mode. -
Page 8: Key Layout
2.2 Key Layout The following is the standard keyboard layout, which was initially set at the factory Standard Keyboard Layout dept clerk shift feed void 8/16 4/12 #/NS Ref/- 7/15 3/11 check shift 2/10 6/14 charge total qty/ amt tend 5/13 time TOTAL... - Page 9 [#/NS](No Sale) key The key is used to open the cash drawer without recording a sale or as a reference number during a sale. [C] (CLEAR) key This key has two basic functions. One is to correct any numeric keys entry error or incorrect command entry;...
- Page 10 11) [PO](Paid Out) key This key is used when some amount of money is taken out from the register for reason other than a sale transaction. 12) [RA](Received On Account) key This key is used when some amount of money is received on account. 13) [RCPT/OFF](Receipt ON/OFF)key When this key is pressed once, the register will stop issuing receipts.
-
Page 11: Display
2.4 Display The Operator’s Display (front display) is located at the top of the register just above the keyboard. The rear display is a 9 digits display that allows your operator to monitor the transaction and view the sale total. The display has two types of display portions — numeric display and message descriptors (status lamps). -
Page 12: Clear Memory Operation
3 CLEAR MEMORY OPERATION 3.1 Initial Clear To Perform an All Clear: The first way: Switch the control lock to the Prog mode. Enter the number “951” on the numeric keypad. Press the [qty/time] key located on the default keyboard layout. The message “InIt SUrE”... -
Page 13: Clear The Reports Data
3.2 Clear the Reports Data Operator can clear the reports data with the following shortcut mode, no need taking the Z reports. Procedure: 1. Switch the control lock to Z mode 2. (A) [TOTAL] (SUrE) … a. press [subttl]to confirm b. -
Page 14: Clear The Plu Stock
Clear the PLU stock Condition: The PLU stock function is active. Switch the work mode to the Z mode (1) Clear designated PLU’s stock (0)[qty/time](PLU barcode)[PLU] by keyboard (0)[qty/time]Scan PLU barcode by Scanner (2) clear all PLU’s stock (0)[qty/time][PLU] Then the “SUrE” message will be displayed, to confirm, press [subttl] key, and otherwise press other function key. -
Page 15: Memory Allocation
4 MEMORY ALLOCATION Using this function, user can redefine the amount of department no. clerk no. table no.etc. After this operation, the ECR will do the all clear operation automatically, so it is better to print whole report before do it. Procedure: Switch the control lock to the Prog mode. -
Page 16: Working Type Choose
5 WORKING TYPE CHOOSE The machine has two working type, Retail Mode and Restaurant Mode. After all clear, the Retail Mode is default. Note: After do the ECR work type change, the following will do automatically: a. Clear all the report data, both daily and period to date b. -
Page 17: Changing To Retail Mode
* * * * * * * ** * * ** * * ** * * ** * * ** * Work mode RESTAURANT Department Num Clerk Num Table Num PLU Num Allocation is completed! * * * * * * * ** * * ** * * ** * * ** * * ** * 5.2 Changing to Retail Mode ECR automatically starts in Retail Mode after the initial clear procedure. -
Page 18: The Special Inputting
6 THE SPECIAL INPUTTING 6.1 Regarding Decimal Point Inputting The Decimal Point Position is set in the System Flag Option. The system default value is two digits decimal point. When the Decimal Point is decided,at the transaction inputting the amount cannot be entered with decimal. - Page 19 Characters Code Chart £ $ Ä Ö Ü ξ Ň ª ¥ Ⅱ ” & · Ⅲ , ’ < > → Θ ↑ ← ↓ Å Æ β € Note: 1. The default is Character Keyboard inputting. Press [ CODE] key once change to character code inputting mode.
- Page 20 [Sub Total] key: Accept the programmed characters. [TOTAL] key: Exit the character programming. [FONT] key: During entering the descriptors, press different times in this key can specifies that the current line you input to a double size character, or be able to combine Double &...
-
Page 21: Programming
7 PROGRAMMING Note: 1. All programming functions are completed in Prog mode. 2. (..)indicates the data are entered by numeric keys. [..] indicates it is a function key. 3. During the Programming, if there is no change to the current parameters, you can press key to skip. - Page 22 ★ FLAG: ABCD (Retail mode) Department status HDLO ② Department mode ① (High digit Lock Department Group 0:Normal(default) 0:Normal Limited 0-7) Max. 1:Negative 1:Single 99999.99 2:Gallonage ★ FLAG: ABCDE (Restaurant mode) Department status HDLO Department ② Send to KP or not Department mode ①...
- Page 23 ★ VAT NO:(VAT mode) Display VAT NO. Display: VAT1 VAT2 VAT3 VAT1 VAT2 VAT3 VAT4 VAT4 ★ (Price): The price display is as follows: 0.00 Price(1-9999999) Price flag ★ (Descriptor):The description display is as follows: The length of current description, Max 12 characters. Descriptor Flag See 6.2.
-
Page 24: Plu Preset Parameter
7.3 PLU Preset Parameter 7.3.1 PLU Attribute Preset (Bar code input) [PLU][subttl](Linked Dept No.) [subttl] (Price)[subttl] (Descriptor)[subttl] ( STC SEL AB ) [ subttl ] (Input Stock)[subttl] scan PLU(preset next PLU) Note: At this time, you can continue preset next PLU, or press [TOTAL] key for quit. After preset all the PLUs parameter you can press [check] Key for printing them. - Page 25 (Stock): Max 99999.999 Example: Bar code Linked DEPT Price Descriptor 6921669003002 2.40 pear (code: 25 24 93 45) “Prog” mode(6921669003002) [subttl](2) [subttl] (240)[subttl] (25 24 93 45)[subttl] ( 11 ) [ subttl ] (100)[subttl][TOTAL] Receipt format: – – – – – – – PLU attribute – – – – – – #6921669003002 pear Link:...
-
Page 26: System Option Preset
7.3.3 PLU Group Programming [0] [PLU] (PLU barcode)[Sub total][TOTAL]/[check] Repeat if needed There are total 10 groups and each group can include max. 50 PLUs. Using group you manage all PLUs and can take each group report to run your business. When you first preset the group, the display format is as follow: 0 0 0 0 The PLU barcode*... - Page 27 A:TERMINAL STATUS CODE-- Terminal Status 1 Terminal Status 2 Terminal Status 3 Terminal Status 4 Terminal Status 5 Terminal Status 6 Terminal Status 7 Machine Number Preset. Receipt Consecutive Number Preset High Amount Lock-out Preset (HALO) Total in Drawer Limit Graphic logo Selection Clerk/receipt ON/OFF key Selection (1) Terminal Status 1...
- Page 28 0 = the electronic journal function is not activated 1 = the electronic journal function is activated Default (2) Terminal Status 2 F 0 2 - A: 0 = not allow direct tender Default 1 = allow direct tender ...
- Page 29 0 = The #/No Sale message is not printed when perform No Sale operation. 1 = The #/No Sale message is printed when perform No Sale Default operation. (4) Terminal Status 4 F 04 - 0 = VAT Version. A:...
- Page 30 E: Print font control in P mode 0 = normal font Default 1 = compress font (6) Terminal Status 6 F 0 6- B C D 0 = Don’t print date on receipt. A: 1 = Print date on receipt. Default 0 = Don’t print time on receipt.
- Page 31 (8) Machine Number Preset. F 08 - XXXX: indicates the number input by user. Total 4 digits. Initial Set is “0001” (9) Receipt Consecutive Number Preset. F 09 - XXXXXX: indicates the number input by user. Total 6 digits. Initial Set is “000001” (10) High Amount Lock-out Preset The High Amount Lock-Out limits of the transaction.
-
Page 32: Tax/Vat Rate Preset
P mode(901)[qty/time] Printing all the Logos (13) Clerk key function F 1 3 - A : 0 = RCPT/OFF key 1 = [clerk] key Default 7.5 TAX/VAT Rate Preset Each either TAX or VAT method depending on the Bit A for Terminal Status 4 programming. - Page 33 Breakpoints Tax Amount Difference Hi Lim 0.00 0.00 0.01-0.10 0.10 Irregular Part 0.01 0.11-0.25 0.15 0.02 0.26-0.46 0.21 0.03 0.47-0.67 0.21 0.04 0.68-0.88 0.21 Regular Part 0.05 0.89-1.10 0.22 0.06 1.11-1.25 0.15 0.07 1.26-1.46 0.21 0.08 1.47-1.67 0.21 0.09 1.68-1.88 0.21 0.10 1.89-2.10...
-
Page 34: Welcome Message Preset
7.6 Welcome Message Preset The Welcome Message can only be set with maximum 6 lines. Each line has maximum characters as follows: Normal 32 characters Double Width 16 characters Double Height 32 characters Double width and height. 16 characters Skip next line (A)... -
Page 35: Check/Charge Key Programming
7.9 Check/Charge Key Programming [check]/[charge](DESCRIPTOR)[subttl][TOTAL] Repeat if needed Descriptor: Max.12 Characters. See 6.2. Descriptors Inputting section for the detail info. 7.10 - % Preset [ - %] ( AB)[subttl] (RATE)[subttl] (DESCRIPTOR)[subttl] [TOTAL]/[check] AB: status B: Status 2 A: Status 1 Code No. -
Page 36: Printout The System Information Operation
7.12 Printout the System Information Operation Users can printout the system information by follow operation: (10000) [qty/time] The receipt result should be as follow: System Information ITEM TOTAL USED - - - - - - - - - - - - - - - - - - - - - - - - - - - - - - - PLU (RETAIL) 60000 DEPT... -
Page 37: Retail Mode
8 RETAIL MODE 8.1 Clerk Assign 8.1.1 Sign On/Off a Clerk After initial clear procedure, Clerk Function is not activated. User can set the bit C of Terminal Status 3 to "1", the clerk function will be active. “Reg” mode (0) [TOTAL] Sign Off Operation: Sign on Operation: “Reg”... -
Page 38: Entering Starting Cash Amount (Ra/Po)
8.3 Entering Starting Cash Amount (RA/PO) If you want to prepare the starting cash amount in drawer when the day begins, enter the amount of the cash, and use RA function. To withdraw cash, use PO function. The amount can be check, charge and misc function other than cash. RA (received on account) entry Procedure: Reg mode... -
Page 39: Plu Operation
Example: Manual price entry. (100) [DEPT1] Item Name Price Qty Total [DEPT1] Repeat DEPT1 = = = = = = = = = = = = = = = = = = = = = Preset Price2.00. [DEPT2] DEPT01 1.00 1.00... - Page 40 1. Bar Coded PLUs which are PLUs programmed to be registered by a scanner. 2. Input PLU barcode then press [PLU] key. 8.5.1 Preset PLU Entry Bar Code PLUs: Using the scanner to scan the PLU directly or enter the barcode and then press [PLU] key [PLU] ...
- Page 41 Operation: (Enter or scan the bar code) (Error: new PLU) [C] (Enter the price) [subttl] Discard the PLU sale: (Enter or scan the bar code)(Error: new PLU)[C][C] Zero price: If there is the PLU but no price. Operation: (Enter or scan the bar code)(Error: no price)[C](Enter the price) [SUBTLL] Discard the PLU sale: (Enter or scan the bar code)(Error: no price)[C][C]...
-
Page 42: Finalizing A Transaction
8.6 Finalizing a Transaction Press the [subttl] key during a transaction when you want to know the sale subttl including tax. Then the sale total will appear in the display. Up to four different ways may be used to close a transaction. 8.6.1 Direct Closing Press the [TOTAL] directly Registrations –... -
Page 43: Split Price Operation
8.6.3 Charge Tendering After [subttl], press the [charge] key directly. It will finalize transaction. Example: Manual price entry (150) [DEPT03] Item Name Price Total Manual price entry = = = = = = = = = = = = = = = = = = = = = (350) [DEPT04] DEPT03... -
Page 44: Return Merchandise (Rm) Operation
Example: purchased quantity [qty/time] Item Name Price Total Second quantity = = = = = = = = = = = = = = = = = = = = = [qty/time] Whole package Price DEPT01 10.00 4.00 (10.00) [DEPT2]... -
Page 45: Refund Operation
The RM operation can also be used to the multiplication operation Procedure: [ref/-] (Qty) [qty/time] (PLU barcode) [PLU]… (Qty) [qty/time] Scan a PLU barcode… (Qty) [qty/time] [DEPT x] … (Qty) [qty/time](Price) [DEPT x] … Example: DEPT1 price is 1.00, PLU01 price is 10.00 [ref/-] Item Name... - Page 46 Example: [ref/-] key has already preset price 1.00 [DEPT2] Preset price2.00 Item Name Price Total Used preset price 1.00 [ref/-] = = = = = = = = = = = = = = = = = = = = = (400) [DEPT4] DEPT02...
-
Page 47: Percentage (- %) Operation
Example: (200) [DEPT2] Item Name Price Total (400) [DEPT4] = = = = = = = = = = = = = = = = = = = = = (600) [DEPT6] DEPT02 2.00 2.00 [subttl] DEPT04 4.00 4.00 (200) [ref/-] ... -
Page 48: Void Operation
Example: Manual price entry (500) [DEPT1] Item Name Price Total (600) [DEPT2] = = = = = = = = = = = = = = = = = = = = = [subttl] DEPT01 5.00 5.00 (10) Manually enter 10%. [-%] DEPT02 6.00... - Page 49 8.11.2 Void Previously Items Operation VOID department (Price) [VOID][DEPTx] Void DEPT manual price entries Void preset DEPT (0) [VOID][DEPTx] VOID PLU By scanner (0) [VOID] scans barcode Example: Manual price entry (500) [DEPT1] Item Name Price Total [DEPT2] Preset price 2.00 = = = = = = = = = = = = = = = = = = = = = ...
-
Page 50: Single Item Department Or Plu Entry
8.12 Single Item Department or PLU Entry Single item operation finalizes a transaction without tendering key entry. The transaction is not finalized until you press a normal department or PLU key before single item department or PLU entry. Example: DEPT5 is a single item. (500) [DEPT5] ... - Page 51 2. Tax Shift –For Tax Version This operation is only used for TAX version. The tax status is changed by TAX SHIFT key. Exempting item tax from a taxable item using tax shift key Before a taxable item entry, to exempt tax, press 0+ [tax shift] will be exempt item tax from a taxable item.
- Page 52 Changing item tax status from a taxable item using tax shift key If one item has already been programmed with tax2, before registering the item: a. To press [1] [tax shift] key, this item will be taxable with tax1. b.
-
Page 53: Reprint The Last Receipt
Note: Please note the TAX SHIFT‘s status, is used when necessary. 3. Exempting total tax for the transaction. Before payment, press [subttl] key, then press [0][tax shift](display [SURE]for the exempt tax operation)[sub total],after this operation, it will only do the payment. For example, DEPT 1 is linked Tax1, DEPT2 is Linked Tax2.Tax1 rate is 10.000%, Tax2 rate is 20.000%. -
Page 54: Calculator Function
2. Non- Add Number When any code number is to be recorded for future reference, such as a check no, customer no, etc. A Non-add Number Print function is used. Operation: [#NS] Code Number Max.9 digits (0-9) (Decimal Point is not allowed) Example: [#NS] ※... -
Page 55: Receipt On/Off
8.17 Receipt ON/OFF There are 2 ways for this operation 1. The first way Use the [RCPT /OFF] key, it can act on any mode; user also can press it at any moment except during the transaction and programming the descriptors. Set the Bit A to “0”... -
Page 56: Restaurant Mode
9 RESTAURANT MODE The operation of changing to the Restaurant Mode, see 5.Working Type Choice section. 9.1 Major Features The special RESTAURANT mode provides: Maximum 40 open tables 70 simultaneously open items for an open table. 9.2 Table Preset Note: The function is only for Restaurant Mode. -
Page 57: Reg Mode Operation
9.3 REG Mode Operation Most transaction operations are the same as the Retail Mode; the following only explains the special operation for the Restaurant Mode. 9.3.1 Open a Table and Suspend the Table Opening a table is a procedure by which we keep an open account for a customer – table until the customers asks to pay for the account. -
Page 58: Active Table Report
Active Table Report 9.4.1 All Active Table X mode(22) [TOTAL] Example: ---- Active table sales report ---- X mode Cnt: (22) [TOTAL] Item Name Cnt/Qty Amount count Qty: quantity = = = = = = = = = = = = = = = = = Table 001 Table1 Item quantity and 36.00... - Page 59 Example: View table 66 sale amount ---- Table individual report ---- X mode Amount Cnt: (66) [DEPT 8/16] Item Name Cnt/Qty count Qty: quantity [TOTAL] = = = = = = = = = = = = = = = = = = = = = 158.31 Table66 sale count Coffee Total count...
-
Page 60: Training Mode
10 TRAINING MODE The register provides a training mode for new clerks. After entering the training mode, a clerk can operate the same transaction entries as those in the REG mode. 1. To change from Normal Operation mode to the Training mode Condition: There are no active tables open. -
Page 61: Communications
11 COMMUNICATIONS 11.1 Serial Port Overview Two RS-232 serial ports are supported. PORT1 ( DB9 male) and PORT2 ( RJ-11 ). Before using an external device, user must choose a port and preset the proper attribute for it. The preset process as follows: ... -
Page 62: Communications With Pc
11.2 Communications with PC Note: When ECR communications with PC, The ECR PORT1‘s Baud Rate and PC COM’s Baud Rate which used for connecting the ECR must preset the same value. 57600 is our suggestion. Uses the standard serial cables connect to the ECR’s PORT and then connect the other end of the cable to your PC’s COM1 or COM2 port. - Page 63 The RP can printout items conditions: 1. Select the fit PORT and corresponding baud rate. 2. Select the type of printer as receipt printer. 3. Select the printer model that user is using. 4. Only at the sales mode. Kitchen Printer: Only prints the quantity of the transactions items.
-
Page 64: Electronic Journal
12 ELECTRONIC JOURNAL The Electronic Journal means Sales Journal. Content has 60000 lines. There will give an alarm to user to do clear journal operation if up to 57000 lines. User can select clear journal operation by manual or automatic. Details see the bit D of the terminal status 1. And you can send all electronic journal information to PC by register link software. -
Page 65: Reporting And Balancing
13 REPORTING AND BALANCING 13.1 Taking Read and Reset Reports 1. The Concepts of Various Types of Reports ◆ Daily Read Report: It can be issued at any time and any number of times during the day. It reads the sale recorded always from the Reset Report was issued last time to the moment. - Page 66 2. Taking Reports Operation TYPE MODE Daily Report Periodical Report REPORT Sales Report (1)[TOTAL] (11)[TOTAL] Department (2)[TOTAL] (12)[TOTAL] Report Department Group (3)[TOTAL][ Input Group (13)[TOTAL][Input Group Report No.][subttl] No.][subttl] Clerk Report (4) [TOTAL] (14) [TOTAL] PLU Report [PLU] or (5) [TOTAL] Hourly Report (7)[TOTAL] Table Report...
-
Page 67: Report Sample Format (Vat Version)
13.2 Report Sample Format (TAX Version) Sales Read or Reset Report (Daily or Periodical) ---- <Z> Daily Report ----- Z number 0003 → Item Name Cnt/Qty Amount Cnt: count Qty: quantity = = = = = = = = = = = = = = = = →... - Page 68 → TransVOID 9.66 Transaction all VOID item count and amount No sale count ------------------------------------------------ ****** Received on account******* → Cash 205.50 Cash amount for RA → Check1 550.00 Check1 count and amount for RA → Charge1 50.00 Charge1 count and amount for RA ------------------------------------------------ *********** Paid Out *********** →...
- Page 69 Department Group Report (Daily or Periodical) Example: group1 -<X>Daily Dept group Report-- ** GROUP 1 ** GROUP Number Item Name Cnt/Qty Amount → Cnt: count Qty: quantity = = = = = = = = = = = = = = = DEPT01 772.11 →...
- Page 70 PLU Group Report (Daily or Periodical) Example Group 01: -<X>Daily PLU group Report- ** GROUP01 ** → Item Name Cnt/Qty Amount Cnt: count Qty: quantity = = = = = = = = = = = = = = = PLU#0001 1000000000001 →...
- Page 71 Hourly Report ----<Z> Hourly sales Report---- Time zone (08-09), Hourly sales count 3, → 08 09 7.55 hourly sales total 7.55 0910 22.00 1617 814.66 1718 526.57 ------------------------------------------------ Total count Total amount 2070.57 → 01-01-2011 Saturday 16:05 Current time PLU Stock Report ----- <X>...
- Page 72 PLU Stock Report (By DEPT) ---- ---- <X> PLU stock report (By DEPT) ** DEPT01** → PLU0001 PLU0001 remain stock PLU0002 PLU0046 PLU0876 PLU1001 ------------------------------------------------ → Monday 16:20 Current time 01-01-2007...
-
Page 73: Other Functions
14 OTHER FUNCTIONS 14.1 Power Failure If a power failure occurs during a transaction, all sales data stored in the memory are automatically protected. When power on, it will print a line message “Power down, continue…” at the time, user only can continue the sale or finalize without doing other operation, otherwise the buzzer will alarm. -
Page 74: Error Code Corresponding List Table
15 ERROR CODE CORRESPONDING LIST TABLE Error Error Description Code The input digit is too big or too small E001 ------- E002 ------- The input digits format illegal E003 ------- Press the illegal key E004 ------- The input digits length is too long E005 ------- Not allow pressed Decimal Point key in this case... - Page 75 E031 ------- The programming operation no end E032 ------- Nonexistent the hard control lock Doing partial electronic journal, the end condition input is smaller E033 ------- than the start condition input E034 ------- Did not found the item with the condition in partial electronic journal E035 ------- Max 16 operable departments...
- Page 76 E108 ------- The sum of the two tables buffer length is too big E109 ------- Nonexistent opened table This logical number is exist in other table E110 ------- E111 ------- Logical number can not be zero E112 ------- The logical number not exist E115 ------- Not in Restaurant Mode...
- Page 77 Date: Jan. 2013 Ver.: 001...