Table of Contents
Advertisement
Advertisement
Table of Contents

Related Manuals for Royal 110dx


Summary of Contents for Royal 110dx
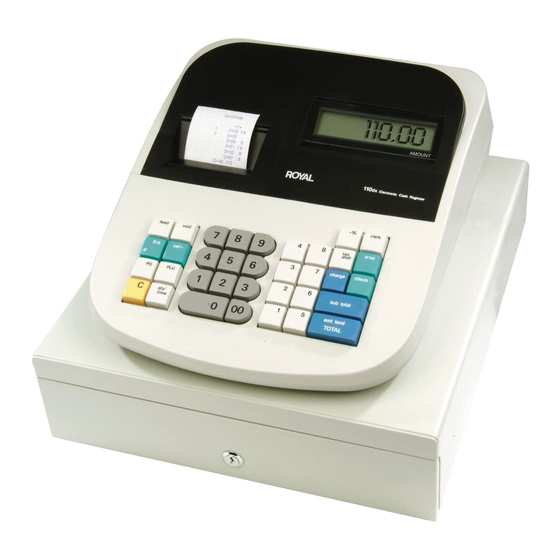
- Page 1 110dx Electronic Cash Register Instruction Manual 8 Departments 99 PLU’s (Price Look-Ups) 4 Clerks Automatic Tax Computation – with 4 Tax Tables (Including Add-on (USA), Canadian and VAT) Programmable Electronic Cash Register Easy Set-Up Instructions QUICK START GUIDE on Page 12...
- Page 2 Periodic management reporting systems • Battery back-up / memory protection of records PLUS... The ROYAL CONSUMER PRODUCT SUPPORT HOTLINE gives you the opportunity to call for operational assistance and problem resolution. Please call toll-free: Customer Service: 1-800-272-6229 (USA) 1-888-266-9380 (in Canada)
-
Page 3: Table Of Contents
TABLE OF CONTENTS __________________________________________________________ INTRODUCING ...YOUR CASH REGISTER ..................... 1 STANDARD ACCESSORIES ........................1 USING THIS MANUAL........................... 1 SPECIFICATIONS, SAFETY AND FCC ......................2 BATTERY SAFETY AND MAINTAINING THE CASH REGISTER..............3 KEYPAD FUNCTIONS.............................4-5 SET-UP ................................5 THE CONTROL SWITCH ........................... 6 CASH DRAWER ............................ - Page 4 TABLE OF CONTENTS __________________________________________________________ TRANSACTION EXAMPLES FOR OPERATING THE CASH REGISTER ........... 28 SAMPLE RECEIPT ............................28 TRANSACTION SYMBOLS......................... 28 STANDARD TRANSACTIONS........................29 Registering a Single Item Sale and Tendering Change ................ 29 Registering a Sale with Multiple Items ....................29 Registering a Charge Transaction......................
-
Page 5: Introducing
Transaction examples provide steps for key operations. Sample receipts are included. Royal's helpful "Quick Start" program (Page 12) will provide you with the most basic programming options for the operation of your new cash register. Many users find "Quick Start"... -
Page 6: Specifications, Safety And Fcc
Total: 9-digit display with 7 numeric-digits input and readout. PRINTER: Impact, numeric only serial printer. INK SOURCE: Black or Purple Ink Roll, Model IR-40 (ROYAL brand part # 013109) PAPER SUPPLY: 57MM (2 1/4") Single-Ply, Bond Register Tape (ROYAL brand part # 013129) MEMORY PROTECTION: Approximately 30 days after power interruption 3 Size AA (1.5-Volt) Batteries (User installed. -
Page 7: Battery Safety And Maintaining The Cash Register
BATTERY SAFETY & MAINTAINING THE CASH REGISTER __________________________________________________________________ FEDERAL COMMUNICATIONS COMMISSION (FCC) RADIO FREQUENCY INTERFERENCE STATEMENT INFORMATION TO THE USER (continued) IN CANADA: This digital apparatus does not exceed the Class B limits for radio noise emissions from digital apparatuses set forth in the Radio Interference Regulations of the Canadian Department of Communications. -
Page 8: Keypad Functions
KEY PAD FUNCTIONS __________________________________________________________________ [ feed ] - Paper Feed Key - Advances the paper tape with no effect on register entries. [ void ] - Void/Error Correction - Used to correct an entry after it is printed or to void the previous entry. [ R/A ] - Received on Account Key - used to register any money received on account that is not part of a sale;... -
Page 9: Set-Up
KEY PAD FUNCTIONS and SET-UP __________________________________________________________________ Numeric Entry Keys – 11-key Numeric Key Pad, including keys [0] through [9] and double-zero [00]. 10. Department Keys - Used to select non-taxable and taxable sales at the pre-programmed tax rate. 11. [ clerk ] – Clerk Key - Used to identify associated transactions with a particular clerk/operator. Supports a clerk identification number for each operator and an optional security code. -
Page 10: The Control Switch
THE CONTROL SWITCH __________________________________________________________________ The Control Switch on the left-edge of the cash register inside the printer compartment must be properly positioned to operate or program the cash register. The Control Switch is also used to access the “X” and “Z” modes to print or reset the totals for the management reports. -
Page 11: The Display
THE DISPLAY __________________________________________________________________ READING THE DISPLAY The display shows entry amounts and related transaction information through use of numbers and special symbols. The display window is situated so that the operator can view the operations. The display is read from left to right as follows. Department - The first 2-digits display the department number associated for the specific entry. -
Page 12: Error Conditions
ERROR CONDITIONS __________________________________________________________________ THE ERROR ALARM SYSTEM The error alarm system warns of an operator error (usually pressing the wrong key for a specific type of entry) or an error when setting a program option. When the error beep tone sounds, an "E" appears in the display and the keypad locks. An error tone will also occur if the user tries to use a cash register function that has not been programmed yet. -
Page 13: The Battery Back-Up System
THE BACK-UP BATTERY SYSTEM __________________________________________________________________ During cash register operations, all transaction data for the management report is stored in the register's memory. The memory also holds all the optional program information, such as PLU and department information programmed in the register. The memory is protected by 3 standard "AA"(1.5-Volt) batteries that should be installed before programming the register. -
Page 14: Loading Paper
(inside). NOTE: It is recommended to use ROYAL brand 2 1/4" (57mm) bond paper, which will help prevent dust deposits on the printer mechanism caused by inexpensive paper rolls. Replace with standard bond quality calculator paper. ROYAL Part #013129. -
Page 15: Installing The Ink Roll
The ink roll is NOT designed to be re-inked. Under no circumstances should this be done or permanent damage to your cash register print head will result. Such damage WILL NOT be covered under Royal's warranty. REPLACE YOUR INK ROLL FOLLOWING THE INSTRUCTIONS BELOW: 1. -
Page 16: Quick Start
QUICK START __________________________________________________________________ Quick Start is a brief but complete start-up program that allows you to "get started" immediately on the most basic aspects of operating your new cash register. Follow these directions precisely: 1. Read and follow the set-up instructions on pages 1-11. Reminder: It is important that the register is plugged in before the back-up batteries are installed. -
Page 17: Quick Start
Once you have mastered the Quick Start operations, you may want to take advantage of other valuable register functions such as Percent Discount Rate, Price Look-Ups (PLU’s) and Security Codes. If you have questions regarding Quick Start or any other aspects of the machine operation, call Royal Customer Service, toll-free, at 1-800-272-6229. HELPFUL HINTS FOR A SUCCESSFUL START-UP GENERAL INFORMATION It is not necessary to re-program the entire machine to make a single program change or correction. -
Page 18: Setting Programs
SETTING PROGRAMS __________________________________________________________________ This cash register allows you to set programs customized to your individual business requirements. These programs include: - Setting the Time and Date - Setting the Clerk System - Setting a Percent Discount (-%) Rate - Assigning a Department Tax Status and Pre-set Department prices - Setting a Tax Rate - Creating Price Look-Ups (PLU’s) - Assigning a Security Code for the Program and "Z"... -
Page 19: Date And Time
SETTING THE DATE AND TIME __________________________________________________________________ Set the date option to print the current date at the top of each receipt, journal record or management report. Set the time option to print the current time at the bottom of the receipt. The time will automatically print and display in military – time (24-hour format). -
Page 20: Setting The Clerk System
SETTING THE CLERK SYSTEM __________________________________________________________________ The Clerk System allows transactions to be associated with a clerk #. Optionally, there can be a security code assigned to each clerk number. The benefit of the system is that sales can be tracked by clerk; a Clerk Report captures the number of transactions and sales for each Clerk number. -
Page 21: Percent Discount (-%)
PERCENT DISCOUNT (-%) __________________________________________________________________ Setting this option automatically calculates the preset rate each time the [-%] key is pressed. This percentage rate can be discounted from an individual item or an entire transaction. You can override the program rate by manually entering a different rate. (See TRANSACTION EXAMPLES FOR OPERATING THE CASH REGISTER). -
Page 22: Assigning A Department Tax Status & Multiple Item Sale
DEPARTMENT TAX STATUS __________________________________________________________________ Each department can represent a category of merchandise. For example, Department 1 can represent sales of beverages; Department 2, sandwiches; Department 3, candy; etc. Each department can be programmed as taxable or non-taxable. If desired, each department can also be programmed with a preset price, although that preset price can be overridden at any time. Each PLU programmed in the register must then be assigned to a Department, which will define the tax rate to be charge for that PLU. -
Page 23: Department Programming
DEPARTMENT PROGRAMMING (Continued) __________________________________________________________________ ZERO PRICE ENTRY SETTING This procedure allows a price of zero ($0.00) to be entered for a department or PLU price during set-up programming. The default setting does not accept a "0" price. Enter the Program mode: Move the Control Switch to the "PRG" position. To allow zero price entry, type [8], then [1], followed by the [R/A] key. -
Page 24: Tax Rate
A tax table rate is based on an approved tax table chart issued by an individual state or local municipality. If programming by tax table rate, then please obtain a copy of the exact tax table from your state or local tax authority and then contact Royal Customer Service for more information. -
Page 25: Programming The Tax Rate
TAX RATE (Continued) __________________________________________________________________ TO PROGRAM A FIXED TAX RATE: (Recommended For Most Applications) "PRG" mode + Tax 1 - 4 + [Tax Shift] + Tax Rate (4 Digit #) + [amt tend/TOTAL] Note: You can program 1 Tax Rate or up to 4 Tax Rates. Remember, when you determine a department's tax status, at that point, you identify the tax rate you want for that department. - Page 26 __________________________________________________________________ PAGE INTENTIONALLY LEFT BLANK...
-
Page 27: Price Look Ups
PRICE LOOK UP (PLU) __________________________________________________________________ The Price Look Up system allows for fast, accurate entry of an item and automatically tracks the number of items sold. Each PLU number is associated to one item or sku. There are 2 methods in programming PLU’s. One method is to set the PLU number with a preset price known as a Fixed PLU Price. -
Page 28: Plu Confirmation Report
PLU CONFIRMATION REPORT __________________________________________________________________ To print a PLU Confirmation Report If needed, enter the program mode: Move the Control Switch to the "PRG" position. Press the [PLU] key. All the PLU’s that have been programmed will print. See sample printout below. Continue with other programming or move the Control Switch out of the "PRG"... -
Page 29: Security Code And Decimal Point
SETTING THE SECURITY CODE AND DECIMAL POINT __________________________________________________________________ SECURITY CODE: For Program and Management Report Protection Management Reports can be printed in either the "X" or "Z" positions on the Control Switch. When printed in the "Z" position, transaction totals are reset to zero. Assigning a security code can prevent accidental reset of transaction totals. Once assigned, the "Z"... - Page 30 __________________________________________________________________ PAGE INTENTIONALLY LEFT BLANK...
-
Page 31: Summary Of Programs
SUMMARY OF PROGRAMS __________________________________________________________________ Listed below is a recap of all the basic programs set according to some of the examples used previously in the manual: Program/Example Type/Press Sample Receipt SET CONTROL SWITCH TO "PRG" SETTING 2-DECIMAL PLACES (12) + [R/A] ALLOWING ZERO DOLLAR PRICE ENTRIES (81) + [R/A] SET DATE: MARCH 7, 2006 (030706) + [#/NS]... -
Page 32: Transaction Examples For Operating The Cash Register
TRANSACTION EXAMPLES __________________________________________________________________ The examples in this section show how to complete different types of transactions. Sample receipts are included that reflect some of the program examples used previously in setting THE REGISTER PROGRAMS. SAMPLE RECEIPT The following sample shows where general transaction information is printed on a receipt and what program options must be set to print the appropriate options. -
Page 33: Standard Transactions
TRANSACTION EXAMPLES __________________________________________________________________ STANDARD TRANSACTIONS Registering a Single Item Sale and Tendering Change NOTE: Up to 7 digits can be used for the amount of the entry. Example: Register a $1.00 item in Department 1 (linked to Tax Rate #1 with 5.5% tax). Subtotal transaction and compute change for $5.00 cash tendered. -
Page 34: Using Split Tendering
TRANSACTION EXAMPLES __________________________________________________________________ Using Split Tendering Example: Register a $10.00 item and a $15.00 item to Department 2; split the total between $20.00 cash and $5.00 charge. [1000] + [DEPARTMENT 2] 2 10·00 2 15·00 [1500] + [DEPARTMENT 2] 25·00 25.00 20·00 [subtotal]... -
Page 35: Percent Discount (-%) Transactions
TRANSACTION EXAMPLES __________________________________________________________________ PERCENT DISCOUNT (-%) TRANSACTIONS Custom Discounting (-%) Individual Items / Overriding the Preset Discount (-%): NOTE: Up to four digits can be used for the discount percentage (0-99.99%). You MUST enter two digits after the decimal position. Example: Register a 10% discount to a transaction. -
Page 36: Plu Codes
TRANSACTION EXAMPLES __________________________________________________________________ PLU CODES Note: PLU Codes must be programmed to use this feature. See The Register Programs to assign PLU information. Using a Fixed PLU Price: Example: Register PLU #1 programmed at the preset price of $1.50: [1] + [PLU] 01 1·50 1·50 [subtotal]... -
Page 37: Voids
TRANSACTION EXAMPLES __________________________________________________________________ VOIDS AND REFUNDS Voiding the Previous Entry in the Middle of a Sale: Example: Void a $2.00 entry to Department 2 made in error. Then register a $3.00 item in Department 2. [200] + [DEPARTMENT 2] 2·00 [VOID] -2·00 3·00... -
Page 38: Refunds
TRANSACTION EXAMPLES __________________________________________________________________ REFUNDS Refund a Single Item: Example: Refund a $1.00 item in Department 1. [ref/-] -1·00 (100) + [DEPTARTMENT 1] -0·06 -1·06 -1·06 [amt tend/TOTAL] 15-31 024 Refund Multiple Items: Example: Refund a $1.00 item in Department 1 and a $2.00 item in Department 2. [ref/-] (100) + [DEPTARTMENT 1] -1·00... -
Page 39: Tax Override Transactions
TRANSACTION EXAMPLES __________________________________________________________________ TAX OVERRIDE TRANSACTIONS Exempting Tax on an Item: NOTE: Use this procedure to exempt an item from being taxed when registered to a taxable department. Example: Exempt tax from Tax Rate # 1 of a $2.00 item linked to Department 1 (preset at 5.5% fixed tax rate # 1). [1] (number representing the Tax Rate to be exempted) + [tax shift] [200] + [DEPARTMENT 1] 2·00... -
Page 40: Other Transactions
TRANSACTION EXAMPLES __________________________________________________________________ OTHER TRANSACTIONS Registering Money Received On Account: Example: Register $10.00 received on account. [1000] + [R/A] 10·00 15-46 030 Paying Money Out: Example: Pay out $5.00. -5·00 [500] + [PO] 15-46 031 Registering an Identification Number: NOTE: Up to 7 digits can be used for the identification number. This entry can be made prior to or after any operation. The # identification is not added to the management report or totals and is NOT retained in the memory of the cash register. -
Page 41: Management Reports
"X" AND "Z" SALES MANAGEMENT REPORTS __________________________________________________________________ Transaction data is maintained in the memory of the cash register as long as the battery back-up system is in effect. This data can be printed as a report for management review. The Management Report can be printed from either the "X" or the "Z" position on the Control Switch. "X"... -
Page 42: Sample Management Report
SAMPLE MANAGEMENT REPORT __________________________________________________________________ The Management Report provides the following information as shown in the sample below: ___________________________ DATE _____________ 03·10·06 X OR Z REPORT COUNTER __________________ 002 _______ REPORT TYPE (X OR Z) ACTIVITY COUNTER __________________ 005 10·00 TX _______ DEPARTMENT SALES TOTAL 38·00 2·35 7·89... -
Page 43: Balancing Formulas
BALANCING FORMULAS __________________________________________________________________ The following examples illustrate how totals are calculated for the management reports: System Balance: DEPARTMENT 1 DEPARTMENT 2 DEPARTMENT 3 DEPARTMENT 4 DEPARTMENT 5 DEPARTMENT 6 DEPARTMENT 7 DEPARTMENT 8 ( - ) MINUS TOTAL ( - ) -% TOTAL TAX TOTAL NET SALES NET SALES... -
Page 44: Plu And Clerk Reports
PLU AND CLERK REPORTS __________________________________________________________________ PLU Report PLU Reports can be taken in either the X or Z position. Remember, if the PLU Report is taken in the Z position, the total will be reset to zero. Move the Control Switch to the "X" or "Z" position as desired. Press the [PLU] key. -
Page 45: Troubleshooting (Full System Clear Procedure)
Plug the register back-in and replace the batteries. Turn the register “on” to the appropriate mode and reprogram the register. If you cannot resolve your difficulty using the previous four steps, feel free to call the Royal Customer Service at 1-800- 272-6229 (in Canada call 1-888-266-9380). -
Page 46: Tax System Preset
TAX SYSTEM PRESET __________________________________________________________________ In addition to the USA tax mode of ADD-ON TAX which is the standard factory setting for this register, two other tax systems are available as follows: Canadian Tax System - Special tax programming for the taxation system in Canada. VAT (Value Added Tax) - which means that the tax amount is included in the price of the item. -
Page 47: Vat Tax System
VAT TAX SYSTEM __________________________________________________________________ The VAT tax system, which stands for Value Added Tax, is most commonly used in Mexico and European Countries. With VAT tax, the tax amount is already included in the price of the item, yet the tax amount will also be printed as a separate item on the itemized receipt. -
Page 48: Canadian Tax System
CANADIAN TAX SYSTEM __________________________________________________________________ To choose the Canadian Tax System, please complete the following: Enter the Program Mode: Move the Control Switch to the "PRG" position. Type [3], type [1], then press the [R/A] key to set the register for Canadian Tax System. Program the Tax Rate as follows: TAX # + [tax shift] + { (NON-TAXABLE LIMIT PRICE)* + [ref/-] } + [TAX RATE] + [amt tend/TOTAL] Maximum 6 Digits... - Page 49 CANADIAN TAX SYSTEM __________________________________________________________________ CANADIAN TAX - METHOD 2 GST Tax: PST Tax: GST/PST Tax: Both 7% and 8% calculated as tax-on-tax (piggyback calculation) For the Canadian tax system of TAX-on-TAX: To Activate Tax-on-Tax: Type [5], type [1], then press the [R/A] key. To De-Activate Tax-on-Tax: Type [5], type [0], then press the [R/A] key.
-
Page 50: Accessories
Ink Rolls (2 per package) (model IR40) 013109 Single-Ply, Bond Paper (3-roll package) (2 1/4” wide (57mm)) 013129 Owner's Manual (Shipping & Handling is not required when ordering this item only) 110DXIM0906A CALL, toll-free, 1-888-261-4555 Or Visit our web site at www.royal.com . -
Page 51: Limited Warranty
Floor, in Somerset, NJ 08875 USA warrants that your NEW Royal Electronic Cash Register or Time Clock (“Product”) is free of defects of workmanship and materials. If there is a defect or malfunction of this Product, Royal will repair the Product free of charge as follows: PARTS: New or comparable rebuilt parts in exchange for defective parts for ONE YEAR from the date of purchase.