Table of Contents
Advertisement
Advertisement
Table of Contents

Related Manuals for Singer Serger 14J334


Summary of Contents for Singer Serger 14J334
- Page 1 MODEL 14J334 SINGER...
- Page 2 "IMPORTANT SAFETY INSTRUCTIONS" "When using an electrical appliance, basic safety precautions the following." "Read all instructions before using this sewing machine." DAN G ER To reduce the risk of electric shock: " 1. "This sewing machine should never be left unattended...
-
Page 3: Table Of Contents
TABLE OF CONTENTS 1. KNOWING YOUR MACHINE Identification chart ... Accessories ... Setting up your machine ... Lint tray ... Changing presser feet ... Changing needle, thread and fabric chart ... Preparation for threading... 2. STARTING TO SEW Threading your machine ... Testing stitch overlock stitches ... -
Page 4: Knowing Your Machine
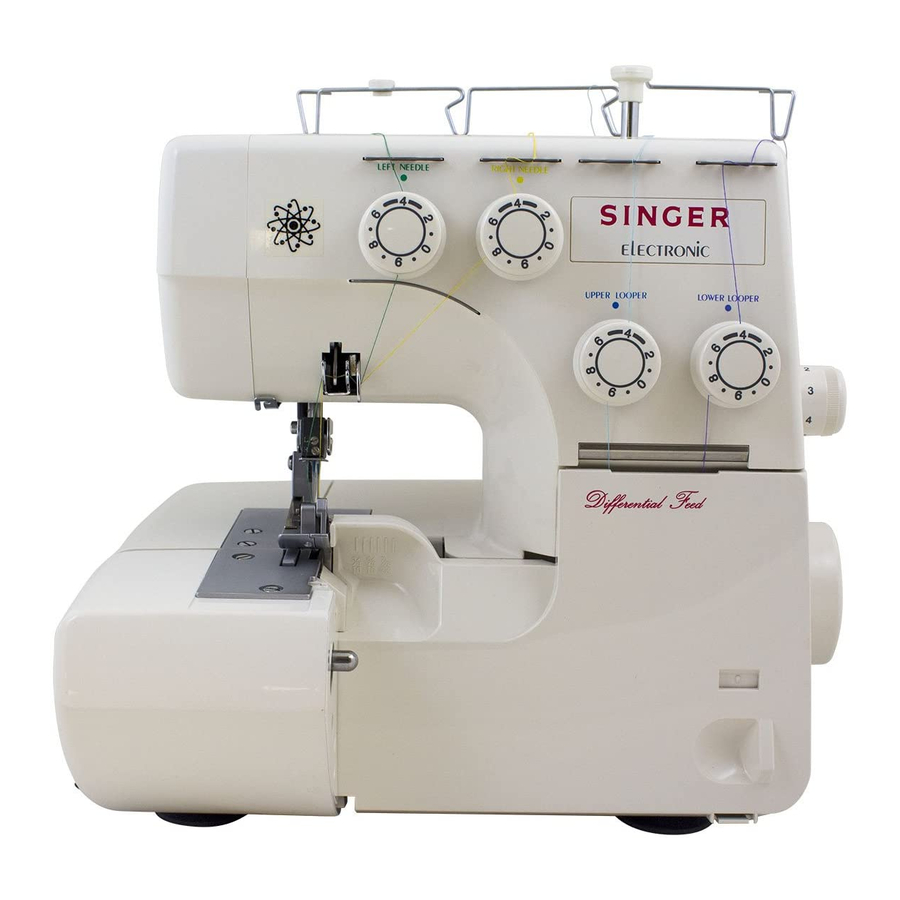
1. KNOWING YOUR MACHINE IDENTIFICATION CHART 1. Detachable Cord Guide used when Needle sewing corded overlock. the left and right needle 2. Foot Pressure Regulator - increases Upper decreases the pressure of the pressure Guides foot on the fabric. lower looper threads, Threading 3. - Page 5 WORKING TABLE OPENED TAPA FRONTAL ABIERTA , Ji, (/--\i OPENING FRONT COVER To open front cover (1), pull it to the right and down towards you. APERTURA DE LA TAPA FRONTAL Para abrir la tapa frontal (1), tirar de ella a la derecha y hacia usted.
-
Page 6: Accessories
6. Machine Cover- #J72543 Used to cover machine when not in use. 7. Needle Pack - Singer 2022 Includes an assortment for sewing various types of fabrics. 8. Oiler - J363398: Used to oil the machine. 9. Spool Nets (4) - #J63523... - Page 7 ® ®...
-
Page 8: Setting Up Your Machine
SETTING UP YOUR MACHINE 1. Wipe off excess oil in the needle plate and bed areas. 2, FOOT CONTROL Push foot control plug into connector socket, and connect the power line plug into power supply outlet, 3. POWER/LIGHT SWITCH Your machine will not operate unless the power/light switch... -
Page 9: Lint Tray
LINT TRAY To remove lint tray from storage position, pull it to the right and lift up and off. To set tray in working position (to collect waste material sewing), place pin (11 into upper hole(2) and latch notch into slot (4). To return to the storage positien, remove... -
Page 10: Changing Needle, Thread And Fabric Chart
CHANGING NEEDLE Raise needle bar to its highest point by turning hand wheel towards you, but leave presser foot down. Loosen needle clamp screw (1) to remove the needle, and place new needle with Flat Side Away From You, into the needle bar as far as it will go, and tighten screw. - Page 11 NEEDLE, THREAD FABRIC CHART Use SINGER Cat, No, 2022 Needles. FABRIC THREAD Light weight: Cotton Organdy, Lawn, Gingam COI-ION LINEN Heavy weight: Polyester No. 60 - 50 Oxford, Denim, Cotton Gabardine Cotton Polyester Light weight: No. 80 Tropical, Wool, Poplin...
-
Page 12: Preparation For Threading
PREPARATION FOR THREADING Your serger machine comes prethreaded. The instructions for rethreading your machine are on pages 12 - 14. If you do not wish to rethread at this time, please take a moment to review these pages and examine the proper threading technique... - Page 13 SPOOL CAPS FOR DOMESTIC TYPE SPOOLS The spool caps (1) hold smaller spools of thread in place. SPOOL DISC AND SPOOL HOLDERS CONE SPOOLS For large cone spools, place the spool discs (2) onto the spool pins (3) of the machine. Place the rubber spool...
-
Page 14: Starting To Sew
2. STARTING TO SEW 2. EMPEZAR THREADING YOUR MACHINE ENHEBRAR Wrong threading may cause skipped stitches, breaking threads, or other problems. sueltos, color coded diagram threading diagrama machine is located inside the front cover. The enhebrar frontal. lower looper is indicated in purple, the upper looper... - Page 15 THREADING UPPER LOOPER ENHEBRAR SUPERIOR Thread the upper looper as indicated 1 - 8. Enhebrar • Pass thread from back to front through 1-8, pole thread guide (1). • Pasar • Feed the thread through the pre-tension traves thread guide (2), as illustrated. •...
- Page 16 THREADING THE NEEDLES ENHEBRAR Thread the needles as indicated 1 - 8. Enhebrar • Pass each thread from back to front Pasar el hilo del parte posterior through pole thread guides (1), traves • Feed each thread through the appropriate Avanzar pro-tension thread...
-
Page 17: Testing Stitch Overlock Stitches
TESTING STITCH OVERLOCK STITCHES After threading is completed, use a scrap of fabric that you plan to sew and test sew in the following order: 1. Gently pulling all the threads to the left, lower the presser foot. Rotate the hand wheel towards you a few times to see if the lock stitches are properly... -
Page 18: Sugerencias De Ayuda
HELPFUL HINTS REPLACING THREAD SPOOLS When replacing thread spools, the following steps helpful for quick changeover. 1. Cut off existing threads near the spools (Fig. 1). Tie the cut ends to thread from new spools as illustrated (seamen's knot), (Fig. 2). Raise presser foot and turn all tension controls to 0. -
Page 19: Settingchart
SETTINGCHART Number of threads Overedge cutting width dial Needle to use Left an_ Right Stitch finger required Left needle thread Right needle thread Tension ^^-"^J Upper looper thread I Lower looper thread 2.5 - 3.5 Stitch length control Ref. No. Reference page Note: The above settings... - Page 20 TABLA DE FIJACION N_mero de hilo Dial de anchura de costura Izquierda y Needle to use Dedo de puntada requerido Hilo aguja izquierda Control de Hilo aguja derecha tensi6n Hilo ancora superior Hilo ancora inferior Control de Iongitud de puntada Nr, de ref.
-
Page 21: Three-Thread Overlock With One Needle
THREE-THREAD OVERLOCK SOBREHILADOS WITH ONE NEEDLE HILOS By threading the LEFT needle only a width of 6 Enhebrando mm will be produced and by threading producir& RIGHT needle only a width of 3,8 mm will be la aguja anchura produced. Guardar Please keep the unused... -
Page 22: Narrow And Rolled Hem, Picot Stitch
NARROW AND ROLLED HEM, PICOT STITCH Narrow (A) and rolled edge (B) is ideal for use on thin materials de chine, silk etc. Picot stitch (C) can be used when sewing on fine "scarflike" these hems, they are unsuitable for use on "hard or heavy" 1, Raise the presser foot. - Page 23 DOBLADILLADOS ENROLLADOS, ESTRECHOS Dobladillados enrollados (B) y estrechos(A) ideales tales come: cresp6n georgette, crespdn de chino, seda, etc. Adem&s puede realizar un pliegue de forro (C), particularmente materiales "deshilachables" finos. La realizacion de esos materiales "duros" o "pesados". 1. Levantar el prensatelas.
-
Page 24: Adjustingthread Tensions
ADJUSTINGTHREAD TENSIONS Turning tension dial to a higher number gives a tighter tension. Turning tension dial to a lower number gives thread tension. The higher the number, the tighter the tension. Test thread tensions on a scrap you plan to use, Increase tensio_ Decrease tension... - Page 25 AJUSTAR LAS TENSIONES DE LOS HILOS Girando el dial de tensi6n hacia el numero m&s alto cla una tensi6n del hilo mayor. Girando el dial de la tensi6n hacia nL_mero mas bajo nos da una tensi6n menor. El nL_mero mas alto, la mayor tensibn. Comprobar cada tensi6n...
-
Page 26: Adjusting Stitch Length, Adjusting Overedge Cutting Width, Stitch Finger (B)
AJUSTAR ADJUSTING STITCH LENGTH PUNTADA Turn the stitch length dial (1) to desired stitch length. Girar el dial obtener The higher the number, the longer the stitch. mayor, This dial can adjust the stitch length from 1 to puede 5 mm. AJUSTARLAANCHURA ADJUSTING OVEREDGE... -
Page 27: Differentialfeed
DIFFERENTIALFEED Differential feed is a system which "stretches" or "gathers" fabric when the amount of feed of front feed dog in relation the rear feed dog is changed. The differential feed has two independent feed dogs, one trent (A) and one rear (B). (Fig.l) Each feed an individual... -
Page 28: Differential Feed Applications
DIFFERENTIAL FEED APPLICATIONS Differential feed designed minimize puckering wavering. It is also very effective for gathering. Puckering Puckering tends to occur on woven or sheer fabrics. To obtain pucker-free seams, set the differential feed control dial at less than 1. Wavering Wavering tends to occur on knitted or stretchable... -
Page 29: Foot Pressure Regulator
FOOT PRESSURE REGULATOR Presser foot pressure has been correctly set at the factory, you do not need to adjust it for most of ordinary sewing. adjustment is necessary, turn the foot pressure regulator higher number to increase or to lower number to decrease pressure. -
Page 30: Basic Techniques
BASIC TECHNIQUES TURNING OUTSIDE CORNERS WITHOUT CUTTING THREADS 1. When reach the fabric edge, stop stitching with needle above the fabric. Raise the presser foot and gently pull on the thread chain just enough to clear the stitch finger. 3. Turn the fabric, lower the presser foot and begin stitching the new direction. -
Page 31: Corded Overlock
CORDED OVERLOCK Corded overlock can be used to strengthen shoulder, sleeve side seams when joining or making up knitted garments. decorative feature knitting yarn of contrasting colours to further enhance your garment• Your machine equipped with a presser foot which has been designed to feed your cord or yarn to the left of the safety stitch or to the right. -
Page 32: Decorative Effects
DECORATIVE EFFECTS In addition to normal overlocking which is fully described in this instruction book, your machine can also be used for a number of decorative applications such as decorative top-stitching, butted seams, pin-tucking or making lengths of decorative braid. See below. Decorative top-stitching - using three threads... -
Page 33: Caring For Your Machine
3. CARING FOR YOUR MACHINE REPLACING MOVING CUTTER Replace a moving cutter if it becomes blunt as follows. NOTE: You should not need to replace fixed cutter, which made of a special hard alloy material. FIRST REMOVE POWER PLUG FROM SUPPLY SOCKET- OUTLET•... -
Page 34: Cleaning And Oiling
CLEANING AND OILING LIMPIEZA Para To keep the machine running smoothly, keep it clean and lubricated at all times. suavemente, DISCONNECT MACHINE FROM POWER DESCONECTAR SUMtNISTRO SUPPLY REMOVING PLUG FROM FANDO SOCKET-OUTLET, 1. Open the front cover and working table. 1. -
Page 35: Checking Performance Problems
CHECKING PERFORMANCE PROBLEMS PROBLEM PROBABLE CAUSE Incorrect Thread Tension(s). Reset Thread Incorrect size Needle, Choose Irregular Thread Stitches Improper Threading. Re-thread Pulling Fabric. Do not pull Fabric; guide it gently, Loose Presser Foot, Reset Presser Foot. Pulling fabric. Do not pull Fabric; guide it gently. Breaking Incorrect size Needle, Choose correct size Needle for... -
Page 36: Optional Accessories
5. OPTIONAL ACCESSORIES BLIND HEM FOOT (o.s-#J50882)(1.0- #J50883) Blind hem feet are obtainable as an optional extra available in two sizes. 0.5 for fine-medium fabrics and 1.0 for medium/heavy fabrics. Fit the appropriate foot. Set the stitch length 4 - 5. Proceed as follows: 1. - Page 37 ELASTICATOR(#J50886) An elastic foot is available as an optional extra. This foot will guide your elastic and at the same time apply pressure to the elastic with specially designed tension controlled roller, allowing you to control the elasticity while sewing. 1.
- Page 38 PIPING FOOT (#J50884) Prepare a piece of ready-made piping (corded bias fold tape). Place folded piping between seam edges with fold extending beyond seam line toward garment. Pin or baste, and stitch the seam. (Fig. 1) Braid or ribbon may also be used, either flat or folded braid can be used in straight seams.
-
Page 39: Mm_Right Needle)
GATHERING/SHIRRING FOOT (#J50885) 1. Tension settings for gathering: Left needle Differential feed Right needle Stitch length Upper looper Lower looper 2. Replace regular presser foot with gathering foot. 3. Clip both fabric layers approximately 5/8"(1.5 cm.) and 1 1/2"(4 cm.) down. Lift front of presser foot to place fabric. - Page 40 NEEDLE THREADER (#J72850) ENHEBRADOR 1. Feed thread through thread 1. Avanzar guide of needle clamp as illustrated. hilo de grapa Raise presser foot. Raise needle bar to highest position, and pull prensatelas. the thread leaving about (10 cm) aguja clear. hilo.
- Page 41 ® ®...