
Related Manuals for Radio Shack HTX-200


Summary of Contents for Radio Shack HTX-200
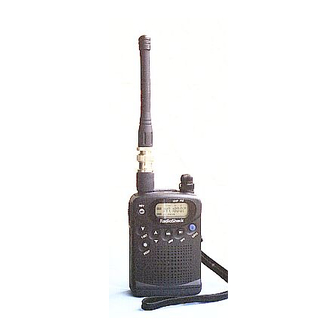
- Page 1 Cat. No. 19-1102 OWNER’S MANUAL Please read before using this equipment. HTX-200 Mini Handheld Two-Meter FM Amateur Transceiver...
- Page 2 FEATURES Your RadioShack HTX-200 Mini Handheld Two-Meter FM Ama- teur Transceiver is compact and lightweight, making it easy to carry almost anywhere. The crystal controlled circuitry provides accurate and stable frequency selection, making it an ideal choice for your amateur communications needs.
- Page 3 Paging Tones— you can set the radio to play a short, selectable paging tone when it transmits, and sound the same tone when it receives a signal. Signal Strength Indicator — a graduated bar shows the relative strength of the received signal. Time-Out Timer —...
-
Page 4: Fcc Information
MANUAL CONVENTIONS Your transceiver’s buttons perform multiple functions. The abbre- viation or symbol for a function is printed on, below, or above each button. To activate certain transceiver features, you must press FUNC (function) and another button at the same time. Those key com- bination instructions are printed as the first button name, +, then the second button name. -
Page 5: Table Of Contents
Attaching the Wrist Strap ... 14 Connecting a Microphone/Speaker ... 14 Using the Menus ... 16 Using the HTX-200’s Menus ... 16 A Quick Look at the Controls ... 19 A Quick Look at the Display ... 22 Operation ... 23 Turning on the HTX-200 ... - Page 6 Power Save ... 40 Time-Out Timer ... 40 Reducing Squelch Tail ... 41 Busy Channel Lockout ... 41 Troubleshooting ... 42 Care and Maintenance ... 43 Using the Keypad Diagnostic ... 44 Resetting the HTX-200 ... 44 Specifications ... 45...
-
Page 7: Introduction To Amateur Radio
INTRODUCTION TO AMATEUR RADIO Your transceiver is the perfect first radio for anyone entering the exciting world of amateur radio, as well as a great additional transceiver for the experienced amateur radio operator. Your transceiver opens a door for you to the world from almost any- where! All you need is an Amateur Radio Operator’s License (Technician Class or higher) issued by the Federal Communica- tions Commission (FCC). - Page 8 Volunteer Examiner Team. Contact the ARRL for a schedule of exam op- portunities in your area. The Technician Class license lets you use the HTX-200 to com- municate directly with other operators, and use repeaters for dis- tant communication.
-
Page 9: Preparation
PREPARATION POWER SOURCES You can operate your transceiver from any of three power sourc- • internal batteries • AC power (using an optional power supply and DC adapter) • vehicle battery power (using an optional DC adapter) Using Internal Batteries Your transceiver can use two AA batteries (not supplied) for pow- er. -
Page 10: Testing Internal Batteries
4. Replace the cover and slide the cover. Testing Internal Batteries When you turn on the HTX-200, BAT appears briefly and the graduated bar (the signal strentgth meter) next to BAT indicates the battery strength. If the batteries are weak, the graduated bar shows less than 4 boxes. -
Page 11: Using Ac Power
USING AC POWER You can operate the HTX-200 from AC power using a regulated power supply capable of supplying 13.8 VDC at least 1A and a vehicle power adapter (see “Using Vehicle Battery Power” on Page 12). The supply should also have an accessory power socket into which the DC-to-DC power adapter fits. -
Page 12: Using Vehicle Battery Power
USING VEHICLE BATTERY POWER You can power the HTX-200 from a vehicle’s 12V power source (such as cigarette-lighter socket) using an 9-volt, 900 mA DC-to- DC power adapter and a size I Adaptaplug with TIP set to +. Both are available at your local RadioShack store. -
Page 13: Connecting The Antenna
. Turn it clockwise to remove it. Caution: Do not over-tighten the antenna Note: You can connect an external antenna to the HTX-200 using an SMA-to-BNC adapter. This adapter, as well as suitable anten- nas, are available through your local RadioShack store. -
Page 14: Attaching The Wrist Strap
ATTACHING THE WRIST STRAP To attach the supplied wrist strap to the top of the belt clip, thread the strap’s small loop through the opening in the top of the clip. Then insert the longer loop through the smaller loop and pull on the strap until the loop is tight. - Page 15 Caution: Use only microphone and speaker accessories that do not share a common ground for the speaker and the microphone. Doing otherwise might damage the transceiver. Note: Inserting a headset’s plug automatically disconnects the in- ternal speaker. You can also connect an optional mono earphone to the SPK jack.
-
Page 16: Using The Menus
USING THE MENUS USING THE HTX-200’S MENUS The HTX-200 provides two menus to access its features, the Main Menu and the Tone Set Menu. To see details about each operation, refer to the page number in the following chart. To access the Main Menu, hold down HTX-200. - Page 17 Main Menu ( ) = default Options (Off) Time out Timer 10 – 990 seconds (Off) Power Save 0.0 – 8.0 MHz in Repeater 100kHz steps. Offset (0.6) Setting setting Description Limits transmit time. Cycles power ( PS flashes) to the receiver section to conserve batteries.
- Page 18 The Tone Set Menu lets you set features that relate to sound and the CTCSS tones. To access these settings, turn on the HTX-200 then hold down FUNC and press T.SET . (The tone option ap- pears.) Press FUNC change the setting.
-
Page 19: A Quick Look At The Controls
A QUICK LOOK AT THE CONTROLS Most of the controls of the HTX-200 have multiple functions. Use the following chart to review the function of each control. Speaker Key/Control VOL/OFF VOL/OFF Microphone Use it to: Turn the radio on/off. Adjust the volume. - Page 20 Key/Control (T.SET) MO (REV) (BEEP) MR (MW) SC (RPT) Use it to: Change (decrease) the frequency by the value set for CS (see the first menu option on Page 16). Press to override squelch. Press and hold to cycle through rC , tC , rPt , and CS settings.
- Page 21 Key/Control C (LOCK) (Push To Talk) Use it to: Press once to display and switch to the cur- rent call frequency. Hold down to change the call frequency and associated parame- ters, such as repeater offset and CTCSS tones. Hold down to transmit. Press to store the set- tings.
-
Page 22: A Quick Look At The Display
A QUICK LOOK AT THE DISPLAY 1. F: appears when the FUNC key is pressed. 2. TX: appears when the radio is transmitting. 3. BUSY: appears when the radio receives a signal. 4. CALL: appears when tone squelch is on and the radio receives a matching tone. -
Page 23: Operation
TURNING ON THE HTX-200 To turn on the HTX-200, rotate clockwise until it clicks. VOL/OFF The HTX-200 sounds a brief melody if the key tone feature is en- abled. Then appears for about 2 seconds and the last HELLO used frequency appears. -
Page 24: Receiving Transmissions
• Volume, power, and squelch are combined in one control. The inner control is the outer control is • If the HTX-200 picks up unwanted, weak transmissions, rotate clockwise to prevent the squelch from opening for these transmissions. If you want to hear weak trans- missions, rotate you might hear hissing between transmissions. -
Page 25: Transmitting
Technician Class license issued by the FCC. Follow these steps to transmit. 1. Select the desired frequency using manual or direct entry. 2. Hold the HTX-200 about 3 inches from your mouth. 3. Hold down microphone. Note: If you try to transmit outside the transmit frequency... -
Page 26: Understanding Repeaters
– above the frequency indicates a negative offset. If nei- ther or – appears, the HTX-200 is set for simplex operation. -
Page 27: Setting The Repeater Offset Frequency
SETTING THE REPEATER OFFSET FREQUENCY The HTX-200’s default repeater offset is 600 kHz, which appears (MHz ). Follow these steps to change the offset. Note: This setting only affects the VFO mode. If you saved a fre- quency offset in a memory, that setting is not affected. -
Page 28: Setting The Repeater Offset Direction
(see “” on Page 31 and “Storing a Transmit/Receive Frequency” on Page 29). Otherwise, the setting reverts to its saved value the next time you turn on the HTX-200. REVERSING THE TRANSMIT AND RECEIVE FREQUENCIES... -
Page 29: Memory Operation
MEMORY OPERATION Your HTX-200 has 30 standard memory locations that you can use to store frequencies for quick access. For each memory loca- tion, you can also store other settings such as the repeater offset, CTCSS tones, and frequencies to pass or lock out during scan- ning. -
Page 30: Recalling Memories
RECALLING MEMORIES To recall saved memory settings, press press to select the desired memory location. Press again to return to the VFO mode. (See “Selecting Fre- quencies (Direct Tuning)” on Page 23.) CLEARING A SINGLE MEMORY Follow these steps to clear any single memory location. 1. -
Page 31: Using The Calling-Frequency Memory
4. Press to store the selected frequency in memory. 5. To enter a frequency offset for repeater operation, press . The HTX-200 displays the current offset for the FUNC+SC calling frequency. To select a new offset value, press . Select 0.0 Hz if you want to remove the offset. To store the setting, press 6. -
Page 32: Scanning Operation
Using Scan Delay If the HTX-200 stops on a signal during scanning, then that signal stops, the scan delay feature delays the continuation of scanning to allow time for the signal to restart. Access the Main Menu (see “Using the HTX-200’s Menus”... -
Page 33: Setting A Memory Location To Always Skip During Scanning
2. Repeatedly press location. 3. Press FUNC flash. 4. To set the HTX-200 to skip the memory location, press then press To include the displayed location during scanning, press SCSP oF 5. When you finish, press setting. -
Page 34: Temporarily Locking Out (Skipping) Locations During Memory Scanning
(skipping) that location from then on. Repeat this for each location you want to skip. To cancel the settings and have the HTX-200 include the skipped frequencies once again, turn the radio off then on again. -
Page 35: Continuous Tone Coded Squelch System Features
HTX- 200 in simplex operation. It also lets you match your radio to the subaudible tone frequency used by a local repeater. To enable the TX and RX tones for the HTX-200, follow these steps. 1. Press + . - Page 36 To select and store a CTCSS subaudible tone in a memory loca- tion, press (In the examples shown on the preceding page, memory location 2 is used.) Then follow the preceding Steps 1–5. Subaudible Tone Frequencies (Hz ) 67.0 69.3 71.9 74.4 77.0...
-
Page 37: Tone Paging
TONE PAGING You can set the HTX-200 to sound an alert tone when it receives a transmission that includes the currently set subaudible receive- tone (or any transmission, if the receive-tone or the tone feature is set to off). Turn off the radio, then press HTX-200 on again. -
Page 38: Other Special Features
OTHER SPECIAL FEATURES CHANGING THE TRANSMIT FREQUENCY RANGE You can change the standard transmit frequency range from 144–148 MHz to an extended range of 142–149.885 MHz. To set the transceiver to its extended range, turn off the transceiv- er, then hold down To return to the standard frequency range, turn off the transceiv- er, then hold down Note: Transmitting out of the normal band is allowed only for... -
Page 39: Turning The Key Tone On And Off
To change the frequency increment used during scanning and stepping to a frequency, use the Main Menu to access the CS op- tion setting (see “Using the HTX-200’s Menus” on Page 16). Then repeatedly press can change the frequency step to 5 kHz, 10 kHz, 12.5 kHz, 15 kHz, 20 kHz, 25 kHz, 50 kHz, or 1 MHz. -
Page 40: Power Save
Use the Main Menu (see “Using the HTX-200’s Menus” on Page 16) to set a value for the time-out timer. With tot and the current... -
Page 41: Reducing Squelch Tail
This causes the other radio to close the squelch before there is “dead air,” preventing the squelch tail. Use the Main Menu (see “Using the HTX-200’s Menus” on Page 16) to set the transmit delay option. Then, with t.dy and the cur- rent status displayed, press to turn this feature on or off. -
Page 42: Troubleshooting
The EPROM infor- mation needs to be reset. Remedies Remove the con- nected micro- phone and replace it, or use the internal micro- phone. Turn power off then on again. Reset the trans- ceiver. See “Resetting the HTX-200” on Page 44. -
Page 43: Care And Maintenance
CARE AND MAINTENANCE Your RadioShack HTX-200 Mini Handheld Two-Meter FM Am- ateur Transceiver is an example of superior design and crafts- manship. The following suggestions will help you care for your transceiver so you can enjoy it for years. Keep the transceiver dry. If it gets wet, wipe it dry immediately. -
Page 44: Using The Keypad Diagnostic
USING THE KEYPAD DIAGNOSTIC The HTX-200 has a built-in diagnostic program that lets you con- firm whether the keypad switches are functioning correctly. To use this diagnostic program, follow these steps. 1. Hold down 2. Press 3. Press . If the action is correct, 4. -
Page 45: Specifications
SPECIFICATIONS GENERAL Frequency: RX ... 136–174 MHz TX ... 144–148 MHz Extended Range ... 142–150 MHz Frequency Generation ... PLL Synthesizer Frequency Stability ... ± 5 ppm Operating Temperature ... 14° to 131° F (–10° to 55° C) Power Source ... DC 3.0V to 9V Modulation ... - Page 46 NOTES...
- Page 48 Limited One-Year Warranty This product is warranted by RadioShack against manufacturing defects in material and workmanship under normal use for one (1) year from the date of purchase from RadioShack company-owned stores and authorized Ra- dioShack franchisees and dealers. EXCEPT AS PROVIDED HEREIN, Ra- dioShack MAKES NO EXPRESS WARRANTIES AND ANY IMPLIED WARRANTIES, INCLUDING THOSE OF MERCHANTABILITY AND FIT- NESS FOR A PARTICULAR PURPOSE, ARE LIMITED IN DURATION TO...