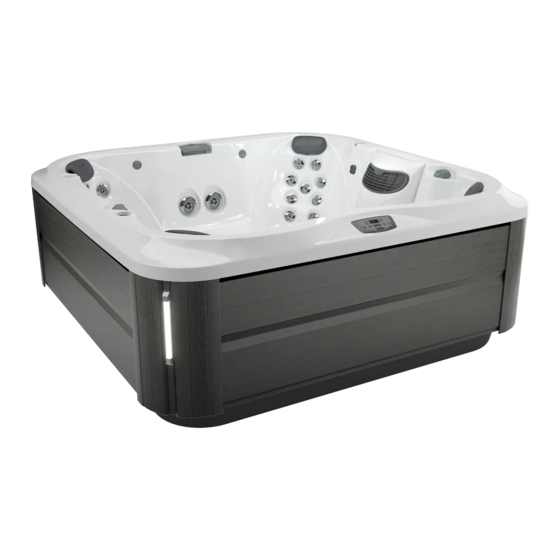
Jacuzzi J-375 Owner's Manual
J-300 collection
Hide thumbs
Also See for J-375:
- Installation manual and use & maintenance (112 pages) ,
- Installation, use & maintenance manual (76 pages) ,
- Owner's manual (68 pages)

Related Manuals for Jacuzzi J-375


Summary of Contents for Jacuzzi J-375
- Page 1 • J-385 ™ • J-375 ™ • J-365 ™ • J-355 ™ • J-345 ™ • J-335 ™ • J-325 ™ • J-315 ™ J-300 ™ COLLECTION OWNER’S MANUAL 2530-398D Rev A...
- Page 2 Attention New Spa Owner! Congratulations on the purchase of your new Jacuzzi ® spa! The following is a list of automated functions performed by your spa. These functions are listed below in an attempt to alleviate any operational concerns you may have during...
-
Page 3: Table Of Contents
10.8 Selecting Desired Massage Action ........30 10.9 Waterfall Feature ..............30 10.10 CLEARRAY on Demand ...........30 10.11 Air Controls ...............31 10.12 Optional BLUEWAVE® Spa Stereo System .....31 10.13. Blow-Out Cycle ..............31 10.14 Cleanup Cycle ..............31 ©Jacuzzi Hot Tubs. All Rights Reserved... - Page 4 J-300 11.0 Menu Features and Programming Instructions ...32 11.1 Primary Filtration Menu .............32 11.2 Secondary Filtration Menu ..........33 11.3 Programming the Heating Mode ........34 11.4 Programming the Change Filter Timer ......35 11.5 Programming the CLEARRAY Timer ........35 11.6 Programming the Water Refresh Timer ......36 11.7 Programming the Time .............36 11.8...
- Page 5 No Heat ................55 16.0 Circuit Board Diagrams ..........56 16.1 North American J-335, J-345, J-355, J-365, J-375 and J-385 Dedicated Power Models (60 Hz) ..56 16.2 North American J-315 and J-325 Convertible Power Models (For a 3-wire 120V 60 Hz connection) ....57 16.3 North American J-315 and J-325 Convertible Power Models (For a 4-wire 240V 60 Hz connection) ....58...
- Page 6 J-300...
-
Page 7: Important Spa Owner Information
Jacuzzi premium insulating cover in place at all times when the spa is not in use. Read and carefully follow the requirements for your spa’s support base found in Section 4.0 titled,... -
Page 8: Important Safety Instructions For All Spa Owners
J-300 Important Safety Instructions for all Spa Owners READ AND FOLLOW ALL INSTRUCTIONS CAREFULLY! This spa was manufactured to meet the standards and specifications outlined in the “Virginia Graeme Baker Pool and Spa Safety Act” (VGB Safety Act). When installing and using this spa, basic safety precautions should always be followed, including: DANGER: RISK OF SEVERE INJURY OR DROWNING! - Page 9 J-300 • A grounding wire connector is provided on this unit to connect a minimum No. 8 AWG (8.4 mm²) solid copper conductor between this unit and any metal equipment, metal enclosures of electrical equipment, metal water pipe, or conduit within 5 feet (1.5m) of the unit.
- Page 10 J-300 WARNING: RISK OF SEVERE INJURY OR DEATH! • Since excessive water temperatures have a high potential for causing fetal damage during the early months of pregnancy, if pregnant or possibly pregnant, consult your physician before using a spa. • Pregnant or possibly pregnant women should limit spa water temperatures to 100°F (38°C).
- Page 11 J-300 WARNING: In addition to maintenance of filters and water chemistry, proper ventilation is recommended to reduce the risk of contracting a waterborne illness (e.g. an infection, bacteria or virus) and/or respiratory ailments that could be present in the air or water. Consult a licensed architect or building contractor to determine your specific needs if installing your hot tub indoors.
-
Page 12: Entrapment Risk
J-300 Entrapment Risk The Consumer Products Safety Commission/USA has reported that users of pools and spas have become entrapped (stuck) to drain and/or suction fittings causing death, drowning, or serious injury (see diagram below). This spa was manufactured to meet the standards and specifica- tions outlined in the “Virginia Graeme Baker Pool and Spa Safety Act”... -
Page 13: Hyperthermia
A Warning Sign is provided in your warranty packet. Please install at a location near your spa, where it is visible to users of the spa. For additional or replacement Warning Signs please contact your local Jacuzzi dealer and reference item number #6530-082. -
Page 14: Important Additional Csa Safety Instructions (Canada Only)
No. 6 AWG (10 mm 5. SAVE THESE INSTRUCTIONS. General Electrical Safety Instructions Your new Jacuzzi spa is equipped with a “state-of-the-art” equipment system. It contains the most advanced safety and self-protective equipment in the industry. Nonetheless, this spa must be installed properly to ensure dependable usage. -
Page 15: Choosing A Location
J-300 Choosing A Location IMPORTANT: Because of the combined weight of the spa, water and users, it is extremely important that the base upon which the spa rests be smooth, flat, level and capable of uniformly supporting this weight, without shifting or settling, for the entire time the spa is in place. -
Page 16: Outdoor Location
J-300 Outdoor Location In selecting the ideal outdoor location for your spa, we suggest that you take into consideration: • The proximity to changing area and shelter (especially in colder weather). • The pathway to and from your spa (this should be free of debris so that dirt and leaves are not easily tracked into the spa). -
Page 17: Location For The Optional Prolink™ Remote Monitoring System
J-300 • Proper Drainage: It is extremely important to have in place measures to sufficiently handle excessive water spillage. Be sure the flooring in which the spa rests on has adequate drainage and can handle the entire contents of the spa. Be sure to make provisions for ceilings and other structures that may be below the spas installation. -
Page 18: General Electrical Safety Instructions
Please contact your dealer or local building department should you have any questions regarding your installation. Proper grounding is extremely important. Jacuzzi spas are equipped with a current collector system. A pressure wire connector is provided on the surface of the control box, located outside the equipment door (Figure... -
Page 19: Power Requirements
Note: Refer to pages 56-60 for circuit board configuration details or contact your authorized Jacuzzi dealer. North American J-335, J-345, J-355, J-365, J-375 and J-385 Models (60 Hz) 240V/40A* 240V/50A**... - Page 20 J-300 Export Models (50 Hz) Service Single Breaker Single Breaker Service 1 Service 1 (including (including Heater)* Heater)** Voltage: 230 VAC 230 VAC Max. Current Draw: 1-Pump System 2-Pump System Wattage: 1-Pump System: 3.5 kW 5.1 kW 2-Pump System: 3.9 kW 6.7 kW Frequency: 50 Hz...
-
Page 21: Electrical Wiring Instructions
J-300 Electrical Wiring Instructions IMPORTANT NOTICE: The electrical wiring of this spa must meet the requirements of the National Electrical Code/USA (NEC) and any applicable state or local codes. The electrical circuit must be installed by a qualified electrician and approved by a local building/electrical inspection authority. - Page 22 J-300 8. The electrical supply for this product must include a suitably rated isolating switch and circuit breaker to comply with local electrical regulations. This RCD/GFCI circuit breaker must be installed at the power supply in the house electrical box. 9.
- Page 23 J-300 Figure B Control Box STEP LIGHT (OPTIONAL) F3 0.125A 240V 1. Main Terminal 2. Bonding Lug/Grounding Terminal 3. Power wires entrance (electrical fitting and conduit must be installed) Figure C Connections (North American 60 Hz 240 VAC Connection Models) STEP LIGHT (OPTIONAL) F3 0.125A 240V...
- Page 24 J-300 Figure D DANGER (North American 60 Hz RISK OF SHOCK OR ELECTROCUTION! 120/240 VAC Convertible Models) STEP LIGHT (OPTIONAL) F3 0.125A 240V Turn power off before servicing. This task should only be performed by a quali- fied technician. Wht Black Green Green 240 VAC 4-Wire connection 60 Hz...
- Page 25 J-300 Figure E (Export 50 Hz 230 VAC Connection*) Blu Brn Service 1 Brn (L1) (N1) (L1) Blu (N1) BREAKER TERMINAL CONNECTIONS L1 = All components Green Factory Default Service 1 (L2) (N2) Blu (N1) (N1) (L1) Brn (L1) Service 2 Brn (L2) Blu (N2) BREAKER TERMINAL...
-
Page 26: Spa Fill Up Procedure
Clear all debris from the spa. (Although the spa shell has been polished at the factory, you may want to treat it with a specially formulated spa cleaner.) Consult your authorized Jacuzzi dealer for additional information prior to filling spa. - Page 27 J-300 5. Add Start-Up Chemicals Add the spa water chemicals as recommended by your authorized Jacuzzi dealer. See “Water Quality Maintenance” (page 46) for general guidance. WARNING: RISK OF POISONING OR DEATH. Never leave chemicals opened and accessible to anyone. Use chemicals according to the vendors instructions.
- Page 28 Water Fill Volume by Model Spa Model Average Fill Volume* Sodium Dichlor J-385 500 Gal (1,893 L) 12.5 oz J-375 470 Gal (1,779 L) 11.75 oz J-365 440 Gal (1,666 L) 11.0 oz J-355 400 Gal (1,514 L) 10.0 oz...
- Page 29 Water that is too soft can be corrosive to metal components. 13. Consult your authorized Jacuzzi dealer for chemical recommenda- tions, then add chemicals to hot tub water to achieve a constant sanitizer reading within the levels recommended on the inside cover of this manual.
- Page 30 J-300 WARNING: RISK OF PERSONAL INJURY. • To decrease the risk of injury, entrapment or drowning, never leave your hot tub unattended for any reason, es- pecially if while the cover is open and accessible to small children and animals! •...
-
Page 31: Control Functions
J-300 Control Functions Control Panel A. CLEARRAY ( )Button: Manually activates the CLEARRAY system for a one- 2-Pump Control Panel Shown hour period. B. CLEARRAY Indicator: Lit when the CLEARRAY is on. C. Light On/Off ( ) Button Options: Turns waterfall light, footwell light, lighted cup holders and backlit pillows on in unison. -
Page 32: General Spa Features And Controls
J-300 General Spa Features And Controls J-385 model illustrated - Location of features varies by model. Specifications/features subject to change without notice. 12. PowerPro MX2 Jets Control Panel 13. PowerPro FX Large Rota- Toggle Air Controls tional Jets Filter/Skimmer Grill 14. -
Page 33: Operating Instructions
2. Control panel displays the controller and control panel software versions. 3. Control panel scrolls the message, “WELCOME TO JACUZZI.” 4. Control panel scrolls the message, “PLEASE REGISTER YOUR SPA AT WWW_JACUZZI_COM.”... -
Page 34: Completing Your Registration
J-300 Keep a record of your serial number and passcode for any future reference. Write that information below. Serial Number: Passcode: 10.2 Completing Your Registration Once the spa is registered online, you will continue the process at the spa control panel. You will need to enter the serial number and passcode given when you registered online. -
Page 35: Activate Jet Pumps
J-300 1. Press and hold then; 2. Press and hold the at the same time for 2 seconds. You will see the temperature change to 105°F (40.5°C) on the LCD display. Press to raise the temperature to 106°F (41°C) To Figure 10.3a lower the temperature, press 3. -
Page 36: Jets
J-300 10.7 Jets The water flow through individual jets in your spa can be adjusted or turned off by rotating the outside jet ring. Some jets offer an adjustable center nozzle that allows you to change the water discharge angle. Simply tilt the center nozzle in these jets to the desired angle to customize your personal massage. -
Page 37: Air Controls
Jacuzzi logo side down to open or press the opposite side of button to close. Note: To minimize heat loss, close all air controls (Jacuzzi logo up) when spa is not in use. Certain jets may draw air even though they are closed. -
Page 38: Menu Features And Programming Instructions
J-300 11.0 Menu Features and Programming Instructions Your spa is equipped with menus that allow you to program additional features. By continually pressing the Menu ( ) button you will cycle through the menus as follows (Figure 1): Current temperature (Main Menu) Primary Filtration (page 32) Secondary Filtration (page 33) Heat (page 34) -
Page 39: Secondary Filtration Menu
J-300 A. Programming the Primary Filtration Cycle To change the programmed Primary Filtration Cycle: Note: If no button is pressed within 5 seconds of each selec- tion the screen will revert back to the Main Menu and the current settings will remain active. -
Page 40: Programming The Heating Mode
11.3 Programming the Heating Mode Your Jacuzzi spa is equipped with 3 modes of heating. An automatic mode called “AUTO,” where the spa’s temperature is maintained at all times. An energy saving heating cycle called “ECO.” A mode that will only activate the heater during the daytime called “DAY”... -
Page 41: Programming The Change Filter Timer
J-300 11.4 Programming the Change Filter Timer A programmable filter timer can be set to remind you when to clean or replace the filters. • The default setting is for 180 days. • The timer range is from OFF to 180 days, in increments of 10 days. Note: It is not recommended that this feature be turned OFF. -
Page 42: Programming The Water Refresh Timer
J-300 11.6 Programming the Water Refresh Timer A programmable water refresh timer can be set to remind you when to when it is time to drain and refill your spa. • The default setting is for 180 days. • The timer range is from OFF to 180 days, in increments of 30 days. Note: It is not recommended that this feature be turned OFF. -
Page 43: Programming The Date
J-300 11.8 Programming the Date To program the date, follow the steps below: Note: If no button is pressed within 5 seconds of each selec- tion the screen will revert back to the Main Menu and the current settings will remain active. 1. -
Page 44: Programming The Lock Feature
J-300 11.11 Programming the Lock Feature You can prevent users from changing certain features of the spa. There are two lock modes to choice from: Note: If no button is pressed within 5 seconds of each selection the screen will revert back to the Main Menu and the current settings will remain active. -
Page 45: Spa Maintenance
Entrapment, page 6. 12.1 Cleaning The Filters Your Jacuzzi spa is equipped with a skimmer bag and two high performance pleated filter cartridges located under the filter cover. The circulation pump drawing water through the skimmer bag and filter cartridge filters fine debris. Large debris is filtered by jets pump 1 drawing... - Page 46 J-300 An optional chemical feeder is available through your authorized Jacuzzi dealer that installs under the filter cap (#2472-673). Always remove the chemical feeder cap and feeder (when used) during the filter cleaning process by turning the cap handle counterclockwise. Reinstall the cap and feeder back onto the filter cartridge after the filter cleaning process is complete.
- Page 47 J-300 Trapped Bubbles Submerge both filter If used, remove the Lift unthreaded filter cartridges in spa. Tilt chemical feeder as cartridge from skimmer threaded end upward instructed prior to rinsing well. to remove trapped air the filter cartridges. bubbles, then keep Rinse debris from filter cartridges submerged to pleats on each cartridge...
-
Page 48: Draining And Refilling
Jacuzzi dealer. The average life expectancy of each filter is approximately two years with proper care and water quality maintenance. -
Page 49: Pillow Care
“skin” is attractive and durable. Regular monthly cleaning and conditioning (vinyl) is strongly recommended and may increase the longevity of your cover. Jacuzzi chemicals are for use in the U.S. only. A. To Clean and Condition the Cover 1. Use a garden hose to loosen debris and dirt. -
Page 50: Tool Free Access Door
5. Do not drag or use the flaps/skirt or the cover lock straps to remove the cover. 6. Use only recommended cover lift systems. 7. Use only chemicals and cleaners recommended by Jacuzzi. 8. Remember to keep spa covered when not in use. Maintaining proper water levels assures efficient operation and efficient electrical usage. -
Page 51: Maintaining The Synthetic Cabinet
12.8 Winterizing Your Jacuzzi spa is designed to automatically protect itself against freezing when operating properly. During periods of severe freezing temperatures, you should check periodically to be certain that the electrical supply to the spa has not been interrupted. In extreme bitter cold weather, less than 32°F (0°C), program the primary... -
Page 52: Restarting Your Spa In Cold Weather
11. Reinstall synthetic cabinet side panel and cover spa so that no casual moisture can enter into it. Consult your authorized Jacuzzi dealer if you have any questions regarding winter use or winterizing. 12.9... -
Page 53: Ph Control
Your authorized Jacuzzi dealer can advise you on the use of these additives. When adding spa shock (chlorine or non-chlorine) or pH balancing chemicals activate the jets pump(s) and leave the spa cover open for a minimum of 20 minutes. -
Page 54: Clearray® (Ultraviolet) Water Purification System
J-300 13.3 CLEARRAY® (Ultraviolet) Water Purification System CLEARRAY Water Purification System is exclusive DANGER! TURN POWER OFF! DO NOT LOOK AT LIT BULB. technology utilizing natural ultraviolet technology to SEVERE EYE DAMAGE OR BLINDNESS CAN OCCUR! eliminate waterborne bacteria, viruses, and algae in Power Lamp portable spas. -
Page 55: Clearray® Bulb Replacement And Quartz Tube Maintenance
J-300 13.4 CLEARRAY® Bulb Replacement and Quartz Tube Maintenance Important: It is MANDATORY that the UV bulb is replaced and the quartz tube be cleaned every 12 months to maintain optimum performance. Figure 1 #3 shown as reference only. It is attached to the #10 metal plate. DANGER: TURN THE SPA BREAKER TO THE OFF POSITION! - Page 56 J-300 Figure 4 Figure 5 Figure 6 Figure 3 3. Disconnect UV bulb socket (6) from the power cord socket (4), Figure 3. 4. Slowly remove the UV bulb (7) out of the quartz tube, Figure 4. 5. Remove the quartz seal compression nut (9) by turning it counterclockwise, Figure 5.
-
Page 57: Error Conditions/Error Messages
14.0 Error Conditions/Error Messages Your spa has a self-diagnostic control system. The system will automatically display the following if a problem is detected. Always insist on genuine Jacuzzi replacement parts. 14.1 Summer Logic When the actual spa water temperature reaches 2°F (1°C) above the set temperature, the spa goes into “summer logic.”... -
Page 58: Panel Displays Ice
“CHANGE CLEARRAY BULB” as long as the error exists. The countdown timer for the UV bulb needs to be reset (page 35). A new UV bulb can be purchased from a local Jacuzzi dealer. 14.7 Panel Displays Change Filter The filter change timer has expired. -
Page 59: Panel Displays Fl--1
The spa heater will deactivate and jets pump #1 may also deactivate. Contact your authorized Jacuzzi dealer or qualified service technician. The display will alternate between “FL--1,” scrolling message “FLOW ERROR OPEN”... -
Page 60: Troubleshooting Procedures
J-300 15.0 Troubleshooting Procedures In the event your Jacuzzi spa is not working the way it should, please first review all the installation and operating instructions in this manual and check for messages on the panel display. If you are still not satisfied it is working properly, please follow the appropriate troubleshooting instructions below. -
Page 61: Poor Jet Action
Nonetheless, we are always striving to improve the quality and features of our products. Your input as a Jacuzzi spa owner is a cherished part of this process. If you have any comments or suggestions, or if you wish to be informed on any new products for your spa, please write to us. -
Page 62: Circuit Board Diagrams
J-300 16.0 Circuit Board Diagrams 16.1 North American J-335, J-345, J-355, J-365, J-375 and J-385 Dedicated Power Models (60 Hz) This wiring diagram is used for all North American, 240V (60 Hz) dedicated power models. STEREO POWER SUPPLY (OPTIONAL) FLOW... -
Page 63: North American J-315 And J-325 Convertible Power Models (For A 3-Wire 120V 60 Hz Connection)
J-300 16.2 North American J-315 and J-325 Convertible Power Models (For a 3-wire 120V 60 Hz connection) This wiring diagram is used for all North American DANGER 120V 60 Hz convertible power models. RISK OF SHOCK OR ELECTROCUTION! Note: Refer to Section 16.3 for a 4-wire 240V connection. Turn power off before servicing. -
Page 64: North American J-315 And J-325 Convertible Power Models (For A 4-Wire 240V 60 Hz Connection)
J-300 16.3 North American J-315 and J-325 Convertible Power Models (For a 4-wire 240V 60 Hz connection) This wiring diagram is used for all North American 240V 60 Hz convertible power models. Dedicated 240V models must be permanently connected (hard-wired) to the power supply. Note: 240 VAC 4-wire connection enhances heater output from 1kW to 4kW. -
Page 65: Export J-335, J-345, J-355, J-365, J-375 And J-385 Models (50 Hz)
J-300 16.4 Export J-335, J-345, J-355, J-365, J-375 and J-385 Models (50 Hz) This wiring diagram is used for all Export 230 VAC 50 Hz spa models. STEREO POWER SUPPLY (OPTIONAL) WI-FI (OPTIONAL) LIGHTING EXPANSION FLOW CLEARRAY SENSOR CONTROL PANEL... -
Page 66: Export J-315 And J-325 Models (50 Hz)
J-300 16.5 Export J-315 and J-325 Models (50 Hz) This wiring diagram is used for all Export 230 VAC 50 Hz spa models. WI-FI (OPTIONAL) STEREO POWER SUPPLY (OPTIONAL) LIGHTING FLOW EXPANSION CLEARRAY SENSOR CONTROL PANEL ZONE 2 STEP LIGHT ZONE 1 (OPTIONAL) WATER... -
Page 67: Dip Switch Settings And Wiring
J-300 17.0 Dip Switch Settings and Wiring 17.1 Switch settings for Domestic 60Hz Models The dip switches are at the S1 location on the board. 240V DOMESTIC DIP SWITCH SETTINGS S1 LOCATION (factory default) DIP SWITCH NUMBER BREAKER OFF OFF OFF OFF OFF OFF OFF OFF OFF OFF 50A* OFF OFF ON OFF OFF OFF OFF OFF OFF OFF... -
Page 68: Switch Settings For Export 50Hz Models
J-300 17.2 Switch settings for Export 50Hz Models EXPORT DIP SWITCH SETTINGS S1 LOCATION 1x16A 2x16A 1x20A EXPORT DIP SWITCH SETTINGS S1 LOCATION 1x40A or 1x16A/1x20A 3x16A 1x32A 1x16A/1x32A DIP SWITCH NUMBER BREAKER 1x16A ON OFF OFF OFF OFF OFF OFF OFF OFF OFF 1x20A ON OFF OFF ON OFF OFF OFF OFF OFF... - Page 69 J-300 Single Service (default setting) 1x16A (J315/J325 Only) This setting will turn the heater off any time the jets pump is activated. 1x20A This setting will turn the heater off any time either one of the pumps are activated on two pump models. 1x32A This setting is for all two pump model spas.
-
Page 70: Single Service 50Hz Connection
J-300 17.3 Single Service 50Hz Connection Wiring for export models with a single service breaker. The jumper wiring is shown below. The included extra White wire (1*) must be installed. ALL MODELS Single Service Jumper Wiring Wire From L1 BRN N1 BLU G-GRN 30A (PMP 2) -
Page 71: Three Service 50Hz Connection
J-300 17.5 Three Service 50Hz Connection Wiring for export models with a three service breaker. The jumper wiring is shown below. ALL MODELS Three Service Jumper Wiring L3 BRN (except the J315 and J325) L1 BRN Wire From N1 BLU L2 BRN 30A (PMP 2) 30A (PMP 1) -
Page 72: Optional Bluewave® Spa Stereo System
J-300 18.0 Optional BLUEWAVE® Spa Stereo System To start enjoying your new stereo receiver, please read the following operation instructions in their entirety. 30-pin 3.5 mm cable Connector USB connector 1. Media Locker Handle Slide the handle to lock and unlock the protective door. 2. -
Page 73: Pairing The Remote And Stereo
J-300 WARNING: RISK OF ELECTRICAL SHOCK HAZARD EXISTS AND EQUIPMENT DAMAGE! Never install or remove electrical devices (e.g. Apple device/MP3/USB/AUX/ Bluetooth) while hands are wet or while sitting partially or fully immersed in the spa! CAUTION: Never leave electrical devices in the Media Locker when spa is not is use to prevent damage from outdoor ele- ments! Never spray Media Locker with a pressurized water hose for any reason! Damage to the device or spa stereo... - Page 74 J-300 2. Treble Setting: Press the Audio button 2 times to access the treble setting. The LCD display will change to “TRE 0,” Figure E Figure E. Press the Up button to adjust the setting to a maximum of +5. Press the Down button to adjust the setting down to -5.
-
Page 75: Wireless Remote Control Functions
J-300 18.3 Wireless Remote Control Functions A wireless radio frequency (RF) remote control is supplied on all spas with the optional audio system. This remote AUDIO MODE provides control of the radio and over some media device functions. A. External Media Device Playback DIR - REPEAT DIR +... -
Page 76: Electronic Device Connections And Functions
J-300 18.4 Electronic Device Connections and Functions IMPORTANT: • If stereo unit is “ON” (blue light is illuminated on the stereo power button) then press the power button on the remote once. • If stereo unit is in “Standby” (red light is illuminated on the stereo power button) then press the power button on the remote once to activate the remote (remote LCD display will read “NO LINK”). - Page 77 J-300 CAUTION: RISK OF ELECTRICAL SHOCK OR EQUIPMENT DAMAGE! Never install, remove or operate any electrical device (e.g. Apple device/MP3/USB/AUX/Bluetooth) while hands are wet or while sitting partially or fully immersed in the spa! Note: The DRM (Digital Rights Management) Files cannot be played on this deck.
-
Page 78: Wireless Remote Battery Replacement Procedure
J-300 F. Connecting Your Bluetooth Device: 1. Turn power “ON” to the stereo unit. 2. From your Bluetooth device, make sure the Bluetooth setting is “ON.” 3. Follow the pairing instructions for your Bluetooth device and connect to the “BLUEWAVE” device that appears on your screen. 4. -
Page 79: Bluewave® Spa Stereo System Specifications
J-300 5. Reinstall the battery cover, using the coin rotate the door CLOSED OPEN to the Close position (Figure E). Fig. E Note: Remote unit is water resistant not waterproof. Although it is designed for use while in the spa, it should never be left in the spa while the cover is on and spa is not in use. - Page 80 J-300 8. This unit should be subjected to periodic routine maintenance (for example, once every 3 months) to make sure that the unit is operating properly.