Regency C34 Classic Owners & Installation Manual
Direct vent freestanding gas stove
Hide thumbs
Also See for C34 Classic:
- Owners & installation manual (60 pages) ,
- Brochure & specs (8 pages) ,
- Owners & installation manual (48 pages)
Table of Contents
Advertisement
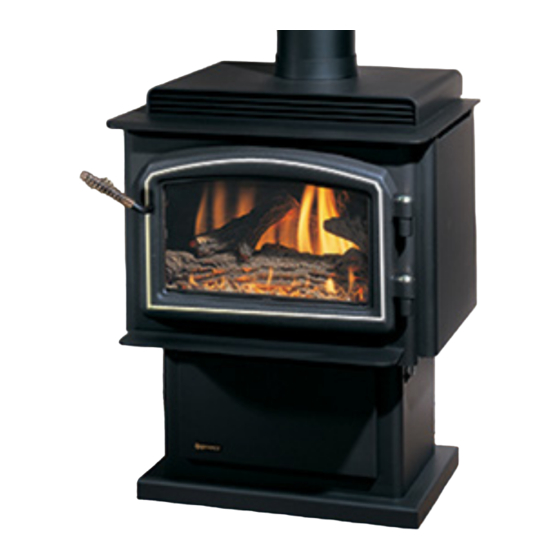
C34 Classic™ Direct Vent
Freestanding Gas Stove
MODELS:
C34-NG10 Natural Gas
WARNING
FIRE OR EXPLOSION HAZARD
Failure to follow safety warnings exactly could result in serious
injury, death, or property damage.
- Do not store or use gasoline or other flammable vapors and liquids in the vicinity of this or any other
appliance.
- WHAT TO DO IF YOU SMELL GAS
•
Do not try to light any appliance.
• Do not touch any electrical switch: do not use any phone in your building.
Leave the building immediately.
• Immediately call your gas supplier from a neighbour's phone. Follow the gas supplier's
instructions.
• If you cannot reach you gas supplier, call the fire department.
- Installation and service must be performed by a qualified installer, service agency or the gas supplier.
Tested by:
919-490c
FPI FIREPLACE PRODUCTS INTERNATIONAL LTD. 6988 Venture St., Delta, BC Canada, V4G 1H4
C34-LP10 Propane
Installer: Please complete the details on the back cover
and leave this manual with the homeowner.
Homeowner: Please keep these instructions for future reference.
Owners &
Installation Manual
C34 Video
09.16.16
Advertisement
Table of Contents

Related Manuals for Regency C34 Classic


Summary of Contents for Regency C34 Classic
- Page 1 C34 Classic™ Direct Vent Owners & Freestanding Gas Stove Installation Manual C34 Video MODELS: C34-NG10 Natural Gas C34-LP10 Propane WARNING FIRE OR EXPLOSION HAZARD Failure to follow safety warnings exactly could result in serious injury, death, or property damage. - Do not store or use gasoline or other flammable vapors and liquids in the vicinity of this or any other appliance.
- Page 2 REGENCY Classic Direct Vent Freestanding Gas Stove To the New Owner: Congratulations! You are the owner of a state-of-the-art Gas Stove by Fireplace Products International Ltd. The Regency Gas Series ® ment now to acquaint yourself with these instructions and the many features of your CLASSIC Direct Vent Freestanding Gas Stove.
- Page 3 INFORMATION FOR MOBILE/MANUFACTURED HOMES AFTER FIRST SALE This Regency ® This appliance installation must comply with the manufacturer's installation instructions and local codes, if any. In the absence of local codes follow the This Regency ® This Regency ® to secure the unit.
- Page 4 Regency CLASSIC™ C34-10 Direct Vent Freestanding Gas Stove ®...
-
Page 5: Table Of Contents
Door and Glass Frame ..........30 Safety screen installation / removal ......31 Door Handle ..............31 Remote Control Installation .........31 Optional Wall Thermostat ...........31 Final Check ..............31 Wiring Diagram ............32 Pilot Adjustment ............33 Aeration Adjustment ............33 Regency CLASSIC™ C34-10 Direct Vent Freestanding Gas Stove ®... - Page 6 This is a copy of the label that accompanies NOTE: Regency units are constantly being ® each CLASSIC Direct Vent Freestanding Gas Stove. We have printed a copy of the contents here for your review. The safety label is located the correct one.
- Page 7 (e) A copy of all installation instructions for all Product Approved side wall horizontally vented gas fueled equipm ent, all venting instructions, all parts lists for venting instructions, and/or all venting design instructions shall remain with the appliance or equipment at the completion of the installation. Regency CLASSIC™ C34-10 Direct Vent Freestanding Gas Stove ®...
-
Page 8: For Your Safety
IF THE BARRIER BECOMES DAMAGED, SURFACE TEMPERATURES, ESPE- THE BARRIER SHALL BE REPLACED CIALLY THE FIREPLACE GLASS, AND WITH THE MANUFACTURER'S BARRIER SHOULD STAY AWAY TO AVOID BURNS FOR THIS APPLIANCE. OR CLOTHING IGNITION. Regency CLASSIC™ C34-10 Direct Vent Freestanding Gas Stove ®... -
Page 9: Important Message
SHUT OFF THE MANUAL GAS VALVE TO THE APPLIANCE BEFORE SHUT- TING OFF THE ELECTRICAL SUPPLY. - WARNING - fornia to cause cancer, birth defects or other reproductive harm. nance of this appliance. Regency CLASSIC™ C34-10 Direct Vent Freestanding Gas Stove ®... -
Page 10: Installation Checklist
Log Installation b. Door and Glass Frame d. Safety Screen top of unit. MANUFACTURED e. Remote Control f. Wall Thermostat MOBILE HOME ADDITIONAL Back wall REQUIREMENTS Side wall sections. 10 | Regency CLASSIC™ C34-10 Direct Vent Freestanding Gas Stove ®... -
Page 11: Optional Fan Installation
5. Place the fan assembly partially in door cover plate hole. See Diagram 4. 6. Attach the 2 ground wires (green) to the ground lug as per Diagram 4. Diagram 7 919-512a 09.16.16 Regency CLASSIC™ C34-10 Direct Vent Freestanding Gas Stove ®... - Page 12 (Diagram 5). 7. Turn fan 90 degrees. (Diagram 5). (Pedestal units only). 8. Disconnect the green ground wires to the grounding lug. Remove fan from stove. (Diagram 3) 09.16.16 919-512a 12 | Regency CLASSIC™ C34-10 Direct Vent Freestanding Gas Stove ®...
-
Page 13: Pedestal Assembly
Reinstall bolts. leg, then slide the bottom shield in between the leg and the base of the stove. Tighten the bolts. 3. Push the Regency logo into the two holes in the front bottom left corner ® of the pedestal cover plate. -
Page 14: Venting Introduction
The location of the termination cap must conform SAFETY PRECAUTIONS FOR THE INSTALLER 1. Wear gloves and safety glasses for protection. or on roof tops. and ceilings. 14 | Regency CLASSIC™ C34-10 Direct Vent Freestanding Gas Stove ®... -
Page 15: Exterior Vent Terminal Locations
* Clearance in accordance with local installation codes and the requirements of the gas supplier 3 feet (91cm) within a height of 15 feet (4.5m) above the meter / regulator assembly 3 feet (91cm) above - if within 10 feet (3m) horizontally Regency CLASSIC™ C34-10 Direct Vent Freestanding Gas Stove ®... -
Page 16: 4" X 6-5/8" Rigid Pipe Cross Reference Chart
SV4BF TM-4CS Trim Plate-Black 4DT-TP 4DFPB 4DcP SV4LA TM-4TP Regency Fireplace Products . 6988 Venture St. . Delta, BC . Canada . V4G 1H4 . 604-946-5155 . www.regency-fi re.com 16 | Regency CLASSIC™ C34-10 Direct Vent Freestanding Gas Stove ®... - Page 17 Never allow the vent to run downward - this could cause high temperatures and may present a possible fi re hazard. Regency Fireplace Products . 6988 Venture St. . Delta, BC . Canada . V4G 1H4 . 604-946-5155 . www.regency-fi re.com Regency CLASSIC™...
-
Page 18: Rigid Pipe Venting Systems
Temp, Ameri Vent Direct venting and Security Secure Vent systems. When using Rigid Vent other than used to secure rigid pipe to unit. The FPI AstroCap Direct Vent, Ameri- ® ® 18 | Regency CLASSIC™ C34-10 Direct Vent Freestanding Gas Stove ®... -
Page 19: Venting Arrangements
Propane and Natural Gas: Residential, Manufactured and Mobile Homes Installations use Vent Restrictor Position "R" (Right) NOTE: See "Vent Restrictor Position" section for installation instructions for the Vent Restrictor Position. Venting Arrangements Examples: Regency CLASSIC™ C34-10 Direct Vent Freestanding Gas Stove ®... - Page 20 Option V V + V1 pipe length is 30 feet with min. Please note min. 1 foot between 90 elbows is required. Lengths do not include elbow indicated. 20 | Regency CLASSIC™ C34-10 Direct Vent Freestanding Gas Stove ®...
-
Page 21: Dv Stove Horizontal Vent Kit
IMPORTANT: Note: if the centerline cannot be tion area after snow falls, and clear to Regency CLASSIC™ C34-10 Direct Vent Freestanding Gas Stove ®... - Page 22 Mill-Pac. 11. Slide the 90 to be drilled through the wall thimble on all 4 corners. 22 | Regency CLASSIC™ C34-10 Direct Vent Freestanding Gas Stove ®...
-
Page 23: Dura-Vent Termination Kit
In the event that you are missing any part, contact your dealer. for your particular installation. See List" section. The FPI AstroCap tems as well as Simpson Dura-Vent ® Security Secure Vent ® of Simpson Dura-Vent Co. Inc. Regency CLASSIC™ C34-10 Direct Vent Freestanding Gas Stove ®... -
Page 24: Dura-Vent Horizontal Installations
Riser Vent, see Diagram 3a. Follow the same installa- tion procedures as used for standard Diagram 1 ported every three feet. Wall straps are available for this purpose. 24 | Regency CLASSIC™ C34-10 Direct Vent Freestanding Gas Stove ®... -
Page 25: Vertical Termination
See diagram 6. Diagram 8 drop a plumb bob from the roof to the hole previously drilled in bows, and possible separation. Wall will penetrate the roof. Determine if ceiling Regency CLASSIC™ C34-10 Direct Vent Freestanding Gas Stove ®... -
Page 26: Cathedral Ceilings
2. Place the support in the opening. Lower it to the correct height as determined by the table and diagram below. 26 | Regency CLASSIC™ C34-10 Direct Vent Freestanding Gas Stove ®... -
Page 27: Direct Vent System
Retro Connector are attached to the appliance is then connected to the chimney Diagram 4 adjustable length section. Diagram 5 condition exists. Do not operate the appliance Diagram 1 Regency CLASSIC™ C34-10 Direct Vent Freestanding Gas Stove ®... -
Page 28: System Data
28 | Regency CLASSIC™ C34-10 Direct Vent Freestanding Gas Stove ®... - Page 29 6. Inlet Pressure Tap 2. Install the replacement battery into the compartment. 9. Alternative TC Connection Point NOTE: need to be replaced annually. Pedestal base shown Regency CLASSIC™ C34-10 Direct Vent Freestanding Gas Stove ®...
-
Page 30: Log Installation
Do not force into position. turn the unit on as per lighting instructions 5. Place the rear log on the rear log support pins the log down onto the pins. See diagram 3. 30 | Regency ® CLASSIC™ C34-10 Direct Vent Freestanding Gas Stove... -
Page 31: Safety Screen Installation / Removal
A wall thermostat may be installed if desired. length of the rod. Connect the wires as per the wiring diagrams. side as shown below. on an interior wall. Regency offers an optional programmable ® DO NOT TRY TO TURN CAUTION... -
Page 32: Wiring Diagram
Instructions thermostat will continue to operate. a three pronged (grounding) plug for your protection against plugged directly into a properly grounded three-prong recepta- 32 | Regency CLASSIC™ C34-10 Direct Vent Freestanding Gas Stove ®... -
Page 33: Pilot Adjustment
® gas supply or altitude. contact your Regency ® dealer for further instructions. Regency CLASSIC™ C34-10 Direct Vent Freestanding Gas Stove... -
Page 34: First Fire
6. Verify log placement. If the pilot cannot be seen when lighting the unit, the logs have been incorrectly positioned. again without a minimum of a 60 second wait. Diagram 1 34 | Regency CLASSIC™ C34-10 Direct Vent Freestanding Gas Stove ®... -
Page 35: Copy Of The Lighting Plate Instructions
Mettre le bouton de contrôle de gaz sur ''OFF'' pour éteindre la veilleuse. Pour économiser le carburant, éteindre la veilleuse quand l’appareil reste longtemps inutilisé. DO NOT REMOVE THIS INSTRUCTION PLATE 919-456 Regency CLASSIC™ C34-10 Direct Vent Freestanding Gas Stove ®... -
Page 36: Normal Operating Sounds Of Gas Appliances
The pilot light generates enough heat to burn someone. If for any reason a log should need air is not obstructed. replacement, use only Regency ® replacement During the annual service call, the burners logs. -
Page 37: Glass Gasket
Panel from bottom of leg shield. assembly down. Note: Access panel only has to be loosened to be taken out. screws. 5. Disconnect receiver wire. 6. Remove cover plate by removing 4 screws Regency CLASSIC™ C34-10 Direct Vent Freestanding Gas Stove ®... -
Page 38: Main Assembly
MAIN ASSEMBLY 38 | Regency CLASSIC™ C34-10 Direct Vent Freestanding Gas Stove ®... -
Page 39: Burner Assembly & Log Set
BURNER ASSEMBLY & LOG SET 910-034 Pilot Assy 3 Flame-S.I.T. -NG Regency CLASSIC™ C34-10 Direct Vent Freestanding Gas Stove ®... -
Page 40: Base Options
BASE OPTIONS Logo ® 40 | Regency CLASSIC™ C34-10 Direct Vent Freestanding Gas Stove ®... - Page 41 Regency CLASSIC™ C34-10 Direct Vent Freestanding Gas Stove ®...
-
Page 42: Warranty
The purchase price must be confirmed by the original Bill of Sale. 42 | Revision Date: September 2016 Regency Gas Products Warranty Regency CLASSIC™ C34-10 Direct Vent Freestanding Gas Stove ®... - Page 43 Products made or provided by other manufacturers and used in conjunction with the FPI appliance without prior authorization from FPI may void this warranty. Revision Date: September 2016 Regency Gas Products Warranty Regency CLASSIC™ C34-10 Direct Vent Freestanding Gas Stove...
- Page 44 Product Registra on and Customer Support: Thank you for choosing a Regency Fireplace. Regency strives to be a world leader in the design, manufacture, and marke ng of hearth products. To provide the best support for your product, we request that you complete a product registra on form at h p://www.regency- re.com/Customer-Care/Warranty-Registra on.aspx...
- Page 45 Product Registration and Customer Support: Thank you for choosing a Regency Fireplace. Regency strives to be a world leader in the design, manufacture, and marketing of hearth products. To provide the best support for your product, we request that you complete a product registration form found on our Web Site under Customer Care within ninety (90) days of purchase.
- Page 48 Installer: Please complete the following information Dealer Name & Address: ______________________________________________ ___________________________________________________________________ Installer: ___________________________________________________________ Phone #: ___________________________________________________________ Date Installed: ______________________________________________________ Serial No.: __________________________________________________________ C34 Video Printed in Canada...