
Related Manuals for Nortel NN46205-310


Summary of Contents for Nortel NN46205-310
- Page 1 Nortel Ethernet Routing Switch 8600 Quick Start Release: 5.0 Document Revision: 02.01 www.nortel.com NN46205-310 321749-B Rev 01...
- Page 2 ANY KIND, EITHER EXPRESS OR IMPLIED. The information and/or products described in this document are subject to change without notice. Nortel, the Nortel logo, the Globemark, and Passport are trademarks of Nortel Networks. All other trademarks are the property of their respective owners.
-
Page 3: Table Of Contents
Unpacking the chassis 32 Removing a power filler panel 33 Installing an Ethernet Routing Switch 8003, 8006, or 8010 chassis into a rack 34 Installing the 8010co chassis in a 19-inch two-post rack 36 Installing the 8003, 8006, and 8010 chassis cable guides 37... - Page 4 Injury to eye warning statement 75 Safety practices and the hazards danger statement 77 Safety practices and the hazards danger statement 78 Preventing electric shock danger statement 80 Copyright © 2008 Nortel Networks Nortel Ethernet Routing Switch 8600 Quick Start NN46205-310 02.01 Standard...
-
Page 5: Regulatory Information And Safety Precautions
Copyright © 2008 Nortel Networks Nortel Ethernet Routing Switch 8600 Quick Start NN46205-310 02.01 Standard... - Page 6 EN 55 024 (CISPR 24). EN 300386 Statement The Ethernet Routing Switch 8000 Series chassis complies with the requirements of EN 300386 V1.3.3 for emissions and for immunity for a Class A device intended for use in either Telecommunications centre or locations other than telecommunications centres given the performance criteria as specified by the manufacturer.
- Page 7 Class A requirements of the Republic of Korea Ministry of Information and Communications (MIC). This device may not be sold for use in a non-business application. Copyright © 2008 Nortel Networks Nortel Ethernet Routing Switch 8600 Quick Start NN46205-310 02.01 Standard...
-
Page 8: National Safety Statements Of Compliance
Importer: Copyright © 2008 Nortel Networks Nortel Networks, Inc. 4655 Great America Parkway Santa Clara CA 95054 USA Nortel Networks de México, S.A. de C.V. Avenida Insurgentes Sur #1605 Piso 30, Oficina Col. San Jose Insurgentes Deleg-Benito Juarez Nortel Ethernet Routing Switch 8600 Quick Start NN46205-310 02.01 Standard... - Page 9 Model 8005DC: 48-60 VDC, 42-34 A Nortel Networks, Inc. 4655 Great America Parkway Santa Clara, CA 95054 USA Nortel Networks de México, S.A. de C.V. Avenida Insurgentes Sur #1605 Piso 30, Oficina Nortel Ethernet Routing Switch 8600 Quick Start NN46205-310 02.01 Standard...
- Page 10 10 Regulatory Information and Safety Precautions Tel: Fax: Embarcar a: Denan Statement (Japan/Nippon only) Copyright © 2008 Nortel Networks Col. San Jose Insurgentes Deleg-Benito Juarez México D.F. 03900 52 5 480 2100 52 5 480 2199 Model 8003AC: 100-240 VCA, 50-60 Hz, 9 A max. por fuente de poder Model 8004AC: 100-240 VCA, 50-60 Hz, 12-6 A max.
-
Page 11: Safety Messages
This section describes the different precautionary notices used in this document. This section also contains precautionary notices that you must read for safe operation of the Nortel Ethernet Routing Switch 8600. Notices Notice paragraphs alert you about issues that require your attention. - Page 12 12 Regulatory Information and Safety Precautions Caution Notice Warning Notice Copyright © 2008 Nortel Networks CAUTION ATTENZIONE ESD Le indicazioni ESD forniscono informazioni per evitare scariche di elettricità statica e i danni correlati per i prodotti Nortel. CAUTION Caution notices provide information about how to avoid possible service disruption or damage to Nortel products.
- Page 13 Danger High Voltage Notice Copyright © 2008 Nortel Networks WARNING AVERTISSEMENT La mention Avertissement fournit des informations sur les moyens de prévenir les risques de blessure lors de la manipulation de produits Nortel. WARNING WARNUNG Warnhinweise bieten Informationen dazu, wie man Personenschäden bei der Arbeit mit Nortel-Produkten...
- Page 14 14 Regulatory Information and Safety Precautions Danger Notice Copyright © 2008 Nortel Networks DANGER PELIGRO Los avisos de Peligro-Alto voltaje brindan información acerca de cómo evitar una situación o condición que cause graves lesiones a personas o la muerte, a causa de una electrocución o de una descarga de alto voltaje.
- Page 15 Copyright © 2008 Nortel Networks DANGER PERICOLO Le indicazioni di pericolo forniscono informazioni per evitare situazioni o condizioni che potrebbero causare gravi danni alle persone o il decesso. Nortel Ethernet Routing Switch 8600 Quick Start NN46205-310 02.01 Standard 30 May 2008...
- Page 16 16 Regulatory Information and Safety Precautions Nortel Ethernet Routing Switch 8600 Quick Start NN46205-310 02.01 Standard 30 May 2008 Copyright © 2008 Nortel Networks...
-
Page 17: Software License
30 days of purchase to obtain a credit for the full purchase price. "Software" is owned or licensed by Nortel Networks, its parent or one of its subsidiaries or affiliates, and is copyrighted and licensed, not sold. Software consists of machine-readable instructions, its components, data, audio-visual content (such as images, text, recordings or pictures) and related licensed materials including all whole or partial copies. - Page 18 Upon termination or breach of the license by Customer or in the event designated hardware or CFE is no longer in use, Customer will promptly return the Software to Nortel Networks or certify its destruction. Nortel Networks may audit by remote polling or other reasonable means to determine Customer’s Software activation or usage levels.
- Page 19 Customer fails to comply with the terms and conditions of this license. In either event, upon termination, Customer must either return the Software to Nortel Networks or certify its destruction. Customer is responsible for payment of any taxes, including personal property taxes, resulting from Customer’s use of the Software.
- Page 20 20 Software license Nortel Ethernet Routing Switch 8600 Quick Start NN46205-310 02.01 Standard 30 May 2008 Copyright © 2008 Nortel Networks...
-
Page 21: New In This Release
• “Nortel Command Line Interface” (page 21) Nortel Command Line Interface The Nortel Ethernet Routing Switch 8600 uses the Nortel Networks Command Line Interface (NNCLI). This document provides configuration instructions for existing features using the NNCLI. Other changes See the following sections for information about the changes that are not feature related: •... -
Page 22: Connecting The Modem Using The Cli
59). Changing passwords using the CLI This section describes the instructions to set new passwords for each access level, or change the logon password for the different switch access using the CLI. For more information, see Changing passwords using the NNCLI... -
Page 23: Introduction
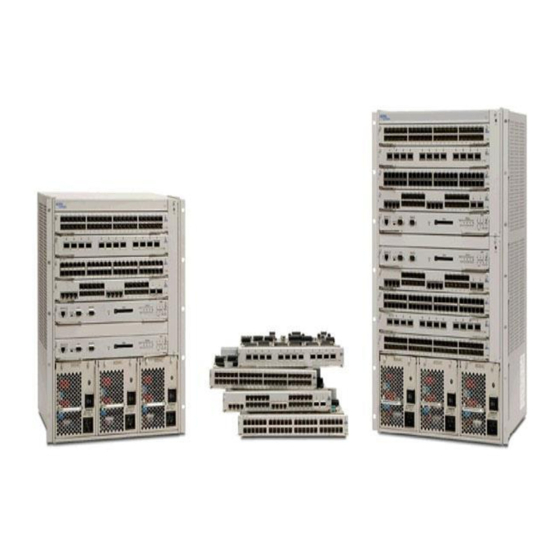
Introduction The Nortel Ethernet Routing Switch 8600 Quick Start, NN46205-310 provides basic instructions about installing the hardware and performing basic configuration of the Ethernet Routing Switch 8010, 8006, 8003, and 8010co chassis and software. Navigation • “Installation preparation” (page 25) •... - Page 24 24 Introduction Nortel Ethernet Routing Switch 8600 Quick Start NN46205-310 02.01 Standard 30 May 2008 Copyright © 2008 Nortel Networks...
-
Page 25: Installation Preparation
8691SF/CPU or 8692SF/CPU modules. Slots are numbered from top to bottom. Install Ethernet Routing Switch 8600 interface modules in slots 1 to 4. Slots 5 and 6 are reserved for Ethernet Routing Switch 8600 SF/CPU modules. Copyright © 2008 Nortel Networks... -
Page 26: Dc Power Supply Accessories
26 Installation preparation The 8003 chassis provides two slots for installing Ethernet Routing Switch 8600 interface modules and one slot for installing an Ethernet Routing Switch 8691/CPU Module. Slots are numbered from top to bottom. DC power supply accessories The DC power supply shipment contains hardware accessories. Use the following checklist to verify the contents of the 8004DC shipping container. -
Page 27: Safety Precautions
“Cable and connector safety” (page 28) • “Electrostatic discharge safety” (page 29) Personal safety For your safety, review the following personal safety warnings before working with the Ethernet Routing Switch 8600. Copyright © 2008 Nortel Networks Accessory 6 nuts 6 lock washers 2 washers DANGER... - Page 28 Do not exceed the bend radius recommended for the cable type installed. • Fiber optic cables and connectors require special care. Copyright © 2008 Nortel Networks WARNING Risk of eye injury by laser Fiber optic equipment can emit laser or infrared light that can injure your eyes.
- Page 29 Proper antistatic packaging effectively shields products from electrostatic charges and reduces the charge generation caused by product movement within the container. Copyright © 2008 Nortel Networks CAUTION Risk of equipment damage To prevent damage from electrostatic discharge, always wear an antistatic wrist strap connected to an electrostatic discharge (ESD) jack.
- Page 30 30 Installation preparation Nortel Ethernet Routing Switch 8600 Quick Start NN46205-310 02.01 Standard 30 May 2008 Copyright © 2008 Nortel Networks...
-
Page 31: Installation
“Unpacking the chassis” (page 32) • “Removing a power filler panel” (page 33) • “Installing an Ethernet Routing Switch 8003, 8006, or 8010 chassis into a rack” (page 34) • “Installing the 8010co chassis in a 19-inch two-post rack” (page 36) •... -
Page 32: Unpacking The Chassis
32 Installation Unpacking the chassis Unpack the shipping container to ensure the chassis and all accessories are included and undamaged. Copyright © 2008 Nortel Networks Nortel Ethernet Routing Switch 8600 Quick Start NN46205-310 02.01 Standard 30 May 2008... -
Page 33: Removing A Power Filler Panel
A power filler panel maintains the proper cooling airflow in the Ethernet Routing Switch 8600 chassis. You must remove the power filler panel from the power bay when you install a power supply in a bay for the first time Copyright ©... -
Page 34: Installing An Ethernet Routing Switch 8003, 8006, Or 8010 Chassis Into A Rack
Installing an Ethernet Routing Switch 8003, 8006, or 8010 chassis into a rack Install an Ethernet Routing Switch 8003, 8006, or 8010 chassis in a standard equipment rack (19-inch). Prerequisites for installing an Ethernet Routing Switch 8003, 8006, or 8010 chassis into a rack •... - Page 35 Installing an Ethernet Routing Switch 8003, 8006, or 8010 chassis into a rack 35 Attach the brackets to the chassis using the supplied Phillips-head screws. Hold the chassis in position and align the flanged end of each mounting rail with the two holes on each side of the vertical rack support.
-
Page 36: Installing The 8010Co Chassis In A 19-Inch Two-Post Rack
Insert a Phillips-head screw through each installation shelf mounting hole and into the corresponding hole in the rack. Copyright © 2008 Nortel Networks --End-- Nortel Ethernet Routing Switch 8600 Quick Start NN46205-310 02.01 Standard... -
Page 37: Installing The 8003, 8006, And 8010 Chassis Cable Guides
ATTENTION Ensure the cable clusters are accessible for maintenance. Procedure steps Copyright © 2008 Nortel Networks Installing the 8003, 8006, and 8010 chassis cable guides 37 WARNING Risk of personal injury It requires three people to lift the 8010co chassis. To make the chassis lighter, remove the modules and power supplies before you lift it. -
Page 38: Installing The Top Cable-Management Bracket
Push the sides of the top cable-management bracket into place. Insert and tighten the eight screws using a Phillips screwdriver to secure the top cable-management bracket to the chassis. Copyright © 2008 Nortel Networks --End-- --End-- Nortel Ethernet Routing Switch 8600 Quick Start NN46205-310 02.01 Standard... -
Page 39: Procedure Job Aid: Installing The Cable-Management Brackets
Align the slots on the side cable-management bracket with the rods in the chassis. Push the bracket into place. For more information, see cable-management brackets” (page 39) Copyright © 2008 Nortel Networks Installing the side cable-management brackets 39 “Procedure job aid: Installing the --End-- Nortel Ethernet Routing Switch 8600 Quick Start NN46205-310 02.01 Standard... -
Page 40: Grounding The 8010Co Chassis
Attach the lug ends of the chassis ground cables to the rack grounding strip using a 7/16-inch hex wrench to fasten the hardware in the correct order. For more information, see 8010co chassis” (page Copyright © 2008 Nortel Networks “Procedure job aid: Grounding the 41). --End-- Nortel Ethernet Routing Switch 8600 Quick Start NN46205-310 02.01 Standard... -
Page 41: Procedure Job Aid: Grounding The 8010Co Chassis
Location of ground studs on a 8010co chassis rear panel Installing a module Install Ethernet Routing Switch 8600 modules to provide communications interfaces for switching and routing operations. Copyright © 2008 Nortel Networks Nortel Ethernet Routing Switch 8600 Quick Start NN46205-310 02.01 Standard... - Page 42 42 Installation ATTENTION You can install an Ethernet Routing Switch 8600 module with the power on or off. Procedure steps Step Action Locate the slot where you want to install the module. Remove the power filler panel. For instructions, see Extend the insert and extract levers away from the front of the module.
-
Page 43: Procedure Job Aid: Installing A Module
1, 2, and 3 from left to right as viewed from the front of the chassis. The 8003 chassis has 2 power supply bays that are numbered 1 and 2 from left to right. Copyright © 2008 Nortel Networks Nortel Ethernet Routing Switch 8600 Quick Start NN46205-310 02.01 Standard... -
Page 44: Nn46205-310 02.01 Standard 30 May
— Crimping tool for crimping the lugs onto the cable — Heat gun to shrink the tubing around the cable (optional) Copyright © 2008 Nortel Networks “Removing a power filler panel” (page --End-- Nortel Ethernet Routing Switch 8600 Quick Start NN46205-310 02.01 Standard... - Page 45 ATTENTION Make sure the +DC cable is always connected to the positive terminal and that the -DC cable is always connected to the negative terminal. Copyright © 2008 Nortel Networks “Removing a power filler panel” (page DANGER Risk of injury by electric shock...
- Page 46 Attach the earth ground lead to the ground stud on the power supply. Use the washers in the following order: • • • • Copyright © 2008 Nortel Networks flat washer crimp lug lock washer hex nut Nortel Ethernet Routing Switch 8600 Quick Start NN46205-310 02.01 Standard...
- Page 47 Attach the positive voltage lead to the positive terminal on the power supply, inserting a lock washer between the crimp lug and each hex nut. Copyright © 2008 Nortel Networks Nortel Ethernet Routing Switch 8600 Quick Start NN46205-310 02.01 Standard...
- Page 48 7 seconds. To correct this condition, turn off the power supplies for a short period of time and then simultaneously turn them Copyright © 2008 Nortel Networks --End-- Nortel Ethernet Routing Switch 8600 Quick Start NN46205-310 02.01 Standard...
-
Page 49: Cable Preparation
“Turning on DC power supplies” (page 50) • “LED power supply” (page 51) Turning on AC power supplies Turn on an Ethernet Routing Switch 8000 Series chassis with an AC power supply. Copyright © 2008 Nortel Networks WARNING Failure to properly crimp the lugs onto the cables constitutes a safety hazard. -
Page 50: Turning On Dc Power Supplies
Turning on DC power supplies Step Action Turn the power switch on each DC power supply to the on position. It is not necessary to remove the bezel to turn the switch on. ATTENTION If the chassis contains two or three power supplies, turn on the power supplies simultaneously. -
Page 51: Led Power Supply
The red fan tray fail LED may light briefly while the fans power to operational speed. LED power supply After you turn on the Ethernet Routing Switch 8000 Series, each module automatically initiates a diagnostic test to verify proper module function. If the power supply LED remains off, do the following:... - Page 52 52 Installation Nortel Ethernet Routing Switch 8600 Quick Start NN46205-310 02.01 Standard 30 May 2008 Copyright © 2008 Nortel Networks...
-
Page 53: Configuration
• one stop bit ATTENTION Nortel recommends to use the default settings for the Modem port for most modem installations. Copyright © 2008 Nortel Networks Nortel Ethernet Routing Switch 8600 Quick Start NN46205-310 02.01 Standard 30 May 2008... - Page 54 Before connecting a modem to an Ethernet Routing Switch you may need to configure the modem port using another type of CLI connection.
-
Page 55: Variable Definitions
<true|false> slip-rx-compression <true|false> mtu <bytes> my-ip <ipaddr> Copyright © 2008 Nortel Networks Connecting a modem using the CLI 55 mtu <bytes> my-ip <ipaddr> peer-ip <ipaddr> pppfile <file> --End-- Value Specifies either 8 (true) or 7 (false) data bits for each byte for software to interpret. -
Page 56: Connecting A Modem Using The Nncli
Connect a modem to a Ethernet Routing Switch 8600 to establish a connection with the switch. To connect a modem to an Ethernet Routing Switch you may need to set up the modem port using another type of connection, such as a terminal connection, to the NNCLI. - Page 57 Reboot the switch. Variable definitions Variable 8databits baud mode my-ip Copyright © 2008 Nortel Networks Connecting a modem using the NNCLI 57 --End-- Value Set number of data bits per byte for software to interpret. Set baud rate for the modem.
-
Page 58: Connecting A Vt-100 Terminal Or Pc For Local Access
Connect an RS-232 cable to the console port on an 8691SF/CPU or 8692SF/CPU module. Connect the other end of the RS-232 cable to a VT-100 terminal or PC serial port. Copyright © 2008 Nortel Networks Value Set peer IP address on point-to-point link. Use the file for PPP initialization parameters. -
Page 59: Setting System Date And Time Using The Cli
<MMddyyyyhhmmss> Procedure job aid: clock set command output The following is a sample output to verify the clock set command . Copyright © 2008 Nortel Networks Setting system date and time using the NNCLI 59 --End-- Nortel Ethernet Routing Switch 8600 Quick Start NN46205-310 02.01 Standard... -
Page 60: Changing Passwords Using The Cli
Set new passwords for each access level, or change the logon password for the different switch access. The Ethernet Routing Switch Switch 8600 ships with default passwords configured for CLI access. When you use Simple Network Management Protocol version 3 (SNMPv3), you can change passwords that are in an encrypted format. - Page 61 <username> [ <password> ] l4admin <username> l4oper <username> lockout-time <HostAddress> <secs> Copyright © 2008 Nortel Networks Changing passwords using the CLI 61 Changes the default lockout time after three invalid attempts. • secs is the lockout time in seconds from 60 to 6500.
- Page 62 <username> [ <password> ] slboper <username> slbadmin <username> ssladmin <username> For more information about the WSM, see Nortel Ethernet Routing Switch 8600 Web Switching Module Fundamentals, (NN46205-314). Copyright © 2008 Nortel Networks Sets the minimum length for passwords in high-secure mode.
-
Page 63: Changing Passwords Using The Nncli
Set new passwords for each access level, or change the logon or password for various access levels of the switch. The Ethernet Routing Switch 8600 ships with default passwords set for access to the NNCLI. When using Simple Network Management Protocol version 3 (SNMPv3), you can change passwords that are in encrypted format. - Page 64 <1-365> default-lockout-time <60-65 000> lockout <WORD 0-64> time <60-65000> min-passwd-len <10-20> password-history <3-32> For more information about the WSM, see Nortel Ethernet Routing Switch 8600 Web Switching Module Fundamentals, (NN46205-314). Copyright © 2008 Nortel Networks • read-write-all <word> • slbadmin •...
-
Page 65: Configuring The System Using The Setup Utility
Configuring the system using the setup utility Use the setup utility for the initial configuration of the switch. The setup utility uses a series of questions to guide you through the configuration process. ATTENTION Answer each question, or accept the default by pressing Enter. Each question includes the default value in brackets and the acceptable parameter options in parenthesis. -
Page 66: Procedure Job Aid: Setup Utility Prompt Descriptions
[n] (y/n)? Do you want to enable enhanced operation mode support [n] (y/n)? Copyright © 2008 Nortel Networks Press Enter to accept the default (/flash/config.cfg), or enter a different file location for the primary configuration file. To store the configuration file on the PCMCIA card, use /pcmcia/config.cfg. - Page 67 [0.0.0.0/0.0.0.0]: First net mgmt route [0.0.0.0:0.0.0.0]: Copyright © 2008 Nortel Networks Configuring the system using the setup utility 67 Specify y if you want to enable CPU high availability (HA) mode. Accept the default (n), if you do not want to enable CPU HA mode.
- Page 68 [Saving the parameters will update the files /flash/boot.cfg and /flash/config.cfg] (y/n)? Copyright © 2008 Nortel Networks Enter the IP address of the second network management route (static route from the network management port to a device in the network). For security reasons, the system does not accept...
-
Page 69: Translation Of Safety Messages
Translation of safety messages Fan tray safety warning message Copyright © 2008 Nortel Networks WARNING Risk of personal injury Grasp the fan tray at the middle of the front panel, and be careful to keep your fingers out of the fan blades. -
Page 70: Preventing Back Injury Warning Statement
70 Translation of safety messages Preventing back injury warning statement Copyright © 2008 Nortel Networks WARNING AVISO Risco de ferimento Segure a bandeja do ventilador no meio do painel frontal e tenha cuidado para não colocar os dedos nas lâminas do ventilador. - Page 71 Heben Ihren Rücken gerade, und heben Sie das Gewicht aus den Beinen heraus. Das Chassis des Ethernet Routing Switch 8010 wiegt ungefähr 101 kg (225 lbs). Das Chassis des Ethernet Routing Switch 8006 wiegt ungefähr 77 kg (170 lbs).
-
Page 72: Preventing Electrical Shock Warning Statement
Uno chassis Ethernet Routing Switch 8010 pesa circa 101 kg (225 libbre). Uno chassis Ethernet Routing Switch 8006 pesa circa 77 kg (170 libbre). Uno chassis Ethernet Routing Switch 8003 pesa circa 49,5 kg (110 libbre). -
Page 73: Preventing Hand Injury Warning Statement
Preventing hand injury warning statement Copyright © 2008 Nortel Networks Preventing hand injury warning statement 73 WARNING AVISO Risco de ferimento por choque elétrico Para evitar o perigo do choque elétrico, tenha cuidado ao trabalhar com equipamentos e conexões elétricos. -
Page 74: Safety Danger Statement
74 Translation of safety messages Safety danger statement Copyright © 2008 Nortel Networks WARNING ADVERTENCIA Riesgo de lesiones por las aspas del ventilador Cuando deba retirar el módulo del ventilador, no coloque las manos en la abertura para evitar accidentes con las aspas de los ventiladores adyacentes. -
Page 75: Injury To Eye Warning Statement
Injury to eye warning statement Copyright © 2008 Nortel Networks Injury to eye warning statement 75 DANGER PELIGRO Riesgo de lesiones por choques eléctricos Para evitar riesgos, pliegue correctamente hacia adentro los terminales de los cables. DANGER PERIGO Risco de ferimento por choque elétrico Enrolar os suportes aos cabos de maneira incorreta implica em um risco de segurança. - Page 76 76 Translation of safety messages Copyright © 2008 Nortel Networks WARNING WARNUNG Risiko einer Augenverletzung durch Laser Glasfasergeräte können Laserstrahlen oder ultraviolettes Licht aussenden, das Ihre Augen verletzen kann. Schauen Sie nie direkt in einen Glasfaserleiter oder Verbindungsanschluss. Gehen Sie immer davon aus, dass Glasfaserkabel mit einer Lichtquelle verbunden sind.
-
Page 77: Safety Practices And The Hazards Danger Statement
Risk of injury by electric shock Before working on this equipment, be aware of proper safety practices and the hazards involved with electrical circuits. Use only power cords that have a grounding path. Ensure the switch is properly grounded before powering on the unit. DANGER DANGER Risques de blessure par choc électrique... -
Page 78: Safety Practices And The Hazards Danger Statement
Risk of injury by electric shock Before working on this equipment, be aware of proper safety practices and the hazards involved with electrical circuits. Use only power cords that have a grounding path. Ensure the switch is properly grounded before powering on the unit. DANGER Risques de blessure par choc électrique... - Page 79 Copyright © 2008 Nortel Networks Safety practices and the hazards danger statement 79 DANGER GEFAHR Verletzungsrisiko durch Stromschlag Informieren Sie sich über entsprechende Sicherheitsmaßnah men und die mit Stromkreisen verbundenen Gefahren, bevor Sie mit diesem Gerät arbeiten. Verwenden Sie nur Netzkabel mit Erdungspfad.
-
Page 80: Preventing Electric Shock Danger Statement
80 Translation of safety messages Preventing electric shock danger statement Copyright © 2008 Nortel Networks DANGER Risk of injury by electric shock Before you continue with this procedure, ensure that the DC power source is switched off. DANGER Risques de blessure par choc électrique Avant de poursuivre cette procédure, assurez-vous que la... -
Page 82: Nortel Ethernet Routing Switch
NORTEL PROVIDES THIS DOCUMENT "AS IS" WITHOUT WARRANTY OR CONDITION OF ANY KIND, EITHER EXPRESS OR IMPLIED. The information and/or products described in this document are subject to change without notice. Nortel, the Nortel logo, the Globemark, and Passport are trademarks of Nortel Networks. All other trademarks are the property of their respective owners.