
Related Manuals for E-FLITE UMX PT-17


Summary of Contents for E-FLITE UMX PT-17
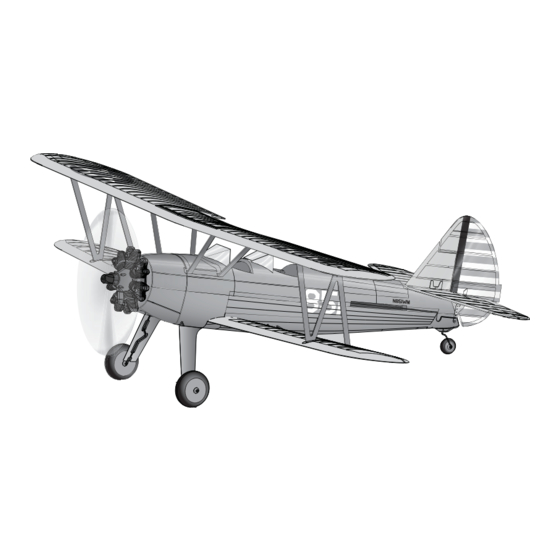
- Page 1 ™ PT-17 Instruction Manual Bedienungsanleitung Manuel d’utilisation Manuale di Istruzioni...
-
Page 2: Safety Precautions And Warnings
NOTICE All instructions, warranties and other collateral documents are subject to change at the sole discretion of Horizon Hobby, LLC. For up-to-date product literature, visit www.horizonhobby.com and click on the support tab for this product. Meaning of Special Language: The following terms are used throughout the product literature to indicate various levels of potential harm when operating this product: NOTICE: Procedures, which if not properly followed, create a possibility of physical property damage AND little or no possibility of injury. -
Page 3: Table Of Contents
Table of Contents Charger Warnings ..........4 Post Flight Checklist ..........9 Battery Charging ............4 Power Components Service .........10 Transmitter and Receiver Binding ......5 Installing the Landing Gear ........11 Low Voltage Cutoff (LVC) ........5 Troubleshooting Guide .........12 Flight Battery Installation and ESC Arming....6 Limited Warranty ..........13 Center of Gravity (CG) ..........6 Warranty and Service Information ......15... -
Page 4: Charger Warnings
Charger Warnings The battery charger (EFLC1008) included with your • Always charge batteries away from fl ammable aircraft has been designed to safely charge the materials. Li-Po battery. • Always inspect the battery before charging. • Always disconnect the battery after charging, and CAUTION: All instructions and warnings must let the charger cool between charges. -
Page 5: Transmitter And Receiver Binding
Transmitter and Receiver Binding Binding is the process of programming the receiver to recognize the GUID (Globally Unique Identifi er) ™ code of a single specifi c transmitter. You need to ‘bind’ your chosen Spektrum DSM2/DSMX technology equipped aircraft transmitter to the receiver for proper operation. Any full range Spektrum DSM2/DSMX transmitter can bind to the DSM2/DSMX receiver. -
Page 6: Flight Battery Installation And Esc Arming
Flight Battery Installation and ESC Arming Arming the ESC also occurs after binding as previously described, but subsequent connection Lower throttle and of a fl ight battery requires the following steps. throttle trim to lowest settings. It is normal for linear servos to make noise. Noise is not an indication of a faulty servo. -
Page 7: Control Direction Tests
Control Direction Tests Traditional Control Direction Test Bind your aircraft and transmitter before doing these tests. Move the controls on the transmitter to make sure the aircraft control surfaces move correctly and in the proper direction. Make sure the tail linkages move freely and that paint or decals are not adhered to them. ®... -
Page 8: Control Centering
Control Centering Before the fi rst fl ights, or in the event of an accident, make sure the fl ight control surfaces are centered. Adjust the linkages mechanically if the control surfaces are not centered. Use of the transmitter sub-trims may not correctly center the aircraft control surfaces due to the mechanical limits of linear servos. -
Page 9: Flying Tips And Repairs
Flying Tips and Repairs We recommend fl ying your aircraft outside in calm Failure to lower the throttle NOTICE: Always conditions. Always avoid fl ying near houses, trees, stick and trim to the lowest decrease throttle wires and buildings. You should also be careful to possible positions during a at propeller strike. -
Page 10: Power Components Service
Power Components Service CAUTION: DO NOT handle propeller parts while the fl ight battery is connected. Personal injury could result. Disassembly 1. Disconnect the battery from the ESC/receiver. 2. Carefully cut free each wing strut from the bottom wing without damaging the wing. 3. -
Page 11: Installing The Landing Gear
Installing the Landing Gear To install the included landing gear: 1. Gently squeeze the gear assembly and insert the landing gear strut wire into the retaining slot of the fuselage as shown. -
Page 12: Troubleshooting Guide
Troubleshooting Guide AS3X Problem Possible Cause Solution Control surfaces not at Control surfaces may not have been Center control surfaces mechanically by neutral position when mechanically centered from factory adjusting the U-bends on control linkages transmitter controls are Aircraft was moved after the fl ight battery Disconnect and reconnect the fl... -
Page 13: Limited Warranty
Troubleshooting Guide (Continued) Problem Possible Cause Solution LED on receiver fl ashes Less than a 5-second wait between fi rst Leaving transmitter on, disconnect and rapidly and aircraft will powering on transmitter and connecting reconnect fl ight battery to aircraft not respond to transmit- fl... - Page 14 exclusive remedy shall be that Horizon will, at its option, you will be asked to provide your complete name, street either (i) service, or (ii) replace, any Product determined address, email address and phone number where you can by Horizon to be defective. Horizon reserves the right to be reached during business hours.
-
Page 15: Warranty And Service Information
Warranty and Service Information Country of Purchase Horizon Hobby Phone Number/Email Address Address Horizon Service Center servicecenter.horizonhobby. (Repairs and Repair Requests) com/RequestForm/ www.quickbase.com/db/ Horizon Product Support United States of 4105 Fieldstone Rd bghj7ey8c?a=GenNewRecord (Product Technical Assistance) America Champaign, Illinois, 61822 USA 888-959-2305 sales@horizonhobby.com Sales... - Page 16 HINWEIS Allen Anweisungen, Garantien und anderen zugehörigen Dokumenten sind Änderungen nach Ermessen von Horizon Hobby, LLC. vorbehalten. Aktuelle Produktliteratur fi nden Sie unter www.horizonhobby.com im Support-Abschnitt für das Produkt. Begriffserklärung Die folgende Begriffe werden in der gesamte Produktliteratur verwendet, um die Gefährdungsstufen im Umgang mit dem Produkt zu defi...
- Page 17 Inhaltsverzeichnis Warnungen zum Laden ........18 Tipps zum Fliegen und Reparieren .......23 Laden des Akkus ..........18 Checkliste nach dem Flug ........23 Binden von Sender und Empfänger ......19 Wartung der Antriebskomponenten ......24 Niederspannungsabschaltung (LVC) .....19 Montage des Fahrwerks ........25 Einsetzen des Flugakkus und Armieren Leitfaden zur Problemlösung ........26 des Reglers............20 Garantie und Serviceinformationen ......27...
-
Page 18: Warnungen Zum Laden
Warnungen zum Laden Das im Lieferumfang befi ndliche Ladegerät Sonneneinstrahlung auf. Bei Aufbewahrung in (EFLC1008) wurde zum sicheren Aufl aden des Li-Po einem heißen Auto, kann der Akku beschädigt Akkus entwickelt. werden oder sogar Feuer fangen. • Laden Sie immer Li Po Akkus weit weg entfernt ACHTUNG: Alle Anweisungen und von brennbaren Materialien. -
Page 19: Binden Von Sender Und Empfänger
Binden von Sender und Empfänger Beim Bindeprozess wird der Empfänger programmiert, um den GUID- (Global eindeutiger Identifi kations-) Code eines einzelnen speziellen Senders zu erkennen. Für einen ordnungsgemäßen Betrieb müssen Sie Ihren gewählten Flugzeugsender mit Spektrum DSM2/DSMX-Technologie an den Empfänger „binden“. Jeder Spektrum DSM2/DSMX Sender kann mit einem DSM2/DSMX Empfänger gebunden werden. -
Page 20: Einsetzen Des Flugakkus Und Armieren Des Reglers
Einsetzen des Flugakkus und Armieren des Reglers Das AS3X System wird auch nach dem Binden initialisiert, für nachfolgende Flüge und dem ashebel und Anschließen des Flugakkus folgen Sie bitte den Gastrimmung erforderlichen Schritten wie unten beschrieben. auf niedrigste Einstellung stellen. Es ist normal, dass die Linearservos Geräusche von sich geben. -
Page 21: Steuerrichtungstest
Steuerrichtungstest Testen der Steuerung Vor Durchführung dieses Tests sollte das Flugzeug an den Sender gebunden sein. Bewegen Sie die Senderkontrollen um sicher zu stellen, dass sich die Ruder in die richtige Richtung bewegen. Vergewissern Sie sich dass die die Leitwerksanlenkungen frei bewegen können und nicht durch Aufkleber gestört werden. -
Page 22: Zentrieren Der Kontrollen
Zentrieren der Kontrollen Vor dem ersten Flug oder nach einem Absturz müssen Sie sicherstellen, dass die Ruder zentri- ert sind. Stellen Sie das Gestänge mechanisch ein, wenn die Ruder nicht zentriert sind. Wenn Sie die Anpassung nur über die Sendertrim- mungen inklusive Sub Trims vornehmen, werden die Ruder aufgrund mechanischer Beschränkungen der Linearservos möglicherweise nicht korrekt... -
Page 23: Tipps Zum Fliegen Und Reparieren
Tipps zum Fliegen und Reparieren Wir empfehlen ihnen das Flugzeug draussen bei Wird bei einem Absturz HINWEIS: Sofort versäumt, Gashebel und leichten Bedingungen zu fl iegen. Vermeiden Sie es Motor aus bei Trimmung auf die niedrigste in der Nähe von Gebäuden, Bäumen und Leitungen Propellerberührung. -
Page 24: Wartung Der Antriebskomponenten
Wartung der Antriebskomponenten ACHTUNG: Hantieren Sie nicht mit dem Propeller oder Teilen davon wenn der Flugakku angeschlossen ist. Es besteht Verletzungsgefahr. Demontage 1. Trennen Sie den Akku vom Empfänger. 2. Trennen Sie vorsichtig die Flächenstrebe von der unteren Tragfläche ohne die Tragfläche zu beschädigen. -
Page 25: Montage Des Fahrwerks
Montage des Fahrwerks Um das im Lieferumfang enthaltene Fahrwerk zu montieren: 1. Drücken Sie das Fahrwerk zusammen und setzen das Fahrwerk wie abgebildet in den Schlitz ein. -
Page 26: Leitfaden Zur Problemlösung
Leitfaden zur Problemlösung AS3X Problem mögliche Ursache Lösung Ruder sind nicht neutral Ruder sind im Werk mechanisch nicht Zentrieren Sie die Ruder mechanisch durch wenn Senderkontrollen zentriert worden anpassen der U Bögen neutral stehen Flugzeug wurde nach dem Anschließen Trennen Sie den Flugakku und schließen ihn der Akkus bewegt bevor dieSensoren sich wieder an. -
Page 27: Garantie Und Serviceinformationen
Leitfaden zur Problemlösung (Fortsetzung) Problem Mögliche Ursache Lösung LED auf dem Empfänger Sie haben weniger als 5 Sekunden nach Lassen Sie den Sender eingeschaltet, trennen blinkt schnell, Flugzeug dem Einschalten des Senders den Flugakku Sie den Flugakku und verbinden ihn wieder reagiert nicht auf den angeschlossen Sender (nach dem... - Page 28 und die Fitness des Verbrauchers für einen eine Garantiebeurteilung ohne Rücksprache mit Horizon bestimmten Einsatzzweck des Produktes. Der nicht durchführen. Dies gilt auch für Garantiereparaturen. Käufer allein ist dafür verantwortlich, zu prüfen, Deshalb kontaktieren Sie in einem solchen Fall den ob das Produkt seinen Fähigkeiten und dem Händler, der sich mit Horizon kurz schließen wird, um eine vorgesehenen Einsatzzweck entspricht.
-
Page 29: Garantie Und Service Kontakt Informationen
Garantie und Service Kontakt Informationen Land des Kauf Horizon Hobby Telefon / E-mail Adresse Adresse Horizon Technischer Service service@horizonhobby.de Christian-Junge-Straße 1 Deutschland 25337 Elmshorn, Deutschland Sales: Horizon Hobby GmbH +49 (0) 4121 2655 100 Konformitätshinweise für die Europäische Union EU Konformitätserklärung Horizon LLC erklärt hiermit, dass dieses Produkt konform zu den essentiellen Anforderungen der R&TTE, EMC Direktive. - Page 30 REMARQUE La totalité des instructions, garanties et autres documents est sujette à modifi cation à la seule discrétion d’Horizon Hobby, LLC. Pour obtenir la documentation à jour, rendez-vous sur le site www. horizonhobby.com et cliquez sur l’onglet de support de ce produit. Signifi...
- Page 31 Table des matières Avertissements relatifs à la batterie .....32 Vérifi cations à effectuer après le vol ....37 Charge de la batterie ...........32 Maintenance de la motorisation ......38 Affectation de l’émetteur au récepteur ....33 Installation du train d’atterrissage ......39 Coupure par tension faible (LVC) ......33 Guide de dépannage ..........40 Installation de la batterie et armement Garantie et réparations ........41...
-
Page 32: Avertissements Relatifs À La Batterie
Avertissements relatifs à la batterie Le chargeur (EFLC1008) livré avec votre avion a • Faites toujours l’inspection de la batterie avant la été conçu pour charger la batterie Li-Po en toute charge. sécurité. • Déconnectez toujours la batterie après la charge, et laissez le chargeur se refroidir entre les ATTENTION : les instructions et charges. -
Page 33: Affectation De L'émetteur Au Récepteur
Affectation de l’émetteur au récepteur L’affectation est le processus qui programme le récepteur pour qu’il reconnaisse le code (appelé GUID- Globally Unique Identifi er) d’un émetteur spécifi que. Vous devez « affecter » l’émetteur Spektrum pour avions à technologie DSM2/DSMX de votre choix au récepteur afi n d’assurer un fonctionnement correct. Tous les émetteurs Spektrum DSM2/DSMX sont compatibles avec le récepteur. -
Page 34: Installation De La Batterie Et Armement Du Contrôleur
Installation de la batterie et armement du contrôleur L’armement du contrôleur se produit à la suite de l’affectation décrite précédemment, cependant les Placez le manche prochains branchements de la batterie nécessitent et le trim des gaz de suivre les étapes suivantes. en position basse. -
Page 35: Test De Contrôle De La Direction
Test de contrôle de la direction Test des commandes classique Vous devez affecter votre avion à votre émetteur avant d’effectuer ces tests. Déplacez les manches de l’émetteur pour contrôlez que les gouvernes pivotent dans les directions appropriées. Assurez-vous que les tringleries coulissent librement, que les autocollants ou de la peinture n’interfèrent pas dans leur mouvement. -
Page 36: Centrage Des Commandes
Centrage des commandes Avant vos premiers vols ou en cas d’accident, vérifi ez le centrage des gouvernes de vol. Si les surfaces de contrôle ne sont pas centrées, ajustez les liaisons mécaniquement. Il se peut que les trims de l’émetteur ne permettent pas de centrer correctement les surfaces de contrôle de l’avion à... -
Page 37: Conseils De Vol Et Réparations
Conseils de vol et réparations Nous vous recommandons de faire voler votre Coupez les gaz juste avant de toucher le sol quand avion en extérieur par temps calme. Ne volez vous effectuez un atterrissage sur le ventre. pas à proximité d’habitations, d’arbres, de lignes Si vous ne coupez pas les REMARQUE: électriques et de constructions. -
Page 38: Maintenance De La Motorisation
Maintenance de la motorisation ATTENTION: NE JAMAIS manipuler l’hélice quand la batterie est connectée au contrôleur. Sous peine de blessures corporelles. Démontage 1. Déconnectez la batterie du récepteur. 2. Découpez délicatement chaque liaison entre les haubans et l’aile inférieure sans l’endommager. -
Page 39: Installation Du Train D'atterrissage
Installation du train d’atterrissage Pour installer le train d’atterrissage : 1. Pressez légèrement les 2 jambes de train au niveau des roues et insérez la boucle du train dans la rainure du fuselage comme indiqué sur l’illustration. -
Page 40: Guide De Dépannage
Guide de dépannage AS3X Problème Cause possible Solution Les gouvernes ne sont Les tringleries ne sont pas correctement Effectuez un réglage mécanique en serrant pas au neutre réglées ou desserrant les “U” des tringleries alors que les L’avion a été déplacé avant l’initialisation Débranchez la batterie et rebranchez la en manches sont au des capteurs... -
Page 41: Garantie Et Réparations
Guide de dépannage (Suite) Problème Cause possible Solution Moins de 5 secondes se sont écoulées entre En laissant l’émetteur allumé, déconnectez la La DEL du récepteur l’allumage de l’émetteur et la connexion de batterie de vol, puis reconnectez-la clignote rapidement et la batterie de vol sur l’avion l’avion ne répond pas L’avion est affecté... - Page 42 (c) Recours de l’acheteur – Il est de la seule discrétion Maintenance et réparation d‘Horizon de déterminer si un produit présentant un cas Si votre produit doit faire l’objet d’une maintenance ou de garantie sera réparé ou échangé. Ce sont là les recours d‘une réparation, adressez-vous soit à...
-
Page 43: Coordonnées De Service Et De Garantie
Coordonnées de service et de garantie Pays d’achat Horizon Hobby Téléphone/E-mail Adresse infofrance@horizonhobby.com Service/Parts/Sales: 11 Rue Georges Charpak France Horizon Hobby SAS 77127 Lieusaint, France +33 (0) 1 60 18 34 90 Information IC Le présent appareil est conforme aux CNR d’Industrie Canada applicables aux appareils radio exempts de licence. - Page 44 AVVISO Istruzioni, garanzie e tutti gli altri documenti accessori sono soggetti a modifi che a totale discrezione di Horizon Hobby, LLC. Per avere la documentazione aggiornata sul prodotto, visitare il sito Web www. horizonhobby.com e fare clic sulla scheda “support” per questo prodotto. Signifi...
- Page 45 Indice Avvertenze per la carica delle batterie....46 Consigli per il volo e riparazioni ......51 Carica della batteria ..........46 Elenco di controllo dopo il volo ......51 Binding del trasmettitore e del ricevitore .....47 Manutenzione del motore ........52 Spegnimento per bassa tensione (LVC) ....47 Installazione del carrello d’atterraggio ....53 Installare la batteria di bordo e Guida alla risoluzione dei problemi .......54...
-
Page 46: Avvertenze Per La Carica Delle Batterie
Avvertenze per la carica delle batterie Il caricabatterie (EFLC1008) fornito insieme a questo • Caricare sempre le batterie lontano da materiali aereo, è stato progettato per caricare le batterie infi ammabili. Li-Po in piena sicurezza. • Controllare sempre le batterie prima di caricarle. •... -
Page 47: Binding Del Trasmettitore E Del Ricevitore
Binding del trasmettitore e del ricevitore Il binding è il processo di programmazione del ricevitore dell’unità di controllo per il riconoscimento del codice GUID (Globally Unique Identifi er) di una particolare trasmittente. Per un corretto funzionamento si dovrà effettuare il ‘binding’ dell’areo selezionato con tecnologia Spektrum DSM2/DSMX al trasmettitore. Qualsiasi trasmettitore DSM2/DSMX Spektrum può... -
Page 48: Installare La Batteria Di Bordo E Armare Il Regolatore (Esc)
Installare la batteria di bordo e armare il regolatore (ESC) Dopo aver fatto la connessione descritta prece- dentemente, si deve armare anche il regolatore Portare complet- (ESC) e nei successivi collegamenti della batteria di amente in basso lo bordo bisogna seguire la procedura spiegata di qui stick motore e il di seguito. -
Page 49: Test Controllo Della Direzione
Test controllo della direzione Prova tradizionale della direzione dei controlli Prima di fare questa prova bisogna connettere l’aereo al trasmettitore. Muovere i comandi sul trasmettitore per essere sicuri che i controlli dell’aereo si muovano correttamente e nel verso giusto. Verifi care che i rinvii della coda si muovano liberamente e che vernice e adesivi non aderiscano ad essi. -
Page 50: Test Di Controllo
Test di controllo Prima del primo volo o in caso di incidente, accertarsi che le superfi ci di controllo del volo siano centrate. Se le superfi ci di controllo non sono centrate, regolare i leveraggi meccanicamente. L’utilizzo dei trim del trasmettitore potrebbe non consentire di centrare correttamente le superfi... -
Page 51: Consigli Per Il Volo E Riparazioni
Consigli per il volo e riparazioni Noi consigliamo di far volare questo aereo Ridurre sempre il motore AVVISO: Diminuire in caso di incidente, per all’esterno con vento calmo. Evitare sempre di sempre il throttle evitare di sovvraccaricare il volare in prossimità di edifi ci, alberi, linee elettriche quando l’elica regolatore e il motore con e abitazioni. -
Page 52: Manutenzione Del Motore
Manutenzione del motore ATTENZIONE: NON maneggiare l’elica quando la batteria di volo è collegata. Questa operazione potrebbe causare lesioni personali. Smontaggio 1. Sconnettere la batteria dall’ESC / dalla ricevente. 2. Tagliare attentamente i montanti ala dall’ ala inferiore senza danneggiare l’ala. 3. -
Page 53: Installazione Del Carrello D'atterraggio
Installazione del carrello d’atterraggio Per installare il carrello d’atterraggio incluso: 1. Comprimere leggermente il carrello d’atterraggio e inserirlo nell’apposita apertura nella fusoliera (vedi illustrazione). -
Page 54: Guida Alla Risoluzione Dei Problemi
Guida alla risoluzione dei problemi AS3X Problema Possibile causa Soluzione Le superfi ci di controllo Le superfi ci di controllo possono non es- Centrare le superfi ci di controllo meccani- non sono in posizione sere state centrate meccanicamente dalla camente impostando i tubi a U sui giunti di neutra quando i controlli fabbrica controllo... - Page 55 Guida alla risoluzione dei problemi (continua) Problema Possibile causa Soluzione Il LED sul ricevitore Meno di 5 secondi di attesa fra la prima re- Lasciare il trasmettitore acceso, discon- lampeggia velocemente censione del trasmettitore e il collegamento nettere e riconnettere la batteria di volo al e il velivolo non si della batteria di volo al velivolo velivolo...
-
Page 56: Garanzia
Garanzia Periodo di garanzia immediatamente presso il venditore. La garanzia esclusiva - Horizon Hobby, LLC, (Horizon) Indicazioni di sicurezza garantisce che i prodotti acquistati (il “Prodotto”) sono Questo è un prodotto sofi sticato di hobbistica e non è un privi di difetti relativi ai materiali e di eventuali errori giocattolo. -
Page 57: Informazioni Per La Garanzia E Le Riparazioni
Informazioni per la garanzia e le riparazioni Stato in cui il prodotto è stato Horizon Hobby Telefono/Indirizzo e-mail Indirizzo acquistato Horizon Technischer Service service@horizonhobby.de Christian-Junge-Straße 1 Germania 25337 Elmshorn, Germania Sales: Horizon Hobby GmbH +49 (0) 4121 2655 100 Informazioni sulla conformità per l’Unione Europea Dichiarazione di Conformità... -
Page 58: Replacement Parts
Cabane Strut Set: Tragfl ächenstreben PT-17 montanti ala e cabane UMX PT-17 UMX PT-17 with E-fl ite UMX PT-17 m. UMX PT-17 avec AS3X BNF E-fl ite UMX PT-17 con EFLU3080 AS3X BNF AS3X BNF AS3X BNF AS6410L DSMX Spektrum AS6410L... -
Page 59: Optional Parts And Accessories
– Optional Parts and Accessories – – Optionale Bauteile und Zubehörteile – – Pièces optionnelles et accessoires – – Pezzi opzionali e accessori – Part # • Nummer Description Beschreibung Description Descrizione Numéro • Codice Hook and Loop Set Parkzone: Klettband Ultras Micros - Bande Set fascette a strappo PKZ1039... - Page 60 ™ PT-17 © 2015 Horizon Hobby, LLC. E-fl ite, AS3X, UMX, DSM, DSM2, DSMX, ModelMatch, Bind-N-Fly, Celectra and the Horizon Hobby logo are trademarks or registered trademarks of Horizon Hobby, LLC. The Spektrum trademark is used with permission of Bachmann Industries, Inc. Futaba is a registered trademark of Futaba Denshi Kogyo Kabushiki Kaisha Corporation of Japan.