Sign In
Upload
Manuals
Brands
TransAct Manuals
Printer
Epic 430
TransAct Epic 430 Manuals
Manuals and User Guides for TransAct Epic 430. We have
1
TransAct Epic 430 manual available for free PDF download: Maintenance Manual
TransAct Epic 430 Maintenance Manual (90 pages)
Ticket printer
Brand:
TransAct
| Category:
Printer
| Size: 3 MB
Table of Contents
Maintenance Manual
1
Change History
3
Federal Communications Commission Radio Frequency Interference Statement
3
Canadian Department of Communications Radio Interference Statement
3
Regulatory Compliance
4
Disclaimer
5
Copyright
5
Trademarks
5
Table of Contents
6
Introducing Your Epic 430 Printer
11
About Your Transact ® Epic 430 TM Printer
13
Who Should Read this Guide
14
What Is Included in this Guide
14
Warranty Options
14
Technical and Sales Support
15
On-Line Technical Support
15
Telephone Technical Support
15
Return Materials Authorization and Return Policies
16
Service Programs
16
Sales Support
16
Contact Information
17
Epic 430 Specifications and Requirements
19
Epic 430 TM Specifications and Requirements
21
Standard Features
21
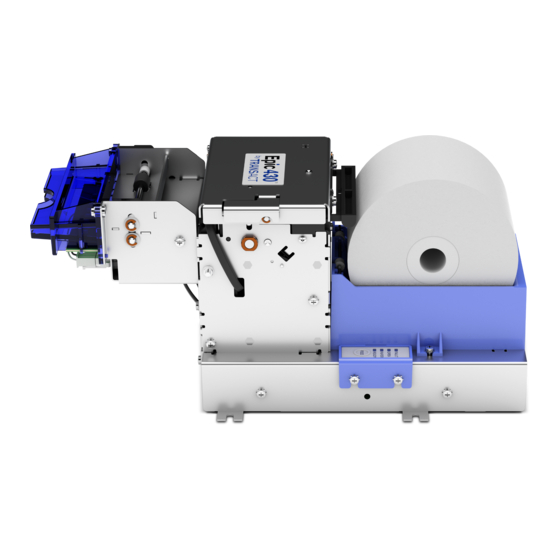
Figure 1. Epic 430 TM Printer
21
Optional Features
22
General Specifications
23
Printer Dimensions
23
Weight
23
Interface Type
23
Figure 2. Epic 430 TM Dimensions
23
Printer Type
24
Printer Environmental Conditions
24
Reliability
24
AC Power Requirements
24
DC Power Requirements
24
Figure 3. Temperature and Humidity Ranges
24
Test Standards
25
Accoustic Noise
25
Printing Specifications
26
Paper Roll Specifications
26
Paper out
26
Auto Cutter Position
26
Communications Interface
27
RS-232 Serial Interface
27
USB Interface
27
Table 1 Serial Interface Pin-Outs
27
Power Input Connector Interface
28
Figure 4. Pin Functions for Power Input Connector
28
Operational Procedures
29
How to Operate the Epic 430
31
TM Printer
31
Indicator Lights (LED)
31
The FEED Button
31
The TEST Button
32
Figure 5. Location of TEST Button Inside Electronics Base
32
Using Self-Test
33
Level 0 Diagnostics
35
Boot Loader Mode
35
Printer Status Led's
37
Auto Error Recovery
38
Loading Paper
39
Figure 6. Loading a Paper Roll
39
Cleaning the Print Head
40
Clearing Paper Jams
40
Configuring Your Epic 430 Printer
41
Configuration Mode Overview
43
Most Frequent Configuration Incompatibilities
43
How to Change Configuration Settings
43
Entering into Configuration Mode
43
Setting up for Color Paper
44
Custom Color
44
Remote Configuration
44
Remote Boot Load
44
Mounting Requirements
45
Mounting Requirements
47
Electronics Base Assembly to Final Product
47
Figure 7. Electronics Base Assembly to Final Product
47
Remote Base Cover
48
Figure 8. Optional Remote Base Cover
48
Epic 430 Grounding
49
Figure 9. Remote Base Mounted to Printer Mechanism
49
Custom Bezel Specifications and Recommendations
50
Figure 10. Custom Bezel Mounting and Hardware Requirements
50
Printer Sensors
51
Printer Sensors
53
Paper out Sensor
53
Figure 11. Sensor Breakdown and Locations
53
Cover-Open Switch
54
Top-Of-Form
54
Paper Low Sensor (Option)
54
Anti-Jam Sensor
54
Transport Ticket Taken Sensor
54
Electrical Connections
55
Communications Interface
57
Figure 12. Communication PCB Location and Connector Info
57
Printer Block Diagram
58
Assembly and Disassembly
59
Precautions for Disassembly
61
Necessary Tools
61
Disconnecting the Power and Communications Cables
61
Figure 13. Power and Communications Cable Connections
61
Main Printer Components
62
Figure 14. Exploded View of Main Assemblies for Epic 430 Printer
62
Principal Subassemblies for the Epic 430™ Printer
63
Figure 15. Right Side Frame Assembly
63
Figure 16. Left Side Frame Assembly
64
Figure 17. Front Frame Subassembly
64
Figure 18. Transport Subassembly
65
Figure 19. Paper Path Subassembly
65
Figure 20. Top Cover Subassembly
66
Figure 21. Connectors on Right Side Assembly Printed Circuit Board
67
Assembling the Printer Mechanism
68
Figure 22. Attaching the Front Frame to the Right Side Frame Assembly
68
Figure 23. Bezel Assembly and Electrical Harness
69
Figure 24. Bezel Assembly Attached to Transport Assembly
69
Figure 25. Connect Transport Assembly
70
Figure 26. Connect Jam Sensor Assembly
71
Figure 27. Connect Paper Path Assembly
72
Figure 28. Top Cover Assembly Attached to Left Side Assembly
73
Figure 29. Top Cover Assembly and Left Side Assembly Attached to Printer Assembly
74
Assembling Main Printer Components
75
Figure 30. Attaching Rear Plate to Printer Mechanism
75
Figure 31. Connect Umbilical Cables to Electronic Base PCB
75
Figure 32. Attach Printer Mechanism to Electronics Base
76
Figure 33. Attach Paper Bucket
77
Figure 34. Base Plate and Paper Spindle for Remote Mounting Applications
78
Parts List
79
Modular Configuration
80
Print Mechanism
81
Rev Q
81
Base Assembly
83
Paper Holder Assembly
84
Remote Base Assembly
85
Spindle Assembly
86
Transport Assembly
87
0Ptional 80MM Paper Guide
88
Index
89
Advertisement
Advertisement
Related Products
Transact EPIC 950
TransAct EPIC 630
TransAct epic430
TransAct Epic 880
TransAct Epic 3000
TransAct Epic Edge
TransAct BANKjet 1500
TransAct Epic 880 100-88002
TransAct Ithaca 280
TransAct ithaca 700 Series
TransAct Categories
Printer
Touch terminals
Label Maker
Desktop
Tablet
More TransAct Manuals
Login
Sign In
OR
Sign in with Facebook
Sign in with Google
Upload manual
Upload from disk
Upload from URL