Sign In
Upload
Manuals
Brands
Sun Microsystems Manuals
Desktop
SPARCstation 20
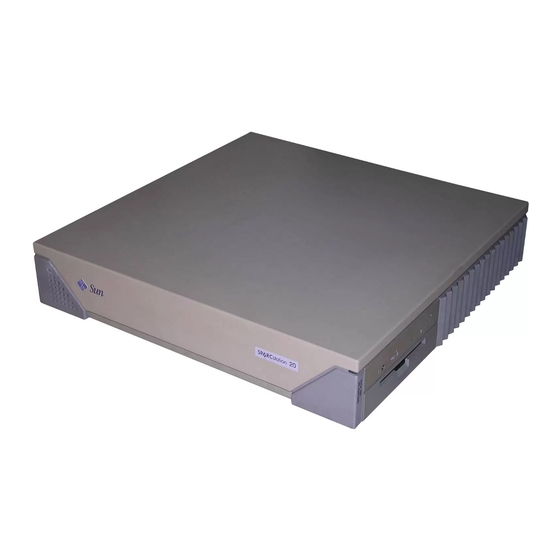
Sun Microsystems SPARCstation 20 Manuals
Manuals and User Guides for Sun Microsystems SPARCstation 20. We have
2
Sun Microsystems SPARCstation 20 manuals available for free PDF download: Service Manual, System Configuration Manual
Sun Microsystems SPARCstation 20 Service Manual (266 pages)
Brand:
Sun Microsystems
| Category:
Desktop
| Size: 2.93 MB
Table of Contents
Table of Contents
3
1 Product Description
25
Standard Features
25
Subassemblies, Boards, and Components
26
FIGURE 1-1 Sparcstation 20 System
26
Interior View
27
FIGURE 1-2 Sparcstation 20 System Exploded View
27
Rear View
28
FIGURE 1-3 Sparcstation 20 System Overhead Interior View
28
FIGURE 1-4 Sparcstation 20 System Unit Rear View
29
Software Requirements
30
Internal Options
30
TABLE 1-1 Sparcstation 20 System Configurations and Software Requirements
30
TABLE 1-2 Internal Options
30
External Options
31
TABLE 1-3 External SCSI Options
31
2 Troubleshooting Overview
33
Default Boot Mode
33
Diagnostic Tools
35
TABLE 2-1 Diagnostic Tools
35
Openboot PROM Diagnostics
36
TABLE 2-2 Autoboot and Diagnostic Switch Settings
36
TABLE 2-3 Openboot PROM Diagnostic Tests
36
Sundiag System Exerciser
38
Sun VTS
39
TABLE 2-4 Sunvts Documentation
39
3 Power-On Self Test (POST)
41
Normal Mode
41
Full Diagnostic Mode
41
Abbreviated Diagnostic Mode
43
Setting up a Tip Connection
43
POST Tests
44
POST Error Messages
47
Status Leds and Indicators
47
FIGURE 3-1 System LED Location
48
Completing POST
49
FIGURE 3-2 Type-5 Keyboard Key Leds
49
4 Troubleshooting Procedures
51
TABLE 4-1 Troubleshooting Tips
51
Video Output Failure
52
Power-On Does Not Succeed
53
Power Supply Test
53
FIGURE 4-1 Power Supply Connector Pinouts
54
System Board Test
55
FIGURE 4-2 Power Supply and Power Supply Connector Location
55
TABLE 4-2 Power Supply Connector Pin Assignments
55
Caps Lock Key Fails to Flash During the POST
56
Disk Drive Errors
57
TABLE 4-3 Troubleshooting Disk Drive Errors
58
SIMM Errors
59
FIGURE 4-3 System Board SIMM Slot Locations
60
5 Safety and Tools Requirements
63
Safety Requirements
63
Symbols
64
TABLE 5-1 Safety Precautions
64
System Precautions
65
FIGURE 5-1 Symbols Used in this Manual
65
Lithium Battery
66
Required Tools
66
Electrostatic Discharge (ESD) Precautions
66
6 Power on and off
69
Removing Power from the System
69
Restarting the System While Troubleshooting
70
FIGURE 6-1 Standby Switch
70
Reading Boot Messages
71
Turning on the Power
71
FIGURE 6-2 Power-On Switch
72
7 Internal Access
73
Removing the Cover
73
FIGURE 7-1 Lock Block Screw and Corner Screw
73
Attaching the Wrist Strap
74
FIGURE 7-2 Removing the Cover
74
Replacing the Cover
75
FIGURE 7-3 Grounding Wrist Strap to Power Supply
75
FIGURE 7-4 Replacing the Cover
76
FIGURE 7-5 Lock Block
76
FIGURE 7-6 Back Panel Corner Screw
77
8 Removing and Installing Subassemblies
79
Power Supply
79
Removing the Power Supply
79
FIGURE 8-1 Attaching a Wrist Strap to Back Panel and Removing the Power Supply
81
Installing the Power Supply
82
FIGURE 8-2 Power Supply and DC Power Harness
82
FIGURE 8-3 Power Supply Captive Screws
83
FIGURE 8-4 Connecting the DC Power Connector to the System Board
83
Led
84
Removing the LED
84
FIGURE 8-5 Speaker/Led Cable Detail
85
FIGURE 8-6 LED Light Pipe Detail
86
Installing the LED
87
FIGURE 8-7 Speaker/Led Cable
87
Speaker
88
Removing the Speaker
88
FIGURE 8-8 Speaker Cover Detail
89
Installing the Speaker
90
FIGURE 8-9 Speaker Connectors
90
Fan Assembly
91
Removing the Fan
91
FIGURE 8-10 Disconnecting the Fan DC Power Connector
92
Installing the Fan
93
FIGURE 8-11 Removing the Fan
93
FIGURE 8-12 Fan Assembly
94
FIGURE 8-13 Mounting the Fan Assembly
95
FIGURE 8-14 Securing the Fan Assembly Using the Fan Installation Tool
96
FIGURE 8-15 Connecting the Fan Assembly DC Power Connector
97
Removing the Fan DC Power Harness
98
FIGURE 8-16 Securing the Fan Assembly DC Power Connector
98
FIGURE 8-17 Fan DC Power Harness
99
FIGURE 8-18 Fan DC Power Harness and Cable Restraint
100
FIGURE 8-19 Disconnecting the Fan Power Connector from the DC Power Connector
101
FIGURE 8-20 Lifting Fan DC Cable from the Cable Trough
102
Installing the Fan DC Power Harness
103
FIGURE 8-21 Disconnecting the Fan Power Connector
103
FIGURE 8-22 CD-ROM Drive DC Power Connector Location
104
FIGURE 8-23 Connecting the Fan DC Power Connector
105
FIGURE 8-24 Routing Excess Cables in Cable Trough
106
SCSI Backplane
107
FIGURE 8-25 Fan DC Power Connector
107
Removing the SCSI Backplane
108
FIGURE 8-26 SCSI Backplane Sockets and Connectors
109
FIGURE 8-27 SCSI Backplane Screws
110
FIGURE 8-28 SCSI Backplane Bracket Tabs
111
Installing the SCSI Backplane
111
SCSI Data Cable
112
Removing the SCSI Data Cable
112
(Suncd 2Plus Drive-Type Chassis)
112
FIGURE 8-29 Internal Cables and DC Power Connector (Suncd 2Plus Drive-Type Chassis)
113
FIGURE 8-30 Back Panel Sbus Slots and Captive Screws
114
FIGURE 8-31 SCSI Backplane, SCSI Data, and DC Power Connectors
114
Installing the SCSI Data Cable (Suncd 2Plus Drive-Type Chassis)
115
FIGURE 8-32 Cable Guide Detail
116
Removing the SCSI Data Cable (Suncd 4 Drive-Type Chassis)
117
FIGURE 8-33 Internal Cables and DC Power Connector (Suncd 4 Drive-Type Chassis)
118
FIGURE 8-34 Removing the System Board
119
Installing the SCSI Data Cable (Suncd 4 Drive-Type Chassis)
120
DC Power Harness
121
Removing the DC Power Harness (Suncd 2Plus Drive-Type Chassis)
121
FIGURE 8-35 Attaching a Wrist Strap to Back Panel and Removing the Power Supply
122
FIGURE 8-36 Internal Cables and DC Power Connector (Suncd 2Plus Drive-Type Chassis)
123
FIGURE 8-37 Back Panel Sbus Slots and Captive Screws
124
FIGURE 8-38 Detail of Cable Guide
125
Installing the DC Power Harness (Suncd 2Plus Drive-Type Chassis)
126
FIGURE 8-39 SCSI Backplane, SCSI Data, and DC Power Connectors
126
Removing the DC Power Harness (Suncd 4 Drive-Type Chassis)
127
FIGURE 8-40 Internal Cables and DC Power Connector (Suncd 4 Drive-Type Chassis)
128
FIGURE 8-41 Back Panel Captive Screws
128
FIGURE 8-42 Removing the System Board
129
Installing the DC Power Harness (Suncd 4 Drive-Type Chassis)
130
Diskette Drive Cable
131
Removing the Diskette Drive Cable (Suncd 2Plus Drive-Type Chassis)
132
FIGURE 8-43 Diskette Drive Cable Location
133
FIGURE 8-44 Diskette Drive Cable Plastic Tab
133
Installing the Diskette Drive Cable (Suncd 2Plus Drive-Type Chassis)
134
FIGURE 8-45 Pulling the Diskette Drive Cable through the Drive Bracket Opening
134
Removing the Diskette Drive Cable (Suncd 4 Drive-Type Chassis)
135
Installing the Diskette Drive Cable (Suncd 4 Drive-Type Chassis)
136
FIGURE 8-46 System Board Cable Routing (Suncd 4 Drive-Type Chassis)
136
9 Storage Devices
141
Hard Disk Drive
141
Removing a Hard Disk Drive
141
FIGURE 9-1 Location of Hard Disk Drives
142
FIGURE 9-2 Single Connector Hard Disk Drive
143
Installing a Hard Disk Drive
144
FIGURE 9-3 Removing a Hard Disk Drive
144
FIGURE 9-4 Installing a Hard Disk Drive
146
CD-ROM Drive
147
Removing a CD-ROM Drive
147
Installing a CD-ROM Drive
148
FIGURE 9-5 Removing the CD-ROM Drive
148
FIGURE 9-6 Suncd 2Plus Rear View and Jumper Settings
149
FIGURE 9-7 Suncd 4 Drive Rear View and Jumper Settings
149
Diskette Drive
150
FIGURE 9-8 Installing a CD-ROM Drive
150
FIGURE 9-9 Diskette Drive Location
151
Removing a Diskette Drive
151
FIGURE 9-10 CD-ROM Drive Filler Panel
152
FIGURE 9-11 Diskette Drive Power Cable
153
FIGURE 9-12 Diskette Drive Data Cable
154
FIGURE 9-13 Removing the Diskette Drive
155
FIGURE 9-14 Installing Grommets and Setting the Diskette Drive Switch
155
FIGURE 9-15 Unseating the Diskette Drive Grommets
156
Installing a Diskette Drive
156
FIGURE 9-16 Setting the Diskette Drive Microswitch
157
FIGURE 9-17 Moving the SCSI Disk Cable and the CD-ROM Drive Power Cable
157
FIGURE 9-18 Diskette Drive Power Cable (P4)
157
FIGURE 9-19 Installing the Diskette Drive
158
FIGURE 9-20 Connecting the Diskette Drive Power Cable
159
FIGURE 9-21 Connecting the Diskette Drive Data Cable
160
FIGURE 9-22 Installing the CD-ROM Drive Filler Panel
161
10 System Board Overview
163
Preventing Damage
163
Handling System Boards and Assemblies
163
System Board Description
164
System Board Frus
165
FIGURE 10-1 System Board
165
FIGURE 10-2 Exploded View of the System Board
166
11 System Board and Component Replacement
167
Mbus Module
167
Removing a Single-Wide Mbus Module
167
FIGURE 11-1 Mbus Module Retainers
168
FIGURE 11-2 Extractor Installation on a Single-Wide Mbus Module
169
FIGURE 11-3 Removing a Single-Wide Mbus Module
169
Installing a Single-Wide Mbus Module
170
FIGURE 11-4 Installing a Single-Wide Mbus Module
170
Removing a Double-Wide Mbus Module
171
FIGURE 11-5 Mbus Module and Sbus Card Retainers
171
FIGURE 11-6 Mbus Module Back Panel Screws and Washers
172
Installing a Double-Wide Mbus Module
173
FIGURE 11-7 Removing a Double-Wide Mbus Module
173
FIGURE 11-8 Installing a Double-Wide Mbus Module
174
FIGURE 11-9 Seating a Double-Wide Mbus Module Back Plate, Side View
175
Sbus Card
176
Removing an Sbus Card
176
FIGURE 11-10 Locking the Mbus Module Retainers
176
FIGURE 11-11 Sbus Card Retainers
177
FIGURE 11-12 Sbus Card Back Plate Screws and Washers
177
FIGURE 11-13 Installing the Card Extractor
178
FIGURE 11-15 Removing the Sbus Card Extractor
179
Installing an Sbus Card
180
FIGURE 11-16 Removing the Sbus Card Adapter Bracket
180
FIGURE 11-17 Installing a Double-Wide Sbus Card
181
FIGURE 11-18 Installing a Single-Wide Sbus Card
181
FIGURE 11-19 Sbus Card Back Panel Screws and Washers
182
Dsimms, Vsimms, and Nvsimms
183
Dsimm
183
FIGURE 11-20 DSIMM, Front View
183
Vsimm
184
FIGURE 11-21 DSIMM, Back View
184
FIGURE 11-22 VSIMM, Front View
184
Nvsimm
185
Removing a SIMM
185
FIGURE 11-23 VSIMM, Back View
185
FIGURE 11-24 NVSIMM, Battery Side
185
FIGURE 11-25 SIMM Slot Locations
186
Installing a SIMM
187
FIGURE 11-26 SIMM Ejection Levers
187
FIGURE 11-27 DSIMM, Back View
188
FIGURE 11-28 VSIMM, Back View
189
FIGURE 11-29 NVSIMM, Battery Side
189
FIGURE 11-30 Aligning the NVSIMM in the Slot, Back View
190
FIGURE 11-31 Inserting a DSIMM
191
FIGURE 11-32 Inserting a VSIMM/NVSIMM
191
Auxiliary Video Board
192
Removing an AVB
192
FIGURE 11-33 AVB Installed
193
FIGURE 11-34 Removing the AVB
193
Installing an AVB
194
FIGURE 11-35 Installing the Auxiliary Video Board
194
System Board
195
Removing the System Board
195
FIGURE 11-36 Disconnecting Diskette, SCSI, DC Power, and Speaker/Led Connectors
196
FIGURE 11-37 System Board Captive Screws
196
Jumper Settings
197
FIGURE 11-38 Removing the System Board
197
FIGURE 11-39 System Board Jumper Settings
198
Installing the System Board
199
FIGURE 11-40 Installing the System Board
199
FIGURE 11-41 System Board Captive Screws
200
Openboot PROM
201
FIGURE 11-42 Connecting Diskette, SCSI, DC Power, and Speaker/Led Connectors
201
FIGURE 11-43 Openboot PROM Location
202
Removing an Openboot PROM
202
Installing an Openboot PROM
203
Nvram/Tod
204
Removing a NVRAM/TOD
204
FIGURE 11-44 Openboot PROM Orientation
204
Installing a NVRAM/TOD
205
FIGURE 11-45 NVRAM/TOD Location
205
FIGURE 11-46 NVRAM/TOD Orientation
206
12 Illustrated Parts Breakdown
207
Replacement Parts List
207
TABLE 12-1 Replacement Parts List and Part Numbers
207
Illustration of Selected Frus
209
FIGURE 12-1 Selected Frus
210
FIGURE 12-2 Sparcstation 20 System Exploded View
211
FIGURE 12-3 Major Components of the System Board
212
FIGURE 12-4 Standard External Cables
213
FIGURE 12-5 Optional External Cables
214
Product Specifications
215
Physical Specifications
215
TABLE A-1 Physical Specifications
215
Electrical Specifications
216
TABLE A-2 Electrical Specifications (System Unit)
216
TABLE A-3 Electrical Specifications (17-Inch Monitor)
216
Environmental Specifications
218
TABLE A-5 Environmental Specifications
218
Functional Description
219
System Overview
219
System Architecture
219
System Board
220
Sbus Card
221
FIGURE B-1 System Board Block Diagram
221
FIGURE C-6 SCSI Connector
221
Mbus Module
222
Mbus-To-Sbus Interface
222
Memory
222
TABLE B-1 Memory Allocations
223
TABLE B-2 DSIMM DRAM Densities
223
FIGURE B-2 DSIMM Memory System
224
FIGURE B-3 VSIMM Memory System
225
TABLE B-3 VRAM Densities
225
Sbus-To-SCSI, Ethernet, and Parallel Interfaces
226
Sbus-To-External Bus Interface
227
FIGURE B-4 MACIO ASIC Functional Block Diagram
227
Clock Chip
228
FIGURE B-5 SEC ASIC Functional Block Diagram
228
System Board Connector Pinouts
229
Parallel Connector
229
FIGURE C-1 Parallel Connector
229
AUI Connector
231
FIGURE C-2 AUI Connector
231
TABLE C-2 AUI Connector Pin Assignments
232
Keyboard and Mouse Connector
233
FIGURE C-3 Keyboard and Mouse Connector
233
Serial Ports a and B Connector
234
FIGURE C-4 Serial Ports a and B Connector
234
Twisted-Pair Ethernet Connector
235
FIGURE C-5 Twisted-Pair Ethernet Connector
235
SCSI Connector
236
TABLE C-5 Twisted-Pair Ethernet Connector Pin Assignments
236
TABLE C-6 SCSI Connector Pin Assignments
236
13W3 Connector
239
FIGURE C-7 13W3 Connector
239
Audio Ports
240
FIGURE C-8 Back Panel Audio Ports and Icons
240
Headphone Connector
241
FIGURE C-9 Microphone Icon
241
FIGURE C-10 Audio Line-Out Icon
241
FIGURE C-11 Audio Line-In Icon
241
FIGURE C-12 Audio Line-In Icon
241
SCSI Addresses
243
Disk Drives
243
TABLE D-1 SCSI Addresses, Solaris 1.1.1 Version B (Sunos 4.1.3_U1 Version B) Operating Environment
243
TABLE D-2 SCSI Addresses, Solaris 2.3 (Sunos 5.3) Operating Environment and Later Versions
244
Selected On-Board Diagnostics
245
Test Device Alias, Test Device Pathname
245
Test-All
246
Watch-Clock
247
Watch-Net, Watch-Aui, Watch-Tpe, Watch-Net-All
248
Probe-Scsi, Probe-Scsi-All
250
Test-Memory
251
Power-Off
252
Module-Info
252
Glossary
253
Advertisement
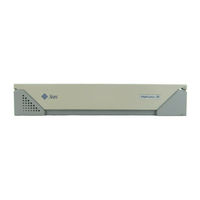
Sun Microsystems SPARCstation 20 System Configuration Manual (30 pages)
Brand:
Sun Microsystems
| Category:
Desktop
| Size: 0.25 MB
Table of Contents
Table of Contents
3
Preface
5
1 Introduction to Graphics on the Sparcstation 10SX and Sparcstation 20
9
2 Reserving DRAM for SX Accelerated Applications
11
Introduction
11
Advantages of Using SXDRAM
12
When to Reserve SXDRAM
12
Calculating the Amount of SXDRAM to Reserve
12
Configuring SXDRAM
13
Memory Bank Layout on the Sparcstation 10SX
13
Memory Bank Layout on the Sparcstation 20
16
System Software Constraints for SXDRAM Configuration
17
Recommended DSIMM/VSIMM Configuration for the Sparcstation 10SX
17
SXDRAM Configuration
18
3 Running Openwindows on the Sparcstation 10SX and Sparcstation 20
21
CG14 Pixel Modes for Running the Window System
21
Visuals Supported by Openwindows 3.3
22
False Color Effects
23
Advertisement
Related Products
Sun Microsystems SPARCstation Voyager
Sun Microsystems SPARCstation LX
Sun Microsystems SPARC station LX
Sun Microsystems SPARC classic X
Sun Microsystems Sun-1
Sun Microsystems Sun-3/260
Sun Microsystems Sun-3/60
Sun Microsystems SPARCclassic
Sun Microsystems SPARCclassic X
Sun Microsystems SPARCstorage
Sun Microsystems Categories
Server
Storage
Desktop
Computer Hardware
Adapter
More Sun Microsystems Manuals
Login
Sign In
OR
Sign in with Facebook
Sign in with Google
Upload manual
Upload from disk
Upload from URL