Sign In
Upload
Manuals
Brands
Ispring Manuals
Water Filtration Systems
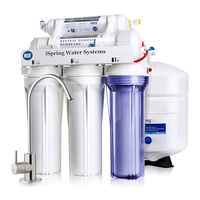
RCC7P-AK
Ispring RCC7P-AK Manuals
Manuals and User Guides for Ispring RCC7P-AK. We have
7
Ispring RCC7P-AK manuals available for free PDF download: Installation Instructions & User Manual, Installation Instructions & Owner's Manual, User Manual
Ispring RCC7, RCC7P, RCC7AK, RCC7P-AK - Water Filtration Systems Manual
Brand:
Ispring
| Category:
Water Filtration Systems
| Size: 3 MB
Table of Contents
System Installation
Prior to Installation
Component Identification
Understanding the Booster Pump and RO Process
Installation Tips
How to Use the Quick-connect Fittings
How to Connect the Compression Fitting
How to Drill a 1/2" Hole in Your Sink or Countertop
Installation Steps
Installing the Feed Water Adapter
Installing the RO Faucet
How to install an Air-gap Faucet
Installing the Drain Saddle
Install the Air Gap
Installing the Vertical Filters
Installing Tank Shut-off Valve
Installing the Reverse Osmosis Membrane
Tubing Hook Up
System Start-up
OWNER'S MANUAL
System Maintenance
Stage 1 – 3 Pre-Filters
Stage 4 RO Membrane
Stage 5 FT15 Inline Post Carbon Filter and Stage 6 FA15 Inline Alkaline Filter
Tank Maintenance
What should I do with the system when going out of town?
Optional Add-on
Glossary and Terms to Know
Troubleshooting Guide for Newly Installed Systems w/ Booster Pump
Zero output water from RO faucet
Tank not filling after several hours
Leaking from between the membrane cap and membrane housing
Low water flow (trickle) at RO faucet
High TDS in RO water
Cloudy water after installation
The system drains water 24/7
Leak from tank valve connection
Pump does not start
Pump runs 24/7
Warranty Registration
Documents / Resources
References
Advertisement
Ispring RCC7P-AK Installation Instructions & User Manual (128 pages)
Unser Sink Reverse Osmosis System with Pump
Brand:
Ispring
| Category:
Water Filtration Systems
| Size: 3 MB
Table of Contents
Table of Contents
5
User Information
6
Product Features
7
Operating Conditions
7
Water Treatment Process
7
Filtration Performance
7
System Components
8
How the Booster Pump and RO System Work
9
Installation
10
Installation Preparation
10
Step 1: Installing the Feed Water Adapter
11
Step 2: Installing Drinking Water Faucet
11
How to Drill a Hole in Sink or Countertop
13
Step 3: Installing the Drain Saddle
14
Step 4: Installing Stages 1, 2, and 3 Filters
14
Step 5: Installing the Tank Valve
15
Step 6: Installing the RO Membrane
15
Step 7: Tubing Connection
16
Step 8: Installing the Leak Stop Valve
17
Step 9: Mounting the System (Optional)
17
Step 10: System Startup
18
System Maintenance
19
When to Change the Lter
22
How Do I Change the Lters
22
O-Ring Replacement
22
Tank Maintenance
22
What Should I Do with the System When I am Not Home
22
Leak Stop Valve Pads (Model #ALS1P3) Replacement
22
Optional Add-On
23
Troubleshooting
23
Glossary and Terms to Know
25
Informationen für den Nutzer
30
Produkteigenschaften
31
Betriebsbedingungen
31
Wasseraufbereitungsprozess
31
Filtrationsleistung
31
Komponentenbezeichnungen
32
Wie die Verstärkungspumpe und das RO-System Funktionieren
33
Installation
34
Vorbereitung der Installation
34
Schritt 1: Speisewasseradapter (Modell-Nr. AFW43) Installieren
35
Schritt 2: Trinkwasserhahn Installieren
35
Wie man ein Loch in die Spüle oder die Arbeitsplatte Bohrt
37
Schritt 3: Abwasserschelle (Modell-Nr. ADS1K) Installieren
38
Schritt 4: vor Lter Installieren
38
Schritt 5: Tankventil (Modell-Nr. ABV2K) Installieren
39
Schritt 6: RO-Membran Installieren
39
Schritt 7: Schläuche Anschließen
40
Schritt 8: Leckschutz-Ventil (Modell-Nr. ALS1) Installieren
41
Schritt 9: das System an der Wand Montieren (Optional)
42
Schritt 10: System in Betrieb Nehmen
42
Systemwartung
43
Filter Austauschen
46
Filteraustausch-Zeitplan
46
Dichtungsring-Austausch (alle 3 Jahre)
46
Tankwartung
46
Was soll ich mit dem System Machen, wenn ich nicht Daheim bin
46
Austausch von Leckschutz-Ventil-Kissen (Modell-Nr. ALS1P3)
46
Optionale Ergänzung
47
Behebung von Störungen
47
Abkürzungen und Wichtige Begri E
49
Informations Sur L'utilisateur
54
Caractéristiques du Produit
55
Conditions de Fonctionnement
55
Processus de Traitement de L'eau
55
Performance de Ltration
55
Component Identi Cation
56
Fonctionnement de la Pompe de Surpression et du Système D'osmose Inverse
57
Installation
58
Préparation de L'installation
58
Étape 1: Installer L'adaptateur D'eau D'alimentation (Modèle AFW43)
59
Étape 2: Installer un Robinet D'eau Potable
59
Comment Percer un Trou Dans un Évier ou un Comptoir
61
Étape 3: Installer le Collier de Vidange (Modèle ADS1K)
62
Étape 4: Installation des Ltres Verticaux : Étapes 1, 2 et 3
62
Étape 5: Installer le Robinet du Réservoir (Modèle ABV2K)
63
Étape 6: Installer la Membrane D'osmose Inverse
63
Étape 7: Raccordement du Tuyau
64
Étape 8: Installation de la Vanne D'arrêt de Fuite (Modèle ALS1)
65
Étape 9: Montage du Système (Facultatif)
66
Étape 10 : Démarrage du Système
66
Maintenance du Système
67
Remplacement des Ltres
70
Calendrier de Remplacement des Ltres
70
Remplacement des Joints Toriques (Tous les 3 Ans)
70
Entretien du Réservoir
70
Que Dois-Je Faire du Système lorsque Je Ne Suis Pas à la Maison
70
Remplacement des Tampons de la Valve D'arrêt de Fuite (Modèle ALS1P3)
70
Complément Optionnel
71
Dépannage
71
Glossaire et Termes à Connaître
73
Informazioni Per Gli Utenti
79
Caratteristiche del Prodotto
80
Condizioni DI Esercizio
80
Processo DI Trattamento Dell'acqua
80
Prestazioni DI Ltrazione
80
Identi Cation des Composants
81
Come Funzionano la Pompa Booster E L'impianto DI Osmosi Inversa
82
Installazione
83
Preparazione All'installazione
83
Passo 1: Installazione del Raccordo Dell'acqua DI Mandata (Articolo Nr. AFW43)
84
Passo 2: Installazione del Rubinetto Dell'acqua Potabile
84
Come Praticare un Foro Nel Lavandino O Sul Piano DI Lavoro
86
Passo 3: Installazione del Raccordo DI Scarico (Articolo Nr. ADS1K)
87
Passo 4: Installare I Pre Ltri
87
Passo 5: Installazione Della Valvola del Serbatoio (Articolo Nr. ABV2K)
88
Passo 6: Installazione Della Membrana Dell'osmosi Inversa
88
Passo 7: Collegamento Dei Tubi
89
Passo 8: Installazione Della Valvola Anti-Perdita (Articolo Nr. ALS1)
90
Passo 9: Fissaggio Dell'impianto (Opzionale)
91
Passo 10: Avvio Dell'impianto
91
Manutenzione Dell'impianto
92
Sostituzione Dei Ltri
95
Programma DI Sostituzione Dei Ltri
95
Sostituzione Degli O-Ring (Ogni 3 Anni)
95
Manutenzione del Serbatoio
95
Cosa Devo Fare con L'impianto Quando Non Sono a Casa
95
Sostituzione Delle Pastiglie Della Valvola Anti-Perdita (Articolo Nr. ALS1P3)
95
Componenti Aggiuntivi Opzionali
96
Risoluzione Dei Problemi
96
Glossario E Termini da Conoscere
98
Información para el Usuario
104
Características del Producto
105
Condiciones de Funcionamiento
105
Proceso de Tratamiento del Agua
105
Rendimiento de la Ltración
105
Identi Cación de Componentes
106
Cómo Funciona la Bomba de Aumento de Presión y el Sistema de Ósmosis Inversa
107
Instalación
108
Preparación de la Instalación
108
Paso 1: Instalación del Adaptador de Suministro de Agua (Modelo N.º AFW43)
109
Paso 2: Instalación del Grifo de Agua Potable
109
Cómo Perforar un Ori Cio en el Fregadero O la Encimera
111
Paso 3: Instalación del Collarín de Desagüe (Modelo N.º ADS1K)
112
Paso 4: Instalación de Los Ltros Verticales: 1.ª, 2.ª y 3.ª Etapa
112
Paso 5: Instalación de la Válvula del Depósito (Modelo N.º ABV2K)
113
Paso 6: Instalación de la Membrana de Ósmosis Inversa
113
Paso 7: Conexión de la Tubería
114
Paso 8: Instalación de la Válvula Antifugas (Modelo N.º ALS1)
115
Paso 9: Montaje del Sistema (Opcional)
116
Paso 10: Puesta en Marcha del Sistema
116
Mantenimiento del Sistema
117
Sustitución de Ltros
120
Programa de Sustitución de Ltros
120
Sustitución de Juntas Tóricas (cada Tres Años)
120
Mantenimiento del Depósito
120
Qué Debo Hacer con el Sistema cuando no Estoy en Casa
120
Sustitución de Almohadillas de la Válvula Antifugas (Modelo N.º ALS1P3)
120
Complemento Opcional
121
Solución de Problemas
121
Glosario y Términos que Debe Conocer
123
Ispring RCC7P-AK Installation Instructions & User Manual (120 pages)
Reverse Osmosis Water Filtration System
Brand:
Ispring
| Category:
Water Filtration Systems
| Size: 2 MB
Table of Contents
Table of Contents
5
User Information
6
Product Features
7
Water Treatment Process
7
Filtration Lifespan
7
Operating Speci Cations
7
Component Identi Cation
8
Installation
9
Before You Start the Installation
9
Required Tools
9
Additional Tools
9
Step 1: Installing Feed Water Adapter (Model #AFW43)
10
Step 2: Installing Drinking Water Faucet
10
Step 3: Installing Drain Saddle (Model #ADS1K)
13
Step 4: Installing the Vertical Filters: Stages 1, 2, and 3
13
Step 5: Installing Tank Shut-O Valve (Model #ABV2K)
14
Air Bladder Pressure Adjustment
14
Step 6: Installing the RO Membrane
14
Step 7: Tubing Connection
15
Step 8: Leak Stop Valve (Model #ALS1) Installation
16
Step 9: Mounting the System (Optional)
17
Step 10: System Startup
17
System Maintenance
19
Optional Add-On
22
Troubleshooting
22
Glossary and Terms to Know
24
Benutzerinformationen
29
Produkteigenschaften
30
Wasserreinigungs-Prozess
30
Lebensdauer der Filterung
30
Betriebsspezi Kationen
30
Komponentenbezeichnungen
31
Installation
32
Vorbereitung der Installation
32
Benötigte Werkzeuge
32
Schritt 1: Speisewasseradapter (Modell-Nr. AFW43) Installieren
33
Schritt 2: Trinkwasserhahn Installieren
33
Schritt 3: Abwasserschelle (Modell-Nr. ADS1K) Installieren
36
Schritt 4: vor Lter Installieren
36
Schritt 5: Tankventil (Modell-Nr. ABV2K) Installieren
37
Luftblasen-Druckregulierung
37
Schritt 6: RO-Membran Installieren
37
Schritt 7: Schläuche Anschließen
38
Schritt 8: Leckschutz-Ventil (Modell-Nr. ALS1) Installieren
39
Schritt 9: das System an der Wand Montieren (Optional)
40
Schritt 10: Inbetriebnahme des Systems
40
Systemwartung
42
Optionale Ergänzung
45
Fehlerbehebung
45
Glossar und Wissenswerte Begri E
47
Informations Sur L'utilisateur
52
Caractéristiques du Produit
53
Processus de Traitement de L'eau
53
Prformance de Ltration
53
SpéCI Cations de Fonctionnement
53
Identi Cation des Composants
54
Installation
55
Préparation de L'installation
55
Étape 1: Installer L'adaptateur D'eau D'alimentation (Modèle AFW43)
56
Étape 2: Installer un Robinet D'eau Potable
56
Étape 3: Installer le Collier de Vidange (Modèle ADS1K)
59
Étape 4: Installation des Ltres Verticaux : Étapes 1, 2 et 3
59
Étape 5: Installer le Robinet du Réservoir (Modèle ABV2K)
60
Réglage de la Pression de la Vessie D'air
60
Étape 6: Installer la Membrane D'osmose Inverse
60
Étape 7: Raccordement du Tuyau
61
Étape 8: Installation de la Vanne D'arrêt de Fuite (Modèle ALS1)
62
Étape 9: Montage du Système (Facultatif)
63
Étape 10: Démarrage du Système
63
Maintenance du Système
65
Complément Optionnel
68
Dépannage
68
Glossaire et Termes à Connaître
70
Informazioni Per L'utente
75
Caratteristiche del Prodotto
76
Processo DI Trattamento Dell'acqua
76
Durata Della Filtrazione
76
Speci Che DI Funzionamento
76
Identi Cation des Composants
77
Installazione
78
Preparazione All'installazione
78
Utensili Necessari
78
Passo 1: Installazione del Raccordo Dell'acqua DI Mandata (Articolo Nr. AFW43)
79
Passo 2: Installazione del Rubinetto Dell'acqua Potabile
79
Passo 3: Installazione del Raccordo DI Scarico (Articolo Nr. ADS1K)
82
Passo 4: Installazione Dei Ltri Verticali: Stadio 1, 2 E 3
82
Passo 5: Installazione Della Valvola del Serbatoio (Articolo Nr. ABV2K)
83
Regolazione Della Pressione Della Vescica D'aria
83
Passo 6: Installazione Della Membrana Dell'osmosi Inversa
83
Passo 7: Collegamento Dei Tubi
84
Passo 8: Installazione Della Valvola Anti-Perdita (Articolo Nr. ALS1)
85
Passo 9: Fissaggio Dell'impianto (Opzionale)
86
Passo 10: Avvio Dell'impianto
86
Manutenzione Dell'impianto
88
Componenti Aggiuntivi Opzionali
91
Risoluzione Dei Problemi
91
Glossario E Termini da Conoscere
93
Información para el Usuario
98
Características del Producto
99
Proceso de Tratamiento de Agua
99
Vida Útil de la Filtración
99
Especi Caciones de Funcionamiento
99
Identi Cación de Componentes
100
Instalación
101
Preparación de la Instalación
101
Herramientas Necesarias
101
Paso 1: Instalación del Adaptador de Suministro de Agua (Modelo N.º AFW43)
102
Paso 2: Instalación del Grifo de Agua Potable
102
Paso 3: Instalación del Collarín de Desagüe (Modelo N.º ADS1K)
105
Paso 4: Instalación de Los Ltros Verticales: 1.ª, 2.ª y 3.ª Etapa
105
Paso 5: Instalación de la Válvula del Depósito (Modelo N.º ABV2K)
106
Ajuste de Presión de la Vejiga de Aire
106
Paso 6: Instalación de la Membrana de Ósmosis Inversa
106
Paso 7: Conexión de la Tubería
107
Paso 8: Instalación de la Válvula Antifugas (Modelo N.º ALS1)
108
Paso 9: Montaje del Sistema (Opcional)
109
Paso 10: Inicio del Sistema
109
Mantenimiento del Sistema
111
Complemento Opcional
114
Solución de Problemas
114
Glosario y Términos que Debe Conocer
116
Advertisement
Ispring RCC7P-AK Installation Instructions & User Manual (136 pages)
Reverse Osmosis Water Purification System
Brand:
Ispring
| Category:
Water Filtration Systems
| Size: 9 MB
Table of Contents
English
5
Table of Contents
5
User Information
6
Product Features
7
Component Identification
8
Installation
9
Before You Start the Installation
9
Step 1: Install Feed Water Adapter (AFW43)
10
Step 2: Install Drinking Water Faucet
10
How to Drill a Hole in Sink or Counter-Top
11
Installing the Faucet Bracket
11
Step 3: Install Drain Saddle (ADS1K)
11
Step 6: Installing the Reverse Osmosis Membrane
12
Step 4: Install the Vertical Filters: Stages 1, 2, and 3
12
Step 5: Installing Tank Shut-Off Valve (ABV2K)
12
Step 7: Tubing Hook up
13
Step 8: Leak Stop Valve (ALS1) Installation
15
Step 9: Mounting the System (Optional)
16
Step 10: System Start-Up
16
System Maintenance
18
Tank Maintenance
19
Troubleshooting
20
Glossary and Terms to Know
21
Deutsch
28
Informationen Ü Ber den Nutzer
29
Eigenschaften des Produkts
30
Identifikation der Komponenten
32
Bevor Sie mit der Installation Beginnen
33
Installation
33
Schritt 1: Installation des Speisewasseradapters (AFW43)
34
Schritt 2: Installation des Trinkwasserhahns
35
Wie man ein Loch in eine Spü le oder eine Theke Bohrt
35
Installation des Wasserhahnhalters
36
Schritt 4: Installation der Vertikalen Filter: Schritte 1, 2 und 3
37
Schritt 5: Einbau des Tank-Absperrventils (ABV2K)
37
Schritt 6: Einbau der Umkehrosmosemembrane
37
Schritt 7: Aufhä Ngen der Rohre
38
Schritt 8: Einbau des Leckage-Absperrventils (ALS1)
40
Schritt 10: Starten des Systems
41
Schritt 9: Montage des Systems (Optional)
41
Wartung des Systems
44
Fehlerbehebung
47
Glossar und Begriffe, die Sie Kennen Sollten
49
Français
56
Garantie
56
Informations Sur L'utilisateur
57
Caracté Ristiques du Produit
58
Identification des Composants
60
Avant de Commencer L'installation
61
Installation
61
Étape 1 : Installation de L'adaptateur D'eau D'alimentation (AFW43)
62
Comment Percer un Trou Dans un É Vier ou un Comptoir
63
Étape 2 : Installation du Robinet D'eau Potable
63
Installation du Support de Robinet
64
Étape 4 : Installation des Filtres Verticaux : Étapes 1, 2 et 3
64
Étape 5 : Installation de la Vanne D'arrê T du Ré Servoir (ABV2K)
65
Étape 6 : Installation de la Membrane D'osmose Inverse
65
Étape 7 : Accrochage des Tubes
66
Étape 8 : Installation de la Vanne D'arrê T de Fuite (ALS1)
68
Étape 9 : Montage du Systè Me (Facultatif)
69
Maintenance du Systè Me
72
Dé Pannage
75
Glossaire et Termes à Connaî Tre
77
Español
84
Informació N para el Usuario
85
Caracterí Sticas del Producto
86
Identificació N de Los Componentes
88
Antes de Iniciar la Instalació N
89
Instalació N
89
Paso 1: Instalació N del Adaptador de Agua de Alimentació N (AFW43)
90
Có Mo Hacer un Agujero en un Fregadero O en una Encimera
91
Paso 2: Instalació N del Grifo de Agua Potable
91
Instalació N del Soporte de la Vá Lvula
92
Paso 3: Instalació N del Soporte de Drenaje (ADS1K)
92
Paso 4: Instalació N de Filtros Verticales: Pasos 1, 2 y 3
93
Paso 5: Instalació N de la Vá Lvula de Cierre del Depó Sito (ABV2K)
93
Paso 6: Instalació N de la Membrana de Ó Smosis Inversa
93
Paso 7: Colgar Los Tubos
94
Paso 8: Instalació N de la Vá Lvula de Cierre de Fugas (ALS1)
96
Paso 10: Poner en Marcha el Sistema
97
Paso 9: Montaje del Sistema (Opcional)
97
Mantenimiento del Sistema
100
Solució N de Problemas
103
Glosario y Té Rminos que Conviene Conocer
105
Italiano
112
Informazioni Sull'utente
113
Caratteristiche del Prodotto
114
Identificazione Dei Componenti
115
Installazione
116
Prima DI Iniziare L'installazione
116
Fase 1: Installazione Dell'adattatore Per L'acqua DI Alimentazione (AFW43)
117
Fase 2: Installazione del Rubinetto Dell'acqua Potabile
118
Fase 3: Installazione Della Sella DI Drenaggio (ADS1K)
119
Installazione del Supporto Della Valvola
119
Fase 4: Installazione Dei Filtri Verticali: Fasi 1, 2 E 3
120
Fase 5: Installazione Della Valvola DI Intercettazione del Serbatoio (ABV2K)
120
Fase 6: Installazione Della Membrana a Osmosi Inversa
120
Fase 7: Appendere I Tubi
121
Fase 10: Avvio del Sistema
124
Fase 9: Assemblaggio del Sistema (Opzionale)
124
Manutenzione del Sistema
127
Risoluzione Dei Problemi
130
Glossario E Termini da Conoscere
132
Ispring RCC7P-AK Installation Instructions & Owner's Manual (28 pages)
Reverse Osmosis
Brand:
Ispring
| Category:
Water Filtration Systems
| Size: 3 MB
Table of Contents
Installation Instructions
1
Table of Contents
3
System Installation
4
Prior to Installation
4
Component Identification
5
Installation Tips
6
Installation Steps
8
Step 1: Installing the Feed Water Adapter
8
Step 2: Installing the RO Faucet
9
Step 3: Installing the Drain Saddle
9
Step 4: Installing the Vertical Filters: Stages 1, 2, and 3
10
Step 5: Installing Thetank Shut-Off Valve
10
Step 6: Installing the Reverse Osmosis Membrane
10
Step 7: Tubing Hook up
11
Step 8: System Start up
13
Leak Stop Valve Installation
14
Owner's Manual
15
Section 1: Ispring RO System Maintenance
15
Section 2: Knowledge Base and FAQ
18
Section 3: Troubleshooting Guide for Newly Installed Systems
22
Section 4: Glossary and Terms to Know
24
Warranty
26
Warranty Registration
27
Ispring RCC7P-AK Installation Instructions & Owner's Manual (27 pages)
Reverse Osmosis Water Filtration Systems
Brand:
Ispring
| Category:
Water Filtration Systems
| Size: 2 MB
Table of Contents
Table of Contents
3
System Installation
4
Prior to Installation
4
Component Identification
5
Installation Tips
7
Installation Steps
9
Step 1: Installing the Feed Water Adapter
10
Step 2: Installing the RO Faucet
10
Step 3: Installing the Drain Saddle
11
Step 4: Installing the Vertical Filters: Stages 1, 2, and 3
12
Step 5: Installing Thetank Shut-Off Valve
12
Step 6: Installing the Reverse Osmosis Membrane
12
Step 7: Tubing Hook up
13
Step 8: System Start up
14
Owner's Manual
16
Section 1: Ispring RO System Maintenance
16
Section 2: Troubleshooting Guide for Newly Installed Systems
20
Section 3: Glossary and Terms to Know
22
Warranty
24
Warranty Registration
25
Ispring RCC7P-AK User Manual (13 pages)
5, 6 or 7-Stage Reverse Osmosis Water Systems
Brand:
Ispring
| Category:
Water Filtration Systems
| Size: 0 MB
Table of Contents
Installation Kit
3
Recommended Tools List
3
Operating Parameter
3
Step 1: Tapping into Cold Water Supply
5
Step 2: Installing the Dispensing Faucet
6
Step 3: Mounting the Tank Ball Valve
7
Step 5: System Start-Up
8
Troubleshooting
9
Limited One-Year Warranty
11
Advertisement
Related Products
Ispring RCC7P
Ispring RCC7AK-UV
Ispring RCC7D
Ispring RCC7U
Ispring RCC7-BN
Ispring RCC7AK-BLK
Ispring RCC7UV
Ispring RCC7AK-UVBN
Ispring RCC7AK-BN
Ispring RCC7-BLK
Ispring Categories
Water Filtration Systems
Water Dispenser
Water System
More Ispring Manuals
Login
Sign In
OR
Sign in with Facebook
Sign in with Google
Upload manual
Upload from disk
Upload from URL