Sign In
Upload
Manuals
Brands
Hitachi Manuals
Camcorder
DZMV200EUK
Hitachi DZMV200EUK Manuals
Manuals and User Guides for Hitachi DZMV200EUK. We have
2
Hitachi DZMV200EUK manuals available for free PDF download: Instruction Manual, Service Manual
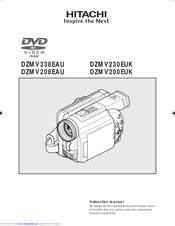
Hitachi DZMV200EUK Instruction Manual (119 pages)
Brand:
Hitachi
| Category:
Camcorder
| Size: 4.31 MB
Table of Contents
Important Information
2
For Your Safety
2
Important Safeguards
3
Table of Contents
7
Read this First
7
About this Manual
10
Checking Provided Accessories
11
Names of Parts
12
Viewing Demonstration
16
Features of DVD Video Camera/Recorder
17
Versatile Functions Available
17
Editing in Various Ways on DVD Video Camera/Recorder Alone
18
Immediate Reviewing of Recorded Image
18
Recording Movie and Still
18
Recording on Disc
18
Using with Various Devices
18
Cautions When Using
19
Cautions When Storing
22
Suggestions and Restrictions
22
Discs
23
Removing and Replacing Disc From/In Cartridge or Caddy
24
Disc Storage Capacity
26
Setups
27
Setting up the DVD Video Camera/Recorder
27
Attaching Shoulder Strap
27
Holding DVD Video Camera/Recorder
27
Attaching Ferrite Cores
28
Attaching Lens Cap
28
Inserting Batteries into Remote Control
29
Setting up the Battery
30
Attaching Battery to DVD Video Camera/Recorder
30
Removing Battery
30
Charging Battery
31
Battery Remaining Level Indicator
33
Using DVD Video Camera/Recorder with AC Adapter
34
Setting Date and Time
35
Changing Display Format of Date and Time
36
Inserting and Ejecting Disc
37
Inserting Disc
37
Removing Disc
39
Basic Techniques
40
Basic Handling of DVD Video Camera/Recorder
40
Opening LCD Monitor
40
Turning DVD Video Camera/Recorder on
40
Closing LCD Monitor
41
LCD Screen Brightness Adjustment
41
Viewing Subject through Viewfinder
41
Recording Movie
42
Using External Microphone
42
Recording Stills
43
Immediately Checking Recorded Scene
44
Playing Back
44
Skip Playback
44
Frame Advance/Frame Back/Slow Playback
45
Search Playback
45
Searching for Point You Wish to View by Specifying It (Go To)
46
Zooming
47
Focusing When Recording Movie
48
Macro Recording
48
Manually Focusing Subject During Movie Recording
49
Adjusting Exposure Manually
50
On-Screen Information
51
Information Display During Recording
51
Switching the Information Display Mode
52
Information Display During Playback
53
Advanced Techniques
54
Setting up Camera Functions
54
Selecting Shooting Mode to Match the Subject (Switching Programme AE Mode)
54
White Balance (Auto/Hold)
55
Using the Electronic Image Stabilizer (EIS)
56
Switching Digital Zoom off
57
Switching to 16:9 Mode
58
Setticng up Record Functions
59
Switchisng Movie Quality Mode
59
Input Selection (for DZ-MV238E(AU) and DZ-MV208E(AU))
60
Changing Method for Recording Stills (for DZ-MV238E(AU) and DZ-MV208E(AU))
61
Self-Timer
62
Switching On-Screen Display Output on or off
63
Initial Settings
64
Setting or Releasing Power Save
64
Switching Operating Sound on or off
64
Changing Display Language
65
Turning Record LED on or off
65
Initialising All Settings to Defaults
66
Disc Navigation
67
Before Using Disc Navigation
67
Structure of Data Recorded on this DVD Video Camera/Recorder
67
Functions Available with Disc Navigation
68
Using Disc Navigation
68
Starting Disc Navigation and Interpreting Navigation Screen
70
Playing Back Scenes
71
Selecting Consecutive Scenes Together
71
Selecting Random Scenes
71
Understanding Flow of Disc Navigation Menu
72
Programme
73
Playing Back Programme
73
Switching to Thumbnail Display of Specific Date (Selecting Programme)
73
Changing Title of Programme
74
Play List
75
Creating New Play List
75
Playing Back a Play List
76
Switching Play List (Switching to Display of each Play List)
76
Adding Scenes to Play List
77
Deleting Scenes from Play List
78
Editing Play List (Adding Scenes Using Menu)
78
Editing Play List (Deleting Scenes Using Menu)
79
Editing Play List (Selecting Scenes Using Menu)
79
Changing Title of Play List
80
Deleting Play List
80
Scene
81
Deleting Scenes
81
Adding Special Effects (Fade)
82
Combining Multiple Scenes
84
Dividing Movies
84
Arranging Order of Scenes (Move)
85
Playing Back by Skipping Scenes (Skip)
86
Selecting Scenes Using Menu Screen
86
Displaying Information Using Menu Screen
87
Disc Management
88
Initialising DVD-RAM Disc
88
Verifying Remaining Free Space on Disc (Capacity)
88
Updating Control Information
89
Finalising Disc
90
Playing Back Scenes Repeatedly (Repeat Play)
90
Connecting to a TV and Viewing
91
Connecting to Other Devices
91
Viewing on TV Screen
91
Connecting to a TV
91
Viewing on TV Screen
92
Recording Image from Other AV Devices (for DZ-MV238E(AU) and DZ-MV208E(AU))
93
Connecting to Other AV Device
93
Recording Image from Other Camcorder or AV Device
94
Cautions When Connecting DVD Video Camera/Recorder to PC
95
Connecting to Your PC
95
Capturing Data for PC
96
Using DZ-WINPC3(W) PC Kit
96
Using Disc on PC
98
Subsidiary Information
99
Cleaning
99
If Dust Adheres to Viewfinder Lens
99
Trouble Messages
100
Trouble Shooting
105
During Recording
106
During Playback
107
System Reset
110
Major Specifications
111
Introduction to Optional Accessories
112
Camera Accessories
112
Power Supplies
112
Miscellaneous
112
Index
113
Advertisement
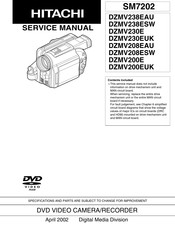
Hitachi DZMV200EUK Service Manual (116 pages)
DVD VIDEO CAMERA/RECORDER
Brand:
Hitachi
| Category:
Digital Camera
| Size: 6.06 MB
Table of Contents
Table of Contents
5
Chapter 1 General Information
7
Specifications
7
Comparison of Specifications/Functions with Previous Model
9
Formats Concerning DVD (DVD-RAM/DVD-R Discs)
12
Formats for DVD-RAM/DVD-R Discs
12
DVD File Format
13
DVD Video Recording Format
13
Initializing and Finalizing DVD-RAM/DVD-R Discs
15
How to Initialize DVD-RAM Disc
15
How to Initialize DVD-R Disc
15
How to Finalize DVD-R Disc
16
Displaying Remaining Disc Capacity
17
Removing Disc from Cartridge or Caddy
18
Disc Packed in Cartridge
18
Disc Packed in Caddy
19
Battery Pack
20
Checking Charged Status
20
Reference for Charging Time and Continuous Movie Recordable Time at Normal Temperature
20
Life
20
Demo (Demonstration) Mode
21
How to Set Demo Mode
21
How to Exit Demo Mode
21
Details of Operation
22
Resetting Various Settings
22
System Reset
22
Resetting Camera Functions
23
Explanation of Trouble Messages
24
Trouble Diagnosis
28
Before Starting Trouble Diagnosis
28
Check (Diagnosis) Position
28
Trouble Diagnosis Table
30
Test Land (TL) Location Diagram
33
Chapter 2 Disassembly
38
Names and Locations of Major Components
38
General View
38
L Block
38
R Block [1/2]
38
Rear Block
40
LCD Block
40
EVF Block
40
Before Starting Disassembly
42
Troubleshooting During Disassembly
43
Removing DVD-RAM/DVD-R Disc
43
Disassembly Procedure
45
Top Cover, R Block, L Block, and Front Block
46
Disc Cover
47
LCD Case U, MR Circuit Board, LCD Block, AUD Circuit Board, Adjustment Cap, and L Case
48
Rear Block, REF Circuit Board, Camera Block, man Circuit Board, Circuit Board Frame, DRF Circuit Board, and Hot Shoe
49
Link Bracket, Drive Block, Lock Unit, and R Case
50
Loader and Drive Mechanism Unit
51
Microphone Cover, Microphone, Lens Hood, and Front Case
51
EVF Block, Jack Holder, Jack Cover S, AVJ Circuit Board, DCJ Circuit Board, Jack Cover R, Battery Terminal, and Rear Cover
52
SE Circuit Board, CCD Image Sensor, and Lens
53
LCD Circuit Board, LCD Frame, Monitor Backlight, Monitor LCD, and LCD Case B
54
Eye Cup, EVF Fulcrum, EVF Case U, EVF Case B, EBLB Circuit Board, EVF LCD, and EVF Backlight
55
Subsidiary Functions for Servicing/ Electric Circuit Adjustment
56
Subsidiary Functions for Servicing
56
Information on Firmware
56
Checking Firmware Versions
56
Updating Firmware
57
Deleting Files on DVD-RAM Disc
58
Deleting Disc Control Data (RX) File
58
Forced Disc Formatting
59
Displaying Various Types of Information
60
Playback File Detailed Information Display
60
Error Code Display
60
Electric Circuit Adjustment
64
Test Equipment/Jigs Necessary for Adjustment
64
List of Jigs and Tools
64
List of Charts for Adjustment
64
Test Equipment, Etc
64
Before Starting Adjustment
65
Connections for Adjustment
65
Cautions
65
Setting DVD Video Camera/Recorder
66
Setting Test Equipment
66
Starting Adjustment Program (MAP)
67
List of Adjustment Items
68
Adjustments Needed after Replacing Major Components
68
Adjustment Item Transfer Diagram
69
Camera Adjustment
70
Sampling Pulse Adjustment
71
Auto Iris Control Adjustment
72
Shutter Adjustment
73
B (Blue) Matrix Adjustment
75
White Balance Adjustment
76
Chroma Gain Adjustment
76
Data Initialize
70
Autofocus
78
Zoom/Focus Tracing Adjustment
78
AF Noise Level Adjustment
79
Stabilizer
79
Spot Noise
80
Error Messages
81
Error Messages During Picture Control System Adjustment
81
Error Messages During Autofocus System Adjustment
82
Error Messages During Stabilizer Adjustment
83
Error Messages During Spot Noise Adjustment
83
Chapter 4 Exploded View
86
Camera
86
LCD Monitor
86
Electronic Viewfinder (EVF)
87
Accessories
87
Chapter 5 Replacement Parts List
88
Mechanical Parts List
88
Electrical Parts List
89
Chapter 6 Schematic, Circuit Board and Block Diagrams
96
Internal Wiring Diagram
96
Avj
98
Drf
98
Regulator [REF]
99
Evf [Ref]
100
Eblb
101
Dcj
101
Lcd
102
Aud
103
IC Block Diagrams
104
Eblb
105
Drf
106
Dcj
106
Avj
107
Lcd
107
Ref
108
Aud
109
Man
110
Drive Mechanism Unit
111
Drc
111
Hdm
112
Identification of Parts Location
112
Block Diagrams
114
Audio/Video Signal Process Section
114
Advertisement
Related Products
Hitachi DZ-MV200A - Camcorder
Hitachi DZ-MV230A - Camcorder
Hitachi DZ-MV270A - Camcorder
Hitachi DZMV208EAU
Hitachi DZMV230EUK
Hitachi DZMV238EAU
Hitachi DZMV230E
Hitachi DZMV200E
Hitachi DZMV270E
Hitachi DZMV2000E
Hitachi Categories
Projector
Air Conditioner
Drill
Power Tool
TV
More Hitachi Manuals
Login
Sign In
OR
Sign in with Facebook
Sign in with Google
Upload manual
Upload from disk
Upload from URL