Sign In
Upload
Manuals
Brands
HHB Manuals
Recording Equipment
DualBurn CDR-882
User Manuals: HHB DualBurn CDR-882 Drive Recorder
Manuals and User Guides for HHB DualBurn CDR-882 Drive Recorder. We have
5
HHB DualBurn CDR-882 Drive Recorder manuals available for free PDF download: User Manual, Service Manual, Brochure, Review, Technical Specifications
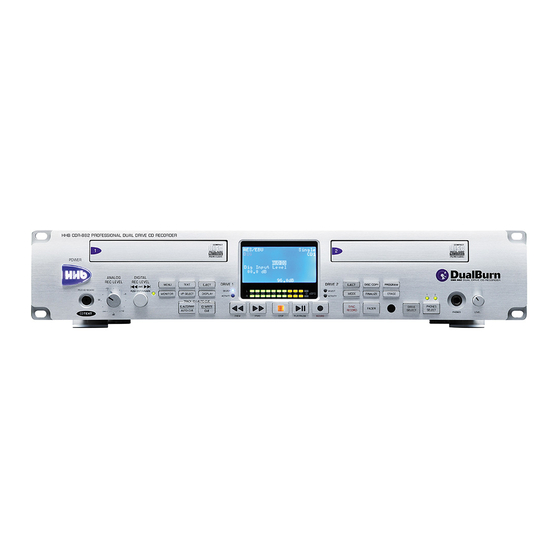
HHB DualBurn CDR-882 User Manual (66 pages)
Dual Drive CD Recorder
Brand:
HHB
| Category:
Recording Equipment
| Size: 5 MB
Table of Contents
Important Safety Instructions
3
Important Safety Precautions
4
Safety Information
4
Table of Contents
5
Contents
5
Introduction
7
What's in the Box
7
Unpacking
7
CDR-882 Primary Features
8
Cautions and Guidance on Installation
8
Safety Guidelines
8
Installation
8
Care & Cleaning
9
Installing the Remote Control Batteries
9
Using the RC-882 Remote Control Handset
10
Compatible Disc Types
10
Connectivity
11
Audio Inputs
11
Audio Outputs
11
Other Connectors
11
Connector Details
11
Front Panel Features
13
Alphanumeric Display
16
RC-882 Remote Control
17
Direct Access Keys
17
Record Keys
17
Quick Start Guide
18
Recording a CD from an Analogue Source
18
Recording a CD from a Digital Source
18
Playing a CD
19
Playing One Disc While Recording Another
19
Reference List of the CDR-882'S Other Main Functions
20
Basic Operation
21
Disc Insertion and Removal
21
Drive Selection
21
Transport Controls
21
Play/Pause
21
Stop
21
Ffwd & Frew
21
Manual Record
22
Selecting a Track (AMS)
22
Fader
22
Selecting an Input
23
Time Displays
23
Monitoring
24
CDR-882 Monitoring System
24
Main Outputs
24
Headphone Outputs
24
Recording
25
Synchronised Recording
25
Record One Track
25
Record Multiple Tracks
25
Finalisation in Synchronised Recording
26
Time Interval Track ID Generation
26
Automatic and Manual Track Ids
26
Finalising
26
Recording on CD-Rws
27
Disc Types
27
Digital Recording Restrictions
27
Menu System
28
Menu Navigation
28
Example
29
The Submenus
29
Audio Submenu
30
Digital Input Level
30
Input Balance
30
Fade-Out Time
30
Input Dither
31
Phones MIX
31
Output MIX
31
Clock Submenu
32
Clock Source
32
Display Submenu
32
Contrast
32
Invert
32
Edit Marker Submenu
33
Direct Mark
33
Auto-Cue Threshold
33
Discspan Submenu
33
Multi-Machine
33
Master/Slave
33
Fade-In Time
33
Fade-Out Time
34
Overlap Time
34
Record Submenu
34
Record Sync
34
S/PDIF-I/P REC Start Trigger
34
Auto Track ID Trigger
35
Audio Threshold
35
Track Length
35
Auto Finalize
35
Digital Output Format
36
Scms
36
Copy Speed
36
Parallel Port
37
Preset
37
Inputs 1 to 5
37
Outputs 1 to 3
37
General Submenu
38
Timer
38
Eject Block
38
Firmware Submenu
38
Advanced Features & Operation
39
Internal & External Clocks
39
Clock Source Display
39
Recording Features
40
Single CD
40
Dual Disc Modes and Functions
40
Dualburn Record
40
Discspan Mode
40
Track Ids in Discspan Mode
41
Identing Discs in Discspan Mode
41
Playback in Discspan Mode
42
Disc Copy
42
Multi-Machine Operation
43
Multi-Machine + Dualburn Operation
43
Multi-Machine + Discspan Operation
44
Replay of Discs Recorded in Multi-Discspan Mode
44
Program Play
45
Program Copy
45
CD Text
46
Displaying CD Text
46
Entering CD Text
46
Cueing
47
Manual Cueing
47
Editing Marker Points
47
Auto-Cue
47
Auto-Pause
47
Pre-Selecting a Track before Loading a Disc
48
Disc End Review
48
Erasing and Unfinalising Discs
48
Erasing/Initialising a Single CD-RW
49
Erasing/Initialising Two CD-Rws
49
Scms
49
Remote Control
50
Parallel Remote Control Port
50
Pinout
50
Electrical Characteristics
50
Rs232 Link Input
51
Pinout
51
Port Parameters
51
Abridged Command Set
51
Appendix 1 - Connector Pinouts
52
Analogue Inputs (Balanced) (1)
52
AES/EBU Input (3)
52
Analogue Outputs (Balanced) (6)
52
AES/EBU Output (8)
52
Multi-Machine RS232 Link Input (Male) (11)
52
Multi-Machine RS232 Link Output (Female) (4)
52
Parallel Remote Input (Female) (13)
52
PS/2 Keyboard (15)
52
Appendix 2 - Menu Flow Diagrams
53
Submenus
53
Audio
54
Clock
55
Display
55
Edit Marker
55
Discspan
56
Record
57
Parallel Port
58
General
59
Appendix 3 - Firmware Updates
60
Appendix 4 - Factory Defaults
61
Appendix 5 - Specifications
62
Notes
63
Advertisement
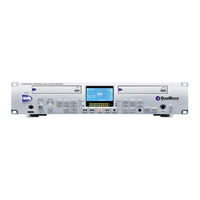
HHB DualBurn CDR-882 Service Manual (37 pages)
Brand:
HHB
| Category:
Recording Equipment
| Size: 10 MB
Table of Contents
Table of Contents
2
Important Information
5
Disassembly and Assembly
6
Lid Removal
6
Figure 2.1-1: Remove the Four Screws on the Top
6
Figure 2.1-2: Remove the Six Screws on the Sides
6
Figure 2.1-3: Remove the Seven Screws on the Rear
6
Figure 2.1-4: Push to Unlock Lid
6
Figure 2.1-5: Interior of the Unit
7
Removal of CD Drives
8
Figure 2.2-1: Data and Power Cables on the Back of the Drive
8
Figure 2.2-2: Bus and Power Cables Removal from the Drive
8
Figure 2.2-3: Bus and Power Cables on the Motherboard
8
Figure 2.2-4: Disconnect Bus and Power Cables from the Motherboard
9
Figure 2.2-5: Cut Tie Holding the Power Cables for Drive 1
9
Figure 2.2-7: How to Reach the Screw under the Power Switch
9
Figure 2.2-6: Twelve Screws that Hold the Drives' Brackets in Place
10
Figure 2.2-8: Removing the Drives from the Chassis
10
Figure 2.2-9: Push the Eject Lever under the Tray to Eject the Disc Tray
11
Figure 2.2-10: Door Removal
11
Figure 2.2-11: 4 Screws that Hold each Bracket Attached to the Drives
11
Figure 2.2-12: Drive, Brackets and Door Disassembled
12
Rear Board [P8202] Removal
13
Figure 2.3-1: FFC Socket on the Upper Board
13
Figure 2.3-2: Unlocking the FCC on the Upper Board
13
Figure 2.3-3: FFC Removal
13
Motherboard [P8200] Removal
14
Figure 2.3-4: Eight Screws, Two Stand-Offs and Nut and Washer on the Rear Panel
14
Figure 2.3-5: Pliers Used to Remove the BNC Nut
14
Figure 2.3-6: Nut-Driver Used to Remove the Serial Port Stand-Offs
14
Figure 2.4-1: Different Connectors on the Motherboard
15
Figure 2.4-2: 3 Ffcs on the Motherboard
15
Figure 2.4-3: Screws and Stand-Offs that Hold the Motherboard to the Rear Panel
15
Figure 2.4-4: Screws that Hold the Motherboard to the Chassis
16
Figure 2.4-5: Push to Release the Motherboard from the Rear Panel
16
Figure 2.4-6: Remove Loose Cables
17
Power Supply Removal
18
Figure 2.5-1: Remove the Four Screws and Disconnect the Molex Type Connector
18
Figure 2.5-2: CDR-882 Switched Mode Power Supply
18
Front Panel Removal
19
Figure 2.6-1: 8 Screws that Hold the Panel to the Chassis
19
Figure 2.6-2: 3 Crews that Hold the Headphones Board
19
Figure 2.6-3: Six more Screws that Hold the Front Panel to the Chassis
20
Figure 2.6-4: Remove the Front Panel
20
Figure 2.6-5: Front Panel Standing Alone
20
Front Panel Disassembly
21
Figure 2.7-1: Remove Pots
21
Figure 2.7-2: Release the Switches Board from the Panel
21
Figure 2.7-3: Unlock the FFC
21
Figure 2.7-4: Separate the Switches and PS2 Boards
22
Figure 2.7-5: Remove the Volume Pot
22
Figure 2.7-6: Remove All the Buttons from the Front Panel
22
Figure 2.7-7: Front Panel and Buttons
23
Figure 2.7-8: 4 Screws that Hold the LCD in Place
23
Figure 2.7-9: Front Panel Completely Disassembled
23
Removing the Power Cables
24
Figure 2.8-1: Remove Power Cabling
24
Figure 2.8-2: Remove Flat Push Connectors
25
Figure 2.8-3: Remove the Power Button
25
Figure 2.8-4: Remove Screws and Sleeve
25
Pcbs Overview
26
Motherboard [P8200]
26
Figure 3.1-1: Motherboard
26
Figure 3.1-2: Motherboard with the most Important Components Highlighted
26
Switches Board [P8201]
28
Figure 3.2-1: Switches Board
28
Figure 3.2-2: Switches Board with the most Important Components Highlighted
28
Rear Board [P8202]
29
Figure 3.3-1: Rear Board
29
Figure 3.3-2: Rear Board with the most Important Components Highlighted
29
Headphones Board [P8203]
30
Figure 3.4-1: Headphones Board
30
Figure 3.4-2: Headphones Board with the Components Highlighted
30
PS2 Board [P8204]
31
Figure 3.5-1: PS2 Board
31
Figure 3.5-2: PS2 Board with the Components Highlighted
31
Power Switch Backlight Board [P8205]
32
Figure 3.6-1: Power Switch Light Board
32
Figure 3.6-2: Power Switch Light Board
32
Power Switch Board [P8206]
33
Figure 3.7-1: Power Switch Board
33
Figure 3.7-2: Power Switch Board with the Components Highlighted
33
Fault Finding
34
The Unit Doesn't Power up
34
The Unit Doesn't Power up Properly or Freezes While Powering up
34
Some Buttons Don't Respond or some LED Don't Flash
35
Firmware Updates
36
CDR-882 Firmware Update
36
Drive Firmware Update
37
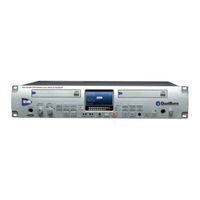
HHB DualBurn CDR-882 Review (2 pages)
PROFESSIONAL DUAL DRIVE CD RECORDER
Brand:
HHB
| Category:
Recording Equipment
| Size: 2 MB
Table of Contents
Dualburn and Discspan Features
2
Machine Operation and Controls
2
Configuration and Recording Setup
2
Playback Options
2
Remote Control and Connectivity
2
Sound Quality and Performance
2
Pros
2
Cons
2
Advertisement
HHB DualBurn CDR-882 Brochure (4 pages)
DualBurn PROFESSIONAL DUAL DRIVE CD RECORDER
Brand:
HHB
| Category:
Recording Equipment
| Size: 0 MB
HHB DualBurn CDR-882 Technical Specifications (2 pages)
DUAL DRIVE CD RECORDER
Brand:
HHB
| Category:
Recording Equipment
| Size: 0 MB
Advertisement
Related Products
HHB CDR-850
HHB CDR800
HHB BurnIT CDR-830
HHB CIRCLE STUDIO MONITORS
HHB CIRCLE SERIES
HHB Portadat PDR1000TC
HHB Portadrive PDR 2000
HHB Categories
Recording Equipment
Microphone
Speakers
Minidisc Recorder
DVD Player
More HHB Manuals
Login
Sign In
OR
Sign in with Facebook
Sign in with Google
Upload manual
Upload from disk
Upload from URL