Sign In
Upload
Manuals
Brands
Epson Manuals
Projector
BrightLink 697Ui
Epson BrightLink 697Ui Manuals
Manuals and User Guides for Epson BrightLink 697Ui. We have
4
Epson BrightLink 697Ui manuals available for free PDF download: User Manual, Installation Manual, Setup Manual
Epson BrightLink 697Ui User Manual (582 pages)
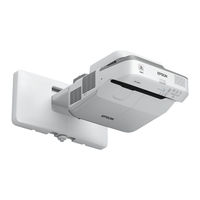
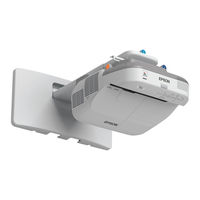
Wireless Full HD 3LCD Ultra Short-throw Interactive Display
Brand:
Epson
| Category:
Projector
| Size: 22.57 MB
Table of Contents
Table of Contents
3
Brightlink 697Ui User's Guide
13
Introduction to Your Projector
14
Projector Features
14
Product Box Contents
16
Additional Components
18
Optional Equipment and Replacement Parts
19
Warranty and Registration Information
20
Notations Used in the Documentation
21
Where to Go for Additional Information
21
Additional Projector Software and Manuals
21
Projector Part Locations
23
Projector Parts - Front/Side
24
Projector Parts - Top/Side
25
Projector Parts - Back Panel
26
Projector Parts - Base
28
Projector Parts - Control Panel
29
Projector Parts - Pen Stand
30
Projector Parts - Remote Control
31
Projector Parts - Control Pad
33
Projector Parts - Touch Unit
34
Setting up the Projector
36
Projector Placement
36
Projector Setup and Installation Options
37
Projection Distance
39
Removing and Attaching the Cable Cover
39
Projector Connections
40
Connecting to Computer Sources
41
Connecting to a Computer for USB Video and Audio
41
Connecting to a Computer for VGA Video
43
Connecting to a Computer for HDMI Video and Audio
43
Connecting to a Computer for Pen Use or USB Mouse Control
44
Connecting a Computer to the Control Pad
45
Connecting to a Computer for Sound
47
Connecting to Video Sources
48
Connecting to an HDMI Video Source
48
Connecting to an MHL-Compatible Device
49
Connecting to a Component Video Source
50
Connecting to a Composite Video Source
50
Connecting to a Video Source for Sound
51
Connecting External Output Devices
52
Connecting to an External Computer Monitor
52
Connecting to an External DVI Monitor or Projector
53
Connecting to External Speakers
54
Connecting to External USB Devices
55
USB Device Projection
55
Connecting a USB Device or Camera to the Projector
56
Connecting a USB Device to the Control Pad
57
Selecting the Connected USB Source
59
Disconnecting a USB Device or Camera from the Projector
59
Connecting to a Document Camera
59
Connecting a Printer to the Control Pad
60
Connecting Multiple Projectors of the same Model
61
Installing Batteries in the Remote Control
63
Installing Batteries in the Pens
64
Using the Projector on a Network
66
Wired Network Projection
66
Connecting to a Wired Network
66
Selecting Wired Network Settings
67
Wireless Network Projection
70
Installing the Wireless LAN Module
71
Connecting Directly to a Smartphone or Tablet
73
Using Quick Wireless Connection (Windows)
75
Selecting Wireless Network Settings Manually
78
Wireless LAN Menu Settings
81
Selecting Wireless Network Settings in Windows
83
Selecting Wireless Network Settings on Mac
83
Setting up Wireless Network Security
84
Wireless Network Projection from a Mobile Device or Windows Computer (Screen Mirroring)
85
Screen Mirroring Restrictions
85
Selecting Screen Mirroring Settings
85
Connecting for Screen Mirroring with a Windows 8.X/Windows 10 Computer
87
Connecting for Screen Mirroring with Miracast
88
Setting up Projector Network E-Mail Alerts
88
Network Projector E-Mail Alert Messages
90
Setting up Monitoring Using SNMP
90
Controlling a Networked Projector Using a Web Browser
93
Creating an Address Book
95
Crestron Roomview Support
96
Setting up Crestron Roomview Support
96
Controlling a Networked Projector Using Crestron Roomview
98
Registering a Digital Certificate on the Projector
99
Importing a Web Server Certificate Using the Projector Menus
99
Registering Digital Certificates from a Web Browser
100
Digital Certificate Types
102
Using Basic Projector Features
104
Turning on the Projector
104
Using the Home Screen
106
Turning off the Projector
108
Selecting the Language for the Projector Menus
110
Image Shape
110
Correcting Image Shape with the Keystone Buttons
111
Correcting Image Shape with Quick Corner
113
Correcting Image Shape with Arc Correction
114
Resizing the Image with the Wide and Tele Buttons
116
Adjusting the Image Position
117
Focusing the Image
118
Remote Control Operation
120
Using the Remote Control as a Wireless Mouse
121
Using the Remote Control as a Pointer
122
Selecting an Image Source
123
Projection Modes
126
Changing the Projection Mode Using the Remote Control
126
Changing the Projection Mode Using the Menus
127
Image Aspect Ratio
128
Changing the Image Aspect Ratio
128
Available Image Aspect Ratios
129
Color Mode
130
Changing the Color Mode
130
Available Color Modes
131
Turning on Auto Iris
131
Controlling the Volume with the Volume Buttons
132
Projecting a PC Free Presentation
133
Supported PC Free File Types
133
Starting a PC Free Slide Show
134
Starting a PC Free PDF File Presentation
136
Starting a PC Free Movie Presentation
138
PC Free Display Options
140
Adjusting Projector Features
142
Projecting Two Images Simultaneously
143
Input Sources for Split Screen Projection
145
Using Multiple Projectors (Duolink)
145
Projector Identification System for Multiple Projector Control
146
Setting the Projector ID
146
Setting the Remote Control ID
147
Adjusting Color Uniformity
148
Adjusting the Lamp's Brightness
150
Matching the Image Colors
152
Adjusting RGBCMY
154
Shutting off the Picture and Sound Temporarily
156
Stopping Video Action Temporarily
156
Zooming into and out of Images
157
Scheduling Projector Events
158
Saving a Scheduled Event
158
Viewing Scheduled Events
159
Editing a Scheduled Event
160
Projector Security Features
161
Password Security Types
162
Setting a Password
162
Selecting Password Security Types
164
Entering a Password to Use the Projector
165
Saving a User's Logo Image to Display
166
Locking the Projector's Buttons
169
Unlocking the Projector's Buttons
169
Installing a Security Cable
170
Creating a User Pattern to Display
170
Copying Menu Settings between Projectors
171
Saving Settings to a USB Flash Drive
172
Transferring Settings from a USB Flash Drive
173
Saving Settings to a Computer
174
Transferring Settings from a Computer
176
Using the Interactive Features
179
Interactive Modes
179
Using the Projected Screen as a Whiteboard (Built-In Whiteboard Mode)
180
Drawing on a Projected Image (Built-In Annotation Mode)
181
Controlling Computer Features from a Projected Screen (PC Interactive Mode)
183
PC Interactive Mode System Requirements
185
Using the Interactive Pens
186
Using the Pens
186
Pen Calibration
189
Calibrating Automatically
190
Calibrating Manually
192
Using Finger Touch Interactivity
195
Touch Unit Safety Instructions
195
Calibrating for Finger Touch Interactivity
197
Using Finger Touch Operations
200
Using Brightlink with a Computer
202
Adjusting the Pen Operation Area
203
Easy Interactive Tools
206
Connecting to a Remote Computer
206
Remote Desktop System Requirements
209
Windows Pen Input and Ink Tools
209
Enabling Windows Pen Input and Ink Tools
210
Using Windows Pen Input and Ink Tools
211
Whiteboard Mode
212
Using the Whiteboard Toolbars
213
The Main Whiteboard Toolbar
214
Selecting Background Templates
218
Zooming Images in Whiteboard Mode
218
Inserting and Working with Images
219
Using the Shapes Tool
220
Selecting Line Width and Color
220
Whiteboard Projector Control Toolbar
220
Selecting Whiteboard Settings
223
Selecting Basic Whiteboard Settings and Policies
224
Selecting Whiteboard Print Settings
227
Selecting Settings for Saving Whiteboard Pages
228
Selecting Settings for Emailing Whiteboard Pages
230
Selecting Settings for a Directory Server
232
Scanning an Image into a Whiteboard Page
235
Whiteboard Scan Settings
237
Selecting a Networked Device Source
237
Saving Pages in Whiteboard Mode
239
Printing Whiteboard Pages
241
Whiteboard Print Settings
243
Emailing Whiteboard Pages
244
Sharing the Whiteboard
246
Starting a Shared Whiteboard Session
246
Connecting to a Shared Whiteboard from a Computer or Other Device
250
Supported Web Browsers for Sharing a Whiteboard
250
Web Browser Toolbars
251
Connecting to a Shared Whiteboard from a Projector
253
Using Brightlink Without a Computer
255
Using the Built-In Annotation Mode
255
Built-In Tools for Use Without a Computer
257
Changing Pen Width and Color Using the Built-In Toolbar
260
Projector Control Toolbar
260
Splitting the Interactive Screen
262
Selecting Interactive Split Screen Settings
264
Using Interactive Features with Two Projectors
265
Temporarily Using Interactive Features on One Projector
265
Adjusting the Menu Settings
268
Using the Projector's Menus
268
Image Quality Settings - Image Menu
270
Input Signal Settings - Signal Menu
272
Projector Feature Settings - Settings Menu
275
Projector Setup Settings - Extended Menu
279
Projector Network Settings - Network Menu
290
Projector Setup Settings - ECO Menu
293
Projector Information Display - Info Menu
295
Event ID Code List
296
Projector Reset Options - Reset Menu
299
Maintaining and Transporting the Projector
301
Projector Maintenance
301
Cleaning the Projection Window
301
Cleaning the Obstacle Sensor
302
Cleaning the Projector Case
303
Air Filter and Vent Maintenance
303
Cleaning the Air Filter and Vents
303
Replacing the Air Filter
307
Projector Lamp Maintenance
310
Replacing the Lamp
310
Resetting the Lamp Timer
314
Replacing the Remote Control Batteries
315
Replacing the Hard Pen Tips
317
Replacing the Soft Pen Tips
319
Transporting the Projector
322
Solving Problems
323
Projection Problem Tips
323
Projector Light Status
324
Using the Projector Help Displays
327
Solving Image or Sound Problems
328
Solutions When no Image Appears
328
Solutions When Image Is Incorrect Using the USB Display Function
329
Solutions When "No Signal" Message Appears
330
Displaying from a PC Laptop
331
Displaying from a Mac Laptop
331
Solutions When "Not Supported" Message Appears
331
Solutions When Only a Partial Image Appears
332
Solutions When the Image Is Not Rectangular
333
Solutions When the Image Contains Noise or Static
333
Solutions When the Image Is Fuzzy or Blurry
334
Solutions When the Image Brightness or Colors Are Incorrect
335
Solutions to Sound Problems
336
Solving Projector or Remote Control Operation Problems
337
Solutions to Projector Power or Shut-Off Problems
337
Solutions to Problems with the Remote Control
338
Solutions to Password Problems
338
Solving Network Problems
339
Solutions When Wireless Authentication Fails
339
Solutions When Network Alert E-Mails Are Not Received
340
Solutions When You Cannot Access the Projector through the Web
340
Solutions When the Image Contains Static During Network Projection
340
Solutions When You Cannot Connect Using Screen Mirroring
341
Solutions When the Image or Sound Contains Static When Using Screen Mirroring
341
Solving Interactive Problems
342
Solutions When "Error Occurred in the Easy Interactive Function" Message Appears
342
Solutions When the Interactive Pens Do Not Work
342
Solutions When the Interactive Pen Position Is Not Accurate
343
Solutions When Manual Calibration Does Not Work
344
Solutions When the Interactive Pens Are Slow or Difficult to Use
344
Solutions When the Interactive Pens Cause Interference or Unwanted Effects
345
Solutions When Finger Touch Interactivity Does Not Work
345
Solutions for Problems with Capturing, Printing, Saving, or Scanning
346
Solutions When Inking Does Not Appear in Microsoft Office
347
Solutions When the Pen Does Not Work over a Network or the Toolbars Do Not Appear
347
Solutions for Problems with a Shared Whiteboard
347
Solutions When the Time Is Incorrect in Whiteboard Settings
347
Where to Get Help
348
Technical Specifications
350
General Projector Specifications
350
Projector Lamp Specifications
351
Interactive Pen Specifications
352
Touch Unit Specifications
352
Remote Control Specifications
352
Projector Dimension Specifications
353
Projector Electrical Specifications
353
Projector Environmental Specifications
354
USB Display System Requirements
354
Projector Safety and Approvals Specifications
355
Supported Video Display Formats
356
Notices
359
Recycling
359
Important Safety Information
359
Important Safety Instructions
360
Restriction of Use
363
List of Safety Symbols (Corresponding to IEC60950-1 A2)
363
FCC Compliance Statement
367
Open Source Software License
368
Binding Arbitration and Class Waiver
578
Trademarks
581
Copyright Notice
582
A Note Concerning Responsible Use of Copyrighted Materials
582
Copyright Attribution
582
Advertisement
Epson BrightLink 697Ui Installation Manual (97 pages)
Brand:
Epson
| Category:
Projector
| Size: 7.64 MB
Table of Contents
Safety Instructions
2
Explanation of Symbols
2
Safety Precautions for Installation
2
Installation Location
4
Package Contents
5
Adjusting the Image
6
Wall Mount
7
Specifications
8
Wall Plate
8
Vertical Slide Adjustment Range
9
Horizontal Slide Adjustment Range
9
Forward/Backward Slide Adjustment Range
9
Connecting Devices
11
Connection Example
11
Connecting the Control Pad
12
Positioning the Projector
13
Installation Worksheet for Projecting on a Pre-Installed Wall-Mounted Board
14
Installation Worksheet for Projecting on a Plain Wall
15
Projection Distance Worksheets
16
Diagonal Image Size and Mounting Position
17
Distance from Projection Surface to Wall Plate
18
Installation Measurement Tables
18
Measurements in Inches for WUXGA Projectors in Native Resolution
21
Measurements in Centimeters for WUXGA Projectors in Native Resolution
24
Installing the Projector
25
Assemble the Parts
25
Install the Wall Plate on the Wall
27
Determine the Projection Distance and Pull out the Mount Arm Slider
29
Route the Cables through the Wall Mount Arm
30
Attach the Mount Arm to the Wall Plate
30
Adjust the Vertical Slide Position of the Arm
32
Attach the Projector to the Wall Mount
33
Connect the Power Cord and Other Cables to the Projector
34
Turn on the Projector
35
Change the Aspect Ratio if Necessary
35
Display the Test Pattern
36
Adjust the Focus
37
Use the Adjustment Dial on the Left Side to Adjust the Horizontal Roll
37
Use the Adjustment Dial on the Top to Adjust the Vertical Tilt
38
Adjust the Horizontal Slide
39
Adjust the Forward/Backward Slide
39
Adjust the Vertical Slide
40
Re-Adjust the Focus
40
Turn off the Display of the Test Pattern
41
Attaching the Covers
42
Attach the Cable Cover to the Projector
43
Using the Easy Interactive Function
44
Attaching a Security Cable
45
Limited Warranty
46
Explication des Symboles
49
Consignes de Sécurité Pour L'installation
49
Contenu de L'emballage
53
Réglage de L'image
54
Support de Montage
55
Caractéristiques
56
Plaque Murale
56
Plage de Réglage du Coulissement Vertical
57
Plage de Réglage du Coulissement Horizontal
57
Plage de Réglage du Coulissement Vers L'avant/L'arrière
57
Connexion des Appareils
59
Exemple de Connexion
59
Connexion du Boîtier de Commande
60
Positionnement du Projecteur
60
Feuille de Travail D'installation Pour la Projection Sur un Tableau Mural Préinstallé
62
Feuille de Travail D'installation Pour la Projection Sur un Mur Ordinaire
63
Taille de L'image Diagonale Et Position de Montage
65
Installation du Projecteur
73
Assemblez Les Pièces
73
Installez la Plaque Murale Sur Le Mur
75
Fixez Le Bras du Support de Montage À la Plaque Murale
78
Réglez la Position du Coulissement Vertical du Bras
80
Fixez Le Projecteur Au Support de Montage
81
Connectez Le Cordon D'alimentation Et Les Autres Câbles Au Projecteur
82
Mettez Le Projecteur Sous Tension
83
Changez Le Rapport Hauteur/Largeur (Au Besoin)
83
Affichez la Mire
84
Réglez la Mise Au Point
85
Réglez Le Coulissement Horizontal
87
Réglez Le Coulissement Vers L'avant/L'arrière
88
Réglez Le Coulissement Vertical
88
Supprimez L'affichage de la Mire
89
Fixation des Caches
90
Fixez Le Cache du Câble Au Projecteur
91
Pour la Fonction Easy Interactive
92
Fixation D'un Câble de Sécurité
93
Garantie Limitée
93
Epson BrightLink 697Ui Installation Manual (90 pages)
Touch Unit and Control Pad
Brand:
Epson
| Category:
Projector
| Size: 18.23 MB
Table of Contents
English
6
Installation Guide
1
About this Installation Guide
3
Explanation of Symbols
3
Safety Instructions
3
Table of Contents
6
Package Contents
7
Specifications
8
Control Pad
9
Installing the Touch Unit
11
Installing the Touch Unit above a Whiteboard
12
Turn on the Projector
12
Display the Installation Pattern
12
Remove the Dial Cover
13
Determine the Installation Position for the Touch Unit Bracket
14
Install the Touch Unit Bracket
15
Connect the Cable
18
Adjust the Angle
18
Attach Cover
27
Installing the Touch Unit on a Whiteboard
28
Turn on the Projector
28
Display the Installation Pattern
28
Remove the Dial Cover
29
Determine the Installation Position for the Touch Unit
30
Install the Touch Unit
31
Connect the Cable
32
Adjust the Angle
32
Attach Labels
40
Attach Cover
40
Installing the Control Pad
41
Installing the Control Pad (Brightlink 697Ui and Brightlink Pro 1450Ui/1460Ui/1470Ui)
41
Check the Installation Location
41
Remove the Front Cover
42
Attach the Control Pad
43
Connect the Projector Cables to the Control Pad
43
Attach the Port Protection Stickers
43
Attach the Front Cover
44
Appendix
45
Using the Easy Interactive Function
45
Attaching a Security Cable
45
Français
51
1 Contenu de L'emballage
52
2 Spécifications
53
3 Installation de L'unité Tactile
56
Installation de L'unité Tactile Au-Dessus D'un Tableau Blanc
56
Mettez Le Projecteur Sous Tension
56
Affichez Le Motif D'installation
57
Retirez Le Couvercle des Cadrans
58
Déterminez la Position D'installation du Support de L'unité Tactile
59
Installez Le Support de L'unité Tactile
59
Branchez Le Câble
62
Réglez L'angle
63
Posez Le Couvercle
72
Installation de L'unité Tactile Sur un Tableau Blanc
73
Mettez Le Projecteur Sous Tension
73
Affichez Le Motif D'installation
73
Retirez Le Couvercle des Cadrans
74
Déterminez la Position D'installation de L'unité Tactile
75
Installez L'unité Tactile
76
Branchez Le Câble
77
Réglez L'angle
77
Collage des Étiquettes
85
Fixez Le Couvercle
85
4 Installation du Boîtier de Commande (Brightlink 697Ui Et Brightlink Pro 1450Ui/1460Ui/1470Ui)
86
Vérifiez L'emplacement Pour L'installation
86
Retirez Le Couvercle Avant
87
Fixez Le Boîtier de Commande
87
Connectez Les Câbles du Projecteur Au Boîtier de Commande
88
Apposez Les Autocollants de Protection de Port
88
Fixez Le Couvercle Avant en Place
89
5 Annexe
89
Pour la Fonctionnalité Easy Interactive Function
89
Fixation D'un Câble de Sécurité
89
Advertisement
Epson BrightLink 697Ui Setup Manual (43 pages)
Brand:
Epson
| Category:
Projector
| Size: 2.69 MB
Table of Contents
Table of Contents
3
About Duolink
5
Duolink Requirements
6
Projector Positioning Guidelines
7
Configuring the Computer
10
Connecting Your Computer and Projectors
10
Configuring the Display Settings
12
Configuring Projector Settings for Multiple Projectors
14
Enabling Multi-Projection
14
Projector Identification System for Multiple Projector Control
16
Setting the Projector ID
16
Setting the Remote Control ID
17
Matching Images for Multiple Projectors
18
Adjusting Color Uniformity
18
Adjusting the Projector's Brightness Level
20
Matching the Image Colors
23
Adjusting RGBCMY
24
Pen Calibration
27
Calibrating Automatically
27
Calibrating Manually
30
Calibrating for Finger Touch Interactivity
33
Enabling Duolink in Easy Interactive Tools
39
Easy Interactive Tools Modes
40
Copyright Notice
42
A Note Concerning Responsible Use of Copyrighted Materials
42
Trademarks
42
Copyright Attribution
43
Advertisement
Related Products
Epson BrightLink 695Wi+
Epson BrightLink 695Wi
Epson BrightLink 696Ui
Epson PowerLite Home Cinema 6100 UB
Epson MOVIEMATE 62
Epson PowerLite Home Cinema 6500 UB
Epson PowerLite Pro Cinema 6030UB
Epson PowerLite 6100
Epson PowerLite Pro Cinema 6040UB
Epson PowerLite Pro Cinema 6010
Epson Categories
Printer
Projector
All in One Printer
Scanner
Printer Accessories
More Epson Manuals
Login
Sign In
OR
Sign in with Facebook
Sign in with Google
Upload manual
Upload from disk
Upload from URL