Dialog Semiconductor SmartBond DA14585 Manuals
Manuals and User Guides for Dialog Semiconductor SmartBond DA14585. We have 11 Dialog Semiconductor SmartBond DA14585 manuals available for free PDF download: User Manual, Quick Start Manual

Dialog Semiconductor SmartBond DA14585 User Manual (99 pages)
Voice RCU Software
Manual
Brand: Dialog Semiconductor
|
Category: Microcontrollers
|
Size: 3 MB
Table of Contents
Advertisement

Dialog Semiconductor SmartBond DA14585 User Manual (77 pages)
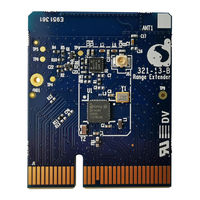
Range Extender
Reference Application
Brand: Dialog Semiconductor
|
Category: Microcontrollers
|
Size: 4 MB
Table of Contents

Dialog Semiconductor SmartBond DA14585 User Manual (60 pages)
IoT Multi Sensor Development Kit
Brand: Dialog Semiconductor
|
Category: Microcontrollers
|
Size: 4 MB
Table of Contents
Advertisement

Dialog Semiconductor SmartBond DA14585 User Manual (57 pages)
Getting started with Development Kit - Basic
Brand: Dialog Semiconductor
|
Category: Microcontrollers
|
Size: 4 MB
Table of Contents
Dialog Semiconductor SmartBond DA14585 User Manual (63 pages)
Brand: Dialog Semiconductor
|
Category: Microcontrollers
|
Size: 4 MB
Table of Contents
Dialog Semiconductor SmartBond DA14585 User Manual (45 pages)
IoT Multi Sensor
Development Kit Hardware
Design
Brand: Dialog Semiconductor
|
Category: Microcontrollers
|
Size: 3 MB
Table of Contents
Dialog Semiconductor SmartBond DA14585 User Manual (34 pages)
Voice RCU Hardware
Manual
Brand: Dialog Semiconductor
|
Category: Microcontrollers
|
Size: 2 MB
Table of Contents

Dialog Semiconductor SmartBond DA14585 User Manual (34 pages)
Getting Started Guide with the IoT Multi Sensor Development Kit
Brand: Dialog Semiconductor
|
Category: Microcontrollers
|
Size: 2 MB
Table of Contents

Dialog Semiconductor SmartBond DA14585 User Manual (30 pages)
Brand: Dialog Semiconductor
|
Category: Microcontrollers
|
Size: 2 MB
Table of Contents

Dialog Semiconductor SmartBond DA14585 Quick Start Manual (2 pages)
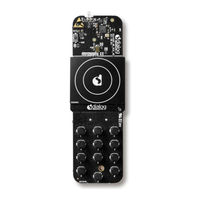
Voice RCU
Brand: Dialog Semiconductor
|
Category: Microcontrollers
|
Size: 0 MB
Table of Contents

Dialog Semiconductor SmartBond DA14585 Quick Start Manual (2 pages)
IoT Multi Sensor Development Kit
Brand: Dialog Semiconductor
|
Category: Microcontrollers
|
Size: 0 MB
Advertisement
Related Products
- Dialog Semiconductor DA14580
- Dialog Semiconductor DA1458 Series
- Dialog Semiconductor DA14583
- Dialog Semiconductor DA14581
- Dialog Semiconductor DA14586
- Dialog Semiconductor DA14531 PRO
- Dialog Semiconductor DA14530/1
- Dialog Semiconductor DA14695 ProDK
- Dialog Semiconductor DA14695-00HQDEVKT-P
- Dialog Semiconductor DA14681