Sign In
Upload
Manuals
Brands
Dell Manuals
Server
PowerEdge T630
Dell PowerEdge T630 Manuals
Manuals and User Guides for Dell PowerEdge T630. We have
4
Dell PowerEdge T630 manuals available for free PDF download: Owner's Manual, Getting Started
Dell PowerEdge T630 Owner's Manual (209 pages)
Brand:
Dell
| Category:
Server
| Size: 21 MB
Table of Contents
Table of Contents
3
Dell Poweredge T630 Server Overview
8
Supported Configurations for the Poweredge T630 Server
8
Front Panel
10
2.5-Inch Hard Drive Chassis
10
3.5-Inchharddrivechassis
12
Lcdpanel
15
Viewing Home Screen
16
Setup Menu
16
View Menu
16
Back Panel
17
Diagnostic Indicators
19
NIC Indicator Codes
20
Powersupply Unit Indicator Codes
20
Hard Drive Indicator Codes
23
Locating Service Tag of Your System
24
Converting the System from Tower Mode to Rack Mode
25
Preparing a System for Conversion from Tower Mode to Rack Mode
25
Documentation Resources
29
Technical Specifications
31
Chassis Dimensions
31
Chassis Weight
32
Processor Specifications
32
PSU Specifications
32
Systembatteryspecifications
32
Expansion Bus Specifications
32
Memory Specifications
33
Drive Specifications
33
Hard Drives
33
Optical Drive
34
Ports and Connectors Specifications
34
Serial Connector
34
Internal Dual SD Module
34
VGA Ports
34
USB Ports
34
NIC Ports
35
Video Specifications
35
Environmental Specifications
35
Particulate and Gaseous Contamination Specifications
36
Expanded Operating Temperature
37
Expanded Operating Temperature Restrictions
38
Initial System Setup and Configuration
39
Setting up Your System
39
Idrac Configuration
39
Options to Set up Idrac IP Address
39
Log in to Idrac
40
Options to Install the Operating System
40
Downloading the Drivers and Firmware
40
Pre-Operating System Management Applications
41
Options Tomanage the Pre-Operatingsystem Applications
41
System Setup
41
Viewing Systemsetup
41
System Setupdetails
42
System BIOS
42
Viewing System BIOS
43
System BIOS Settings Details
43
Boot Settings
43
Viewing Boot Settings
44
Boot Settings Details
44
Choosing the System Boot Mode
45
Changing the Boot Order
45
Viewing Systemsecurity
46
System Security Settings Details
46
Viewing System Information
48
System Information Details
48
Viewing Memory Settings
51
Memory Settings Details
51
Viewing Processor Settings
52
Processor Settings Details
52
Viewingsata Settings
54
SATA Settingsdetails
54
Viewing Integrated Devices
57
Integrated Devices Details
57
Viewing Serial Communication
58
Serial Communication Details
58
System Profile Settings
59
Viewing System Profile Settings
59
Viewing Miscellaneous Settings
61
Miscellaneous Settings Details
61
Idrac Settings Utility
62
Entering the Idrac Settings Utility
62
Changing the Thermal Settings
62
Device Settings
63
Dell Lifecycle Controller
63
Embedded System Management
63
Boot Manager
63
Viewing Boot Manager
64
Boot Manager Main Menu
64
PXE Boot
65
Installing and Removing System Components
66
Safetyinstructions
67
Beforeworkinginsideyoursystem
67
After Working Inside Your System
67
Recommended Tools
68
Front Bezel (Optional)
68
Removing the Optional Front Bezel
68
Installing the Optional Front Bezel
69
System Feet
70
Removing the System Feet
70
Installing the System Feet
71
Caster Wheels (Optional)-Tower Mode
72
Removing Caster Wheels
72
Installing Caster Wheels
73
System Cover
75
Removing the System Cover
75
Installingthesystemcover
76
Inside the System
77
Cooling Shroud
78
Removing the Cooling Shroud
78
Installing the Cooling Shroud
79
Cooling Fans
79
Removing a Cooling Fan
80
Installing a Cooling Fan
81
Cooling-Fan Assembly (Optional)
82
Removing the Optional Cooling Fan Assembly
82
Installing the Optional Cooling Fan Assembly
83
Systemmemory
84
General Memory Module Installation Guidelines
85
Mode-Specific Guidelines
85
Sample Memory Configurations
87
Removing Memory Modules
90
Installing Memory Modules
91
Flex Bays
92
Removing a Flex Bay
92
Installing a Flex Bay
93
Hard Drives
94
Removing a Hot Swappable Hard Driveor SSD
95
Installing a Hot Swappable Hard Drive
96
Removinga2.5-Inchharddriveblank
97
Installing a 2.5-Inch Hard Drive Blank
98
Removinga3.5-Inchharddriveblank
99
Installing a 3.5-Inch Hard Drive Blank
99
Installing a Hot Swappable 2.5-Inch Hard Drive Intoa 3.5-Inch Hard Drive Adapter
100
Removing a 2.5-Inch Hot Swappable Hard Drive from a 3.5-Inch Hard Drive Adapter
101
Installing a 3.5-Inch Hard Drive Adapter into a Hot Swap Hard Drive Carrier
102
Removing a 3.5-Inch Hot Swappable Hard Drive Adapter from a 3.5-Inch Hot Swappable Hard Drive Carrier.103
103
Removing a Hard Drive from a Hard Drive Carrier
104
Installing a Hotswappable Harddrive Intoa Hotswappable Hard Drive Carrier
104
Opticaldrives and Tape Drives
105
Removing the Optical Drive or Tape Drive
105
Installing the Optical Drive or Tape Drive
108
Removing the Slim Optical Drive Blank
109
Installing the Slim Optical Drive Blank
110
Internal USB Memory Key (Optional)
111
Replacing the Optional Internal USB Memory Key
111
Expansion Card Holder
112
Removing the Expansion Cardholder
112
Installing the Expansion Card Holder
113
Expansion Cards
114
Expansion Card Installation Guidelines
114
Removing a Expansion Card
116
Installing an Expansion Card
117
GPU Card Holder (Optional)
118
Removing the Optional GPU Card Holder
118
Installing the Optional GPU Cardholder
119
GPU Cards (Optional)
120
GPU Card Installation Guidelines
120
Removing an Optional GPU Card
121
Installing an Optional GPU Card
122
Internaldualsdmodule(Optional)
124
Removing the Optional Internal Dualsd Module
124
Installing the Optional Internal Dualsd Module
126
Internal SD Card
128
Removing an Internal SD Card
128
Installinganinternalsdcard
128
Processorsandheatsinks
129
Removing a Heatsink
129
Removing a Processor
130
Installing a Processor
133
Installing a Heat Sink
135
Power Supply Unit
137
Hot Spare Feature
138
Removing an Acpower Supply Unit
138
Installing an AC Power Supply Unit
139
Wiring Instructions for a DC Powersupply Unit
140
Input Requirements
140
Kit Contents
140
Assembling the DC Input Power Wires
142
Removing a DC Power Supply Unit
143
Installing a DC Power Supply Unit
143
Removing the Power Supply Unit Blank
145
Installing the Power Supply Unit Blank
145
System Battery
146
Replacing the System Battery
146
Hard Drive Backplane
147
Removing the Hard Drive Backplane
148
Installing the Hard Drive Backplane
165
SD Vflash Media Card (Optional)
172
Replacing an Optional SD Vflashmedia Card
173
Control Panel Assembly
173
Removing the Control Panel Assembly
173
Installing the Control Panel Assembly
175
System Board
177
Removingthesystemboard
177
Installing the System Board
178
Entering the System Service Tag by Using System Setup
180
Restoring the Service Tag by Using the Easy Restore Feature
181
Trusted Platform Module
181
Installing the Trusted Platform Module
181
Initializing the TPM for Bitlocker Users
182
Initializing the TPM for TXT Users
182
Power Interposer Board and Powerdistribution Board
183
Removing the Power Interposer Board
183
Removing the Power Distribution Board
184
Installing the Power Distribution Board
185
Installing the Power Interposer Board
186
Using System Diagnostics
188
Dell Embedded System Diagnostics
188
Running the Embedded System Diagnostics from Boot Manager
188
Running the Embedded System Diagnostics from the Dell Lifecycle Controller
188
System Diagnostic Controls
189
Jumpersandconnectors
190
Systemboardconnectors
190
System Board Jumper Settings
192
Disabling a Forgotten Password
192
Troubleshooting Your System
194
Safety First - for You and Your System
194
Troubleshooting System Startup Failure
194
Troubleshooting External Connections
195
Troubleshooting the Video Subsystem
195
Troubleshooting a USB Device
195
Troubleshooting a Serial I/O Device
196
Troubleshooting a NIC
196
Troubleshooting a Wet System
196
Troubleshooting a Damaged System
197
Troubleshooting the System Battery
198
Troubleshooting Power Supply Units
198
Troubleshooting Power Source Problems
198
Power Supply Unit Problems
199
Troubleshooting Cooling Problems
199
Troubleshooting Cooling Fans
200
Troubleshooting System Memory
200
Troubleshootingan Internal USB Key
201
Troubleshooting an SD Card
201
Troubleshooting an Optical Drive
202
Troubleshooting a Hard Drive
203
Troubleshooting a Storage Controller
203
Troubleshooting Expansioncards
204
Troubleshooting Processors
205
Getting Help
206
Contacting Dell
206
Documentation Feedback
206
Accessingsysteminformationbyusingqrl
206
Quick Resource Locator (QRL) for Poweredge T630
207
Advertisement
Dell PowerEdge T630 Owner's Manual (221 pages)
Brand:
Dell
| Category:
Server
| Size: 10 MB
Table of Contents
Table of Contents
3
1 Dell Poweredge T630 Server Overview
9
Supported Configurations for the Poweredge T630 Server
9
Front Panel
11
2.5-Inch Hard Drive Chassis
11
Inch Hard Drive Chassis
13
LCD Panel
16
Back Panel
19
Diagnostic Indicators
21
NIC Indicator Codes
22
Power Supply Unit Indicator Codes
23
Hard Drive Indicator Codes
26
Locating Service Tag of Your System
27
2 Converting the System from Tower Mode to Rack Mode
28
Preparing a System for Conversion from Tower Mode to Rack Mode
28
3 Documentation Resources
32
4 Technical Specifications
35
Chassis Dimensions
36
Chassis Weight
37
Processor Specifications
37
PSU Specifications
37
System Battery Specifications
37
Expansion Bus Specifications
37
Memory Specifications
38
Drive Specifications
38
Hard Drives
38
Optical Drive
39
Ports and Connectors Specifications
39
Serial Connector
39
Internal Dual SD Module
39
VGA Ports
39
USB Ports
39
NIC Ports
40
Video Specifications
40
Environmental Specifications
40
Particulate and Gaseous Contamination Specifications
41
Expanded Operating Temperature
42
Expanded Operating Temperature Restrictions
43
5 Initial System Setup and Configuration
44
Setting up Your System
44
Idrac Configuration
44
Options to Set up Idrac IP Address
44
Log in to Idrac
45
Options to Install the Operating System
45
Downloading the Drivers and Firmware
45
6 Pre-Operating System Management Applications
47
Options to Manage the Pre-Operating System Applications
47
System Setup
47
Viewing System Setup
48
System Setup Details
48
System BIOS
48
Idrac Settings Utility
70
Device Settings
71
Dell Lifecycle Controller
71
Embedded System Management
71
Boot Manager
72
Viewing Boot Manager
72
Boot Manager Main Menu
72
PXE Boot
73
7 Installing and Removing System Components
74
Safety Instructions
74
Before Working Inside Your System
74
After Working Inside Your System
75
Recommended Tools
75
Front Bezel (Optional)
75
Removing the Optional Front Bezel
75
Installing the Optional Front Bezel
76
System Feet
77
Removing the System Feet
77
Installing the System Feet
78
Caster Wheels (Optional)-Tower Mode
79
Removing Caster Wheels
79
Installing Caster Wheels
80
System Cover
82
Removing the System Cover
82
Installing the System Cover
83
Inside the System
84
Cooling Shroud
85
Removing the Cooling Shroud
85
Installing the Cooling Shroud
86
Cooling Fans
87
Removing a Cooling Fan
87
Installing a Cooling Fan
89
Cooling-Fan Assembly (Optional)
90
Removing the Optional Cooling Fan Assembly
90
Installing the Optional Cooling Fan Assembly
91
System Memory
92
General Memory Module Installation Guidelines
93
Mode-Specific Guidelines
94
Sample Memory Configurations
95
Removing Memory Modules
98
Installing Memory Modules
100
Flex Bays
101
Removing a Flex Bay
101
Installing a Flex Bay
103
Hard Drives
104
Removing a Hot Swappable Hard Drive or SSD
104
Installing a Hot Swappable Hard Drive
105
Removing a 2.5-Inch Hard Drive Blank
106
Installing a 2.5-Inch Hard Drive Blank
107
Removing a 3.5-Inch Hard Drive Blank
108
Installing a 3.5-Inch Hard Drive Blank
109
Installing a Hot Swappable 2.5-Inch Hard Drive into a 3.5-Inch Hard Drive Adapter
110
Removing a 2.5-Inch Hot Swappable Hard Drive from a 3.5-Inch Hard Drive Adapter
111
Installing a 3.5-Inch Hard Drive Adapter into a Hot Swap Hard Drive Carrier
112
Removing a 3.5-Inch Hot Swappable Hard Drive Adapter from a 3.5-Inch Hot Swappable Hard Drive Carrier
112
Removing a Hard Drive from a Hard Drive Carrier
113
Installing a Hot Swappable Hard Drive into a Hot Swappable Hard Drive Carrier
114
Optical Drives and Tape Drives
114
Removing the Optical Drive or Tape Drive
115
Installing the Optical Drive or Tape Drive
118
Removing the Slim Optical Drive Blank
119
Installing the Slim Optical Drive Blank
120
Internal USB Memory Key (Optional)
121
Replacing the Optional Internal USB Memory Key
121
Expansion Card Holder
122
Removing the Expansion Card Holder
123
Installing the Expansion Card Holder
123
Expansion Cards
124
Expansion Card Installation Guidelines
124
Removing a Expansion Card
126
Installing an Expansion Card
127
GPU Card Holder (Optional)
129
Removing the Optional GPU Card Holder
129
Installing the Optional GPU Card Holder
130
GPU Cards (Optional)
131
GPU Card Installation Guidelines
131
Removing an Optional GPU Card
131
Installing an Optional GPU Card
133
Internal Dual SD Module (Optional)
135
Removing the Optional Internal Dual SD Module
135
Installing the Optional Internal Dual SD Module
137
Internal SD Card
139
Removing an Internal SD Card
139
Installing an Internal SD Card
139
Processors and Heat Sinks
140
Removing a Heat Sink
140
Removing a Processor
141
Installing a Processor
145
Installing a Heat Sink
146
Power Supply Unit
148
Hot Spare Feature
149
Removing an AC Power Supply Unit
149
Installing an AC Power Supply Unit
150
Wiring Instructions for a DC Power Supply Unit
151
Removing a DC Power Supply Unit
154
Installing a DC Power Supply Unit
155
Removing the Power Supply Unit Blank
156
Installing the Power Supply Unit Blank
157
System Battery
158
Replacing the System Battery
158
Hard Drive Backplane
159
Removing the Hard Drive Backplane
159
Installing the Hard Drive Backplane
177
SD Vflash Media Card (Optional)
185
Replacing an Optional SD Vflash Media Card
186
Control Panel Assembly
186
Removing the Control Panel Assembly
186
Installing the Control Panel Assembly
188
System Board
190
Removing the System Board
190
Installing the System Board
191
Trusted Platform Module
194
Installing the Trusted Platform Module
194
Initializing the TPM for Bitlocker Users
195
Initializing the TPM for TXT Users
195
Power Interposer Board and Power Distribution Board
196
Removing the Power Interposer Board
196
Removing the Power Distribution Board
197
Installing the Power Distribution Board
198
Installing the Power Interposer Board
199
8 Using System Diagnostics
201
Dell Embedded System Diagnostics
201
Running the Embedded System Diagnostics from Boot Manager
201
Running the Embedded System Diagnostics from the Dell Lifecycle Controller
201
System Diagnostic Controls
202
9 Jumpers and Connectors
203
System Board Connectors
203
System Board Jumper Settings
205
Disabling a Forgotten Password
205
10 Troubleshooting Your System
207
Safety First - for You and Your System
207
Troubleshooting System Startup Failure
207
Troubleshooting External Connections
207
Troubleshooting the Video Subsystem
207
Troubleshooting a USB Device
208
Troubleshooting a Serial I/O Device
208
Troubleshooting a NIC
209
Troubleshooting a Wet System
209
Troubleshooting a Damaged System
210
Troubleshooting the System Battery
211
Troubleshooting Power Supply Units
212
Troubleshooting Power Source Problems
212
Power Supply Unit Problems
212
Troubleshooting Cooling Problems
212
Troubleshooting Cooling Fans
213
Troubleshooting System Memory
214
Troubleshooting an Internal USB Key
215
Troubleshooting an SD Card
215
Troubleshooting an Optical Drive
216
Troubleshooting a Hard Drive
217
Troubleshooting a Storage Controller
217
Troubleshooting Expansion Cards
218
Troubleshooting Processors
219
11 Getting Help
220
Contacting Dell
220
Documentation Feedback
220
Accessing System Information by Using QRL
220
Quick Resource Locator (QRL) for Poweredge T630
221
Dell PowerEdge T630 Owner's Manual (176 pages)
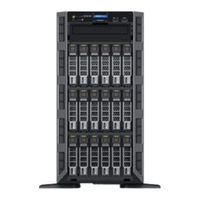
a rackable tower server
Brand:
Dell
| Category:
Server
| Size: 11 MB
Table of Contents
Table of Contents
3
1 About Your System
9
Supported Configurations
9
Front-Panel Features and Indicators
10
LCD Panel Features
13
Home Screen
14
Setup Menu
14
View Menu
15
Hard-Drive Indicator Codes
16
Back-Panel Features and Indicators
17
NIC Indicator Codes
19
Power Indicator Codes
19
Documentation Matrix
22
Quick Resource Locator
23
2 Performing Initial System Configuration
24
Setting up Your System
24
Methods of Setting up and Configuring the Idrac IP Address
24
Information about Logging in to Idrac
25
Methods of Installing the Operating System
25
Remote Management
25
Downloading and Installing Drivers and Firmware
25
3 Pre-Operating System Management Applications
27
Navigation Keys
27
About System Setup
28
Enabling Console Redirection
28
Entering System Setup
28
System Setup Main Menu
28
System BIOS Screen Details
28
System Information Screen Details
29
Memory Settings Screen Details
30
Processor Settings Screen Details
31
SATA Settings Screen Details
33
Boot Settings Screen Details
35
Network Settings Screen Details
36
Integrated Devices Screen Details
36
Serial Communication Screen Details
38
System Profile Settings Screen Details
38
System Security Settings Screen Details
40
Miscellaneous Settings Screen Details
42
About Boot Manager
43
Entering Boot Manager
43
Boot Manager Main Menu
43
Changing the Boot Order
43
Choosing the System Boot Mode
44
Assigning a System and Setup Password
44
Deleting or Changing an Existing System Password and Setup Password
45
4 Installing and Removing System Components
46
Safety Instructions
46
Before Working Inside Your System
46
After Working Inside Your System
46
Recommended Tools
47
Front Bezel (Optional)
47
Installing the Front Bezel
47
Removing the Front Bezel
48
System Feet
48
Removing the System Feet
48
Installing the System Feet
49
Caster Wheels (Optional)-Tower Mode
50
Installing Caster Wheels
50
Removing Caster Wheels
51
Removing the System Cover
52
Installing the System Cover
52
Inside the System
53
Cooling Shroud
54
Removing the Cooling Shroud
55
Installing the Cooling Shroud
56
Cooling Fans
56
Removing a Cooling Fan
56
Installing a Cooling Fan
57
Cooling-Fan Assembly (Optional)
58
Removing the Cooling-Fan Assembly (Optional)
58
Installing the Cooling-Fan Assembly (Optional)
59
System Memory
59
General Memory Module Installation Guidelines
61
Mode-Specific Guidelines
61
Sample Memory Configurations
62
Removing Memory Modules
65
Installing Memory Modules
66
Flex Bays
68
Removing a Flex Bay
68
Installing a Flex Bay
69
Hard Drives
70
Removing a Hot-Swap Hard Drive
70
Installing a Hot-Swap Hard Drive
71
Removing a 2.5 Inch Hard-Drive Blank
72
Installing a 2.5 Inch Hard-Drive Blank
72
Removing a 3.5 Inch Hard-Drive Blank
73
Installing a 3.5 Inch Hard-Drive Blank
74
Installing a 2.5 Inch Hard Drive into a 3.5 Inch Hard-Drive Adapter
74
Removing a 2.5 Inch Hard Drive from a 3.5 Inch Hard-Drive Adapter
75
Installing a Hard-Drive Adapter into a Hard-Drive Carrier
75
Removing a Hard-Drive Adapter from a Hard-Drive Carrier
76
Removing a Hard Drive from a Hard-Drive Carrier
76
Installing a Hard Drive into a Hard-Drive Carrier
77
Optical Drives and Tape Drives
77
Removing the Optical Drive or Tape Drive
78
Installing the Optical Drive or Tape Drive
81
Removing the Slim Optical Drive Blank
81
Installing the Slim Optical Drive Blank
82
Internal USB Memory Key (Optional)
82
Replacing the Internal USB Key
83
Expansion Card Holder
84
Removing the Expansion Card Holder
84
Installing the Expansion Card Holder
84
Expansion Cards
85
Expansion Card Installation Guidelines
85
Removing an Expansion Card
86
Installing an Expansion Card
87
GPU Card Holder (Optional)
88
Removing the GPU Card Holder
88
Installing the GPU Card Holder
89
GPU Cards (Optional)
90
GPU Card Installation Guidelines
90
Removing a GPU Card
90
Installing a GPU Card
92
Internal Dual SD Module
92
Removing the Internal Dual SD Module
92
Installing the Internal Dual SD Module
94
Internal SD Card
94
Removing an Internal SD Card
94
Installing an Internal SD Card
95
Processors
95
Removing a Processor
95
Installing a Processor
99
Power Supplies
101
Hot Spare Feature
102
Removing an AC Power Supply Unit
102
Installing an AC Power Supply Unit
103
Wiring Instructions for a DC Power Supply Unit
104
Removing a DC Power Supply Unit
106
Installing a DC Power Supply Unit
107
Removing the Power Supply Unit Blank
108
Installing the Power Supply Unit Blank
109
System Battery
109
Replacing the System Battery
109
Hard-Drive Backplane
110
Removing the Hard-Drive Backplane
111
Installing the Hard-Drive Backplane
129
SD Vflash Media Card
129
Replacing an SD Vflash Media Card
129
Control Panel Assembly
130
Removing the Control Panel Assembly
130
Installing the Control Panel Assembly
132
System Board
133
Removing the System Board
133
Installing the System Board
134
Trusted Platform Module
136
Installing the Trusted Platform Module
136
Re-Enabling the TPM for Bitlocker Users
137
Re-Enabling the TPM for TXT Users
137
Power Interposer Board and Power Distribution Board
138
Removing the Power Interposer Board
138
Removing the Power Distribution Board
139
Installing the Power Distribution Board
140
Installing the Power Interposer Board
141
System Top Cover
141
Removing the System Top Cover
141
Installing the System Top Cover
142
5 Converting the System from Tower Mode to Rack Mode
144
Safety Instructions
144
Preparing a System for Conversion from Tower Mode to Rack Mode
144
6 Troubleshooting Your System
148
Safety First-For You and Your System
148
Troubleshooting System Startup Failure
148
Troubleshooting External Connections
148
Troubleshooting the Video Subsystem
148
Troubleshooting a USB Device
148
Troubleshooting Idrac Direct (USB XML Configuration)
149
Troubleshooting Idrac Direct (Laptop Connection)
150
Troubleshooting a Serial I/O Device
150
Troubleshooting a NIC
150
Troubleshooting a Wet System
151
Troubleshooting a Damaged System
152
Troubleshooting the System Battery
152
Troubleshooting Power Supply Units
153
Power Source Problems
153
Power Supply Unit Problems
153
Troubleshooting Cooling Problems
154
Troubleshooting Cooling Fans
154
Troubleshooting System Memory
155
Troubleshooting an Internal USB Key
156
Troubleshooting an SD Card
156
Troubleshooting an Optical Drive
157
Troubleshooting a Tape Backup Unit
157
Troubleshooting a Hard Drive
158
Troubleshooting a Storage Controller
159
Troubleshooting Expansion Cards
159
Troubleshooting Processors
160
System Messages
161
Warning Messages
161
Diagnostic Messages
161
Alert Messages
161
7 Using System Diagnostics
162
Dell Embedded System Diagnostics
162
When to Use the Embedded System Diagnostics
162
Running the Embedded System Diagnostics from Boot Manager
162
Running the Embedded System Diagnostics from the Dell Lifecycle Controller
162
System Diagnostic Controls
163
8 Jumpers and Connectors
164
System Board Connectors
164
System Board Jumper Settings
166
Disabling a Forgotten Password
166
9 Technical Specifications
168
10 Getting Help
175
Contacting Dell
175
Locating Your System Service Tag
175
Quick Resource Locator (QRL)
175
Advertisement
Dell PowerEdge T630 Getting Started (2 pages)
Brand:
Dell
| Category:
Server
| Size: 0 MB
Advertisement
Related Products
Dell PowerEdge T605
Dell PowerEdge T610
Dell PowerEdge T620
Dell EMC PowerEdge T640
Dell EMC PowerEdge T640 D24XR
Dell PowerEdge T110
Dell PowerEdge T410
Dell PowerEdge T100
Dell Wyse ThinOS T10
Dell Wyse Enhanced Ubuntu Linux T50
Dell Categories
Laptop
Desktop
Monitor
Server
Storage
More Dell Manuals
Login
Sign In
OR
Sign in with Facebook
Sign in with Google
Upload manual
Upload from disk
Upload from URL