Sign In
Upload
Manuals
Brands
Dell Manuals
Laptop
P148G
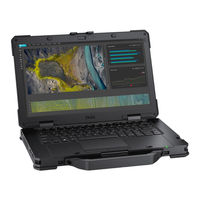
Dell P148G Manuals
Manuals and User Guides for Dell P148G. We have
3
Dell P148G manuals available for free PDF download: Owner's Manual, Service Manual, Manual
Dell P148G Owner's Manual (195 pages)
Brand:
Dell
| Category:
Laptop
| Size: 49 MB
Table of Contents
Table of Contents
3
Chapter 1: Views of Dell Pro Rugged 14 RB14250
8
Right
8
Left
9
Top
10
Front
11
Back
12
Bottom
13
Locate the Service Tag or Express Service Code Label of Your Computer
14
Battery-Charge Status Light
15
Chapter 2: Set up Your Dell Pro Rugged 14 RB14250
16
Chapter 3: Specifications of Dell Pro Rugged 14 RB14250
18
Dimensions and Weight
18
Processor
18
Chipset
19
Operating System
19
Memory
19
External Ports and Slots
20
Internal Slots
20
Ethernet
21
Wireless Module
21
WWAN Module
21
Optional GPS Module
22
Audio
23
Storage
23
Media-Card Reader
24
Keyboard
24
Keyboard Shortcuts of Dell Pro Rugged 14 RB14250
25
Camera
26
Touchpad
27
Battery
27
Power Requirements
28
Power Adapter
29
Power Adapter Requirements (for Computers Shipped with Integrated Graphics)
29
Power Adapter Requirements (for Computers Shipped with Discrete Graphics)
30
Display
31
Fingerprint Reader (Optional)
32
Sensor
32
GPU-Integrated
32
Multiple Display Support Matrix
32
GPU-Discrete
32
Multiple Display Support Matrix
33
Hardware Security
33
Smart-Card Reader
33
Contactless Smart-Card Reader
33
Contacted Smart-Card Reader
37
Operating and Storage Environment
38
Dell Low Blue Light Display
38
Chapter 4: Working Inside Your Computer
40
Safety Instructions
40
Before Working Inside Your Computer
40
Safety Precautions
41
Standby Power
41
Electrostatic Discharge-ESD Protection
41
ESD Field Service Kit
42
Working Environment
42
Transporting Sensitive Components
43
After Working Inside Your Computer
43
Bitlocker
43
Recommended Tools
43
Screw List
44
Major Components of Dell Pro Rugged 14 RB14250
47
Chapter 5: Removing and Installing Customer Replaceable Units (Crus)
50
Battery
50
Rechargeable Li-Ion Battery Precautions
50
Removing the Batteries
50
Installing the Batteries
52
Stylus
53
Removing the Stylus
53
Installing the Stylus
54
Chapter 6: Removing and Installing Field Replaceable Units (Frus)
56
Handle
56
Removing the Handle
56
Installing the Handle
57
Keyboard
58
Removing the Keyboard (Standard)
58
Installing the Keyboard (Standard)
61
Removing the Keyboard (Rubberized)
65
Installing the Keyboard (Rubberized)
67
Solid State Drive Carrier
71
Removing the Solid State Drive Carrier
71
Installing the Solid State Drive Carrier
72
M.2 Solid State Drive
73
Removing the M.2 2230 Solid State Drive from the Carrier
73
Installing the M.2 2230 Solid State Drive into the Carrier
74
Removing the M.2 2280 Solid State Drive from the Carrier
76
Installing the M.2 2280 Solid State Drive into the Carrier
76
Base Cover
78
Removing the Base Cover
78
Installing the Base Cover
79
Coin-Cell Battery
81
Removing the Coin-Cell Battery
81
Installing the Coin-Cell Battery
82
Fan
83
Removing the Fan
83
Installing the Fan
84
Global Positioning System (GPS) Board
85
Removing the GPS Board
85
Installing the GPS Board
86
Rear I/O-Board
88
Removing the Rear I/O-Board
88
Installing the Rear I/O-Board
89
RF Switch Board
90
Removing the RF Switch Board
90
Installing the RF Switch Board
91
Wireless Local Area Network (WLAN) Card
93
Removing the WLAN Card
93
Installing the WLAN Card
94
Wireless Wide Area Network (WWAN) Card
96
Removing the WWAN Card
96
Installing the WWAN Card
98
Dock I/O-Module
101
Removing the Dock I/O-Module
101
Installing the Dock I/O-Module
102
Dock Wi-Fi Board
104
Removing the Dock Wi-Fi Board
104
Installing the Dock Wi-Fi Board
106
Heat Sink
107
Removing the Heat Sink (for Computers Shipped with Integrated Graphics)
107
Installing the Heat Sink (for Computers Shipped with Integrated Graphics)
108
Removing the Heat Sink (for Computers Shipped with Discrete Graphics)
110
Installing the Heat Sink (for Computers Shipped with Discrete Graphics)
111
System Board
112
Removing the System Board
112
Installing the System Board
118
Memory Module
123
Removing the Memory Modules
123
Installing the Memory Modules
124
Right Type-C Board
126
Removing the Right Type-C Board
126
Installing the Right Type-C Board
127
Left Type-C Board
129
Removing the Left Type-C Board
129
Installing the Left Type-C Board
130
Latch Doors
132
Removing the Right Type-C Port Latch-Door
132
Installing the Right Type-C Port Latch-Door
133
Removing the Rear Ethernet Port Latch-Door
133
Installing the Rear Ethernet Port Latch-Door
134
Removing the Rear HDMI Port Latch-Door
135
Installing the Rear HDMI Port Latch-Door
136
Removing the Rear Serial Port Latch-Door
137
Installing the Rear Serial Port Latch-Door
138
Removing the Left Audio Port Latch-Door
139
Installing the Left Audio Port Latch-Door
140
Removing the Left USB Port Latch-Door
141
Installing the Left USB Port Latch-Door
142
Removing the Left Type-C Port Latch-Door
143
Installing the Left Type-C Port Latch-Door
144
Display Assembly
145
Removing the Display Assembly
145
Installing the Display Assembly
147
Display-Panel Assembly
150
Removing the Display-Panel Assembly
150
Installing the Display-Panel Assembly
151
Display Back-Cover Assembly
154
Removing the Display Back-Cover Assembly
154
Installing the Display Back-Cover Assembly
155
Palm-Rest Assembly
157
Removing the Palm-Rest Assembly
157
Installing the Palm-Rest Assembly
158
Chapter 7: Software
160
Operating System
160
Drivers and Downloads
160
Chapter 8: Technology and Components
161
Rugged Control Center
161
Chapter 9: BIOS Setup
162
Entering BIOS Setup Program
162
Navigation Keys
162
F12 One Time Boot Menu
162
View Advanced Setup Options
163
View Service Options
163
System Setup Options
163
Updating the BIOS
184
Updating the BIOS in Windows
184
Updating the BIOS Using the USB Drive in Windows
185
Updating the BIOS from the One-Time Boot Menu
185
System and Setup Password
186
Assigning a System Setup Password
186
Deleting or Changing an Existing System Password or Setup Password
187
Clearing CMOS Settings
187
Clearing BIOS (System Setup) and System Passwords
188
Chapter 10: Troubleshooting
189
Handling Swollen Rechargeable Li-Ion Batteries
189
Locating the Service Tag or Express Service Code of Your Dell Computer
189
Dell Supportassist Pre-Boot System Performance Check Diagnostics
190
Running the Supportassist Pre-Boot System Performance Check
190
Built-In Self-Test (BIST)
190
M-Bist
190
LCD Power Rail Test (L-BIST)
191
LCD Built-In Self-Test (BIST)
191
System-Diagnostic Lights
192
Recovering the Operating System
192
Real-Time Clock (RTC Reset)
193
Backup Media and Recovery Options
193
Wi-Fi Power Cycle
193
Drain Residual Flea Power (Perform Hard Reset)
193
Chapter 11: Getting Help and Contacting Dell
195
Self-Help Resources
195
Advertisement
Dell P148G Service Manual (139 pages)
Brand:
Dell
| Category:
Laptop
| Size: 36 MB
Table of Contents
Table of Contents
3
Chapter 1: Working Inside Your Computer
7
Safety Instructions
7
Before Working Inside Your Computer
7
Safety Precautions
8
Electrostatic Discharge-ESD Protection
8
ESD Field Service Kit
9
Transporting Sensitive Components
10
After Working Inside Your Computer
10
Bitlocker
10
Chapter 2: Removing and Installing Components
11
Recommended Tools
11
Screw List
11
Major Components of Latitude 5430 Rugged
14
Battery
16
Lithium-Ion Battery Precautions
16
Removing the Batteries
16
Installing the Batteries
17
Primary Solid State Drive
18
Removing the Primary M.2 2230 Solid State Drive
18
Installing the Primary M.2 2230 Solid State Drive
20
Removing the Primary M.2 2280 Solid State Drive
22
Installing the Primary M.2 2280 Solid State Drive
24
Passive Stylus
27
Removing the Stylus
27
Installing the Stylus
27
Handle
28
Removing the Handle
28
Installing the Handle
29
Keyboard
30
Removing the Keyboard (Rubberized)
30
Installing the Keyboard (Rubberized)
32
Removing the Keyboard (Standard)
33
Installing the Keyboard (Standard)
35
Base Cover
36
Removing the Base Cover
36
Installing the Base Cover
38
Coin-Cell Battery
39
Removing the Coin-Cell Battery
39
Installing the Coin-Cell Battery
40
Fan
41
Removing the Fan
41
Installing the Fan
42
Wi-Fi I/O Board
42
Removing the Wi-Fi I/O Board
42
Installing the Wi-Fi I/O Board
43
WLAN Card
45
Removing the WLAN Card
45
Installing the WLAN Card
46
WWAN Card
47
Removing the WWAN Card
47
Installing the WWAN Card
48
Dock I/O Board
50
Removing the Dock I/O Board
50
Installing the Dock I/O Board
51
LED Board
53
Removing the LED Board
53
Installing the LED Board
53
Left I/O Board
54
Removing the Left I/O Board
54
Installing the Left I/O Board
55
Speakers
56
Removing the Speakers
56
Installing the Speakers
57
Secondary Daughterboard
59
Removing the Secondary Daughterboard
59
Installing the Secondary Daughterboard
60
Heat Sink
61
Removing the Heat-Sink
61
Installing the Heat-Sink
62
Removing the Heat-Sink - for Computers with Discrete Graphics Card
62
Installing the Heat-Sink - for Computers with Discrete Graphics Card
63
Rear I/O Board
64
Removing the Rear I/O Board
64
Installing the Rear I/O Board
65
System Board
66
Removing the System Board
66
Installing the System Board
71
Memory Modules
75
Removing the Memory Modules
75
Installing the Memory Modules
76
Right Type-C Daughterboard
77
Removing the Right Type-C Daughterboard
77
Installing the Right Type-C Daughterboard
79
Left Type-C Daughterboard
80
Removing the Left Type-C Daughterboard
80
Installing the Left Type-C Daughterboard
81
Power-Button Board
83
Removing the Power Button Board
83
Installing the Power Button Board
84
Power Button with Fingerprint Reader
86
Removing the Power Button Board with Fingerprint Reader
86
Installing the Power Button Board with Fingerprint Reader
87
Display Assembly
89
Removing the Display Assembly
89
Installing the Display Assembly
91
Display Bezel
92
Removing the Display Bezel
92
Installing the Display Bezel
94
Camera
97
Removing the Camera
97
Installing the Camera
97
Display Hinges
98
Removing the Display Hinges
98
Installing the Display Hinges
99
Display Cable
100
Removing the Display Cable
100
Installing the Display Cable
101
Display Panel
103
Removing the Display Panel
103
Installing the Display Panel
105
Display Back-Cover
107
Removing the Display Back Cover
107
Installing the Display Back Cover
108
Touchpad
109
Removing the Touchpad
109
Installing the Touchpad
110
Touchpad Buttons
112
Removing the Touchpad Buttons
112
Installing the Touchpad Buttons
113
Palmrest Assembly
114
Removing the Palmrest Assembly
114
Installing the Palmrest Assembly
115
Chapter 3: Drivers and Downloads
116
Chapter 4: BIOS Setup
117
Entering BIOS Setup Program
117
Navigation Keys
117
One Time Boot Menu
117
System Setup Options
118
Updating the BIOS
129
Updating the BIOS in Windows
129
Updating the BIOS in Linux and Ubuntu
130
Updating the BIOS Using the USB Drive in Windows
130
Updating the BIOS from the F12 One-Time Boot Menu
130
System and Setup Password
131
Assigning a System Setup Password
131
Deleting or Changing an Existing System Setup Password
132
Clearing BIOS (System Setup) and System Passwords
132
Clearing CMOS Settings
132
Chapter 5: Troubleshooting
133
Handling Swollen Lithium-Ion Batteries
133
Dell Supportassist Pre-Boot System Performance Check Diagnostics
133
Running the Supportassist Pre-Boot System Performance Check
134
Built-In Self-Test (BIST)
134
M-Bist
134
LCD Power Rail Test (L-BIST)
135
LCD Built-In Self Test (BIST)
135
System-Diagnostic Lights
135
Recovering the Operating System
136
Real-Time Clock (RTC Reset)
136
Backup Media and Recovery Options
136
Wifi Power Cycle
137
Drain Residual Flea Power (Perform Hard Reset)
137
Using Non-Latitude 5430 Rugged Batteries
137
Chapter 6: Getting Help and Contacting Dell
139
Dell P148G Manual (30 pages)
Brand:
Dell
| Category:
Laptop
| Size: 1 MB
Table of Contents
Table of Contents
3
Chapter 1: Set up Your Latitude 5430 Rugged
5
Chapter 2: Views of Latitude 5430 Rugged
7
Right
7
Left
7
Top
8
Front
9
Bottom
10
Back
10
Service Tag
11
Battery Charge and Status Light
11
Chapter 3: Specifications of Latitude 5430 Rugged
12
Dimensions and Weight
12
Processor
12
Chipset
13
Operating System
13
Memory
13
External Ports
14
Internal Slots
14
Ethernet
14
Wireless Module
15
WWAN Module
15
Audio
16
Storage
16
Media-Card Reader
17
Keyboard
17
Camera (Optional)
18
Touchpad
18
Power Adapter
19
Battery
19
Display
20
Fingerprint Reader on the Power Button (Optional)
21
Sensor
21
GPU-Integrated
22
GPU-Discrete
22
Multiple Display Support Matrix
22
Hardware Security
22
Smart-Card Reader
23
Contacted Smart-Card Reader
23
Contactless Smart-Card Reader
24
Operating and Storage Environment
25
Chapter 4: Color, Material, and Finish
27
Advertisement
Advertisement
Related Products
Dell P143G
Dell P144G
Dell P144G002
Dell P145G
Dell P142G001
Dell P146G
Dell P141G
Dell P149G
Dell P141G002
Dell P143G001
Dell Categories
Laptop
Desktop
Monitor
Server
Storage
More Dell Manuals
Login
Sign In
OR
Sign in with Facebook
Sign in with Google
Upload manual
Upload from disk
Upload from URL