Sign In
Upload
Manuals
Brands
Brother Manuals
All in One Printer
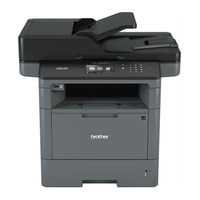
DCP-L6600DW
Brother DCP-L6600DW Manuals
Manuals and User Guides for Brother DCP-L6600DW. We have
5
Brother DCP-L6600DW manuals available for free PDF download: Service Manual, Basic User's Manual, Reference Manual, Instructions For Use, Quick Setup Manual
Brother DCP-L6600DW Service Manual (408 pages)
Brand:
Brother
| Category:
All in One Printer
| Size: 30.81 MB
Table of Contents
Service Manual
1
Open Source Licensing Remarks
3
Other Information
3
Table of Contents
4
Safety Information
11
Additional Information
17
Chapter 1 Supplemental Specifications
19
General
19
Network Connectivity
27
Service Information
28
Supplies
30
Media Specifications
33
Fax (Only for the Models with Fax Function)
33
Copy
34
Scanner
35
Chapter 2 Error Indications & Troubleshooting
36
Introduction
36
Precautions
36
Checks before Commencing Troubleshooting
37
Operating Environment
37
Power Supply
37
Consumable Parts
37
Overview
39
Cross-Section Drawing
39
Printer Part
39
Scanner Part
40
Paper Feeding
41
Printer Part
41
Scanner Part
42
Operation of each Part
43
Block Diagram
45
Main Components
46
Error Indications
47
Error Codes
48
Error Messages
57
Communication Errors
69
Troubleshooting
73
Error Cause and Remedy
73
Troubleshooting for Paper Feeding Problems
117
No Paper Is Fed from Machine Paper Tray
117
No Paper Is Fed from LT
118
No Paper Is Fed from TT
119
No Paper Is Fed from MP Tray
120
Multiple Sheets of Paper Are Fed
121
Paper Becomes Wrinkled
121
Paper Is Fed at an Angle
122
Paper Is Curled
123
Duplex Printing Is Not Possible
123
Paper Jam
125
Troubleshooting for Image Defects
130
Image Defect Examples
130
Troubleshooting According to Image Defect
131
Poor Fixing
133
Image Distortion
134
Faint Print
137
White Spots
138
Horizontal Lines
141
Troubleshooting for Software Problems
143
Cannot Receive Data
143
Troubleshooting for Network Problems
144
Cannot Print Via Network Connection
144
Cannot Connect to Access Point
144
Troubleshooting for Control Panel Problems
144
Nothing Is Displayed on the LCD
144
Nothing Is Displayed on the LED
145
Control Panel Is Inoperable
145
Troubleshooting for Toner and Drum Problems
146
New Toner Is Not Detected
146
Toner Cartridge Cannot be Recognized
146
Error Message Prompting Toner Cartridge Replacement Does Not Disappear
146
Drum Error
147
Error Message Prompting Drum Replacement Does Not Disappear
147
Troubleshooting for Fuser Unit Problems
148
Fuser Unit Failure
148
Troubleshooting for Laser Unit Problems
148
Laser Unit Failure
148
Troubleshooting for PCB Problems
149
Main PCB Failure
149
Memory Full
149
Troubleshooting for Document Feeding Problems
150
No Document Is Fed
150
Multiple Documents Are Fed
150
Document Jam
150
Document Becomes Wrinkled
151
Document Size Is Not Detected Correctly
152
Troubleshooting for Image Defects
153
Defect Examples
153
Troubleshooting According to Image Defect
153
Troubleshooting for Fax Problems
157
Fax Cannot be Sent
157
Fax Cannot be Received
158
Communication Error Occurs
158
Troubleshooting for Other Problems
159
Cannot Print
159
Cannot Update Firmware
159
USB Direct Interface Errors
159
Paper Low" Message Does Not Disappear
160
Chapter 3 Disassembly/Reassembly
161
Safety Precautions
161
Packing
162
Screw Catalogue
163
Screw Torque List
164
Lubrication
167
Overview of Gears
169
Harness Routing
171
Disassembly Flow Chart
184
Machine
184
Disassembly Procedure
187
Preparation
187
Paper Tray
188
Back Cover / Outer Chute
190
Fuser Cover
191
Fuser Unit
192
MP Cover ASSY
195
Front Cover ASSY
197
Side Cover L
198
Side Cover R
199
Adf/Document Scanner Unit
200
ADF Unit
203
Hinge L ASSY, Hinge R, Hinge R Support, Hinge Arm R
205
ADF Cover ASSY, Document Stopper
206
Gear Cover, ADF Front Cover, Document Sub Tray
207
Document Separate Roller ASSY
209
ADF Separation Holder ASSY
210
Second Side CIS Unit, Second Side CIS Flat Cable (Models with Duplex Printing Only)
211
Panel Unit
216
Panel PCB ASSY, LCD (for LCD: 4.85 Inch Models)
218
LCD Relay Flat Cable (for LCD: 3.7 Inch Models)
220
Panel PCB ASSY, LCD, LCD Relay PCB ASSY LCD Relay Flat Cable (for LCD: 3.7 Inch Models)
220
Touch Panel ASSY
222
NFC PCB ASSY (Models with NFC Only)
223
USB Host PCB ASSY
224
First Side CIS Unit, First Side CIS Flat Cable
225
Joint Cover ASSY
232
Modem PCB ASSY (Models with FAX Only)
234
Stack Sensor PCB ASSY (Models with USB Host on the Rear Side Only)
236
Main PCB ASSY / Wireless LAN PCB (Wireless LAN Models Only)
237
External Temperature/Humidity Sensor
239
Laser Unit
240
PF Roller Holder ASSY
242
Low-Voltage Power Supply PCB ASSY
243
Toner Amount Detection Sensor PCB ASSY (Light Emission)
246
Main Fan
248
Filter
250
Relay Front PCB ASSY
251
Registration Clutch / T1 Pickup Clutch
252
Main Frame L ASSY
253
Paper Feed Motor
256
Develop Joint Gear 37 / Develop Joint
258
Toner Amount Detection Sensor PCB ASSY (Light Reception)
259
MP Solenoid
260
Develop Clutch 51R
261
Internal Temperature Sensor
262
Fuser Drive Gear 39
263
Eject Motor
265
Back Cover/Duplex Tray Sensor
266
LT/TT Connector
267
High-Voltage Power Supply PCB ASSY
268
Eject Sensor PCB ASSY
271
MP Roller Holder ASSY / MP Separation Pad ASSY / MP Separation Pad Spring
272
T1 Paper Feed Sensor PCB ASSY / T1 Paper Feed Actuator / T1 Paper Feed Actuator Spring
273
MP Paper Empty Sensor PCB ASSY / MP Paper Empty Actuator 1 / MP Paper Empty Actuator 2
275
Paper Empty Sensor PCB ASSY (Models with USB Host on the Rear Side Only)
278
Registration Front/Rear Sensor PCB ASSY
279
Disassembly Procedure (Lt Unit)
282
Paper Tray
282
LT Roller Holder ASSY
284
LT Side Cover L
285
LT Side Cover R
286
LT Front Cover ASSY
287
LT Control PCB ASSY
288
LT Pickup Clutch
289
LT Release Clutch
290
LT Connector ASSY / LT Connector Upper
293
LT Paper Feed Sensor PCB ASSY
294
LT Paper Empty Sensor PCB ASSY
297
Chapter 4 Adjusting and Updating Settings as Required after Parts Replacement
298
If You Replace the Main Pcb Assy
298
Installing Firmware (Sub Firmware and Main Firmware)
299
Checking Firmware Version
299
Installing Firmware
300
Adjusting Touch Panel (Function Code: 61)
302
Initializing the EEPROM of the Main PCB ASSY (Function Code: 01)
302
Configure for Country/Region and Model (Function Code: 74)
302
Activating Memory Writing
302
Setting Serial Number and Entering Adjusted Value of Laser Unit
303
Acquiring White Level Data (Function Code: 55)
304
Adjusting Left-End and Upper-End Print Position (Function Code: 45) (TT Only)
304
Resetting to Factory Shipping State
304
If You Replace the Low-Voltage Power Supply Pcb Assy
305
Resetting Irregular Power Supply Counter of the Low-Voltage Power Supply PCB (Function Code: 88)
305
If You Replace the Laser Unit
306
Entering Adjusted Value of Laser Unit
307
Resetting Printed Pages Counter of the Laser Unit
307
If You Replace the Lcd Panel Assy or Panel Pcb
308
Adjusting Touch Panel (Function Code: 61)
308
Checking LCD Operation (Function Code: 12)
308
If You Replace the Adf Unit, First Side Cis Unit, Second Side Cis Unit or Document Scanner Unit
309
Acquiring White Level Data (Function Code: 55)
309
Scanning and Printing Check
309
If You Replace the Fuser Unit
310
Resetting Printed Pages Counter of the Fuser Unit
310
If You Replace a Pf Kit
311
Resetting Printed Pages Counter of a PF Kit
311
If You Replace the Tt / Lt
312
Installing Firmware (Main Firmware)
313
Checking Firmware Version
313
Installing Firmware
314
Adjusting Left-End and Upper-End Print Position (TT Only)
315
Chapter 5 Service Functions
316
Maintenance Mode
316
How to Enter Maintenance Mode
316
Method of Entering Maintenance Mode for Service Personnel
316
Method of Entering End-User Accessible Maintenance Mode
317
List of Maintenance Mode Functions
318
Details of Maintenance Mode Functions
320
Initialize EEPROM Parameters (Function Code: 01, 91)
320
ADF Performance Test (Function Code: 08)
321
Print Quality Test Pattern (Function Code: 09)
322
Set Worker Switches (WSW) and Print Worker Switch Setting Data (Function Code: 10, 11)
323
Check LCD Operation (Function Code: 12)
326
Check Control Panel Key Operation (Function Code: 13)
327
Save Netconfig Data (Function Code: 18)
328
Display Software Version (Function Code: 25)
329
Change Onepushdemo Function Setting (Function Code: 28)
330
Check Sensor Operation (Function Code: 32)
331
Display LAN Connection Status (Function Code: 33)
335
Set PC Print Functions (Function Code: 43)
336
Change USB No. Return Value / Adjust Left-End Print Position / Adjust Upper-End Print Position / Set HEXDUMP Mode (Function Code: 45)
339
Adjust Printable Range for each Speed Level (Full Speed / Half Speed for Thick Paper / Quiet Mode) (Function Code: 46)
342
Set Country / Language (Function Code: 52)
344
Transfer Received Fax Data / Log Information (Function Code: 53) (Fax Models Only)
345
Fine-Tune Scanning Position (Function Code: 54)
347
Acquire White Level Data and Set CIS Scan Area (Function Code: 55)
348
Adjust Touch Panel (Function Code: 61)
349
Continuous Print Test (Function Code: 67)
350
Print Frame Pattern (Single-Side Printing) (Function Code: 69)
354
Print Frame Pattern (Duplex Printing) (Function Code: 70)
355
Print Test Pattern (Function Code: 71)
356
Configure for Country/Region and Model (Function Code: 74)
359
Print Maintenance Information (Function Code: 77)
364
Check Main Fan Operation (Function Code: 78)
366
Delete Fax Data (Function Code: 79)
367
Display Machine Log Information (Function Code: 80)
368
Display Machine Error Code (Function Code: 82)
372
Send Communication Log Information to Telephone Line (Function Code: 87)
373
Reset Counters for Consumable Parts (Function Code: 88)
374
Quit Maintenance Mode (Function Code: 99)
375
Other Service Functions
376
Print Communication Error List
376
Reset the Drum Unit Counter
376
Chapter 6 Wiring Diagram
377
Wiring Diagram
377
Chapter 7 Periodical Maintenance
380
Safety Precautions
380
Periodical Replacement Parts
381
Preparation
381
Fuser Unit
382
Laser Unit
386
PF Kit MP
396
PF Kit 1
397
PF Kit 2/3/4/5
399
Appendix 1 Serial Numbering System
401
Appendix 2 Deleting User Setting Information
402
Appendix 3 Installing the Maintenance Printer Driver
403
Advertisement
Brother DCP-L6600DW Basic User's Manual (76 pages)
Brand:
Brother
| Category:
All in One Printer
| Size: 4.33 MB
Table of Contents
Compilation and Publication Notice
8
Important Note
8
Table of Contents
9
General Information
11
Control Panel Overview
11
Touchscreen LCD Overview
13
In 1 ID Copy
14
How to Navigate the Touchscreen LCD
15
Access Brother Utilities (Windows ® )
16
Uninstall the Brother Software and Drivers (Windows ® )
16
Initial Setup
17
Set the Date and Time
17
Adjust the Machine's Volume
17
Paper Handling
18
Load Paper
18
Load Paper in the Paper Tray
18
Load Paper in the Multi-Purpose Tray (MP Tray)
20
Change the Check Paper Size Setting
21
Change the Paper Size and Paper Type
22
Recommended Print Media
22
Using Special Paper
23
Print
24
Print from Your Computer
24
Print a Document (Macintosh)
24
Print a Document (Windows ® )
24
Print on both Sides of the Paper Automatically (Windows ® )
24
Print more than One Page on a Single Sheet of Paper (N in 1) (Windows ® )
25
Print on Envelopes, Thick Paper or Labels
26
Copy
28
Copy a Document
28
Copy Settings
30
Copy Options
30
Copy Multiple Pages on both Sides of the Paper
32
Copy a 2-Sided Document Using the ADF
33
Copy a 2-Sided Document Using the Scanner Glass
34
Copy an ID Card
34
Scan
36
Scan from Your Computer (Windows ® )
36
Controlcenter4 Advanced Mode (Windows )
36
Scan Using the Scan Button on Your Brother Machine
37
Scan Using the Scan Button on the Machine
37
Scan Settings
38
Fax
39
Before Faxing
39
Set Your Station ID
39
Set Telephone Line Compatibility for Interference and Voip Systems
40
Receive Modes
40
Choose the Correct Receive Mode
42
Set the F/T Ring Time (Fast Double-Ring)
43
Set the Number of Rings before the Machine Answers (Ring Delay)
43
Store Numbers
44
Store Address Book Numbers
44
Change or Delete Address Book Names or Numbers
44
Telephone Services and External Devices
46
Voice Mail
46
Voice over Internet Protocol (Voip)
46
Connection of an External Telephone Answering Device (TAD)
46
External and Extension Telephones
46
Send and Receive a Fax Using Your Machine
47
Send a Fax
47
Fax Using Your Computer (PC-FAX)
49
Send Faxes from Your Computer
49
Receive Faxes on Your Computer (Windows ® Only)
49
Troubleshooting
51
Identify the Problem
51
Error and Maintenance Messages
52
Fax and Telephone Problems
58
Troubleshooting for Other Fax Problems
59
Print or Scan Problems
61
Document and Paper Jams
63
Find the Jammed Document or Paper
63
Clear the Document Jam
63
Clear the Paper Jam
64
Appendix
71
How to Enter Text on Your Brother Machine
71
Information for Compliance with Commission Regulation 801/2013
72
Supplies
73
Index
74
Brother DCP-L6600DW Reference Manual (31 pages)
Brand:
Brother
| Category:
All in One Printer
| Size: 2.48 MB
Table of Contents
The Online User's Guide Helps You Get the most out of Your Machine
3
Questions or Problems? Take a Look at Our Faqs, Solutions, and Videos Online
4
Important Note
4
General Information
5
Control Panel Overview
5
Touchscreen LCD Overview
7
How to Navigate the Touchscreen LCD
9
Access Brother Utilities
10
Load Paper in the Multi- Purpose Tray (MP Tray)
11
Print from Your Computer
12
Copy a Document
13
Scan a Document
15
Scan from Your Computer
15
Scan Using the Scan Button on the Machine
15
Before Faxing
17
Choose the Correct Receive Mode
18
Fax Using Your Machine
19
Send a Fax
19
Troubleshooting
21
Identify the Problem
21
Error and Maintenance Messages
22
Document and Paper Jams
26
Solutions for Wireless Connection
26
How to Enter Text on Your Brother Machine
27
Print and Scan Using Your Mobile Device
28
Advertisement
Brother DCP-L6600DW Quick Setup Manual (2 pages)
Brand:
Brother
| Category:
All in One Printer
| Size: 2.83 MB
Brother DCP-L6600DW Instructions For Use (2 pages)
Brand:
Brother
| Category:
All in One Printer
| Size: 2.3 MB
Advertisement
Related Products
Brother DCP-L2520DW
Brother DCP-L2541DW
Brother DCP-L5600DN
Brother DCP-L5700DW
Brother DCP-L5650DN
Brother DCP-L5652DN
Brother DCP-L8410CDW
Brother DCP-L3517CDW
Brother DCP-L2511D
Brother DCP-L2535D
Brother Categories
Sewing Machine
All in One Printer
Printer
Label Maker
Fax Machine
More Brother Manuals
Login
Sign In
OR
Sign in with Facebook
Sign in with Google
Upload manual
Upload from disk
Upload from URL