Do you have a question about the HVBS-463 and is the answer not in the manual?
Questions and answers
Richard Newell
March 4, 2025
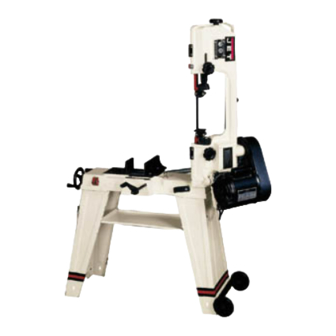
cord was removed now need to know how to reconnect the wiring. I don't understand the application for wires 1, 2, 3, 4
1 comments:
Mr. Anderson
May 14, 2025
To reconnect the wiring for the Jet HVBS-463 bandsaw after the cord was removed, follow these steps:
1. Unplug the machine: Ensure the saw is disconnected from power before working on wiring.
2. Access the wiring panel: Open the electrical box where the cord connects, usually located at the base or motor housing.
3. Identify the cord wires: The power cord typically has three wires—black (hot), white (neutral), and green (ground).
4. Locate internal terminals: - The black (hot) wire connects to the switch or terminal labeled "L" or "Line." - The white (neutral) wire connects to the terminal labeled "N" or directly to the motor if it's wired that way. - The green (ground) wire connects to the chassis ground screw or terminal marked with a ground symbol.
5. Use wire connectors or terminal screws to secure each wire properly. Ensure all connections are tight and insulated.
6. Confirm wiring diagram: Refer to the wiring diagram on the saw’s label or inside the panel to verify wire placement.
7. Close the panel and test: After confirming connections, close all covers and plug in the saw to test operation.
If unsure about wiring or if colors do not match standard codes, consult a qualified electrician.


Need help?
Do you have a question about the HVBS-463 and is the answer not in the manual?
Questions and answers
cord was removed now need to know how to reconnect the wiring. I don't understand the application for wires 1, 2, 3, 4
To reconnect the wiring for the Jet HVBS-463 bandsaw after the cord was removed, follow these steps:
1. Unplug the machine: Ensure the saw is disconnected from power before working on wiring.
2. Access the wiring panel: Open the electrical box where the cord connects, usually located at the base or motor housing.
3. Identify the cord wires: The power cord typically has three wires—black (hot), white (neutral), and green (ground).
4. Locate internal terminals:
- The black (hot) wire connects to the switch or terminal labeled "L" or "Line."
- The white (neutral) wire connects to the terminal labeled "N" or directly to the motor if it's wired that way.
- The green (ground) wire connects to the chassis ground screw or terminal marked with a ground symbol.
5. Use wire connectors or terminal screws to secure each wire properly. Ensure all connections are tight and insulated.
6. Confirm wiring diagram: Refer to the wiring diagram on the saw’s label or inside the panel to verify wire placement.
7. Close the panel and test: After confirming connections, close all covers and plug in the saw to test operation.
If unsure about wiring or if colors do not match standard codes, consult a qualified electrician.
This answer is automatically generated