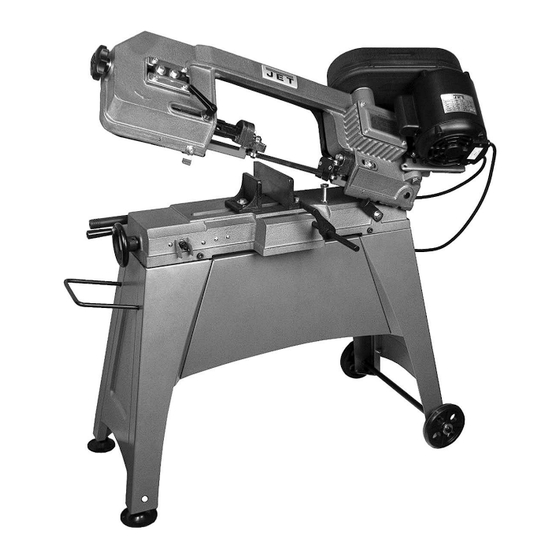
Jet HVBS-56M Operating Instructions And Parts Manual
Horizontal-vertical band saw
Hide thumbs
Also See for HVBS-56M:
- Owner's manual (17 pages) ,
- Brochure (56 pages) ,
- Operating instructions and parts manual (24 pages)
Table of Contents
Advertisement
Quick Links
Download this manual
See also:
Owner's Manual
Advertisement
Table of Contents

Subscribe to Our Youtube Channel
Related Manuals for Jet HVBS-56M


Summary of Contents for Jet HVBS-56M
- Page 1 This .pdf document is bookmarked Operating Instructions and Parts Manual Horizontal-Vertical Band Saw Model HVBS-56M 427 New Sanford Road LaVergne, Tennessee 37086 Part No. M-414458 Ph.: 800-274-6848 Revision H 11/2015 www.jettools.com Copyright © 2015 JET...
-
Page 2: Important Safety Instructions
3. Do not use this band saw for other than its should be carefully checked to determine that it intended use. If used for other purposes, JET will operate properly and perform its intended disclaims any real or implied warranty and holds function. -
Page 3: About This Manual
If there are questions or comments, please contact your local supplier or JET. JET can also be reached at our web site: www.jettools.com. -
Page 4: Table Of Contents
11.1.1 HVBS-56M Bow Assembly – Exploded View ..................17 11.1.2 HVBS-56M Bed Assembly – Exploded View ..................18 11.1.3 HVBS-56M – Bow and Bed Assemblies Parts List ................19 11.2.1 HVBS-56M Stand – Exploded View ....................22 ... -
Page 5: Specifications
Subject to local/national electrical codes. The specifications in this manual were current at time of publication, but because of our policy of continuous improvement, JET reserves the right to change specifications at any time and without prior notice, without incurring obligations. -
Page 6: Setup And Assembly
5.3 Unpacking and cleanup 5.0 Setup and assembly 1. Inspect all contents for shipping damage. Compare contents of shipping carton with contents list in this manual. Report any damage Read and understand all or part shortages to your distributor. instructions before attempting assembly. Band Saw must be disconnected from power during 2. -
Page 7: Assembling Stand
Figure 3 5.4 Assembling stand 5.6 Additional assembly Refer to Figure 3. 1. Remove shipping bracket (P, Figure 4) and adjust switch trip (Q) so that it will turn off switch NOTE: Only make fasteners hand-tight at this time. when bow reaches down position. (Note: Switch They will be fully tightened after band saw has been trip is bendable for optimum positioning.) settled atop stand. -
Page 8: Vertical Cutting Plate
) on motor base 6.0 Electrical connections to secure belt tension. The HVBS-56M Band Saw is rated at 115/230V power, and is pre-wired for 115 volt. The band saw comes with a plug designed for use on a circuit with a grounded outlet that looks like the one pictured in A, Figure 8. -
Page 9: Voltage Conversion
grounded. Failure to comply may cause serious or fatal injury. Use only 3-wire extension cords that have 3-prong grounding plugs and 3-pole receptacles that accept the tool's plug. Repair replace damaged or worn cord immediately. When operated at 115-volt, this tool is intended for use on a circuit that has an outlet that looks like the one illustrated in A, Figure 8. -
Page 10: Adjustments
6. Close pulley cover and connect to power Ampere Total length of Volts source. Rating cord in feet General rule for band saw blade speed: The harder More the material being cut, the slower the blade speed. More Than Refer to Table 2 for blade speed recommendations. Than Speed Motor... -
Page 11: Blade Tension
7.4 Blade tension 1. Disconnect band saw from power source. 2. Open blade cover by removing knob and 2 screws (G, Figure 15). Observe position of blade on wheel. If blade is not adjacent to wheel flange, adjust blade tracking according to sect. 7.7, Blade tracking. -
Page 12: Blade Tracking
7.8 Feed pressure adjustment 4. Hold bottom nut (L ) to prevent it turning further, and retighten top nut (L Turn handle (O, Figure 19) clockwise to decrease 5. Repeat above steps for opposite blade guide feed pressure; counterclockwise to increase feed assembly. -
Page 13: Auto Shut-Off Adjustment
However, the following procedure will be adequate for break-in of JET-supplied blades on lower alloy ferrous materials. 1. Clamp a round section workpiece in the vise. The workpiece should be 2 inches or larger in diameter. -
Page 14: Evaluating Cutting Efficiency
shows acceptable clamping positions, the may force chips into the guide bearings and other bottom row shows unacceptable positions. critical areas of saw. If the thickness of profile section is very thin, a Periodically apply a light coat of oil on exposed piece which duplicates the profile should be metal surfaces to inhibit rust. -
Page 15: Additional Servicing
9.2 Additional servicing Any additional servicing on the band saw should be performed by an authorized service representative. Figure 24 10.0 Troubleshooting HVBS-56M Band Saw 10.1 Mechanical and electrical problems Symptom Possible Cause Correction * Motor will not start. Low voltage. -
Page 16: Operational Problems
Some parts are shown for reference only, and may not be available individually. Non-proprietary parts, such as fasteners, can usually be found at local hardware stores or may be ordered from JET. -
Page 17: Hvbs-56M Bow Assembly - Exploded View
11.1.1 HVBS-56M Bow Assembly – Exploded View... -
Page 18: Hvbs-56M Bed Assembly - Exploded View
11.1.2 HVBS-56M Bed Assembly – Exploded View... -
Page 19: Hvbs-56M - Bow And Bed Assemblies Parts List
11.1.3 HVBS-56M – Bow and Bed Assemblies Parts List Index No Part No Description Size 1 ....TS-0051031 ....Hex Cap Bolt............5/16”x3/4” ...... 4 2 ....TS-0561011 ....Hex Nut ..............1/4” ........ 1 3 ....TS-0680021 ....Flat Washer ............. 1/4” ........ 4 8 .... - Page 20 Index No Part No Description Size 63 ....HVBS462-063 ... Bearing Shaft Pin ................... 2 64-1 ... HVBS462-064-1 ..Blade Seat Left ....................1 64-2 ... HVBS462-064-2 ..Blade Seat Right .................... 1 65 ....HVBS56M-065 ..Adjustable Bracket-RH .................. 1 65A ....
- Page 21 158 .... HVBS463-158 ... Hex Nut ..............3/16” ......2 159 .... HVBS463-159 ... Round Cross Head Screw ........3/16”x1/2” ...... 1 160 .... JET-92....... JET Logo with 3M adhesive........92 x 38 mm ....1 ....JJ6CS-OEW2 .... Open End Wrench (not shown) ....... 12/14 mm ...... 1 ....
-
Page 22: Hvbs-56M Stand - Exploded View
11.2.1 HVBS-56M Stand – Exploded View 11.2.2 HVBS-56M Stand – Parts List Index No Part No Description Size 1 ....HVBS56M-CSA ..Complete Stand Assembly ................1 1-1 ..... HVBS56M-S1 .... Left Stand Leg ....................2 1-2 ..... HVBS56M-S2 .... Right Stand Leg ..................... 2 1-3 ..... -
Page 23: Electrical Connections - Hvbs-56M Band Saw
12.0 Electrical Connections – HVBS-56M Band Saw... -
Page 24: Warranty And Service
Accessories; Shop Tools; Warehouse & Dock products; Hand Tools; Air Tools NOTE: JET is a division of JPW Industries, Inc. References in this document to JET also apply to JPW Industries, Inc., or any of its successors in interest to the JET brand.
Need help?
Do you have a question about the HVBS-56M and is the answer not in the manual?
Questions and answers